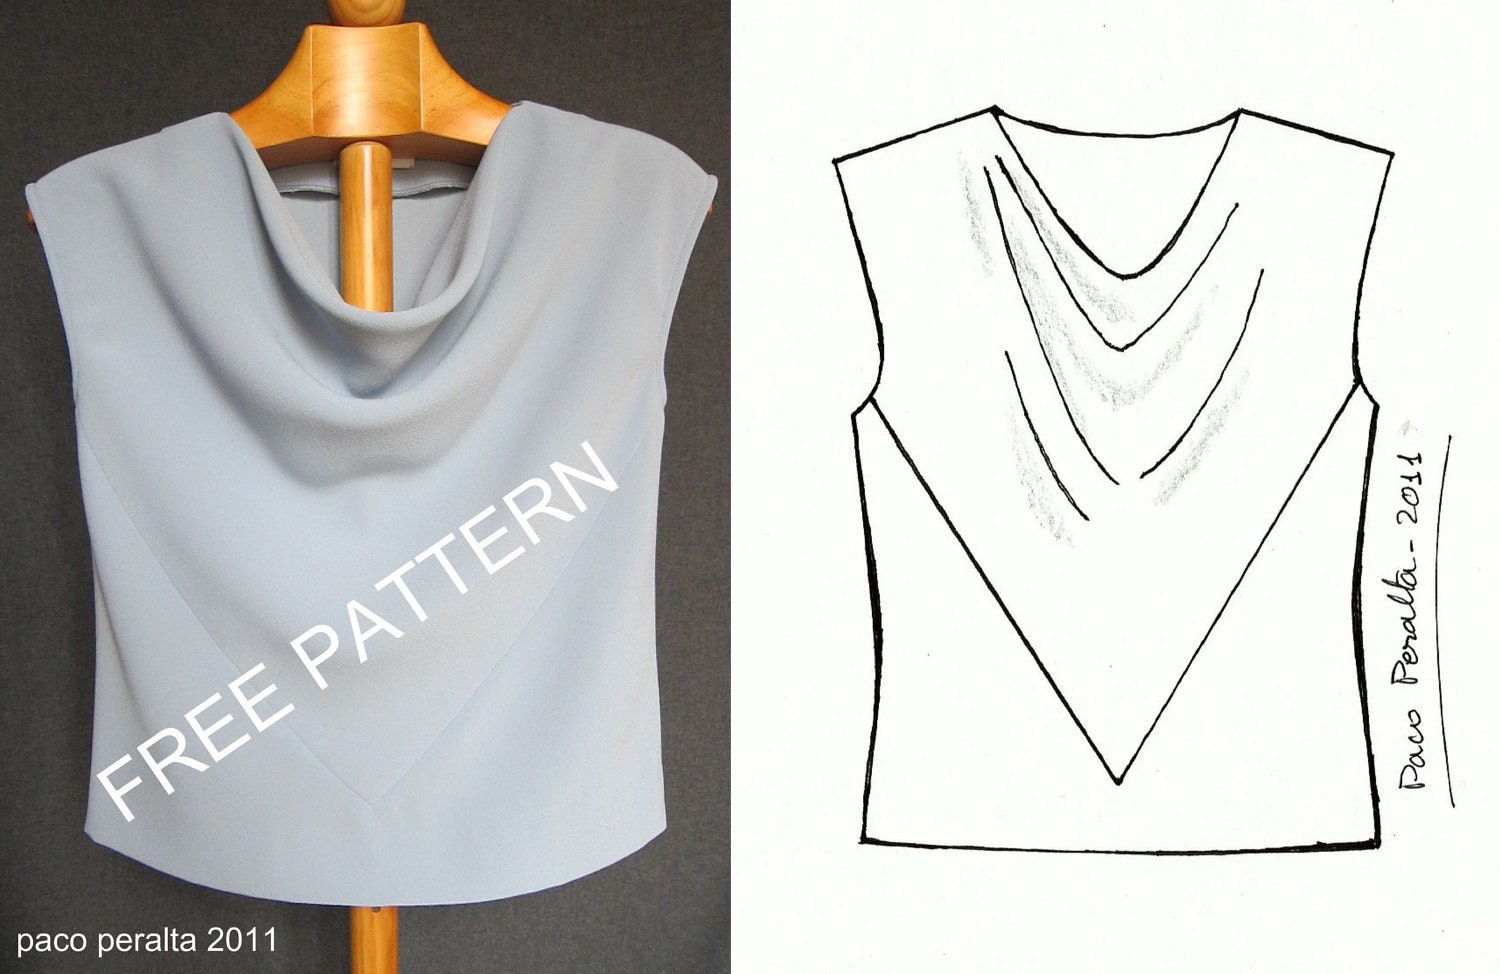
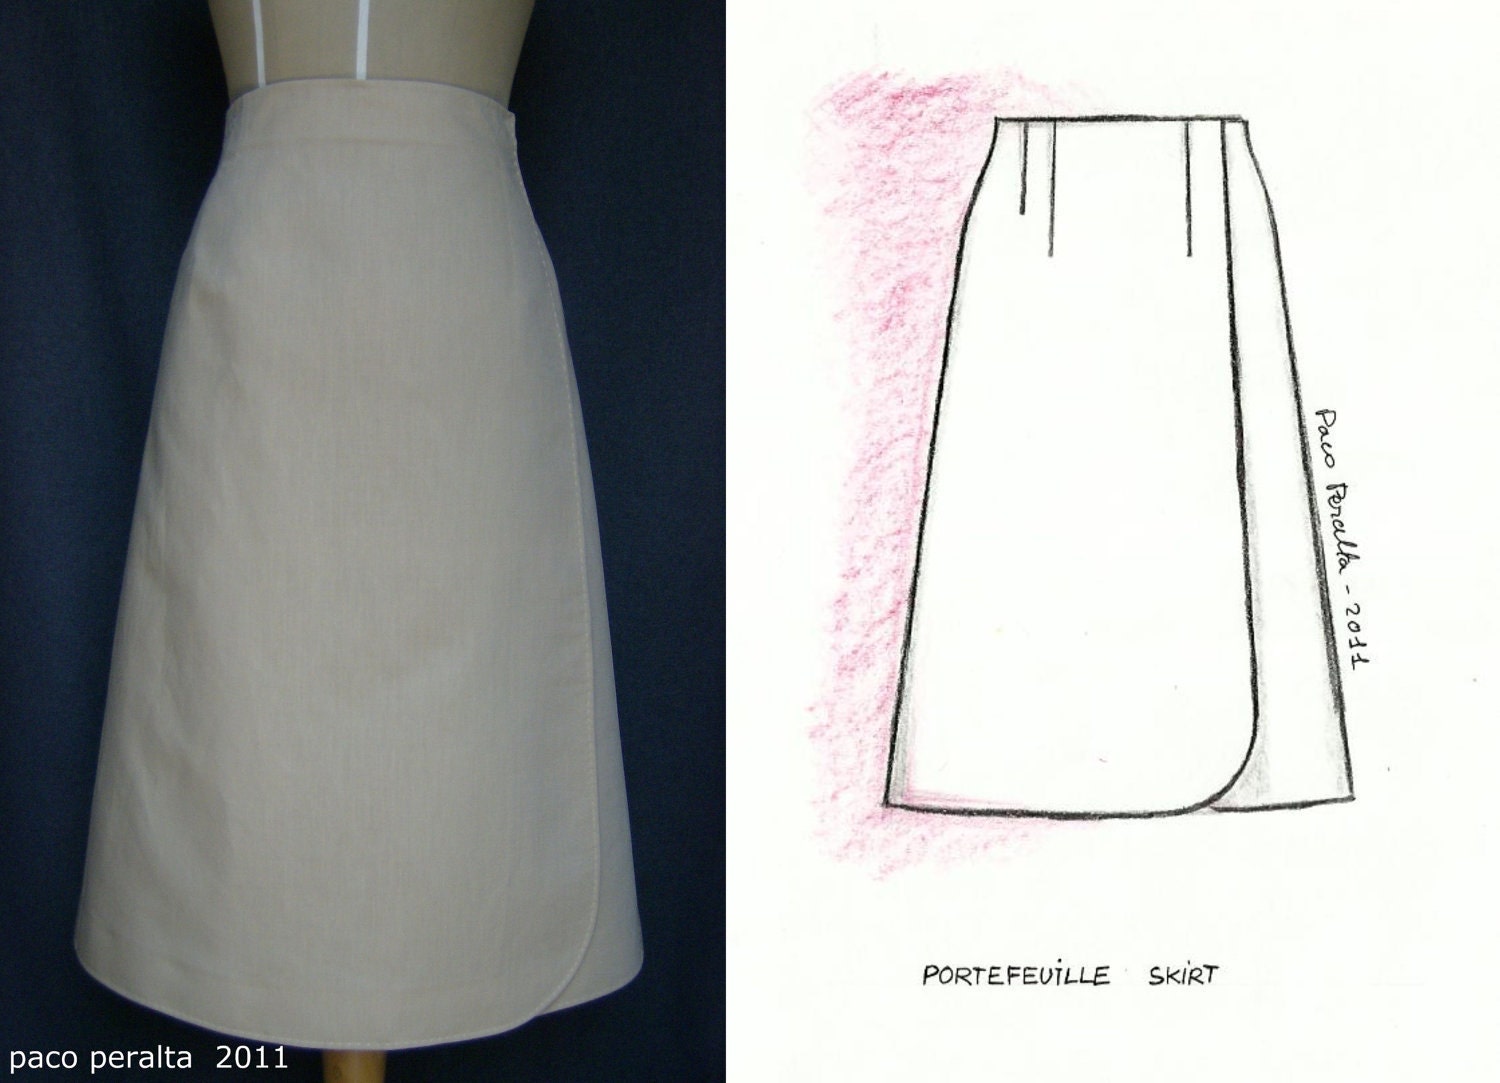
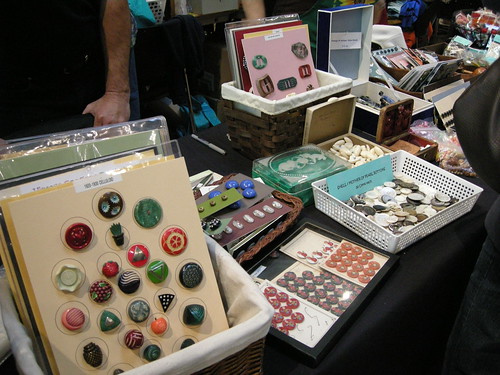
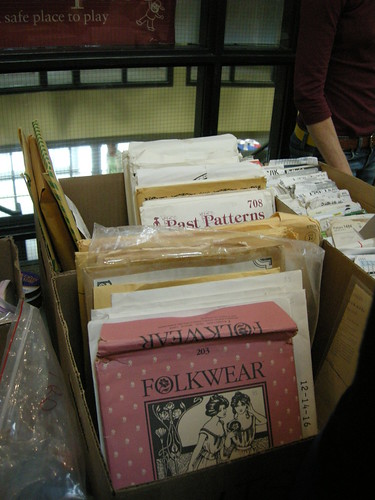
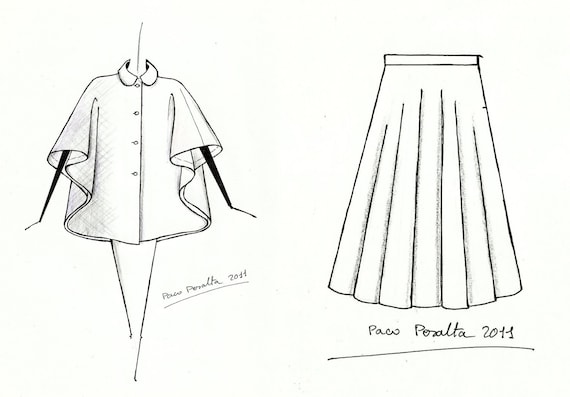
I was pretty excited to see that Paco Peralta was offering a free pattern for a draped top to anyone who ordered from him in November. I placed an order at his Etsy store on November 1 and my package arrived today.
I ordered the cape and skirt set.
I received the draped top, as promised.
But to my surprise, the package also contained ...
The portefeuille skirt.
He wrote "It is my pleasure - I'm sure you will make a beautiful version of this skirt." Paco, I hope I can live up to your expectations!
Monday, November 14, 2011
Friday, November 11, 2011
Making fabric takes a long time
| Lace scarf in progress |
I'm on the fence about whether I want or need a yellow wool lace scarf. However the yarn was in stash (and is a lovely colour) and the pattern is easy enough.
And now ... back to my regularly scheduled craft. Sewing. I'm testing a pattern which I traced more than a year ago as a possible alternative to the Material Things Fearless Jacket pattern, when I was having so much trouble with it. But then I persevered and this one got left behind.
I've got it cut out in a strange quilted knit which might (or might not) make an interesting jacket on the curling rink.
It might also tell me whether I want to commit to this pattern for my brick red lamb leather.
Stay tuned.
Sunday, November 6, 2011
I want to wear these forever
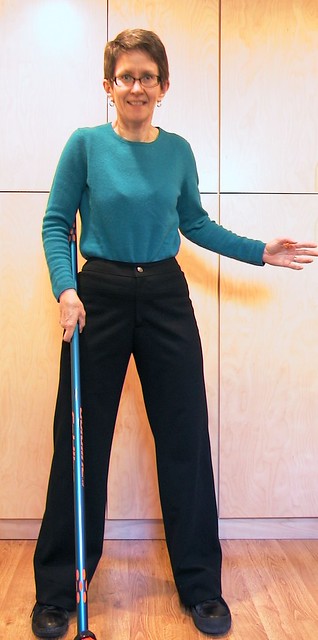
What's that, you ask? The curling pants are finally finished. And even though they haven't been tested in the large fridge that is the curling rink, The Sewing Lawyer predicts that they will be quite up to the task of keeping her warm, and not gapping or binding while the curious posture required in curling is attempted.
I've been wearing a pair of cast-offs since starting to curl a couple of years ago. They are RTW, ripstop nylon lined with some kind of black synthetic knit fabric with a plush surface. These pants sport a gathered elastic waist and cuffs, and have side zippers. Ick.
Last year at Fabricland, the great Canadian chain store, they had a rather nice and very beefy ponte-type knit. I couldn't resist and a pant length came home with me. In stash, a mistake from on-line shopping years ago at Wazoodle, was quite a lot of of black synthetic (supplex nylon) knit fabric with a plush surface. It's softer than the lining of my RTW pants, by a factor of 10 or so.
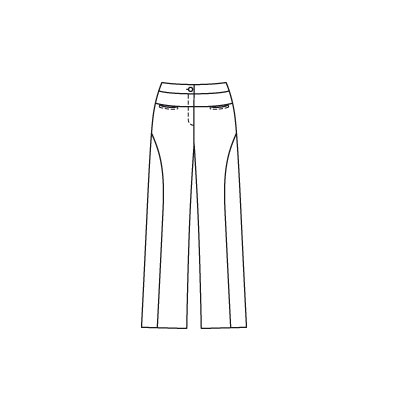
I muslined the interesting pants from the December, 2009 issue of Burda Magazine. Here's the line drawing.
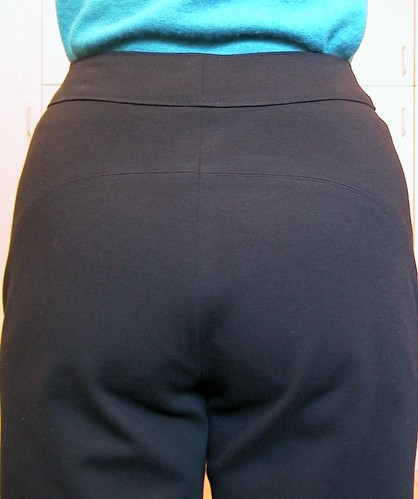
The curved seam goes around to the back where it incorporates the dart shaping needed, and makes a little yoke.
I left off the pockets.
The biggest challenges in making these were to ensure the seams would stay flat and smooth in both lining and outer fabric. I sewed the pants entirely on my sewing machine, using a 1.5x1.5mm zig zag stitch which is stretchy but thin enough to press open.
For the outer layer, I topstitched using the same tiny zig zag stitch before trimming the seam allowances. In the lining, I flattened the seam using a 3-step zig zag, and trimmed the seam allowance very close to the stitching. This worked really well.
It's hard to take a good picture of a really black garment, and the camera finds every bit of lint!
To keep the waist and fly front relatively bulk-free, I used a cotton woven fabric for the waistband and fly facings, and the fly shield. I also interfaced the outer waistband to reduce stretchiness almost to zero there.
This pattern has a nicely contoured waistband pattern with side seams and CB seam for fitting. I used my fold before stitching, always-perfect waistband technique, illustrated here, except this was the quick and dirty (i.e. not couture, no hand-sewing) version. After the facing is pressed and folded as illustrated in the earlier post, pin it securely to all edges, and simply topstitch around the entire waistband by machine. I used the little zig-zag again for consistency.
A jeans button (hammered in, no sewing!) and machine sewn hems through all layers completed these pants.
They are warm.
And they are SO COMFY!
I'm ready!
| Behold |
Last year at Fabricland, the great Canadian chain store, they had a rather nice and very beefy ponte-type knit. I couldn't resist and a pant length came home with me. In stash, a mistake from on-line shopping years ago at Wazoodle, was quite a lot of of black synthetic (supplex nylon) knit fabric with a plush surface. It's softer than the lining of my RTW pants, by a factor of 10 or so.
I muslined the interesting pants from the December, 2009 issue of Burda Magazine. Here's the line drawing.
The curved seam goes around to the back where it incorporates the dart shaping needed, and makes a little yoke.
I left off the pockets.
The biggest challenges in making these were to ensure the seams would stay flat and smooth in both lining and outer fabric. I sewed the pants entirely on my sewing machine, using a 1.5x1.5mm zig zag stitch which is stretchy but thin enough to press open.
For the outer layer, I topstitched using the same tiny zig zag stitch before trimming the seam allowances. In the lining, I flattened the seam using a 3-step zig zag, and trimmed the seam allowance very close to the stitching. This worked really well.
To keep the waist and fly front relatively bulk-free, I used a cotton woven fabric for the waistband and fly facings, and the fly shield. I also interfaced the outer waistband to reduce stretchiness almost to zero there.
| Pretending to skip |
A jeans button (hammered in, no sewing!) and machine sewn hems through all layers completed these pants.
They are warm.
And they are SO COMFY!
I'm ready!
Sunday, October 16, 2011
Two pink things
First, please admire the perfection of the pink cashmere, neatly wound into a ball (or is there another name for one of these?) using my new wool winder. Though my husband says I should be sure to mention what a headache it was to make the #*%# thing, I think it's brilliant.
The wool should unwind neatly from the centre.
No doubt this is all old news to you knitters out there, but it's new technology chez The Sewing Lawyer.
In other breaking news, I successfully changed my second bra (the front closing one) into a standard back-hooking bra with a closed bridge in front. It actually wasn't that hard and it fits so much better. Before, the wires were not only too far apart, the bridge was too low which meant the wires were not at the right angle. Now, as you can see, they come up higher at CF where they are more vertical.
I sewed on 3 of the little pink/écru bows that I bought at the Fabric Flea Market yesterday. I think they look kind of cute!
The wool should unwind neatly from the centre.
No doubt this is all old news to you knitters out there, but it's new technology chez The Sewing Lawyer.
In other breaking news, I successfully changed my second bra (the front closing one) into a standard back-hooking bra with a closed bridge in front. It actually wasn't that hard and it fits so much better. Before, the wires were not only too far apart, the bridge was too low which meant the wires were not at the right angle. Now, as you can see, they come up higher at CF where they are more vertical.
| After |
| Before |
Stash augmentation
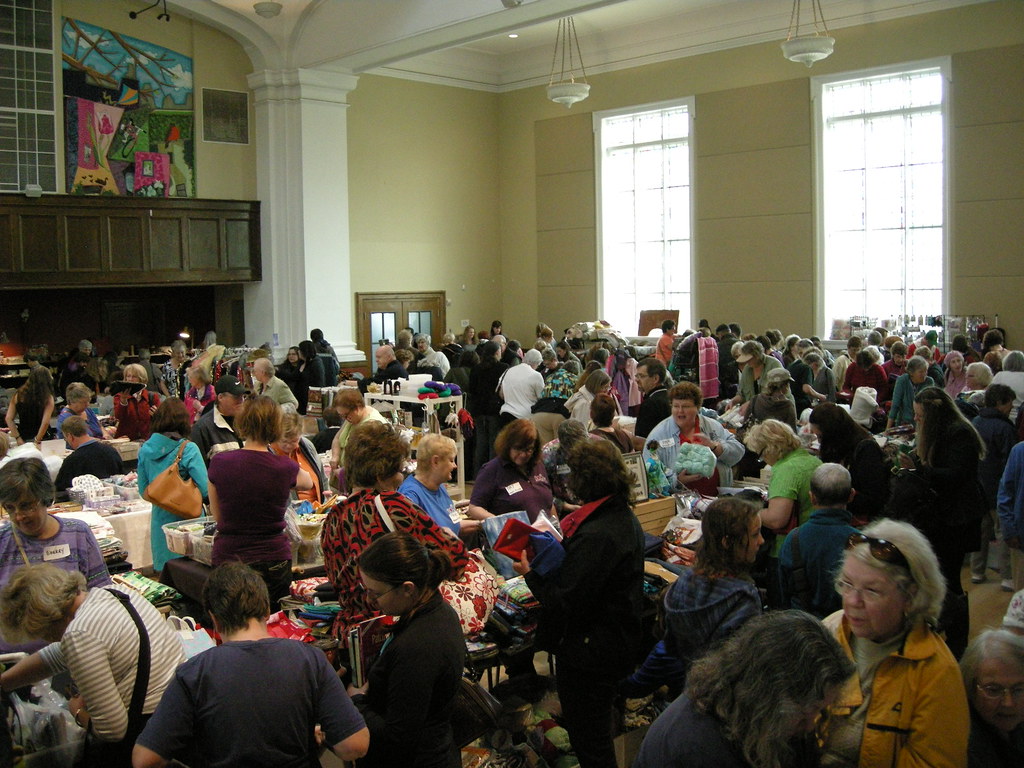
So I have long been involved in organizing the Fabric Flea Market. Annually since 1995. In addition to being a great fund-raiser, it's a stash transfer tool. We give the stash-busting vendors, most of whom have reached SABLE*, a way to recoup some of their investment from stash-building purchasers.
Maybe some of the purchasers don't realize that they, too, have reached SABLE.
Like me. I'm still in denial.
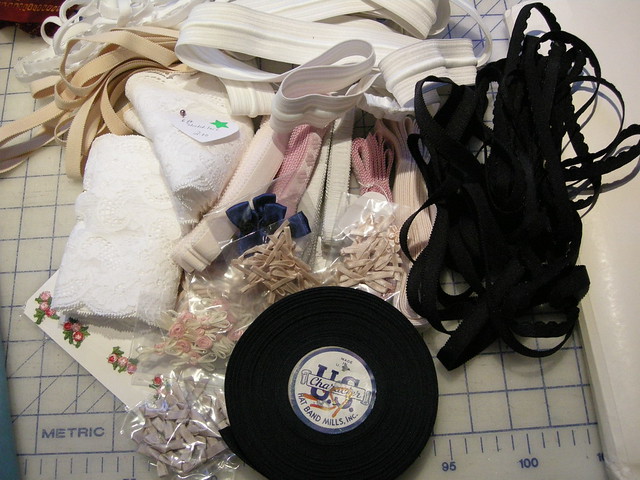
Without further ado: my haul from yesterday.
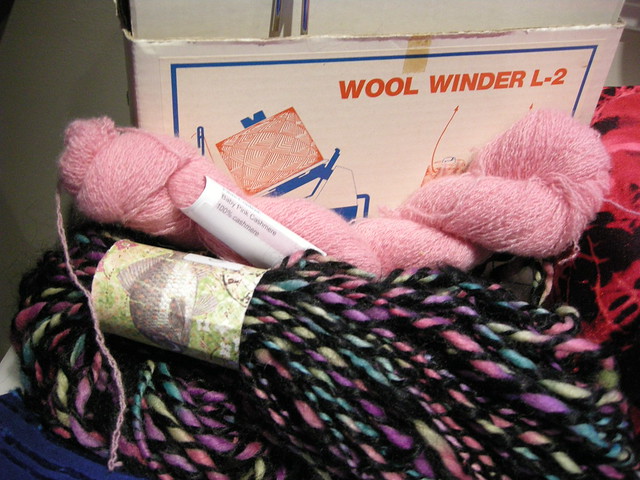
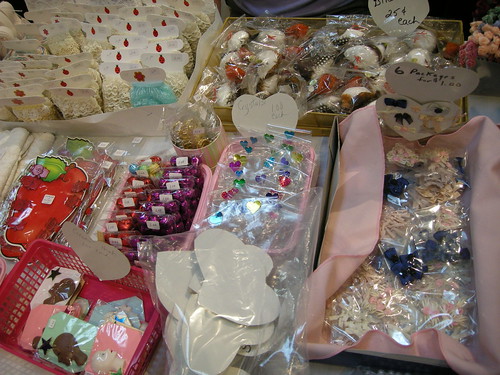
Starting small: stretch lace, elastic of various kinds, including plush picot elastic & strap elastic for more bra-sewing. Also, tiny bows and flowers for lingerie-decorating.
That's a roll of dark navy grosgrain ribbon at the bottom. It's rayon and wonderfully moldable with steam and heat, for facing waistbands and other behind-the scenes uses.
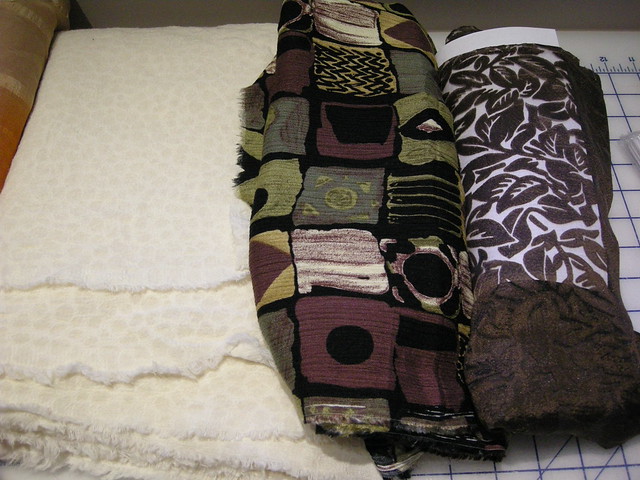
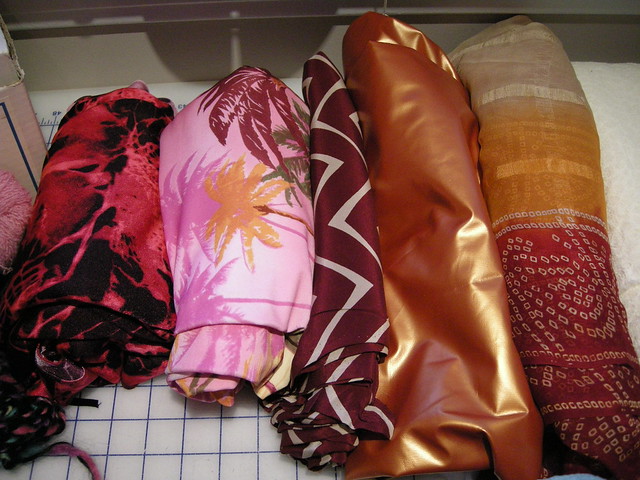
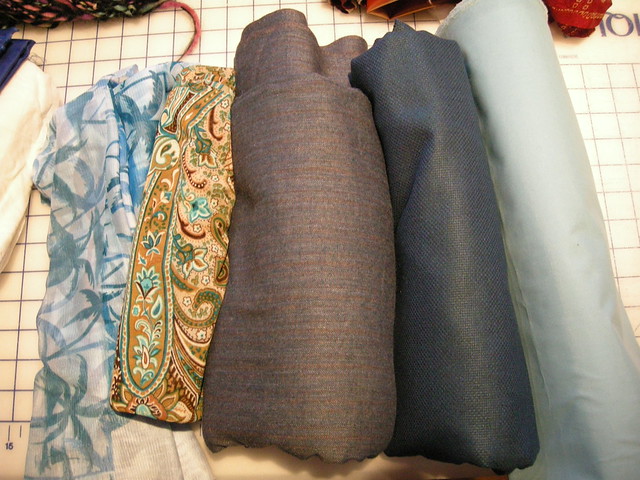
A really interesting wool (maybe a blend) woven with texture and stretch; crinkle rayon print; silk burnout (with white paper behind to show the pattern).
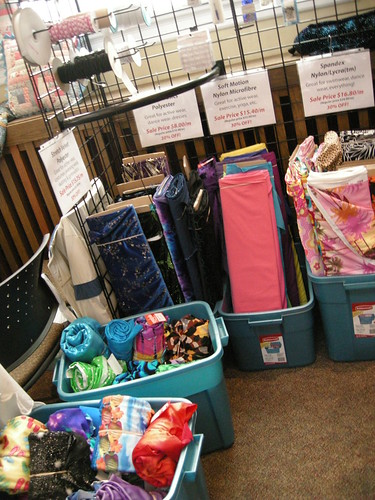
Nylon/lycra for workout clothes; 100% poly swimsuit fabric; silk crepe with zig-zag design; amazing coppery raincoat fabric; silk chiffon sari, with ombre border print.
Two stretch mesh prints; teal/brown viyella; wool/silk dress fabric (shirtdress?); more raincoating (the true colour is more turquoise).
Wool winder to turn 100% cashmere repurposed yarn and hand-spun, hand-dyed black mohair with wool/acrylic blend yarn into neat, usable balls.
There seem to be some colour themes developing. I knew about the brown and teal, and of course the orange, but the pink is a surprise to me.
What did you do yesterday?
*SABLE = Stash Accumulation Beyond Life Expectancy
Maybe some of the purchasers don't realize that they, too, have reached SABLE.
Like me. I'm still in denial.
Without further ado: my haul from yesterday.
Starting small: stretch lace, elastic of various kinds, including plush picot elastic & strap elastic for more bra-sewing. Also, tiny bows and flowers for lingerie-decorating.
That's a roll of dark navy grosgrain ribbon at the bottom. It's rayon and wonderfully moldable with steam and heat, for facing waistbands and other behind-the scenes uses.
A really interesting wool (maybe a blend) woven with texture and stretch; crinkle rayon print; silk burnout (with white paper behind to show the pattern).
Nylon/lycra for workout clothes; 100% poly swimsuit fabric; silk crepe with zig-zag design; amazing coppery raincoat fabric; silk chiffon sari, with ombre border print.
Two stretch mesh prints; teal/brown viyella; wool/silk dress fabric (shirtdress?); more raincoating (the true colour is more turquoise).
Wool winder to turn 100% cashmere repurposed yarn and hand-spun, hand-dyed black mohair with wool/acrylic blend yarn into neat, usable balls.
There seem to be some colour themes developing. I knew about the brown and teal, and of course the orange, but the pink is a surprise to me.
What did you do yesterday?
*SABLE = Stash Accumulation Beyond Life Expectancy
The Fabric Flea Market, 2011 Edition
Sunday, October 9, 2011
Pretty in pink
Following hot on the heels of yesterday's post, here is The Sewing Lawyer's latest custom-made bra - all done! It is not perfect but definitely wearable.
| Inner bra cup - in progress |
Inside the straps (cut on the lengthwise grain) is a layer of duo-plex to ensure they won't stretch. It pads them very nicely. The bridge is also underlined with duoplex since you absolutely don't want any stretch there.
Inside the cups is a layer of flesh-tone power net. I used a triple-stitch zig-zag to flatten the lining seam. The outer cup seam is flattened with the traditional line of straight stitching about 2mm away from the seam, on either side.
The least satisfactory part of this bra (construction-wise) is the seam along the top of the cup. I used a stretch stitch to join the satin to the power net, and understitched with a straight stitch to keep the lining from rolling to the outside. This edge would look better if it was finished with elastic to stabilize it. It stretched slightly in construction, even though I cut the upper cup with the DOGS (direction of greatest stretch) perpendicular to the edge and seam to minimize the likelihood of unwanted stretching.
The fit would be better if the bridge (the little piece at CF between the cups) was narrower. I don't know if this is possible, since it has to accommodate the plastic clasp and it would be even more difficult to sew if it was smaller. Future bras will close in the back so I can better control the bridge dimension.
This bra is a modification of the Sharon front closing bra from the Pin Up Girls line of Bra-Makers Supply but, as explained yesterday, the Sharon cup wasn't doing anything for me so I subbed in the cup from a bodysuit pattern in the June, 1996 issue of Burda Magazine.
Before starting I read up on converting styles in the Bra-Makers Manual (also available from Bra-Makers Supply) and I added 1/4" (7mm) to the lower edge of the cup pieces to ensure there would be enough room for the wires inside the cup. This is needed because the Sharon is a partial band style (the cups are not sewn into a fabric piece) whereas the front of the Burda bodysuit pattern functioned like a band in relation to the cups. In a full band bra, the wire sits outside the cup below the seam joining the cup to the band, but in a partial band bra, the wire must be accommodated inside the lower edge of the cup itself.
An aside: In a comment on my review of the Amanda bra pattern, Squirrelypoo (of FehrTrade) wondered why there was a side seam in the band on that pattern. I think it's because the front band of a full band bra cannot stretch but the back band must, so they must at least be cut in different directions even if you use the same fabric. The pink bra doesn't have a front band and the back band connects directly to the cups with no extra seam.
I notice there's a new pattern on the Bra-Makers site designed for foam cups - the Anita, which is made with stretch lace. But there's definitely another pink bra in my future before I need to buy new supplies.
Issa of London - silk jersey dress
| Issa of London silk jersey dress |
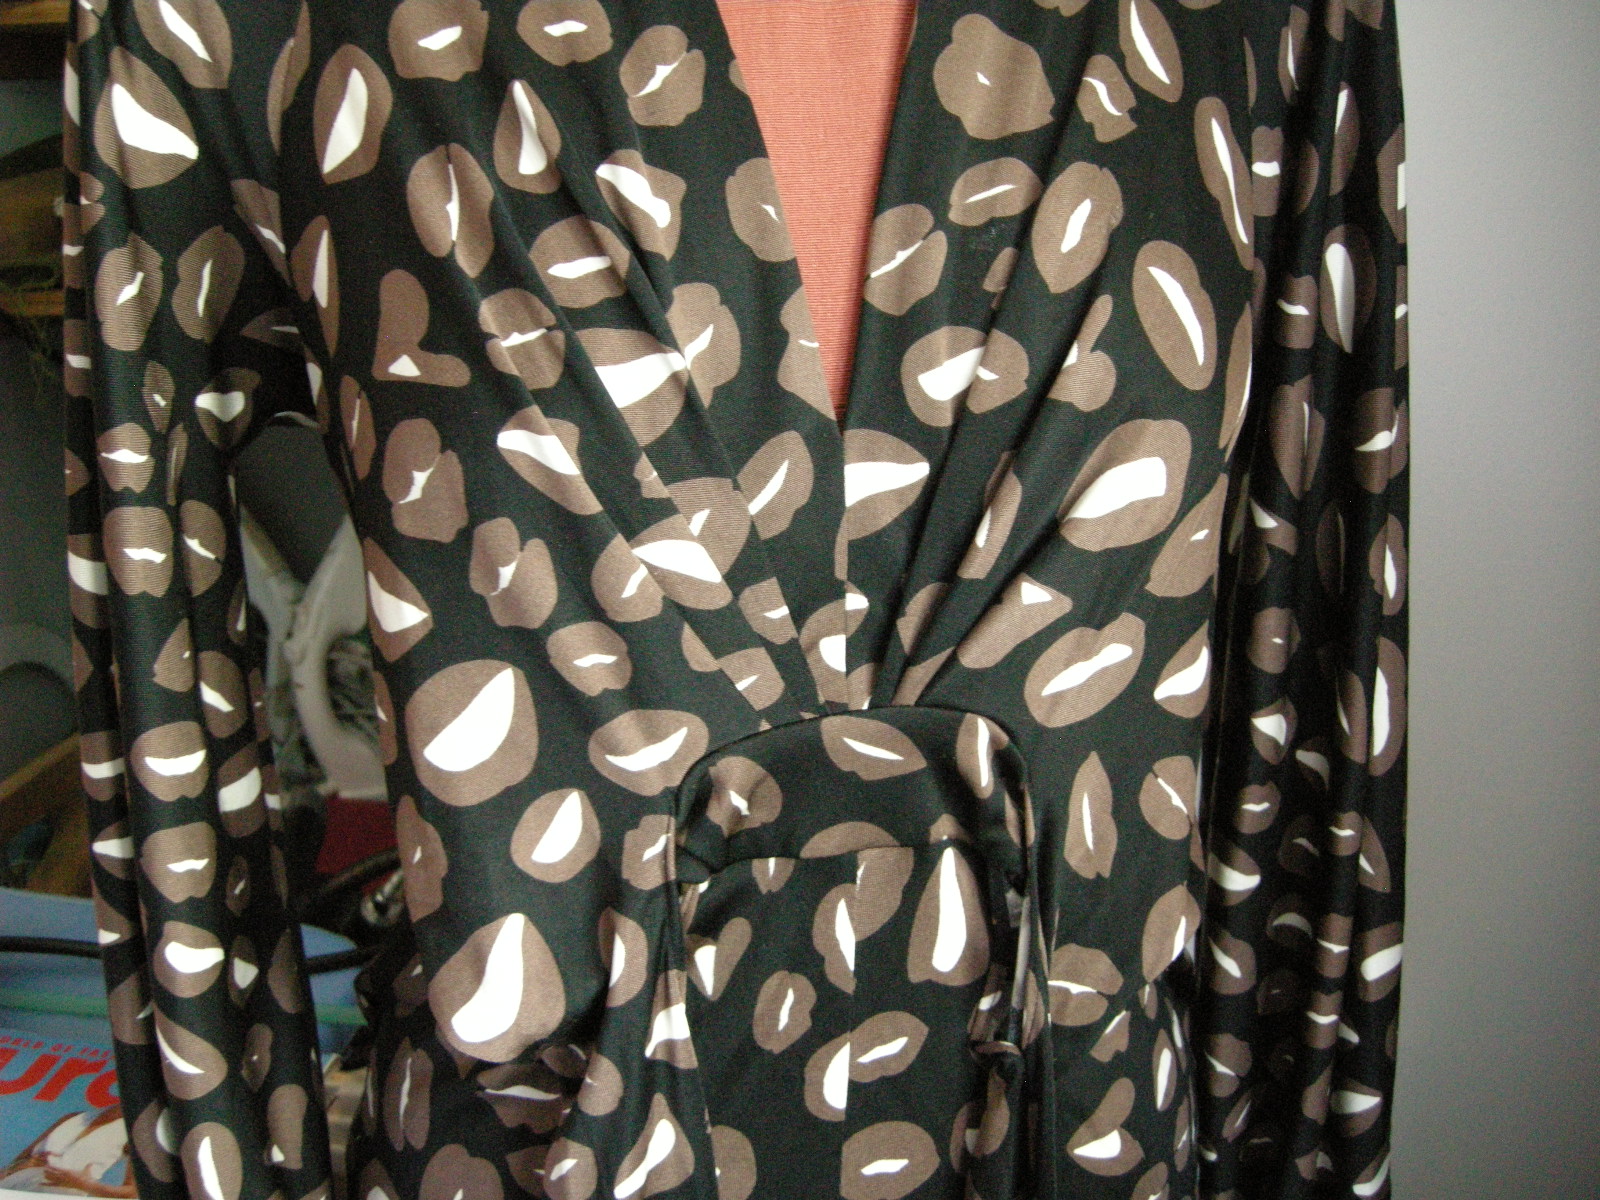
I've got the dress on loan for a week or so to see if I can figure out what the pattern for it would look like. It is truly intriguing! Here's a verbal description which hints at the complexity of this apparently-simple wrap style. My inept photos can be enlarged if you click on them.
Starting at the top, the dress has a high back neck which extends from the front bodice (think shawl collar). There are two ingenious tucks in the collar just at the shoulder point which control the fullness beautifully. They are released at the front (where the fullness contributes to the deeply plunging neckline) and at the back, so that the back of the collar hugs the neck.
The very full sleeves are cut in one with the back of the dress, which has a centre back seam.
| Back sleeve - cut on |
The sleeve is gathered into a generous cuff, which is a single layer of silk jersey, folded double at the wrist opening and machine-hemmed.
| Raglan seam at front |
The V neck has a self facing, which is simply folded back twice. It's not interfaced (there is no interfacing anywhere in this dress).
But the most astonishing feature of the dress is the pleats and ties in the front bodice.
At left you can see the bodice, untied. The upper part has three tucks on each side. One of them (the closest to CF) is very deep - maybe 2" or 5cm. The others are about half as deep.
The bodice tucks are sewn into a little front band, and to either side the bodice curves down and extends into the ties.
| The skirt extends upwards into the tie (the Issa logo is part of the print, as you may be able to see here) |
The bottom part of the tie is similarly cut in one with the skirt. The bottom piece of the tie is narrower than the top layer so the seams of the tie roll around to the bottom as you may be able to see at right.
| Mysterious waist opening |
The dress is worn with the ties wrapped towards CF and then around twice. This conceals the openings where the ties attach, and cinches in the skirt, creating diagonal folds from the hip (see the top photo of the dress on my duct tape double).
This size 2 dress looks astonishingly good on - and it seems to fit different body types very well. My friend is giving it to her 18 year old daughter because she thinks it's too short for her. It's too short for me too. Which is just as well.
If I can manage to make a pattern, I'll show it to you here.
Saturday, October 8, 2011
Why I keep old Burda magazines
| Too pointy! |
I started to tackle the Sharon pattern (at left) from Bra-Makers Supply and I can already tell that the cup design is just not me.
Exhibit A. My padded-out duct tape double is not precisely me, but close enough. Erm.
I pinned the wires in place for these pictures so the cup would maintain its shape. It sure does. It's shape isn't mine.
One of my favorite old Burdas is from June, 1996. This issue included some great summer clothes (including the long tunic-shirt I showed you here) but it also had a great lingerie section, including 2 bodysuits (one also doubles as a swimsuit) and a boned bustier. All in all there are patterns for three different styles of seamed cup garments in this single issue. Bonanza!
![]() |
| Bodysuits from 1996-06 issue |
Against my better instincts I'm posting a picture.
The fabric was a border print, nylon and lycra. Purchased at the late-lamented Textile Outfitters store in Calgary. I remember it was fun figuring out how to use the border print on the cups. Putting the upper cup on a gold stripe meant that I ignored the grain line on the pattern. I did not use wires although the pattern is perfect for them. I like the wide straps which are pleated into the extension of the upper cup.
Sadly, the elastic in this suit has disintegrated but I'm glad I kept it for today's examination. I like the line of the seam in this cup much better than the more horizontal Sharon seam. And it's not pointy.
I think I'll just sub the Burda cups into the Sharon band. Why wouldn't this work? The Sharon pattern is designed for low or no-stretch cups and the Burda is designed for stretch fabric, but the cups are lined so they are reasonably firm. I don't think it should matter. I cut the Sharon cups out of Duoplex, a fabric included in the bra kit which, I have to say, is the most hideous stuff ever. I have some lovely stretchy satin in pink in my stash.
Sunday, October 2, 2011
Calvin Klein PJs
| Bright red with fun jungle animals |
Obviously I took liberties with the sleeve length in the interests of night-time warmth, but more fundamentally with the attitude (suave, sophisticated) of this pattern. Silk charmeuse? Heavens no. The Sewing Lawyer's Calvin Klein PJs are made of luscious 100% cotton jersey. Printed with fun jungle animals (many upside-down) to boot.
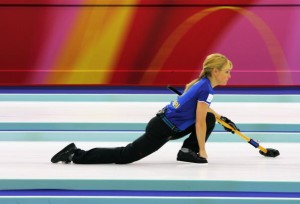
In other news, the curling season has started. Which means three occupied evenings per week, so maybe even less sewing than before. Curling is lots of fun for young and old, and involves moderate exercise which is countered by immediate post-game consumption of the drink of your choice and snacks. It also involves periods of intense activity (trotting alongside rocks and sweeping like mad) but more time standing around in a fridge-like atmosphere. This will be my third season as a curler.
Why am I telling you this? Because I need to make myself some new curling clothes. The pants I have been wearing for this activity ... I can hardly find the words to describe them. It may be enough to say that they are RTW and handed down from my son when suddenly he got much larger. He wore them long enough to wreck one of the snaps at the waist, which has not stopped his mother from wearing them for two long curling seasons. And for cross-country skiing. They are functional.
| Famous Norwegian men's curling team pants from the 2010 Winter Olympics |
![]() |
| The 2010 Canadian women's team, skipped by Cheryl Bernard |
| #116 from November, 2009 |
After leafing through my Burda Magazines, I found a few pattern possibilities. So far my favorite is #116 from December, 2009. It has some neat seaming. The back is also interesting - the curved seam turns into a back yoke, and there are vertical seams down the centre of each leg. However, I think I'd do some major pocket modification. Perhaps modest zipped side pockets instead of the "Look! Hips!" flaps.
If I had spiffy new pants, I might have to make a new jacket too.
Subscribe to:
Posts (Atom)