Monday, May 22, 2017

This is what I was working on


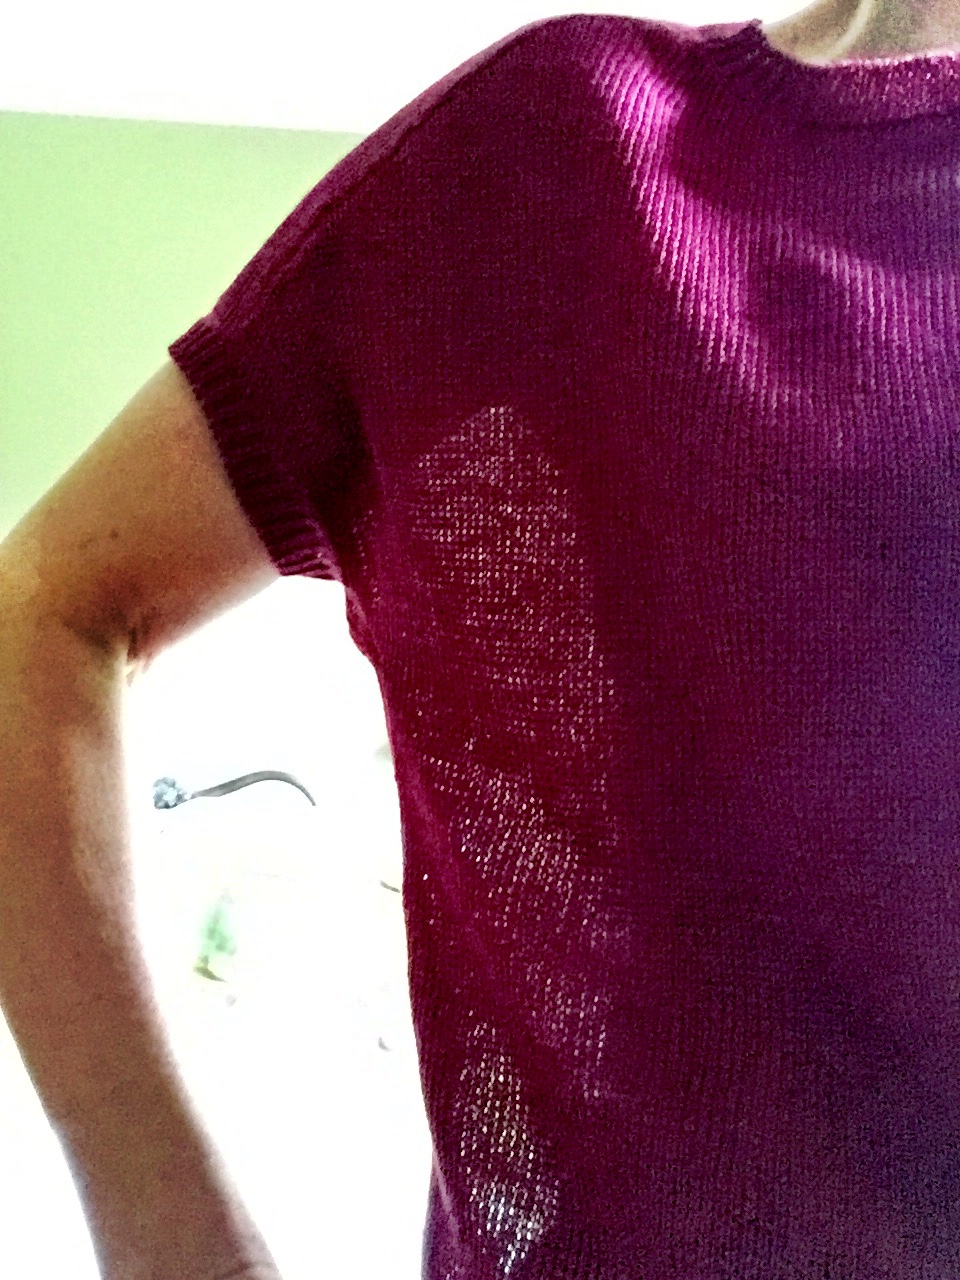
Why yes, it's crazy bright!

But also thin and drapey. Should be perfect for summer, if summer ever comes to these parts. (The furnace came on this morning!)

There are lots of details in my previous post and more serious information can be found on my Ravelry project page.

The short form is:

147g
100% tencel
44cm x 60cm, approximately

The colour is more accurate in the other photos
I always like to see knitting laid flat so I can assess how it is constructed. As you can see, this top has a very simple shape.

There are some short rows at the top of the stripey lace portion and below the band of ribbing at the top of both front and back. This serves to introduce a bit of slope at the shoulder, so the cap sleeve isn't too big and floppy.

I added some subtlety to the construction by making the back a tiny bit (1.5cm or so) longer than the front. This is in the top ribbed band only. The point is to allow the shoulder seam to shift forwards in wearing. This does two things at once. It lowers the top of the front neck, and it prevents the back from riding up. Basically, I think the shoulder seams would have shifted forward anyway; this just lets them lie there naturally.

The arm openings are finished with a line of single crochet. This helps the edges lie flatter, and simultaneously takes care of some (ahem) knitting imperfections.

The back is otherwise identical to the front.

I like it! Since it took less than one cone, I'm hoping to exchange the other for a different colour. I may need two of these.

But it won't be for a while. I had to put the 360 away. Company's coming next weekend, and I have to go back to work after my five weeks off. Blogging will become less frequent, I'm sorry to say.


Sunday, May 21, 2017

What The Sewing Lawyer thinks while working on a machine knitting project

"I should use the special features of that SK360 that I've never used in an actual project, like a stitch pattern that requires a punch card."

Gets manual out. Considers drive lace. [Drive lace is a kind of lace that forms open areas where stitches that are selected by a punchcard are allowed to run. Susan Guagliumi talks about it here.]

Compares cards. Wonders which ones would work with drive lace. Picks a card.

Studies manual in detail (see this video). There are So.Many.Steps!

Gets out cone of icky synthetic to try it. Plods through steps.

"The P Carriage is FUN!"

Picks another card to try. Forgets to set card to advance. Notices that the first row (on which the card is stuck) selects the same stitches to knit and drop over and over, and that this allows vertical lacey stripes to form.


"OOH PRETTY!"

Decides to knit a top with all-over vertical lacey stripes. Knits swatch, measures swatch.

Knits another swatch to try out ribbing.

Knits another swatch to try out a different kind of ribbing.


"OOH PRETTY!"

Looks on Ravelry for a pattern that is vaguely similar to what she has in mind.

Bingo!: Yamamichi-mon.

Bonus! It's a free pattern and it has a schematic drawing with measurements.

Prints out gauge specific graph paper and charts shape of Yamamichi-mon top.

Counts itty-bitty boxes to determine numbers of stitches and rows.

Agonizes over how to cast on for the chosen ribbing.

First step in casting on - the zig-zag row

Congratulates self for figuring it out.

Knits ribbing. So far, so good!

Starts knitting pattern. Edge stitches are not knitting. Tries to fix stitches. Catches yarn on gate pegs.

"Gate pegs are evil!"

Figures out how to get edge stitches to knit. [Sometimes, you have to pull the needles out to D position. Generally, you need more weights.]

Knits back and forth, back and forth, back and forth. Repeat over 200 rows, more or less.

Time for short rows!

Consults manual.

"Where are the Russell levers?" (And why are they called that, anyway?)

"Better drop those stitches down while I have the chance."

"The P Carriage is FUN!"

Figures out how to knit short rows while simultaneously keeping pattern going.

Congratulates self.

Figures out how to continue knitting on all stitches, and how to convert the pattern back to ribbing. Knits ribbing.

Remembers to increase stitch size on very last row to enable stretch bind off. Congratulates self.

Remembers to remove all weights before casting off. Congratulates self.

Sore back from hunching over machine while casting off 185 tiny stitches.

"Done!!" Congratulates self.

Wet block overnight.

The next morning: "OOH PRETTY!"

Rinse and repeat.

Realizes at some point (irony) that this particular form of drive lace doesn't require a punchcard at all.

Soon there will be a new top!


Wednesday, May 17, 2017

Sewing sorbet


A knit top is so quickly made and so hard to mess up that it works as a sort of sewing sorbet - a palate cleanser after or between more difficult projects.

I had extracted this thin drapey knit (poly-lycra I think) from stash because I liked the colours, which coordinate with my teal skirt and also somewhat surprisingly well with my striped cardigan.

The print is nevertheless kind of dark, so I suppose I am continuing with my seasonally backward-looking sewing here. It'll have to end soon as it's quite hot today.

This is a version of Jalie 2449, which I see is out of print. It seems to date from 2004.

I would have made 2804 again, but I didn't want a horizontal seam on the front, which turns out to look kind of awful just above the top of my high-waisted skirt.

I've made 2449 twice before - once from a beefy cotton-lycra and once from one of those disappointing rayon knits. The cotton version (which I am still wearing after many, many years) is pretty snug. The rayon version, which didn't last, became quite loose after it had been washed a few times. I actually preferred the fit as the fabric deteriorated. It didn't reveal all the bumps of my body and undergarments.

So, as I did when making 2804, I cut this top out outside the lines, adding about 1cm to the vertical seams and leaving the waist area, in particular, less fitted than the pattern.

Original try - ca. 2006
I wasn't sure how the looser fit would work with the neckbands. On my cotton-lycra version (at left), I have to pin the layers together at that cross-over point to avoid revealing any more of my person than intended. Further, the snug fit leads to all sorts of pulling.

It turns out that the top works much better if it's not so snug on the body. The bands are cut with quite a bit of negative ease so the fronts are eased into them and this holds them against the body while the looser fit means that movement doesn't cause the fronts to spread apart.

Another one for my wardrobe. Next, I shall get back to my knitting machine. I am inspired to try something called drive lace. Stay tuned.

Tuesday, May 16, 2017

Shapes - mine and not-mine

A picture is worth 1000 words. Therefore, behold:

Marked up ineptly in Skitch

The yellow outlines are the cup pattern pieces for Harriet. The pink outlines my TNT cup pattern. There are two things that occur to me.

  • The shape at the bottom is very different. 
  • The "dart" at the top is very different.

Bottom Edge

The lower edge of the Harriet cup is relatively flat (black arrow) whereas my TNT pattern has quite a curve (red arrow). Harriet curves up, but only a bit, at the seam between the lower cup and the upper cup. My TNT pattern curves deeply and smoothly throughout the entire bottom line of the cup.

Dart

When I say "dart", I mean the space between the top edge of the lower cup piece and the bottom edge of the top cup piece.

To assist, I marked the ends of the dart on the Harriet pattern with orange exclamation markers (the marker should actually point at the little dot on the upper edge of the lower cup) and those on the TNT pattern with green check mark markers.

Imagine the two marked shapes sewn together in three dimensions. We have a lightly darted cup with a lot of curve in the lower edge of the cup (TNT) and a deeply darted cup with a relatively flat lower edge (Harriet).

What is the effect of these differences?

Harriet cup projection - side view
When the lower edge of the Harriet cup is sewn to the frame of the bra, the lower cup projects outward. Because the lower edge is so flat, it's like sewing a cylinder into a flat piece with a circular opening. If you think of the frame as a flat plane, the cup pieces would emerge from it almost at a 90 degree angle. This can be seen at left.

Harriet cup projection - view from the bottom of the band
The big dart in the Harriet cup is formed at the top edge of the lower cup (notice that the seam between the two lower cup pieces is quite flat). The apex of the dart is more or less where the two cup seams converge. Have a look at the photo to the right.

By contrast, when the already-curved edge of the TNT cup is sewn into the same frame shape, it is not forced upward at a right angle, but rather forms a slope. The highest point of the cup is lower (less of a dart) and the continuous curve of the dart means that the shape of the cup is less pointy.

I prefer to get my roundness from the support of a flatter lower cup sewn in stretch fabric than from the pre-defined projection of a cup sewn in fabric with low or no stretch. Lucky for me, I'm small enough that the former works.

Therefore, my next trick is either going to be a mash-up or something completely different, to cleanse my sewing palate.

Oh Harriet, I'm not sure about this

I've had a lingerie explosion in my sewing room. And I've been sewing bras for days. Am I closer to that perfect-fitting bra? In one sense, yes. In another, definitely not.

Let me explain. When we last spoke, I had sewn up two Q&D muslins of two different patterns, and decided to go all out and sew up a real version of the Harriet bra pattern.

However, based on my fit test (sewn out of hideous pink duoplex), I refined the pattern pieces for the bridge (and side) and the cup. For the bridge, I kept the narrow top, but angled the bottom more, making it a wider triangle. This was based on my TNT bra pattern. It was kind of dumb to even try a new bra pattern without adjusting the bridge right out of the gate, in retrospect. For the cup, I trimmed the upper cup and inner lower cup (the triangular piece) slightly because I'm flatter towards the centre than some people (for whom Harriet is designed, I have concluded).

At this point, we may usefully ask whether The Sewing Lawyer thoroughly read and understood ALL the instructions for this bra pattern. The answer is "not really".

Now that I read all the instructions, I see that you are supposed to cut the cups and cradle out of "low-stretch knit fabric designed for supportive bras, such as duoplex, simplex or stable tricot". My tester was duoplex. So far, so good.

However, I hate duoplex but I have a bin full of nice stretchy lacey fabric for bras. So I cut my first "real" tester out of a firm but stretchy lace fabric. I lined the bridge and cradle pieces to stabilize them with some random non-stretchy and sort of thick fabric from stash. I lined the cups with some fairly firm but stretchy stuff, which is also sort of thick. I went nuts topstitching, with a two-stitch zig-zag built into my sewing machine. It sort of stretched out the seam lines. I steamed them into submission and got to the point where I could try the bra on (bottom elastic and wire channels installed, wires in, straps and fastenings pinned on).

Bra #1 - outside
Bra #1 - inside
What did I learn?

Well, I might have steamed the cup seam lines into submission, but the combination of aggressive topstitching and stretchy fabric meant the cups were still too big.

Also, the combination of my fabric choices made for a pretty lumpy bra.

And I didn't like the fabric all that much.

On the plus side, the band fit really well, and the wire line was totally in the right place. But those cups!

I decided to cut my losses and salvage what bits I could and move on.

For my second outing, having learned a thing or two, I made some further changes.

First, I used thinner fabric (a stable tricot) to stabilize the frame.

Second, I shaved still more from the cup pieces in the same centre area as before to flatten them some more.

Bra #2
But I cut the bra pieces (all of them) from a thin but firmish stretch lace. Based on previous bra-making experience (but without truly having understood the instructions) I figured that this fabric had enough oomph for the cups without lining.

I again got to the point of being able to try this on, and realized I was wrong on the last point. I should have lined the lower cup pieces with the stable tricot. This wasn't going to work.

On the plus side, the bra looks great. It's pretty, in a non-ostentatious beige lace kind of way. The band totally works. And it does fit in the sense that there isn't excess fabric in the cups.

I could recut and restart with due attention to reducing the stretch factor in the lower cup pieces. However, I have also come to the conclusion that the cup shape on Harriet is just not me. It isn't only the stretchiness of the cups that is bugging me. Based on other bras I have made, this same fabric, unlined, would be fine for my TNT bra. The fabric gives me enough support. What is bothering me is the way that the cup as designed wants the breasts to be distributed. It's not that the cups force them in and up (like a push-up bra). They are, as other reviewers have noted, designed to give quite a round shape. That shape doesn't match mine.

What I should really do is do a further mash-up of the Harriet band and my TNT cups. But first, I need to get the right size rings and sliders...

Saturday, May 13, 2017

Grumpy

Fashion trends The Sewing Lawyer cannot understand:

1.  "Cold shoulder" garments. So, it's warm enough not to have your shoulders covered, but not warm enough to make long sleeves uncomfortable? Sorry, that makes no sense.


This is attributed to Donna Karan here but had sold out at $238.

2.  Bell sleeves. There's such a long list of things you cannot really do while wearing them. Like eating, or putting on a coat.


Photo from here.

3.  Jumpsuits - unless you are an infant or enjoy stripping every time you need to use the bathroom, these are neither cute nor fun to wear.


Both of these available at Nordstrom's. Jumpsuit on left Hervé Léger, "only" $2,285 (CAD); on right, Vince Camuto $140.

You don't have to spend a lot to be really uncomfortable ... but you can.

4. Severely distressed denim (that came that way):


Not to pick on Nordstroms, but these can be purchased there for the princely sum of $1279 CAD. Ripped, or ripped off?


Enough!

Friday, May 12, 2017

Also interesting - bra geometry

I sewed up quick and dirty muslins of both the Maya (L) and the Harriet (R). I am happy to have used up this horrid pink duoplex!


Ignore the obvious fitting problems on this plastic torso...

Things I learned from trying these on:

  • The cups on both are OK. Volume is more or less right, although I have provisionally pinned out a bit of volume in the cups of the Harriet so that it will fit me even better. 
  • The Maya cups focus volume inward, whereas the Harriet is engineered for a more natural shape for me (YMMV) with more volume at the sides. The Sewing Lawyer, like the plastic torso, has zero cleavage.
  • Both bras are the right size. However, the fit is slightly off for me on both of them. I think this is because of the bridge orientation (very upright).
  • Maya has less height (in both cups and band) and doesn't feel as secure. The wire line is shorter, especially at the sides. I really like the feel of how the side of the cup on the Harriet is pulled up near the wire line by the cup extension that will attach to the strap. 
  • Obviously, the band on the Harriet is wider, but the actual difference on the finished bra would only be about 2mm. They look different here because the Harriet has much wider seam allowances at the bottom band. However, the wide band of fabric on the Harriet sits well on the rib cage and feels pretty darned good. 
Harriet and Maya - direct comparison
(click to enlarge for better detail)

Taking to comparing the pattern for the band, I taped them up on my window (ignore the background scenery). More things I learned:
  • Maya is slightly higher at CF but much lower at the side of the cup. The Harriet feels much more secure.
  • The bridge as designed on the Maya is almost 2x as wide as that of the Harriet sample I sewed. I narrowed the bridge on the Maya muslin by about 1cm to compensate. If I had sewn the bridge as designed, the cups would have been very far apart - much further apart than the cups on my partial band bra, which fits really well. 
  • The orientation of the bridge to the cups is almost identical in both patterns. 
  • The cup seamlines are almost exactly the same too.
  • So is the orientation of the band - the CB lines on the patterns are parallel to each other when the CF lines are parallel. The CB and CF are not parallel to each other, however. The back of the band points at a downward angle when compared with the front. (A downward pointing back band supposedly provides more support; maybe I don't need much of that.)
So then I compared the Maya to my self-drafted pattern, which I had modified for a full band using the instructions in the Bra Makers' Manual. (Disclaimer - I have never actually made my self-drafted full band pattern.) 

Maya and self-drafted pattern - direct comparison
 (click to enlarge for better detail)
Observations:
  • The most obvious point of difference is that when the CFs are matched, along with the outline of the cup, the orientation of the back band on the two patterns is very different. While the Maya points downward, my self-drafted pattern is pretty flat. 
  • But the most important point of difference is the bridge. My self-drafted bridge is less upright and more triangular. The cup is as a result pushed slightly away from CF. 
Conclusion:
  • If I was truly being scientific I would adjust both the Maya and the Harriet to accommodate my different bridge. 
  • However I am more interested in getting quickly to a good result, and the Maya cups felt skimpy whereas the Harriet was immediately far more comfortable. 
  • Therefore I will adjust the Harriet and make a real bra. 
Onward!


Thursday, May 11, 2017

Well, this is interesting - bra sizing

I have always worn a size 34B in a bra. Maybe many years ago I got measured or calculated my size from measurements, I don't remember. Typically if I was shopping for a bra, I'd go out and try some on. It is a painful process. Making a bra is a different kind of painful process. You have to ascertain your size without having the opportunity to try it on until you are almost finished making it.

My TNT bra pattern was cobbled from different bits (cup design from an ancient Burda World of Fashion swimsuit pattern, band and bridge from a Pinup Girls pattern (the Sharon front closing bra). Every element was then tweaked as needed to improve the fit. I literally have no idea what "size" this pattern is. I know the band is too long and when I make it, I cut off the amount needed to get the right fit in the band. This is easy and painless because the band is straight as you can see at right. It's acceptable because I make one at a time and I use different fabric and elastic. A too-long band piece gives me insurance and allows me to fine-tune the fit as I go.

So my planned bra making experiment involves some prior planning, i.e. choosing which size to cut. The two patterns (Maya and Harriet) take completely different approaches to figuring out the right size, and neither uses the standard North American approach of adding an apparently arbitrary number to your underbust measurement to get to your size "number".

The Maya instructions start as usual with an underbust measurement. However, instead of basing size on the difference between the underbust and full bust measurements, you determine a completely different value - the wire size. Which curved shape best corresponds to your "breast root"? Based on experience I thought that a 34 wire would be right for me and I confirmed this by holding a size 34 wire against my anatomy. Then you use the supplied chart to identify the size. Under this system, my size is 34B or 75B (EU sizing). That seemed reassuring.

The Harriet instructions are to take your underbust measurement. That number is your band size (logical, no?). Then measure the full bust. The difference in inches (Harriet is from the US) determines your cup size. Based on this process, my size is 30D! Well, that is a very different number from my usual 34B. It instantly makes me nervous.

So I printed off the 34B Maya and the "sister sizes" for the 30D Harriet. Those sizes are 30D, 32C and my usual 34B, interestingly enough. Then I got all my patterns out and did a flat pattern comparison.

What I learned (you knowledgeable people probably already knew it):


  • I had read that sister sizes all have the same cup volume, but always thought that the volume would be distributed differently, i.e. the A cup size would represent a flatter breast that was more spread out on a bigger body (bigger band, wider breast root) than the sister C cup size which would project more. This seems to be wrong. All the sister sizes use the same wire so they have the same shape and size breast root.
  • The cup pattern in the Harriet bra is exactly the same for all the sister sizes. Only the frame (bridge, outer cradle and band pieces combined) changes. 
  • Since all the bras call for a 34 wire, it is not surprising but nevertheless reassuring that the shape of the cradle (the round opening in the frame where it goes around the cups) is very similar in all three bra patterns.  
  • My TNT bra pattern and the 34B Maya are the same length, more or less, from CF to CB. But my TNT bra is actually too long for me (I cut the bra band to fit as I'm making it). So I'd have to do the same with the Maya. I could do this as the back band is straight, although it's a bit more tapered than my TNT bra. 
  • The bridge on the Maya is far wider than my TNT bridge. It would be over 3cm wide at the top. I can tell that is too wide so I have taken 6mm off the bridge even before testing.
  • The Harriet does not have a straight band. It's wider at the side for more support and scooped between the straps. Therefore it's more important to get the band size right from the get-go. 
  • The bridge on the Harriet varies in width with the sister sizes - the 34B bridge is far wider than my TNT bridge. The 30D bridge is about the same. 
  • The 30D band is far shorter than my TNT pattern. The 34B band is a bit longer. The 32C band seems pretty good, especially if I combine it with the narrower 30D bridge. 


Based on all this, I *think* I'm actually a 32C. (How typical, most women apparently wear the wrong size bra.) Back in a jiffy after I sew up some rough and ready testers in both patterns.

Wednesday, May 10, 2017

Flower power bra - put a bow on it

I'll keep this short. I finished the bra. It fits (better on me than on my duct tape double). You get the picture - but this picture only.

The outer fabric is a stretchy nylon lace purchased in a favourite store on Queen Street in Toronto. It's the one with the Russian proprietor. I don't know the name, but if you have been in there, you know him.

The bra is ivory, less pink than it looks in this photo. The stash came through with elastic in two widths, hooks/eyes, sliders/loops and fold-over elastic, all in matching ivory, and little rosebud bows.

The straps are cut from the strap-elastic-roll-that-will-last-forever. It is a firm shiny-faced and plush-backed elastic with a firmly rounded picot edge.

Detail at left.

There is a reason bras have decorative bows.

They cover up the awkward spots where things meet, possibly not perfectly.

The lace is very thin/flimsy so the bra is fully lined with a light stretch mesh. That and the elastic seems to be enough support.


Up next? The Maya bra, in this firm lace.

Tuesday, May 9, 2017

But first, this skirt

It's still pretty cold here so it does not seem at all ridiculous to have just finished this nice warm wool skirt in the first half of May.

It's #104 from the March 2009 issue of Burda Style (which I have made before).

The fabric is from stash (natch). I picked it up at the Fabric Flea Market so I do not know the exact composition, but am guessing there is a good amount of cashmere mixed with the wool. It is a light coating weight and has a napped surface with a bit of a sheen on which every crease and wrinkle stands right out. But oh how lovely it is! My favourite shade of teal. In fact, it coordinates perfectly with the top and cardigan I just finished.

The colour is truer to life in the photo at right.

I love how the lines of the shaped waistband flow into the pocket openings.

Monday, May 8, 2017

Lingerie

I think I'd like to make a bra (or maybe several). I cut one out about (mumble) months ago and the pieces are still lying around. This is a personal pattern that I have made a few times (see here and here for the first two examples). So then I went on Pattern Review because I was wondering about other styles. Much clicking later and I have downloaded the *Free* Maya bra pattern from AFI Atelier and purchased the Harriet bra pattern from Cloth Habit because it is so pretty!


Future bra
In one of my other bra making posts, I mentioned that I have a lifetime's supply of lingerie findings and fabrics. So off I go...

Sunday, May 7, 2017

Woo-hoo, even more knitting!!


«--- Mine

                                     Ankestrick's --»


I felt like I was neglecting one of my knitting machines. It's a standard gauge (4.5mm) Japanese machine (Singer 360 if you are interested).

So I decided to use it to knit a top out of some laceweight linen that I bought last year. There was a new and delicious looking pattern on Ravelry (Summer by Ankestrick, photo from the pattern above). So what if it's (a) handknit, (b) knitted top down and seamless and (c) made in DK weight yarn? How hard can it be to figure out the shape and convert it?

That weird drawing at left? That's my mapping of the beginning part of the pattern instructions. The back neck and shoulders are shaped with short rows, and every time you pass one of the four markers you increase at least one stitch. These increases eventually make what look like seams forming saddle shoulders that are very dropped.

Following my usual process, I sketched the shape of the sweater in two dimensions on gauge-specific graph paper and knitted the pieces - laid out prior to construction at right.

I think it took me as long to sew the pieces together with my new (to me) linker (Singer DL1000) as it did to knit them in the first place. The longest part of the whole process was attaching the ribbed bands at the neck and arm edges. I had to do quite a number of repairs, which are now invisible even to me. There is a distinct learning curve for all this!

I was pretty interested to see how I would like the fit of the very sloped shoulders when combined with a boxy shape, which is a new style for The Sewing Lawyer.

At left, you can see how the garment silhouette corresponds (or not) to my anatomy - as well as how airy the knitted linen fabric is. The garment structure puts the arm opening low down but the boxiness allows for movement that would otherwise be inhibited by the shoulder slope. The garment will ride up if I raise my arms too high. So this is not an active-wear style. It should be fine as a casual summer top, which is exactly what this is.

Now if only the weather would warm up!