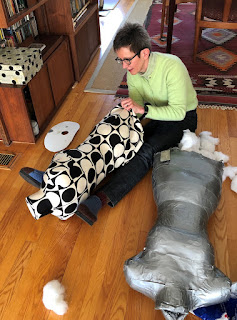
 At right is a random photo of a project modeled by the DTD. As you can see, she had shoulder ... ah ... knobs, kind of like Venus de Milo. These resulted from the wrapping process, as we included the part of my shoulder beyond that knobby bone you measure to when measuring your shoulder length.
However Dot is neatly sliced at the point where the torso portion of the shoulder ends (if she had bones, it would be at that knobby bone). So she is a lot narrower there than I am. I figure that the relative narrowness of Dot's shoulders wouldn't support the shoulders of my projects as realistically as the DTD's shoulders did.
Bootstrap, conveniently, offers a pattern so you can make add-on arms for your dress form. In photos I had seen of this made up, it seemed to have nice round shoulders. So I bought Dot a pattern for some arms and, seizing the day, made them up (sort of).
 |
| Photo from Bootstrap page |
 |
| Dot, armed |
If you are paying attention, you'll notice that Dot's arms are rather short. This is for three reasons.
First, since I really only wanted the arms to help pad out her shoulder area, the forearms included in the pattern were excess to requirements. In fact, I reasoned, stuffing the wrist-length arm into in-progress sleeves might be a bit of a pain. (Not to mention that my arms are shorter than average, and Bootstrap didn't ask me about that, so the arms would have been too long.)
The second reason I cut Dot off at the elbows is that the pattern pieces seemed off to me and I couldn't rouse anyone at Bootstrap (Facebook page) to answer my query about them.
 Here is a photo of the pattern pieces for the arm, laid out in the right orientation of upper and lower according to the markings on the pattern pieces, and to the match points. The thing that threw me off was the fact that the fairly pronounced curve in the lower arm pieces would fall at the front of the arm (single notches). I don't know about your arms, but I don't think mine are shaped like that.
The third reason I didn't sew the forearms was because I goofed in the cutting out process. I matched the upper arms brilliantly (click on a photo of the arms to enlarge it, and marvel at my prowess) but botched in matching the lower arm pieces, maybe because the shapes didn't make much sense to me but really because I wasn't paying close enough attention. There was already a lot going on with these arms, pattern-wise, and I didn't want either to have non-matching arms or to fuse even more fabric to cut out all four of the needed pieces again (none of them were right).
 |
| Showing the armhole plate and attachment yoke |
As between the dress form pattern and the arm pattern, I'd say the making of the former is a little better explained and illustrated in the instructions. Some of the sewing steps in making the arm are a little confusing at first glance (especially sewing the armhole "plate" to the shoulder yoke attachment piece and then to the shoulder of the upper arm). Further, the final finishing where you must attach the under arm to the plate with hand stitching after the arm is stuffed and the cardboard inserted to stiffen the plate is finicky. By comparison, the dress form itself is completely done by machine and the finishing is extremely neat.
However, I am glad I made these. Next I will make an actual garment so you can look forward to in-progress photos of things worn by Dot, the armed dress form.


