Friday, October 15, 2021

Installment 3 - machine knitting from 2021

I believe I promised you information on how I hope to be free from laborious calculations for my machine knitting projects.

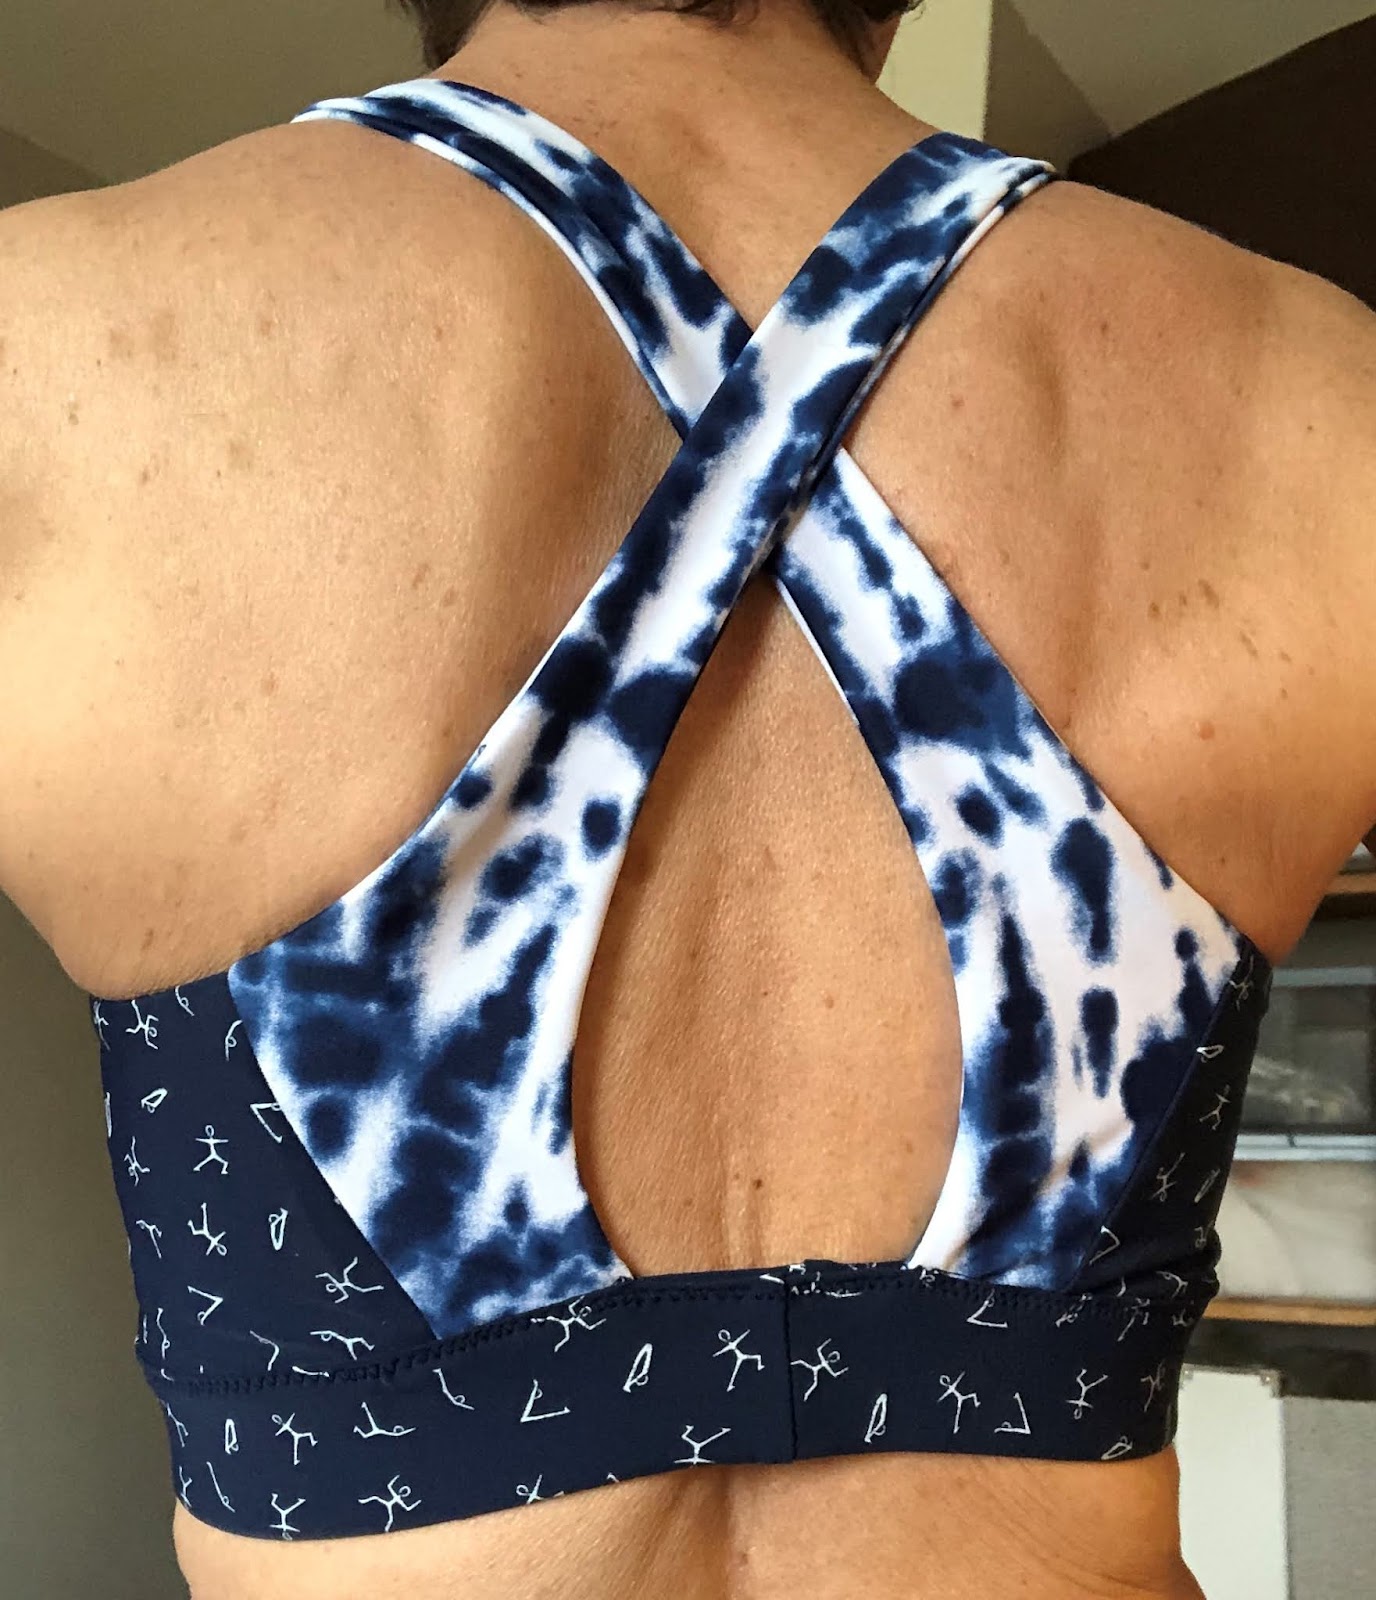
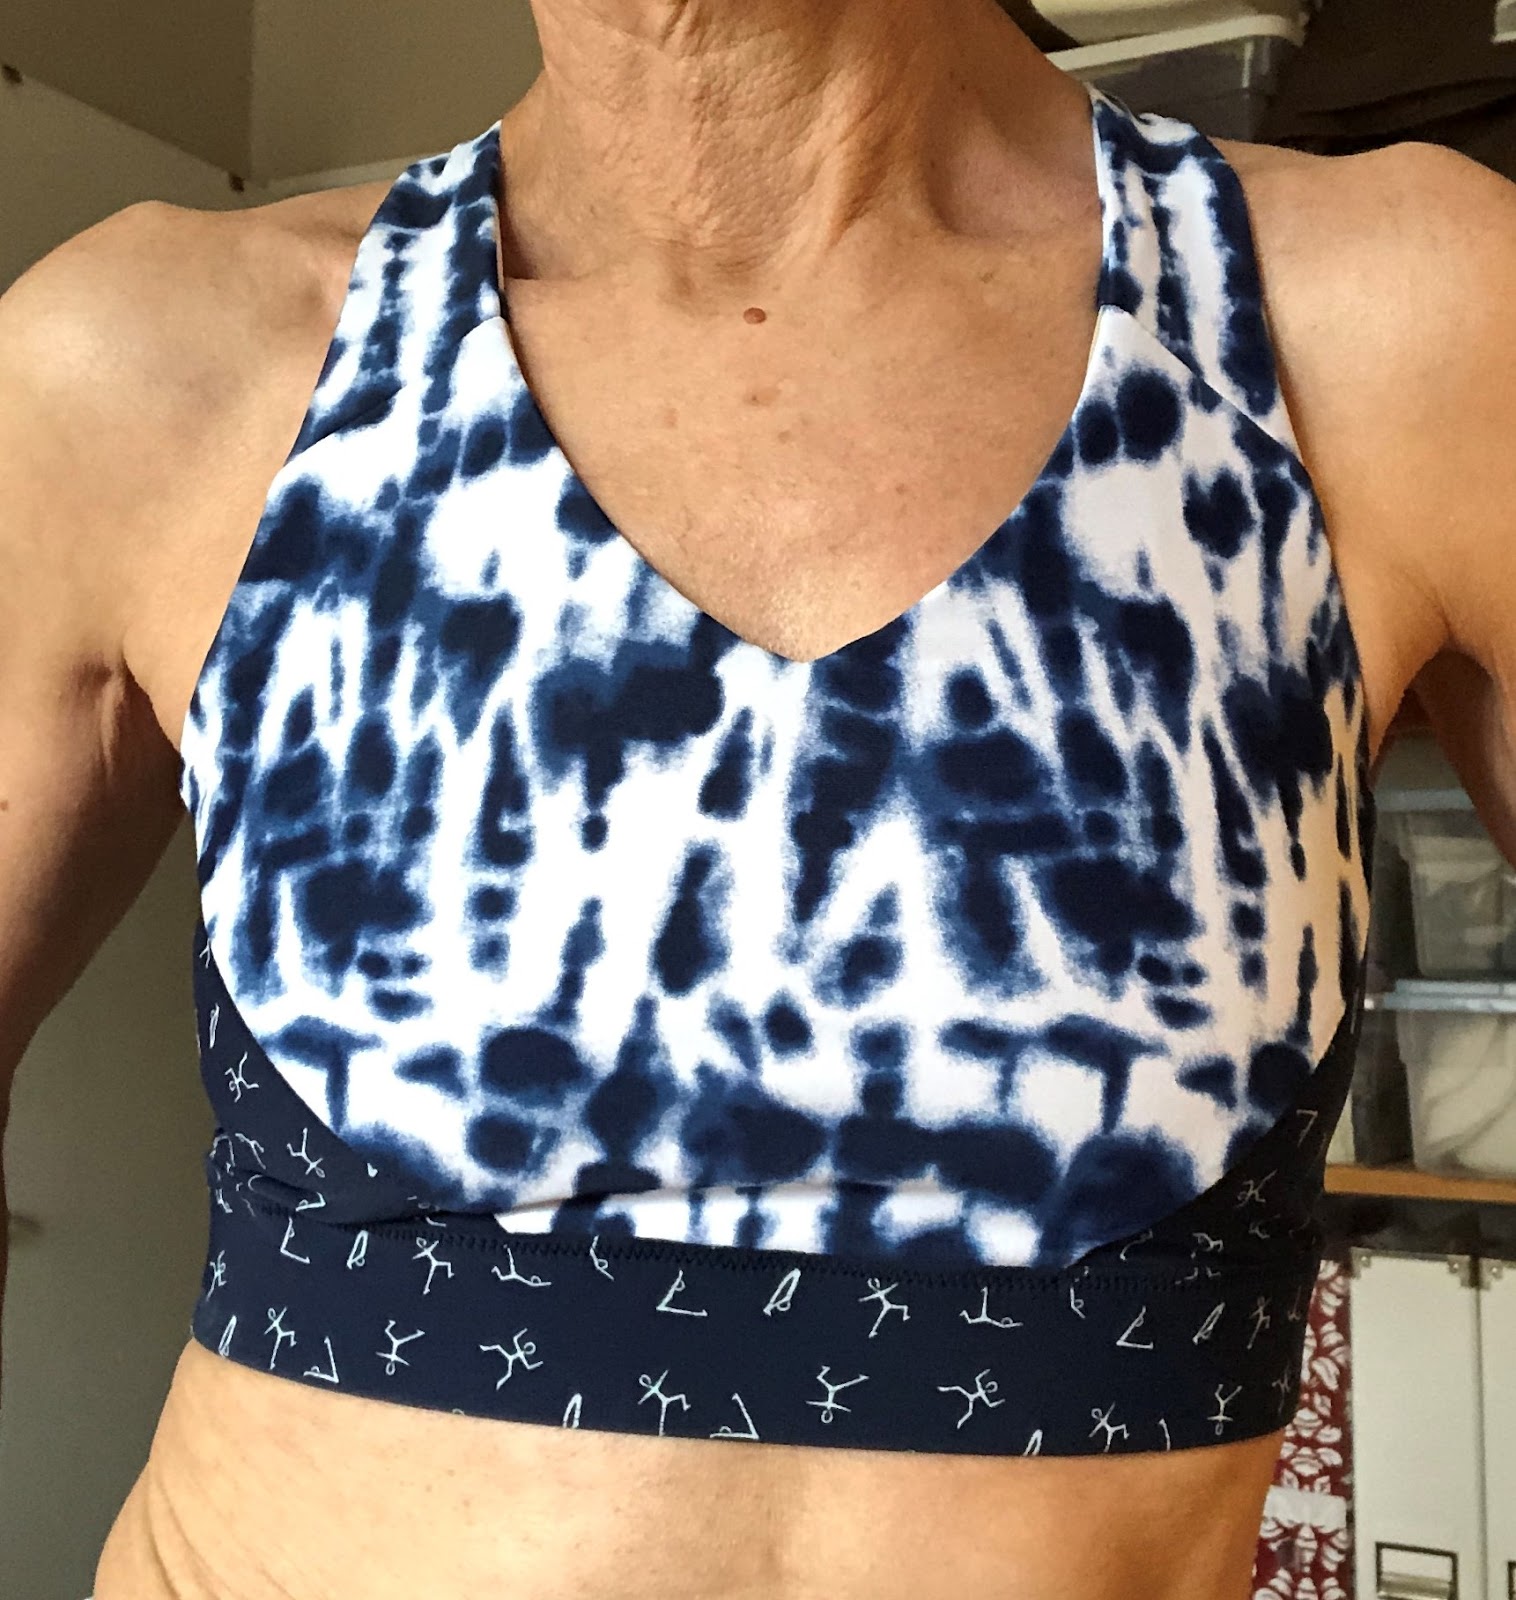
I bought software! Behold, at left, a top I made using it. (More details on the project below.)

Some machine knitters use a program called Design-A-Knit (DAK) but I couldn't warm to it. For one thing, the price is rumored to be many hundreds of US dollars (the website for the US distributor is remarkably bad, it's impossible to even find purchase details like cost). Also, I had looked at the demo and it didn't make a lot of sense to me. Plus, maybe it's more than I need. 

So instead, I purchased Garment Designer, a program for creating patterns for sewing and knitting. Like DAK (currently on version 9), GD has been around for many years. I had heard of it way back in the day when I was working with PatternMaster Boutique (PMB).  

My impression at the time was that GD was a less powerful program than PMB. I think I was right - while you can alter the basic shapes provided by GD to a point, it is not a full CAD type program. However, the positive side of that is that it does a lot of the hard work for you in providing those basic shapes. (As I recall, PMB was moving in that direction but I don't know how far it went down that road. You had to understand a lot about ease and pattern drafting to make it really work.)

Anyhow, I was seeing that some machine knitters (especially Miss Celie's Pants) were using GD with great success. So I forked out my $200 (US) and waited for the disk to arrive in the mail (I am convinced that people who sell pattern drafting software are still living in the 1990s.) 

Right away, with no training, it was easy to adjust the pattern shapes to get the kind of fit I was looking for. I did what they always say you should - measure a garment you already have that fits you the way you want your new thing to fit. Once I did that I could tweak my pattern shapes in GD until I had exactly those dimensions.

At right is a screenshot of my pattern. GD allows you to input your knitting gauge and then it calculates how many stitches and rows you need, and where all your shaping needs to happen. You can print out the shaping instructions and follow them while knitting. OK, so it's not interactive knitting like DAK offers, but it is a step up from a hand-drawn graph and it has worked quite well for me so far. 

So this top. I adapted the pattern from a hand knitting pattern called Sommerloch. The designer is one of my favourites, and the details on this top were instantly very appealing to me. I had this black silk yarn purchased from ColourMart and even though I had to use my garter bar on the standard gauge machine (a first) and make rows of garter stitch using black yarn that has 24 tiny strands in it, it was worth it. 

The chain stitch attachment at the shoulder is gorgeous and was quite easy to do (compared to garter stitch on a standard bed knitting machine). 

Then I made a matching cardigan, also using GD to develop the pattern. I adapted the stitch detail from Sommerloch so it coordinates in style as well as yarn (more garter bar in black 24/100 NM yarn). 

Here is the screen shot of the pattern pieces I created.

I nudged the neckline edges away from the original positions so I could attach a neck band which I didn't bother trying to draft using the program. 

I also guessed at the cuffs, which are a bit looser than ideal, but very acceptable. I had to guess a bit at how deep they would be, and subtract that length from my overall sleeve piece.


Here I am wearing the pieces together. It's a very classic twinset, if I do say so myself. 


Friday, September 24, 2021

2021 Knitting, part 2

Wow, talk about fits and starts. Part 1 was published August 1 and here it is the end of September already! Well, there has been more machine knitting. Quite a lot, actually.

In April, I joined the Machine Knit Community or MKC for short. It is a paid subscription, and it's open for new members only during 4 months of the year. Starting Oct. 1, it'll be accepting new members again for that month. 

I had read somewhere that the site was a good boot in the rear for machine knitters and that it had really helped people keep knitting, and keep improving. 

Having been on the site now for 6 months, I'd agree that this was a good move for me. The MKC is run by Nic Corrigan of Whitehall Studio in Yorkshire. Pre-pandemic, she had a shop/studio in her town where she designed patterns, made stuff and sold it, and also taught MK classes in person. Like everyone, in early 2020 she had to quickly readjust - she gave up the space in town and moved her workshop into her house. Then she set up the MKC. It will be one year old in October. 

Here's what you get if you join:

  • As you would expect, you can participate in an online forum with like-minded people. I'm not sure how many members there are but it is very international. 
  • Better yet, you can attend (live, online) regular hour-long seminars about machine knitting. Every month there is a theme, and the seminars typically relate to the theme. We did lace during the summer, now we're on to intarsia. We've talked about the design process. For me, one of the best themes was improving your knitting space. 
  • The seminars feature people who are working in the field of knitting. We've had Bill King (at least 4 times since I joined), Elena Berenghean, Olgalyn Jolly, Juan Alcantar from Juan's knitting garage and many others. They don't just talk - typically they also demo the techniques they are talking about. If you can join live, you can ask them questions. It's a great way to pick up tips from the pros. 
  • The seminars are recorded and you can watch them again (and again and again). You can also watch all the videos from seminars that were held before you joined. In January, I paid to take some classes at a virtual Vogue Knitting Live from Bill King and Olgalyn Jolly. They were fantastic, but once over, they were gone. It costs about as much to join the MKC as it did to sign up for 3 classes at VKL.
  • You can also sign up for specific classes, connected with a pattern that Nic or someone else designed. This costs extra but gives you access to help with the pattern and techniques, lots of video content, and weekly sessions with the designer. 
Every week, you're asked if you want to set a goal for the week. Just one thing. Some people find this really motivates them to get at the machine and knit. 

So what have I knitted?

First up - this top from the Circle of Lace pattern. Following a MK pattern is mostly a departure for me but I loved the details on this top. The pattern is only available on Facebook (search for MallyKnits). It's made sideways and uses a lace pattern from Stitchworld but you can substitute any lace pattern that looks good sideways. 

I made this on my Brother 910/950 which has the Stitchworld patterns programmed into its original electronics. I had taken the AYAB board out (it stopped working, I reinstalled the original board, took it to Peter Smith in Toronto, it was blown fuses, cost $3 or so to fix) so just used the lace that the pattern called for. Easy peasy (once I got a new sponge bar and figured out the tricks of the 910/950 and its lace carriage). 

This top is made with lace weight yarn at a big stitch size so it is very light. I used some superwash wool from my stash. 

There's plenty of short rowing in this pattern (gives the flared shape) and while the pattern is all text, I didn't find it too hard to follow. I did adjust the rate of short rowing to make it slightly less flared and if making it again, would reduce the flare even more.

I love the neck finish (though if making it again would ignore the instruction to double up the yarn for the final rows; it is a bit too heavy).

I also think the little row of purl bumps at the join with the sleeves is very attractive. The top is all seamed on the machine, and tells you how to get this effect.

Finally, I think the side seams are beautiful. 

The details in this pattern are worth the price. 

There is a lot more info on my project page on Ravelry


Next I'll show you a cardigan I made from another MK pattern. This one is the Gorple cardigan by Nic Corrigan. I splashed out for the course as an extra on the MKC. 

This is also partly knit sideways - the sleeves extend to form a yoke at the back. The pattern calls for both sleeves to be knit in one piece from cuff to cuff.

This project illustrated for me the value (and non-value) of MK patterns. 

I could not get the row gauge called for by this pattern although I was able to match the stitch gauge with no problem. Because the pieces are knitted both up and down and sideways, this meant that the numbers in the pattern would be completely wrong. I ended up drawing the pieces out on paper (per my usual technique) using the numbers and gauge in the pattern to get the shape and dimensions called for by the pattern, and then re-drawing at those dimensions, using my actual gauge. It was a complete pain! 


I also made the cardigan longer than the pattern (which is quite cropped). If making it again, I would re-draft it to be narrower in both body and sleeve as well . The front is OK but when I look at the back view, I can see it is just too big for me!

Again I used pure wool yarn from deep stash and though I figured it would be a really boring cardigan, and it is, it is also strangely useful, and fall hasn't even really started yet.  

Again, there are more details on my Ravelry project page.

Also - warning, COVID hair! 

In my next post, I'll talk about my new way of largely avoiding the laborious task of drawing my pattern shapes on graph paper for machine knitting. 

Will I ever use another MK pattern? Stay tuned. 

Sunday, August 1, 2021

And of course, there has been knitting (part 1)

This year I have zero hand knit projects and nine completed machine knit projects. Last year I had one hand knit project and eight machine knitted finished objects.

I gave these socks to my son for his birthday. They were a tour de force of short-rowing and I am pretty sure I decided I had to make them only because I had the exact yarn and colourway that illustrated the pattern in my stash (and couldn't quite imagine wearing it myself).

These are Broken Jack (free pattern on Ravelry) done in Biscotte Yarns Felix self-striping yarn, colourway "Go Habs Go", a name that could be impossible to understand if you have no ties to Canada. 

Here's a hint. I like these stripes broken up into short row diamonds better than the straight striping pattern, but didn't see the benefit of continuing the diamonds into the foot area - where they would be mostly hidden and possibly lumpy.

After that it was all machine knitting, all the time.

In two years, I made three baby blankets.

This is a Diana Sullivan pattern - Seashell Child's Blanket.

It's knitted in a self-striping yarn on my mid-gauge and, like the socks, the shells are made by short-rowing which completely breaks up the repeating stripes and makes them look a lot more interesting. 

I made it for my nephew and his partner and apparently the baby really likes her blankie, which makes me happy. 

I made the baby's big sister a matching poncho. 

On the poncho, I did a wide i-cord edging - another Diana Sullivan technique. 

At right is the front side showing 5 stitches ...

Below is the back side also showing 5 stitches. 

This is knit on in one pass using the i-cord technique (knit in one direction, slip in the other) but over 8 needles. The slip pass makes a long float, which is then latched up for the missing 2 stitches. It's a neat technique.

I hate that Blogger now refuses to let me have two photos on the same line. Sorry for the spread-out read. 

Then I made this crazy intarsia animal faces blanket for a friend's first grandchild. 

It's an adaptation of a free hand-knitting pattern available on Ravelry. Warning: the pattern is written in Finnish. But what do you really need other than the charts and some good photos of the embellishments? 

Knitted on my bulky KH-260 in surprisingly nice aran-weight acrylic from Michael's. 

The finishing took fooooorevvvvver.

The final blankie was my fourth Amazababy blanket. This soft (but bumpy!) blankie never fails to please. 

Knitted in Woolike, budget yarn but so soft and so nice on the machine! 

I mixed up the colours by using dark navy and orange instead of black and red. You noticed right away, right?


Phew! That's enough blogging for today. Stay tuned for part 2 in which I will show you some other MK projects. 


Saturday, July 31, 2021

What else have I made? Bras!

If I was blogging more regularly it would provide me with an accurate account of what I've made in the past months. Oops, now I have to wrack my brains to try and remember.

I went on a bit of a bra-making tear in about February, which is the time of year that tends to happen, if past years are any guide. I made two sports bras and three for everyday wear. 

The first sports bra was the Jalie Coco, which I made with a few amusing sort-of-coordinating stretch fabrics that I bought at Ann's Fabric in Hamilton when I was there last year. 


I have a beef with over-the-head sports bras which is that they are hard to deal with when you've been sweating (which you probably will do while wearing a sports bra, right?). One of the things I thought I would be able to do with this pattern is to insert hooks at the CB of the band. The pattern isn't written that way, and so far I haven't had the energy to figure out how to modify it. But that would make it a lot easier to get on and off, I think. 

Something I realized after wearing this a few times (which I should have realized a lot earlier, since I tend to be short through the armscye area) is that I should have shortened the straps. They look OK but I feel like the bra is sitting too far down on my body. 

The Coco bra has minimal if any shaping and relies on compression to hold everything together. It is fully lined. I used some power mesh from stash in the front and side, and the straps are self-lined. With this type of lining and the firm lower band, the bra is very supportive. The front lining is designed with the option of inserting bra cups between two lining layers, and as a result the front lining is a little complicated. I did not even consider making this option and dumbed the pattern down by combining the CF lining piece with the "cup" lining piece. In this way I got rid of two seams that had no shaping built into them and seemed to have the potential for show-through bumpiness.

By contrast, the next sports bra that I made has fully shaped cups with plenty of seams. This is the Greenstyle Endurance sports bra. It has a front zipper for easy on-and-offing, no matter how sweaty you are. I went ahead and shortened the straps by about 2.5 cm based on my Coco experience, even though I had never made anything like it before. I love the fit and feel of this bra and the shortened straps are perfect for me. 

The Endurance is sewn with a seamed bra foam inner layer in front, a lined back and all edges are encased in wide fold-over elastic. Surprise! I had bra foam and wide FOE in stash, along with a remnant of colourful nylon lycra and a shortish coil separating zipper. I even had a little scrap of scuba knit for the top and bottom zipper shield. 

I found the bra foam super easy to sew. The edges are butted together and sewn with a 3 step zig-zag - no bulky seam allowances. It's very comfortable against the skin too. 

I skipped the step of stitching down all the seam allowances in the outer fabric, which wasn't the smartest thing since quite predictably, once I washed the bra the seam allowances all did that little rolling thing that jersey knits always do. Luckily this is not noticeable in my busy print, and I can't feel it. Next time.

The bra has a nice racer back and the FOE finishing makes it look very snappy. It is easy to get on and off, although I sometimes find it hard to get the zipper connected at the lower edge when putting it on (negative ease). Maybe a molded plastic zipper would be easier. 

If you are still with me, the other new bra pattern I tried out is the Atelier AFI Exquisite bra. This is a very lovely "balconette" bra with seamed cups. The cups are supposed to be made from non-stretch fabric and decorated with lace. 

I used a stretch fabric but lined it to reduce the stretch factor. And I made a slightly smaller size than recommended. I adjusted the bridge to be narrower than the pattern based on my earlier bra experiments. It turned out perfectly. I'm actually amazed at the fit, especially given that I had previously tried the free Maya pattern and didn't care for it. 

You'll just have to believe me when I say it fits me better than my plastic display form.

I also made 2 versions of my self-drafted bra pattern, including one that is a complete clone of this one and I finally made up the full band version of the same pattern. I had previously made the pattern using the information in Beverly Johnson's Bra Maker's Manual (vol. 1). It worked out fine, although my elastic application left a bit to be desired. 


Friday, July 30, 2021

Another new dress


I've had more wear from this dress which is a fantastic summer outfit that requires no fussing. Shaping? What shaping? Very cool on a hot day.

It's the Kalle Dress from Closet Core Patterns. 

I am still sewing entirely from stash. The fabric is a batik print I got at the Fabric Flea Market a few years back. I wonder if there will be any FFMs in the post-pandemic future? That was a lot of people in a room.

It was a bit of a struggle to get all the pieces out of my fabric as the piece was only 2 metres and I was making view C (full length button band) which calls for 2.5 metres. If I had had more fabric I would also have lengthened the back. 

I had to cut out the bias for the hem finish from some black shirting that was on hand. The buttons are vintage black glass, another past FFM find. I had two fewer than the pattern called for but you know what? I was never going to do up the one on the collar band, and a little judicious re-spacing of the rest was never going to be noticed. Problem solved. 

I made the front longer and adjusted the curve of the shirttail hems to be a squarer sort of curve for more coverage, as they looked a little skimpy and I had noted comments to the same effect in reviews of this pattern. The side view copied from the CC website shows what needed to be fixed. 


All dressed up and (still) nowhere to go

I posted a photo of the thrifted rayon print I used for this dress in 2015, so it has been marinating for a while in my stash. I had a lot of it - enough to cut out the massive lower skirt piece in this dress pattern on the fold and leave leftovers. It's the Carole Dress from Fibre Mood. 

Why did I buy this pattern from a formerly unknown-to-me online outfit from Belgium?  

Because I looked at Carolyn's blog in early 2020 and she was waxing poetic about Fibre Mood patterns, and this dress in particular which she had made a couple of times. 

I was also inspired by her blog to buy their patterns for the paper bag pants and the Faye dress. Have I printed them yet? erm no.

Carolyn blogged about this pattern twice. In her second post she sort of suggested that she had had to make some adjustments to the pattern for fit, but didn't describe them. As for me, I found I had to make some to get this dress to something I would be willing to wear. 

There were two major things wrong with this pattern, IMHO. 

First, as you can see in the line drawing, there were no darts or other shaping incorporated into the waist area and this left an enormous amount of excess fabric in the middle of my back. 

While I'm not averse to a dress that blouses attractively above a waist belt, this dress did not seem to me to call for it. The waist tie is extremely narrow (about 1cm) and I thought one of the nice features of the dress, as Carolyn had made it, was the semi-fitted back silhouette. By contrast, the line drawing shows a blobby unattractiveness at the waist. I was dubious about this as I progressed through the sewing steps, following the instructions faithfully. I figured I could whang some fisheye darts in there once I could see how bad it was going to be.


It was bad enough that the back darts are a good 3cm each at their widest point. I eyeballed what was necessary by pinning out as much fabric as was needed with the dress on my trusty dressform. 

Can you see the darts? I didn't think so. 

Second, once I got it attached, I realized that the skirt was waaaaaay too long in back for an ordinary human. I did not adjust the front for length but the back is at least 15cm shorter as a result of my adjustments and is still plenty long enough.

The fix was to rip out the seam between the skirt yoke and lower skirt and take out a massive curved wedge, tapering to nothing somewhere in the front. I do not actually trust the accuracy of the line drawing but maybe the skirt seam was as curved down as it shows. It's much more horizontal in my finished dress, not that you can see it. 

Luckily the instructions had induced me to sew the seam that attaches the lower skirt to the upper skirt last so I didn't have to mess with changing the side seams. 

The enormity of figuring out how exactly I was going to increase the depth of the concave curve in the lower skirt while also decreasing the depth of the convex curve in the skirt yoke and the impossibility of imagining where or for what I would wear the dress during the early part of the pandemic meant that the partially completed dress sat on my form literally for most of a year. In the end, it wasn't that hard because rayon is incredibly shifty and therefore forgiving. And nobody can see that seam!

I have worn this dress once (working from home, for a lark) but am hopeful I can actually wear it out in actual company when I attend a family event that is hopefully going to take place in early September. 
  

Wednesday, February 10, 2021

Adventures in machine knitting, garter bar edition (part II)

 I had heard tell you could use a garter bar to make lace but I could not for the life of me figure it out. The garter bar has no moving parts, every prong fits on a needle and seemingly can only receive one stitch. But Diana Sullivan demonstrated how to manipulate your stitches to only give the GB access to the stitches on selected needles. It leaves the others alone. You can shift the selected stitches right or left and deposit them on a next-door needle, leaving one that's empty. It then makes a hole (the equivalent of K2tog, YO in hand knitting). 

I wouldn't need this technique for my standard gauge machines, which are Brothers (and have lace carriages that make transferring stitches sooooo much easier. However I got a new SK860 (a mid-gauge) and had some DK silk so....

Cullum
Cullum is a hand knit pattern with a very simple lace chart. I probably had to recalculate the gauge for my yarn. Honestly, the silk would have knitted fine on my standard gauge but I wanted to try (a) the machine and (b) the technique. 

It's also a very simple pattern, just 2 pieces (probably hand knit in the round).

I like how the 3 rows of eyelets bias. This is generated by always shifting the stitches in the same direction for each lace row. If you shifted them in alternate directions they would zig and zag a bit. 

You can see my yarn is as stretched as can be on this machine. 

There was no way I could get the icord edging tight enough on the mid-gauge. I made it on a standard gauge machine. It makes a really nice, firm neckline.

I like the finished top quite a lot but the sunny yellow is a hard one to match. 

(The Sewing Lawyer with mid-summer pandemic hair...)


Adventures in machine knitting, garter bar edition (part I)

 Last summer I took a course with Diana Sullivan, machine knitting guru from Austin Texas. Of course I wasn't in the same room as she was, nor with any other attendees (and there were dozens). She offered it on Facebook through a private group. It ran over 4 weekends and each Saturday there was a live 3 hour class on the group. You could easily ask questions through the chat function if you were watching along, and Diana would stop and answer as she demoed various techniques.

The videos were recorded and could be reviewed at your leisure while the group page continued to exist. Unfortunately, Diana took it down after a few months. She is now selling edited videos of the entire seminar on her website.

My version of Le Mont Royal shrug
For me, the garter bar "extra" class was worth the entire cost of this seminar (which was modest). I've had a standard (4.5mm) garter bar set for a long time but have (still) never used it. At some point I decided I ought to have a garter bar for all my machines so I bought the mid-gauge (6.5mm) and bulky (9mm) ones from KrisKrafter. Like I used the one I had all the time so I was sure I'd use these too? (I'm not sure what gets into machine knitters but we have to have All.The.Things.)

Let me speak to you of garter stitch. It's the easiest stitch to knit by hand, and the most awkward on a machine. By hand, you turn your knitting, and every row is a knit row, knitted into the back of the knit row below it. By contrast, the machine holds the knitting with the same orientation all the time, knitting row after row back and forth. Stockinette is what results. You need to turn your knitting (or reform individual stitches) to get garter stitch. You use a garter bar to do this turning. 

Here is a YouTube video showing how it's done. I especially like her honesty when she says "you're going to swear at the machine a lot when you first start to try and use it" and also how, after turning the knitting over and hooking it back on the needles, she says that "with any luck" all the stitches will be on a needle.

Le Mont Royal

In a fit of inspiration (even before the Diana Sullivan class) I decided to make myself a simple thing on my bulky machine using a garter bar. A shrug, which is a rectangle of knitting with the ends closed to a tube (sleeves) and the middle left open (body). I used this free pattern - Le Mont Royal by Espace Tricot.

You'll notice that the sleeve ends are a good chunk of garter stitch rows, and that the edge of the shrug is also garter stitch. I used the garter bar to knit all of the edging rows, and reformed the edge stitches by hand, every second row, for the body of the shrug.


Test swatch with garter bar
I picked mohair yarn for this project, which conceals a multitude of mistakes, but is also "difficult" in that it has these hairy bits that like to get caught up in the gate pegs (knitting machines are spiky). 

Also, the base yarn is very skinny, and it turns out it was hard to make sure I had all the stitches (as opposed to the hairy halo only) on a needle after turning the knitting. But this yarn is such a glorious colour combo - basic teal but with flashing red and green and blue hairs when the light catches it. I think I had 10 skeins in total which is what was at the thrift shop the day my husband found it.  

Considering that the shrug was 66 stitches wide (meaning I had to stick the two half-bed width garter bars together to turn it) and that it was my first outing with this ornery tool, it worked quite well. I resorted to life lines just in case, but also got very adept at using this nifty tool (photo at left) to latch up when I dropped a stitch. I made a fascinating video of me knitting one row of this shrug. Lucky for you, I had had lots of practice by that point so there were no tears or bad words, and I only dropped one stitch which I was able to repair.

The pattern is knit in one piece from one end to the other. I couldn't figure out at the time how to start the knitting with garter stitch (I could have used waste yarn and ravel cord of course) so I knitted from the middle out and seamed the two halves together instead. This at least means my two ends are identical. 

The shrug has 4 buttons on each "sleeve" which means you also have to make 4 buttonholes in the garter stitch. 

It is designed to be worn as a shrug or unbuttoned like a shawl. 

I didn't think this through and made my two halves mirror images so that the buttonholes would be on the top on both sides (symmetrical). This means that when I wear it like a shawl (which to be honest only happened for this photo) I have two buttonhole edges meeting rather than one buttonhole edge and one button edge. So I made a toggle out of two pieces of horn. 

Mohair is toasty warm!

I have another garter bar project, inspired directly by the Diana Sullivan seminar, but it'll have its own post.


Tuesday, February 9, 2021

Made any masks lately?

Oh I held out for a while. Non-sewers were all getting their ancient machines out from the back of the closet and firing them up. I was in denial.

Yeah, it didn't last. 

Dhurata Davies Mask
(early in pandemic)
(yes I did cut my own bangs)
It turns out I have a lot of stashed cotton bits left over from various projects. And old sheets. And now I have special ear elastic and silicone cord locks.

In the early days I was making this one by Dhurata Davies (but with ear elastics instead of the long ties). 

I made SO MANY of them! (See left). Gotta keep the family safe!


Later I tested Jalie's mask pattern. Four styles with headband and bag for your spares!

Jalie View A
(later in pandemic) 
(lots more hair)
My favourite is view B which has a similar shape to the Dhurata Davies pattern but is a bit more sophisticated. 3 layers! 

So do I have a photo of me wearing view B? Of course not. Enjoy this pic of my most sober/serious mask. This one is view A. It is a bit more complicated in structure. (Whenever I have to go to an in-person meeting for work I gravitate towards this one instead of the crazy African prints. Almost everyone else wears boring black or a disposable one...)

I never thought I could get used to wearing a mask. But it turns out you can get used to a lot of weirdness. 

I'm back ... but I didn't really go anywhere (like the rest of the world)

Yikes, what a year 2020 was.

My last few posts almost 12 months ago were written in a state of denial; recalling what had been normal. I reread how I expected to be working from home for a few weeks or months "at most" and chuckled ruefully. That silk shirt? Worn (maybe) once. Those wool trousers? More often, but fewer than 10 times (they are very comfortable). In the fall, I went through the formality of moving my winter clothes out of the storage closet for ready access, but most of my jackets and dresses languish unworn. Even that nice wool knit dress I made a year ago isn't getting much love, although I do love it. I'm now living in jeans and comfy stretchy clothes like everyone else, and wonder if I will be OK going back to my structured professional wardrobe. 

I previously mentioned how my work exploded with COVID. It calmed down (somewhat) but I'm still working from my sewing room so the space is tainted by too much time spent there not sewing.  Too much inactivity (still standing at my ironing board standing desk, though it is now augmented with a gas lift table top for better ergonomics). Too many screens. Too little time.

But I've been a bit more creative lately and was feeling bad about my neglected blog.

So here is a project I completed recently. I have a pair of MEC pants (lightweight nylon, 0 stretch, many pockets) and for a few years have been musing to myself that I should clone them. They are very comfortable (see above re comfy clothes). I found an article in (I think) Threads Magazine on how to make a pattern from an existing garment. Now that I'm looking for it again of course I can't find it. But here's the gist. 

EDITED - I still can't find it but there is a YouTube video by David Page Coffin that more or less illustrates the method.

Use foam mats as a base (I have some that I use for blocking knits), cover with paper. Use pins to pierce the paper along the seam lines of the garment. Obviously you have to keep it as flat as possible. Once you have put enough holes in the paper to see the lines, use a pencil and ruler/curve to mark the seam lines. Repeat for all pieces. Check dimensions. Guesstimate grain lines. Sew a trial muslin to see if it worked.

It was ridiculously easy and surprisingly I got a quite accurate pattern on my first attempt. 

Here are my finished pants. The fabric is a woven cotton with no stretch, but it has more give than the original nylon. The pants are very much the shape of the original. I have already modified the front to be higher at the waist for my next version. 

(Notice The Sewing Lawyer's longer hair "style"...)

The most interesting features of these pants are impossible to see in these photos. 

They have a gigantic crotch gusset. It's completely invisible when the pants are being worn, however it is so deep that it's practically the entire lower part of the crotch curve. To the right is a photo showing the resulting shape. It reminds me of the talk about square crotch curves a few years ago and how they fit a flatter bottomed person very well. 

The pants also have lots of pockets. The two hip pockets are standard construction, but very deep and anchored in the fly front. 

The back pocket has a zipper that's inserted in a separate strip of fabric separating the lower pants back from the yoke. 

A zippered side leg pocket is similarly inserted into a strip of fabric sewn in between the front and back side seams. 

I go back and forth on whether to copy all these features in my next version (winter outdoor pants) but on balance think I will take the trouble, just because. 


Back zipper pocket, left.

The waistband, very fortuitously, matches vertically at the front very well. It's curved as you can see. 

The zipper tape fills in the width of the strip of fabric (approximately 1/2"). I just used cheap skirt zippers from Fabricland. 

Here's an inside shot. I made the pocket bags from an athletic knit. Obviously, the colour is all wrong but it does make the detail easier to see in these photos. 

The original pants had mesh knit pockets. 


I've been doing some machine knitting too, so stay tuned.