Holidays, that is. As you know from my last post, I decided to sew some Christmas presents. Some decision-making and present-sewing was still happening at the very last minute, i.e. the evening before we bundled ourselves, our luggage and provisions and our wrapped presents into the car for the long drive to the GTA.*
What you won't likely have picked up from my last post is that all the sewn gifts this year were repurposed and/or sewn from stash. I'm not exactly sure how this happened, but it did. Yay for stashes!
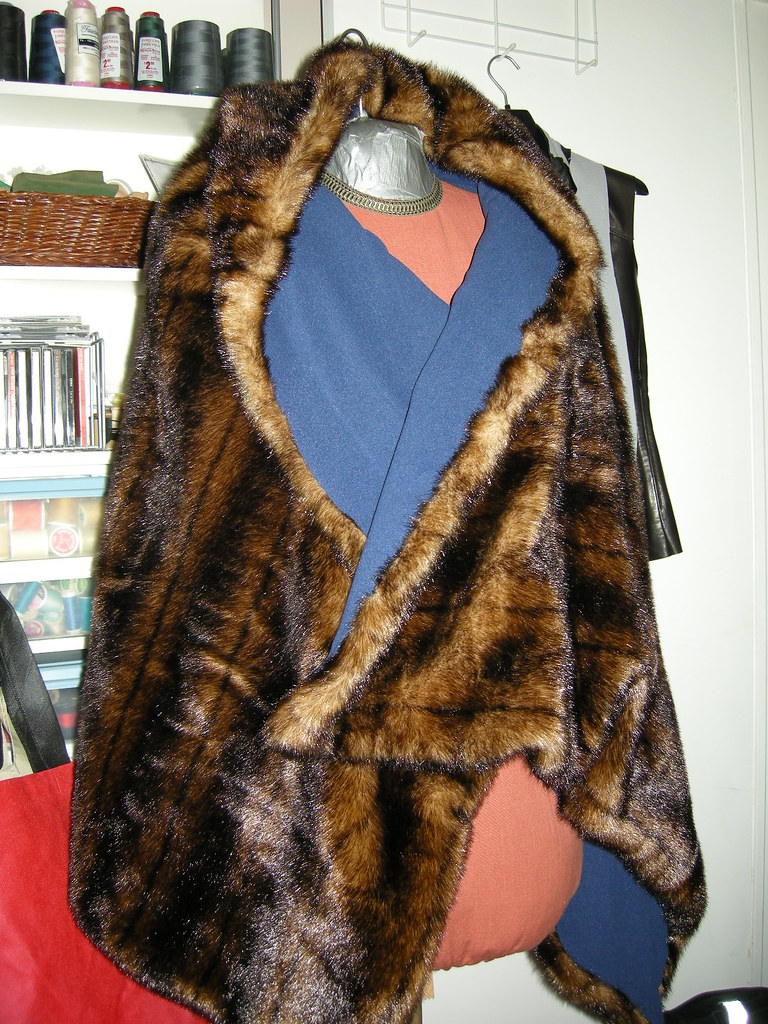
Of particular interest, the furry thing gracing my dress form is a fur blanket made from a great-quality fake fur coat which (luckily) was XL and quite long so it made a decent-sized rectangular piece. It's lined with 100 weight fleece from stash. I had a brainwave that my 20 yo son would love such a thing, and he does. That's good, because it was a pain to make. First, there are all the dust animals (bigger than bunnies) which are produced when you cut the fur. Then, seaming the fur pieces so the seams were invisible, more or less, took a few tries since any unevenness is instantly visible as a texture change. I did this by hand, from the back. Last but not least, sewing on the fleece backing was a challenge since the fleece would not stay still on the fur - I swear I did not have to touch it for it to start creeping along the nap of the fur. I laid the fur piece on the floor, fur side up (creating more animals), positioned the fleece on top so it was more-or-less even, pinned extensively, picked up the whole mess, and sewed one side. I started with the top edge, i.e. with the fur nap running away from it. Rinse and repeat, as they say, saving the bottom edge to last.
The boy says now that I've figured out sewing with fake fur, could I puhleeze make him a new zip-in lining for his leather Engineering jacket in something a little wild. He'd have to come fabric shopping with me so it may not happen.
Next up? I'm buoyed up by the success of the eyeglasses cases I made from leather to get back (finally) to my leather jacket. Had you forgotten about it? Well, I haven't. Poor one-sleeved thing, it has been languishing in the sewing room in plain view for almost two whole months, and it is ABOUT TIME I finished it. But it's stuck in the sewing queue behind a couple of active-wear items that I cut out in a burst of enthusiasm and leather-jacket-denial before the OMG-Christmas-is-coming moment. I want to get these projects off the cutting table and into a drawer before I do the jacket, since I've got to free up the cutting table for the jacket lining (see, it does make sense). I can't do all this before 2011, since I foolishly signed on to work the rest of this week, but I intend to at least make a good start by the end of next weekend.
After that I want to muslin Vogue 1083 and get serious about sewing a new outside for my inside-out fur coat.
No other retrospectives on 2010, predictions for 2011, or optimistic resolutions from the Sewing Lawyer will be served. I'm eager to see how it all rolls out. Stay tuned!
* For those of you who don't know the term, the GTA is the Greater Toronto Area, also known as "the 905" (for its area code, to distinguish it from the 416 which is Toronto proper). I know that the GTA looks like a small town in comparison to many cities of the world (it's only the 45th biggest metropolitan area in the world, with 5.6 million people). However, getting there and getting through it are a chore.
Tuesday, December 28, 2010
Sunday, December 19, 2010
Santa's workshop
I was hit by a sudden panic two weeks ago. So I've been busy. However, I'm now less stressed.


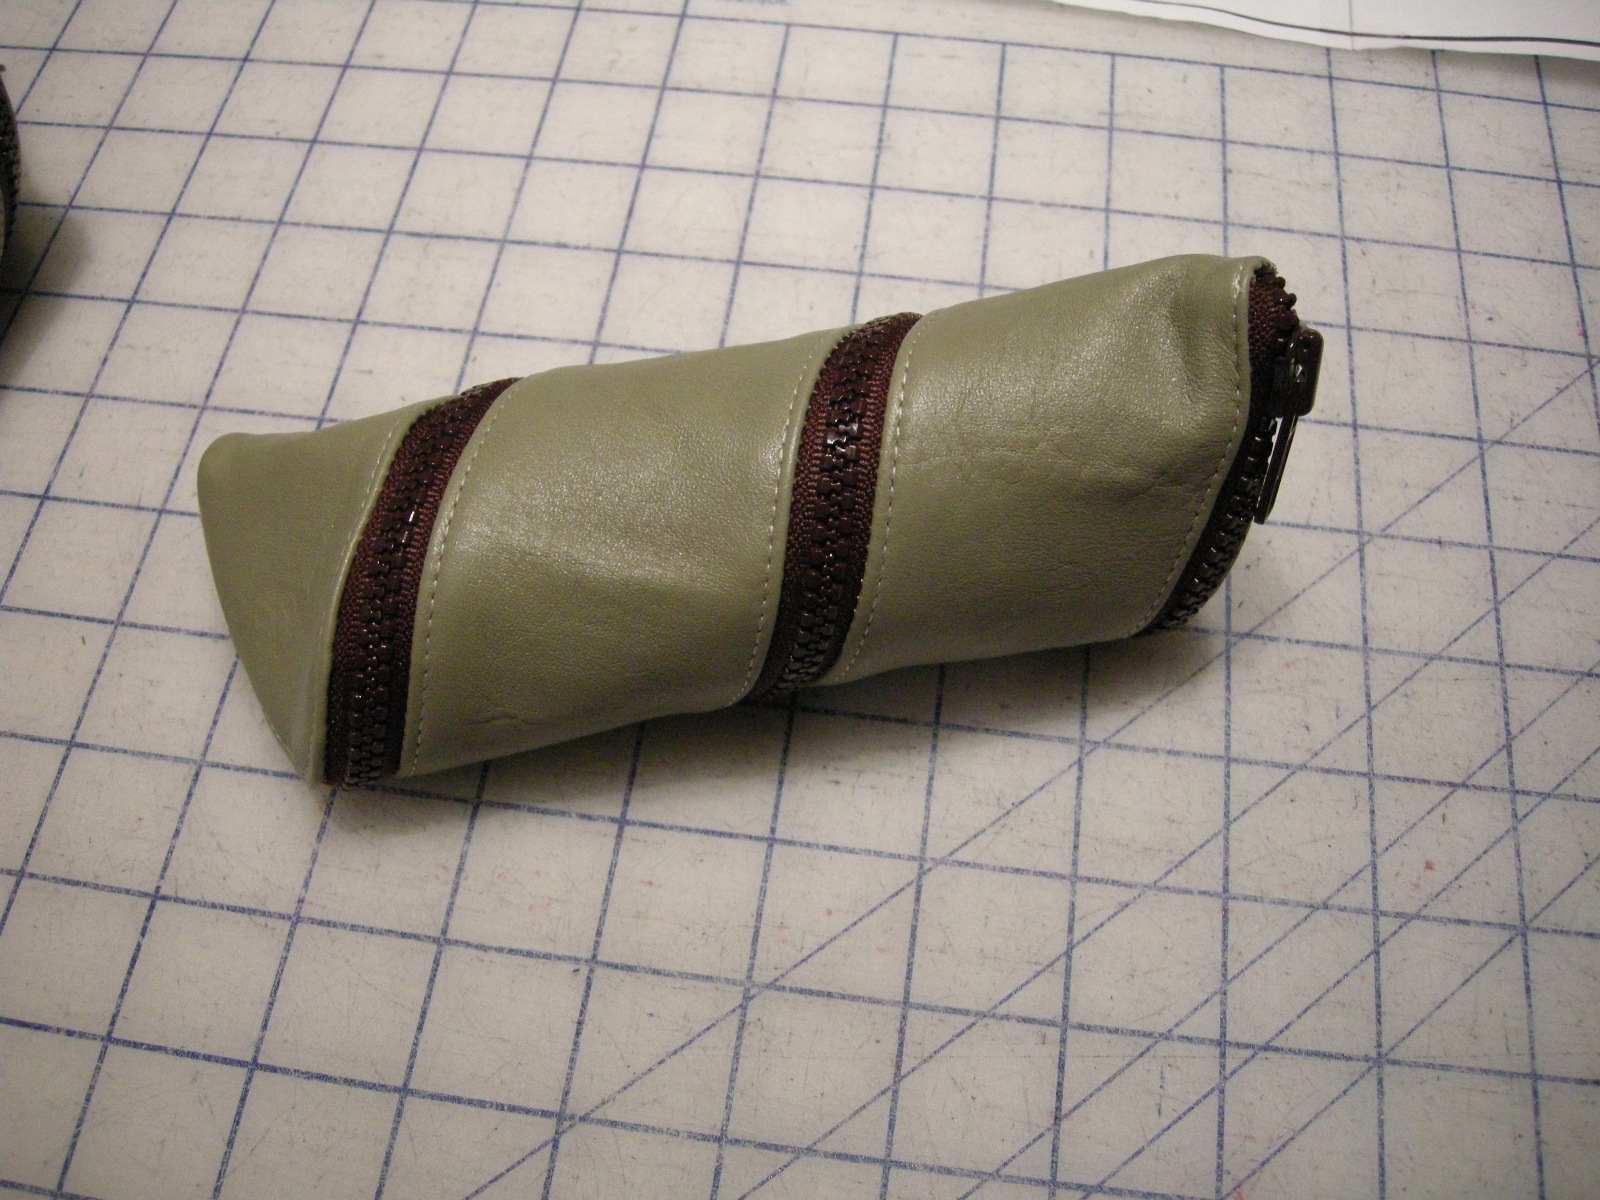
 About the little pile of zipped leather containers pictured above - some time ago one of my local sewing friends gave out a pattern for an ingenious case for eyeglasses. Hers was made from fabric but I chose to use leather, most of which came from thrift store leather skirts.
The piece is 21.5" long by 2 5/8" (52 x 6.5 cm) wide, with round ends. Interface the piece with fusible. Find a zipper of about 24" (60 cm) in length.
 Sew the zipper to the leather, starting with the bottom end of the zipper at a point about 2.5" (6cm) from one end and continuing to a similar point at the other end. Then repeat, going in the opposite direction. You may have to rip and re-establish the stopping point to ensure that it zips up evenly (you will immediately see what I mean if you make one and it doesn't). The further away from the end you start, the fatter and shorter the resulting case will be. I thought 2.5" produced a case with a good length to width ratio.
 When sewing the zipper around the round end, you will need to clip into the zipper tape to let it curve.
 Then topstitch from the right side.
Next, you have to trim the open ends of your zipper and secure them inside with a couple of hand stitches.
 To line, cut the same piece from thin (100 weight) polar fleece or similar fabric. Remove about .25" (7mm) from the edges.
Coat the wrong side of the leather piece with rubber cement. Let it dry a bit, then place your fleece piece on top, patting it down so it sticks to the glue.
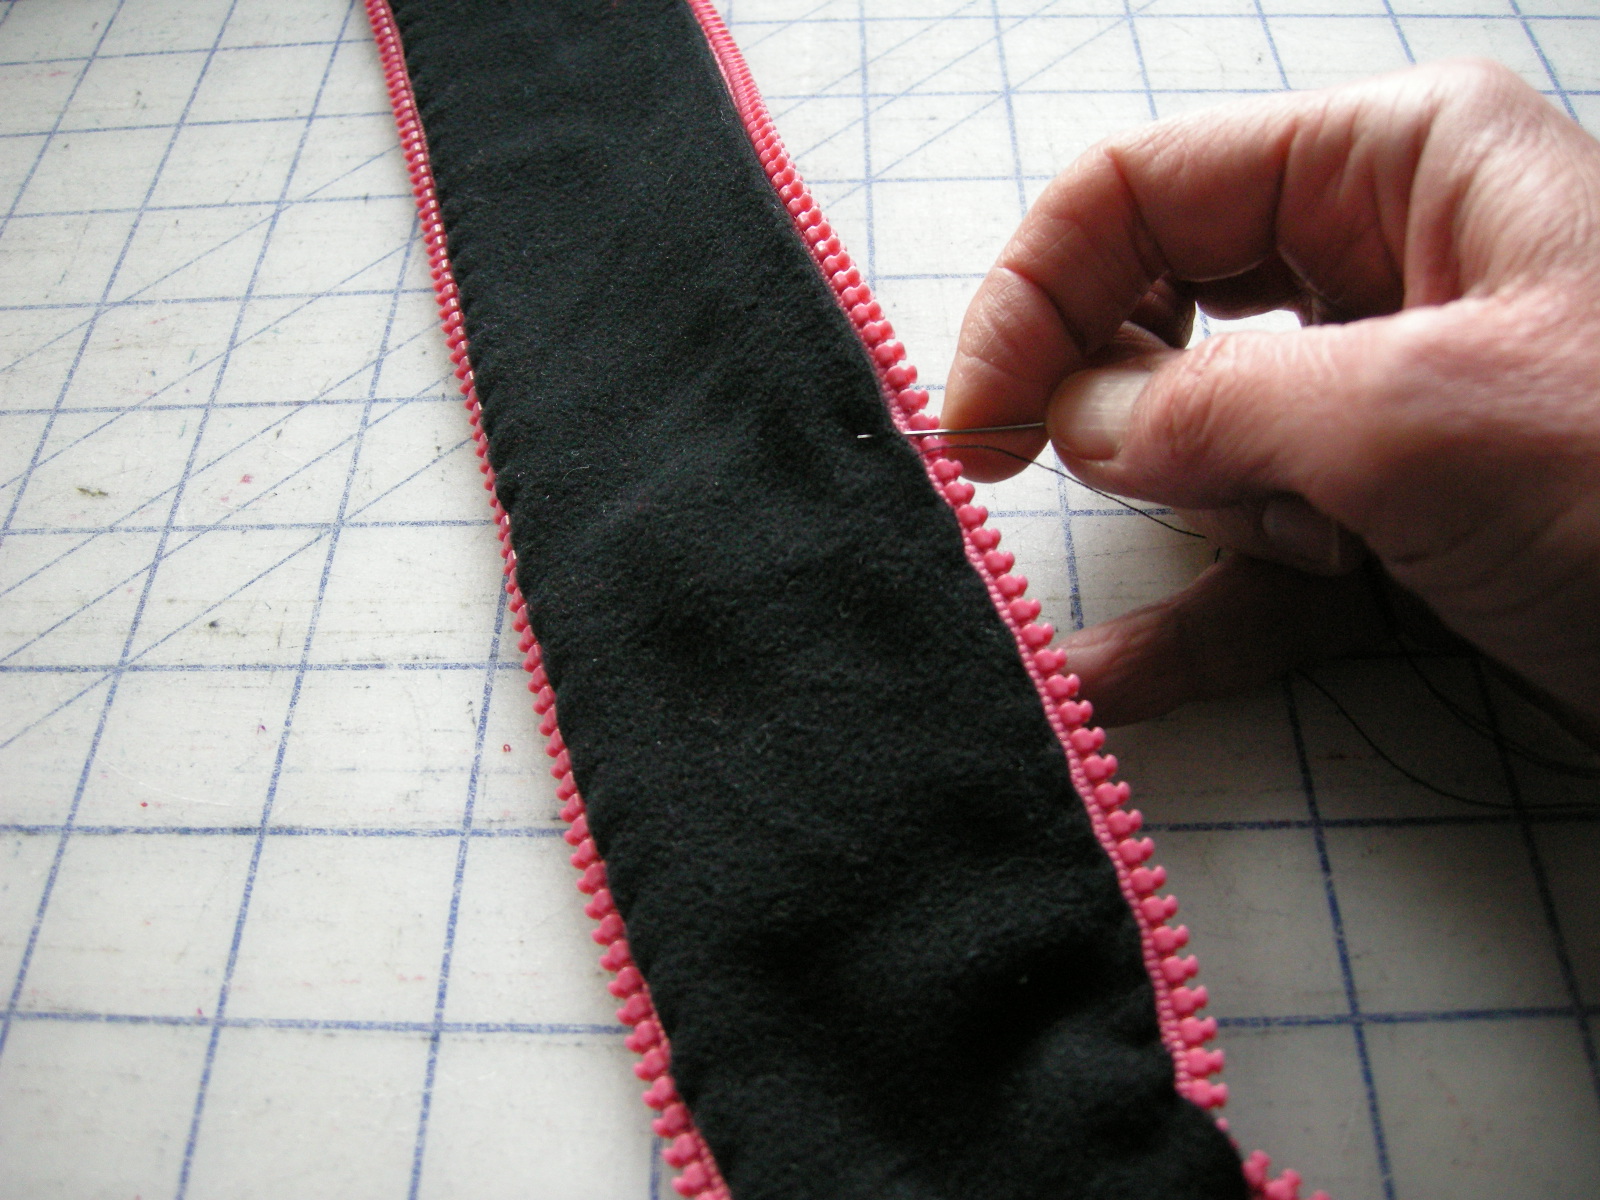
 Attach the lining to the zipper tape with hand stitches.
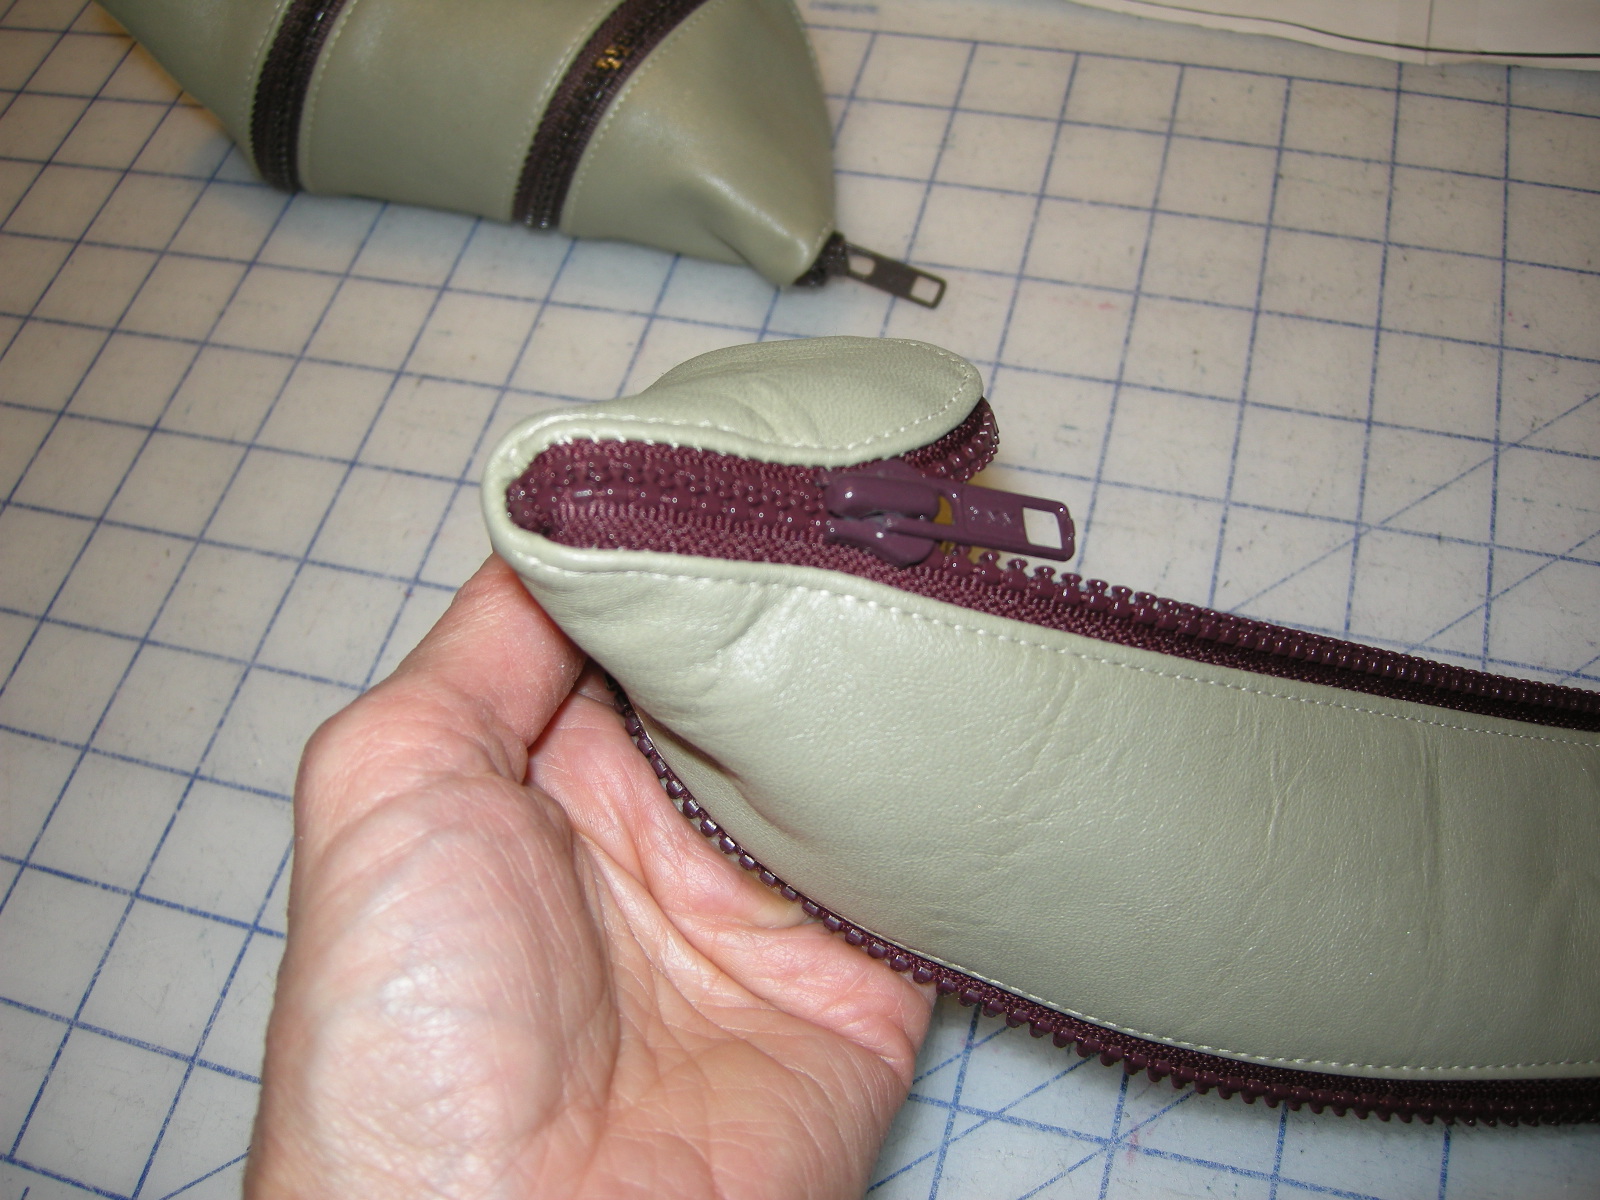
 Start to zip ...
 And you're done!

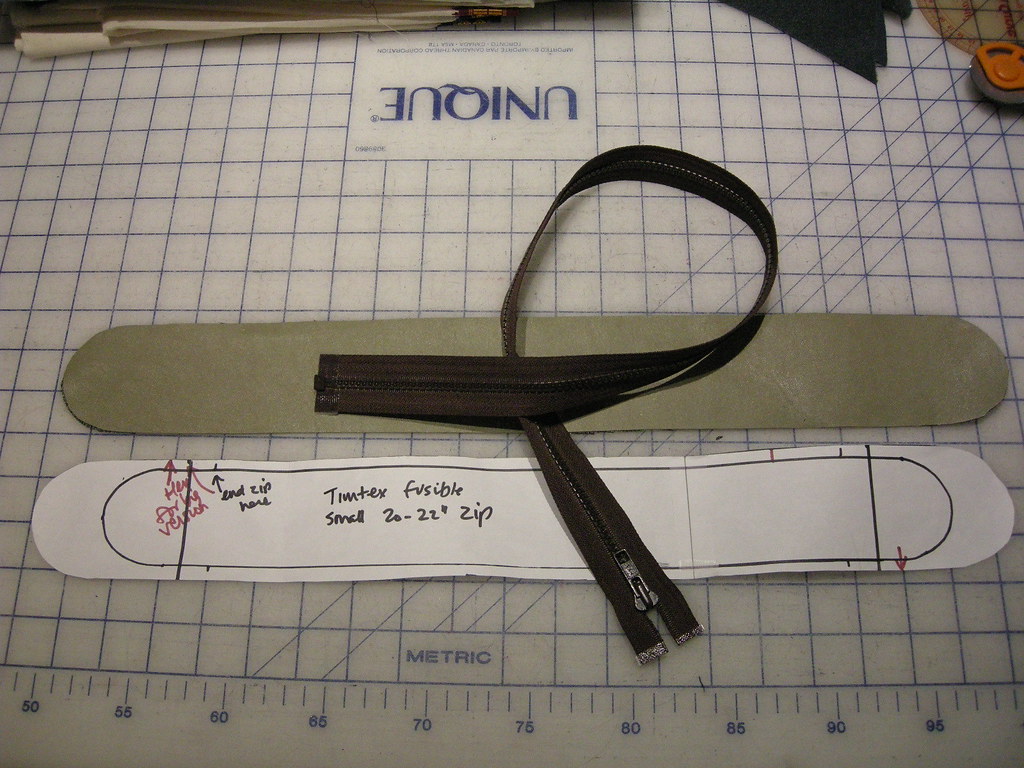
The piece is 21.5" long by 2 5/8" (52 x 6.5 cm) wide, with round ends. Interface the piece with fusible. Find a zipper of about 24" (60 cm) in length.


Next, you have to trim the open ends of your zipper and secure them inside with a couple of hand stitches.
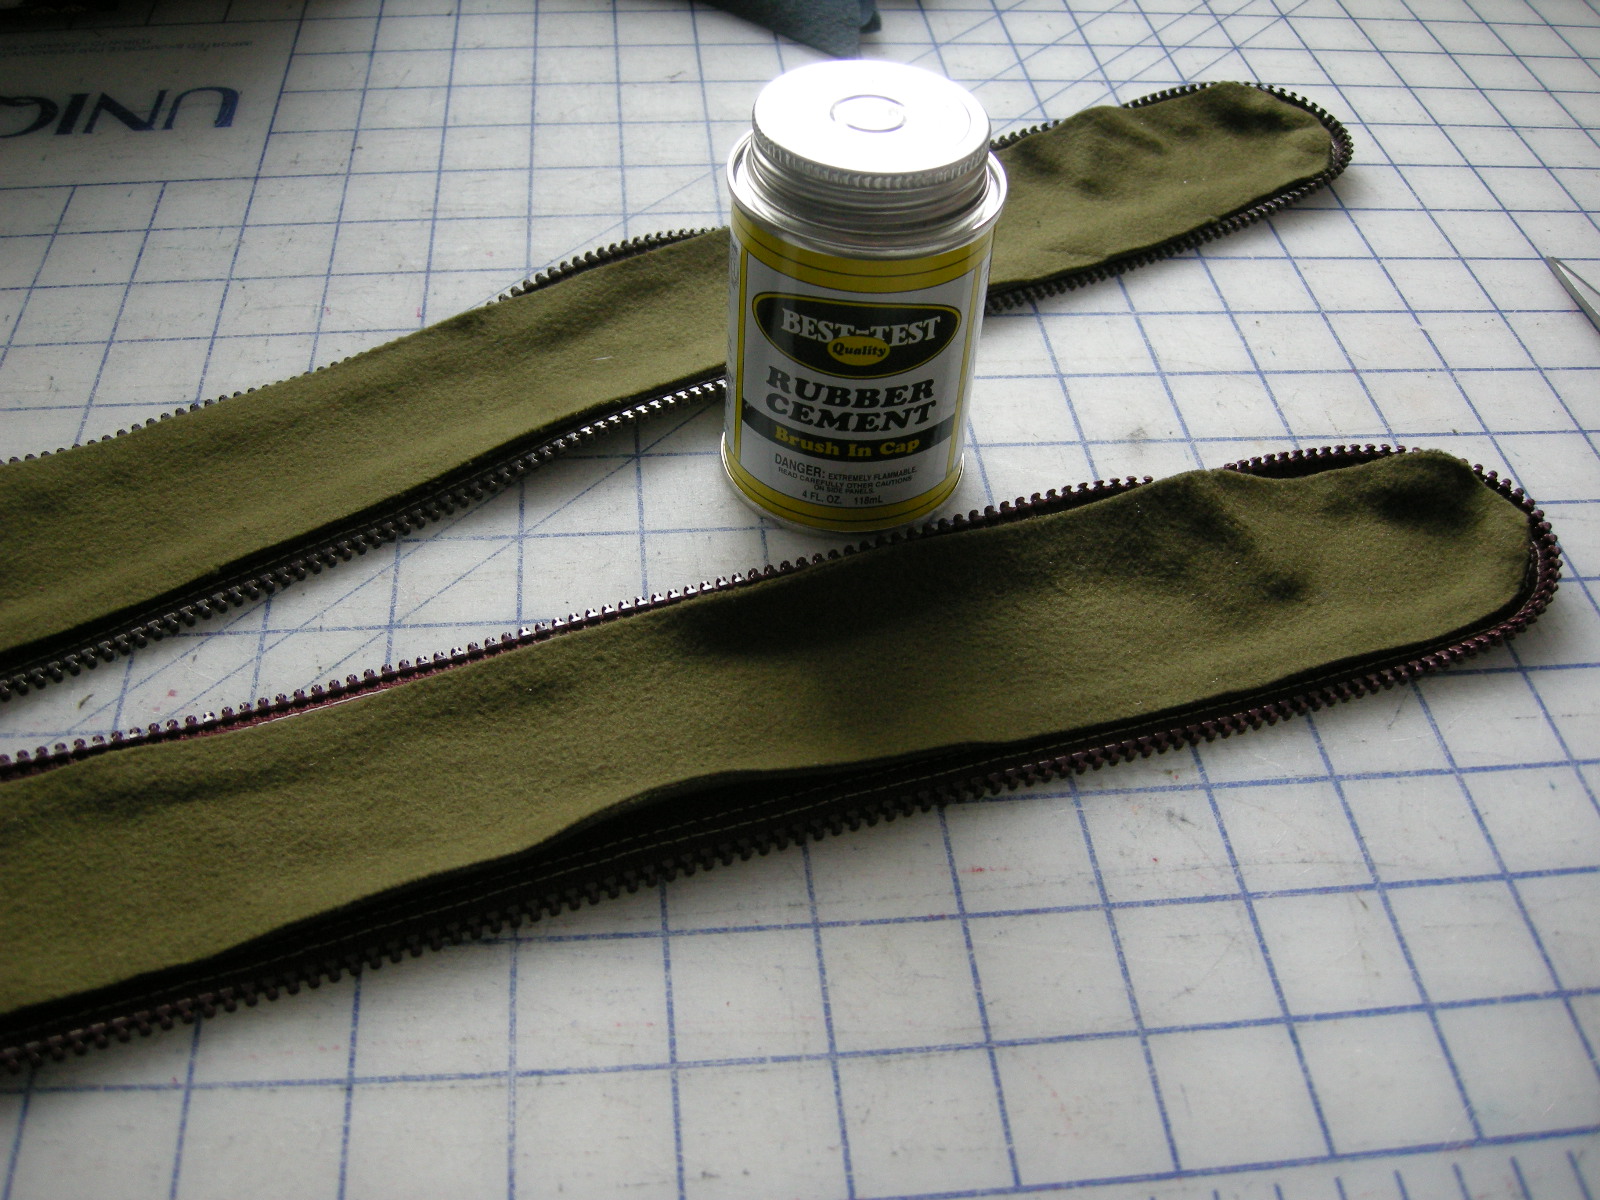
Coat the wrong side of the leather piece with rubber cement. Let it dry a bit, then place your fleece piece on top, patting it down so it sticks to the glue.
Sunday, December 5, 2010
Not the usual Sewing Lawyer style
I'm a member of a group of local sewers (sewists, if you prefer). We got together initially because we all owned PatternMaster Boutique (PMB) a pattern-drafting computer program. We still do, and we even use it - but it turns out we're also somewhat omnivorous when it comes to patterns and all of us are on the lookout for good ideas most of the time. So when one of our membership showed us a simple drapey jacket that she had made, and when we all - different ages, sizes and builds - tried it on and looked pretty good in it, we were intrigued. We decided we should all purchase suitable fabric and, with our sergers, make our own.
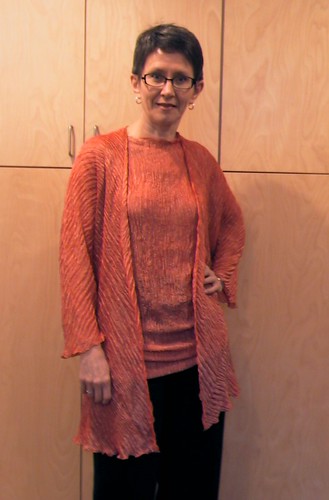
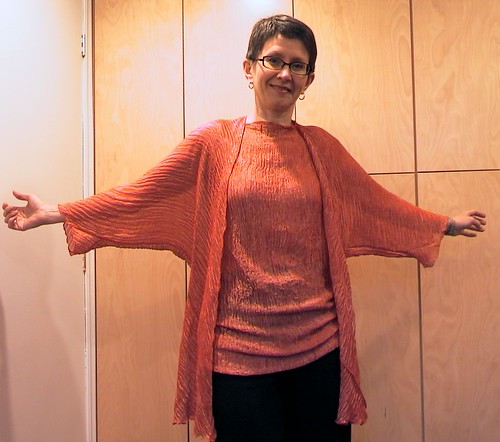
 Here's mine.
This jacket design was attributed by my friend to Carter Smith, an American fibre artist who specializes in shibori dying. There's more about him here.
Shibori is a "Japanese term for several methods of dyeing cloth with a pattern by binding, stitching, folding, twisting, compressing it, or capping. Some of these methods are known in the West as tie-dye", to quote Wikipedia.
 The jacket design takes advantage of the type of fabric Carter Smith tends to work with - drapey silk with beautiful pattern or surface design. This is because it's made with only two (2) pieces, and each of them is just a big square.
 After I was introduced to the idea of this jacket, the perfect fabric presented itself. This was from Fabricland of all places - it's 85% silk and 15% metallic. It has a lovely soft hand and is supremely drapey - the crinkles don't lessen much and if they do, a quick dunk in the sink brings them back with no ill effects, I discovered. Great stuff! I bought the last of the bolt and it was the perfect amount for these two pieces.
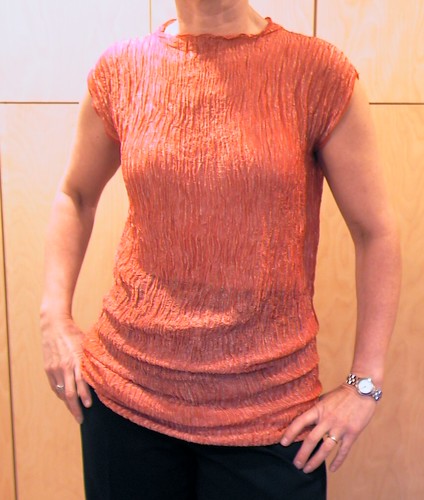
 The second piece is this top, which is essentially a tube (CB seam) with shoulder seams and simple slit arm openings.
So, do you want to know how to make the jacket?
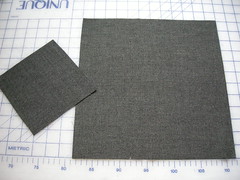
 First, you need 2 squares of your chosen fabric. The small one's sides are half the length of the sides on the big square. My sample squares measure 12" and 6".
Instructions for a bias garment like this jacket were published in issue no. 143 of Threads Magazine ("Get biased - create a bias topper from two squares of fabric"). However there is a serious error in the article as published. It said to adjust the size of the smaller square according to your hip measurement - and that the diagonal measurement on the small square should be 1/2 your hip measurement. In the next issue, after several people complained that this made a garment which was much too small, Threads acknowledged that each side of the small square should be 1/2 your hip measurement. (Or, more straightforwardly, each side of the large square should be the same measurement as your hip circumference...) My jacket squares are 40" and 20".
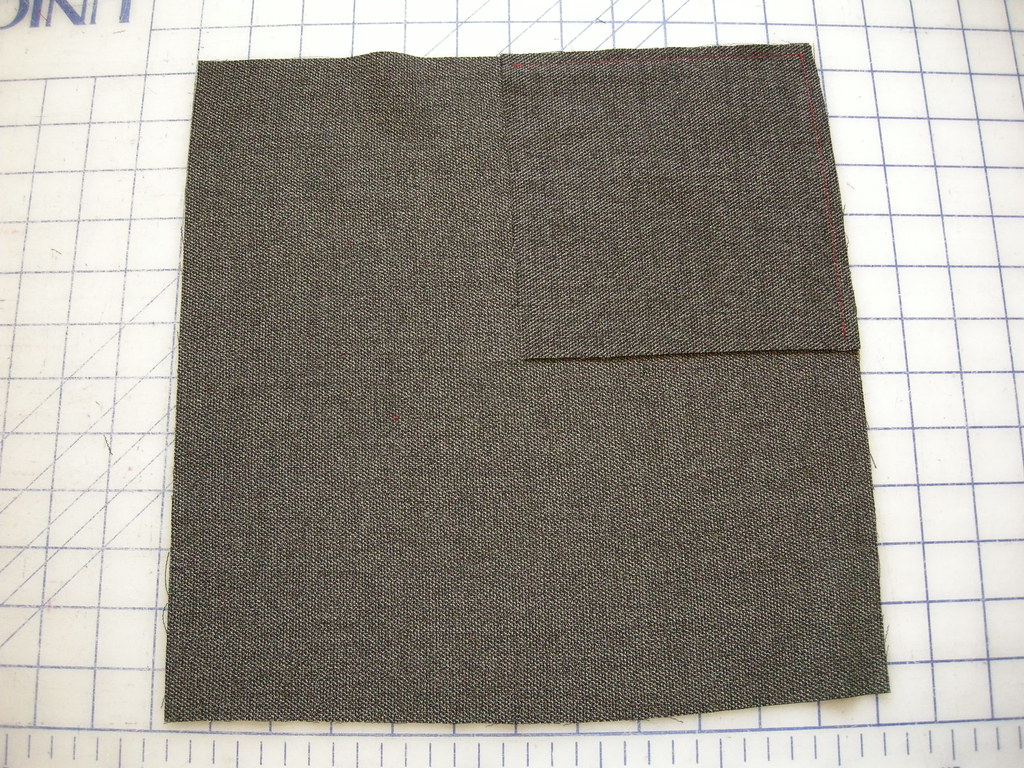
 Place your small square on the big one, right sides together, with edges matching at one corner. Sew the edges together using a narrow seam. If you trust your fabric you can use a rolled hem on the serger to do this. I used a 4 thread stitch on my serger but without the stitch finger - the resulting seam is rolled, a bit wider than the rolled hem, but much stronger.
(If you click on the pictures, they should enlarge.)
 The next step is to take the free corner of your small square, and pull it diagonally across so the edges match those of the opposite corner of the big square. Then, mark a point some distance away from the pointy ends of the resulting triangle. For a full-size jacket, 10" is about right; at right my opening is about 3", and is marked with pins.
Sew the right angle of the triangle from one marked point to the other, i.e. leaving the pointy ends unsewn.
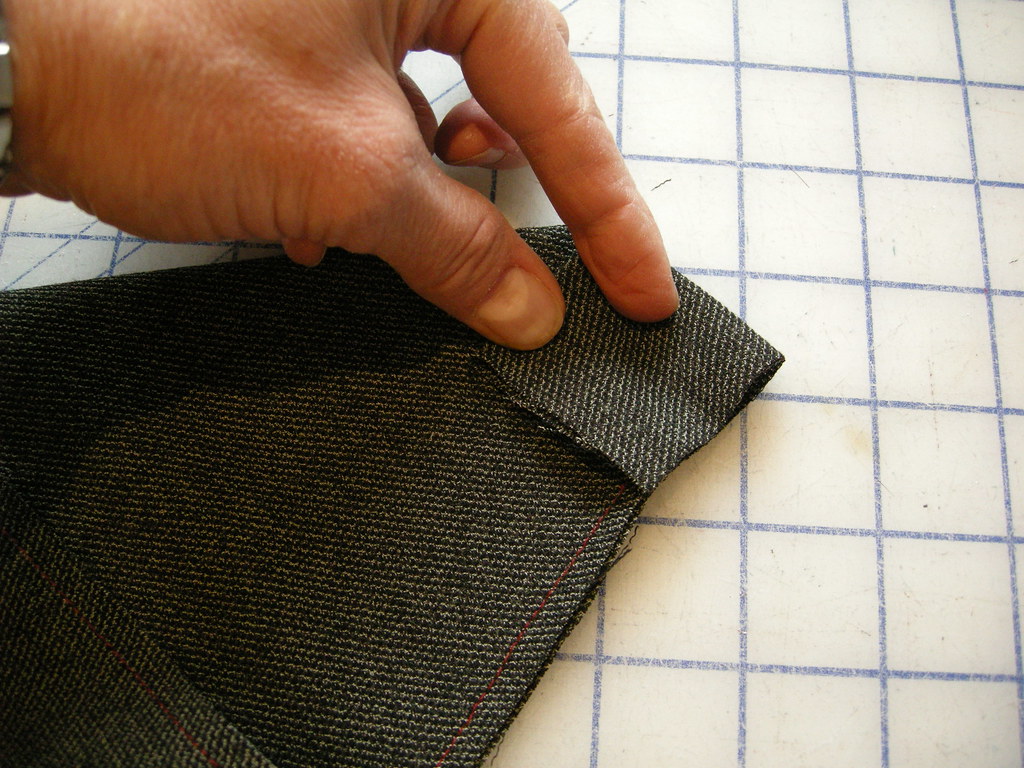
 Take that pointy end and fold it down so the free corner is above the end of your stitching, and the unsewn edges are matching. Sew the remaining open sides of that little square.
At this point you have a fully enclosed thing which is vaguely triangular with a square bottom. To turn it into a wearable garment you have to cut openings at the bottom, sleeve ends, and neck. A front opening is optional since you can make this as a pullover.
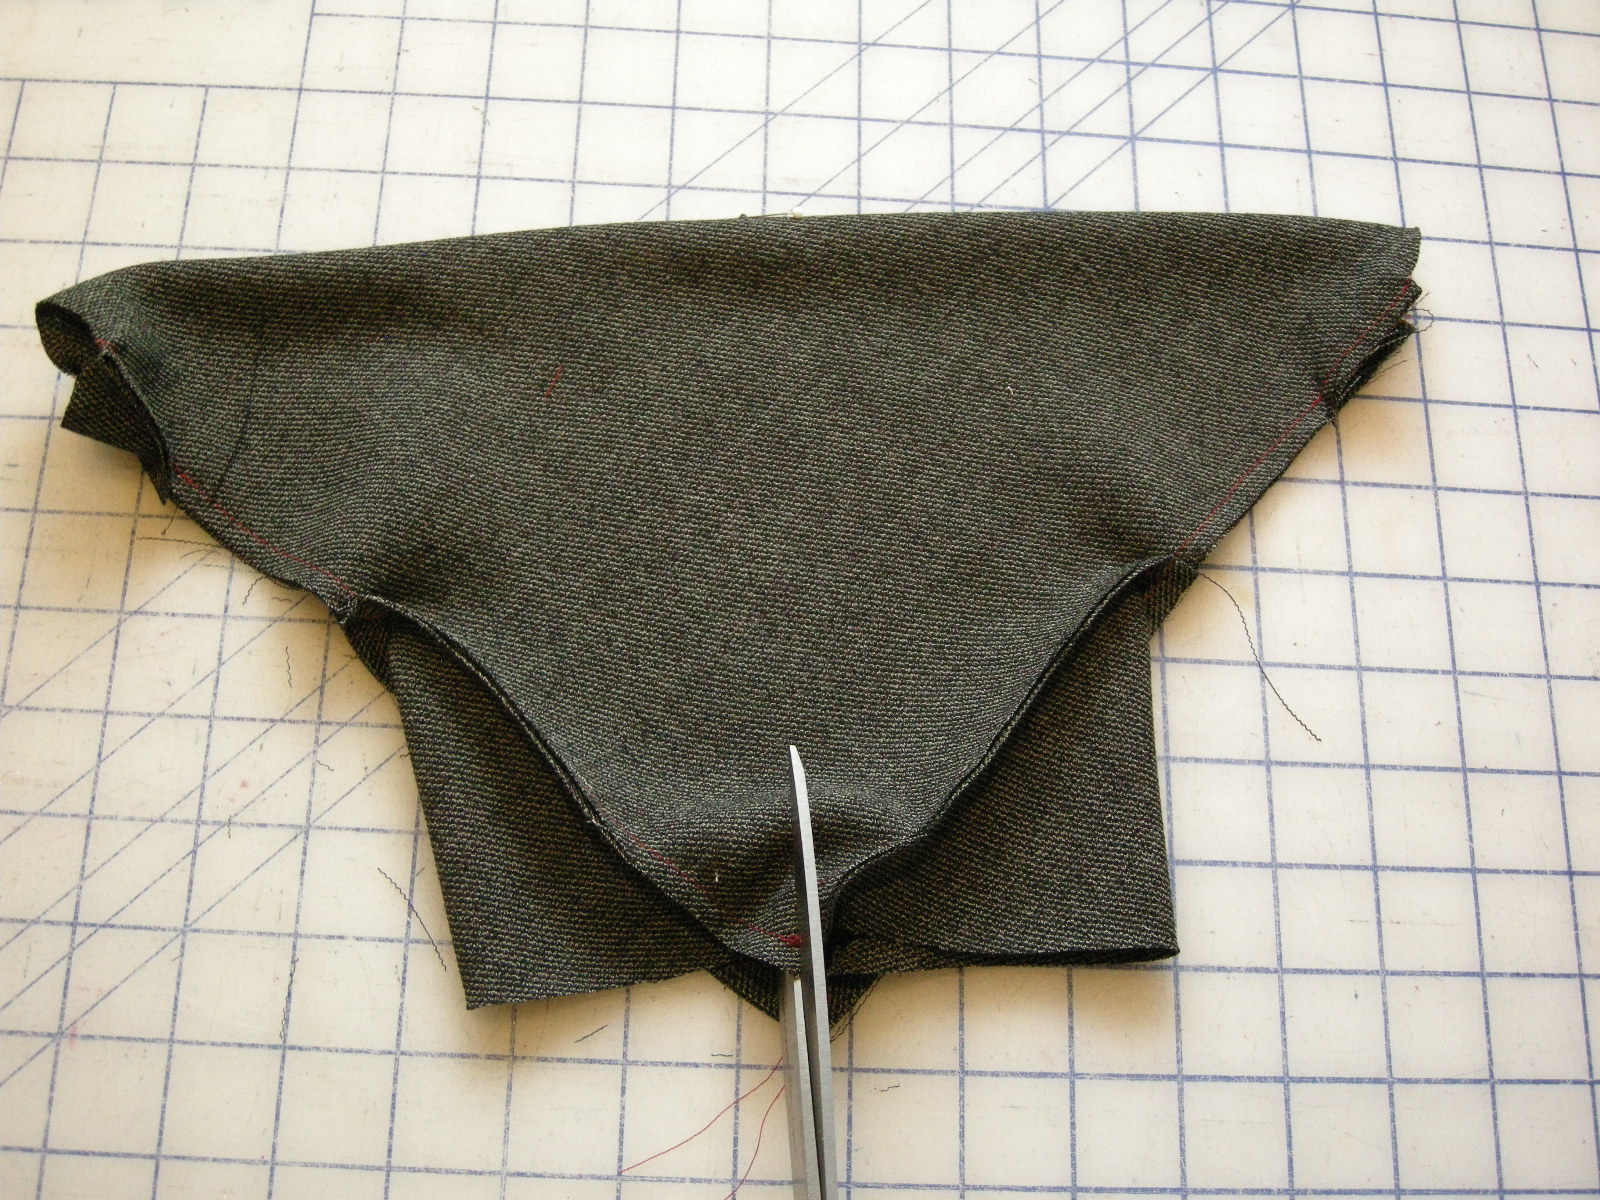
 For the bottom (hip) opening, you slit the small square diagonally. In the photo at right, I've marked where the ends of the slit will be with little stickers. It seems slightly counterintuitive to cut in this direction, but just do it - if you paid attention to your intuition at this point, there would be tears...
 Do the same thing at the pointy ends of the triangle, which by now you may have guessed will be the sleeve openings.
This is a different sleeve finishing method than in the Threads article - they want you to just cut the pointy end off. This method makes a neat little gusset instead - it fits better and I think looks better than a batwing shape ending right in the cuff.
 Then find the neck point by folding your jacket in half. Mark this point with a pin.
 If you are making a jacket, cut open the CF up to the point marked by the pin at neck point.
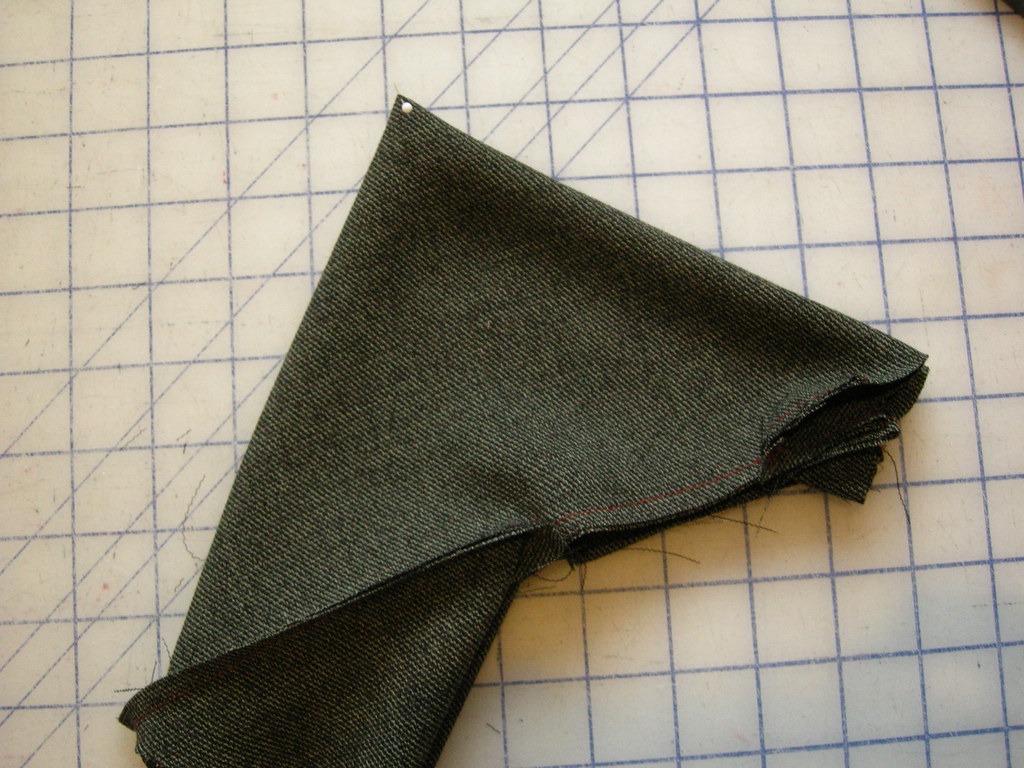
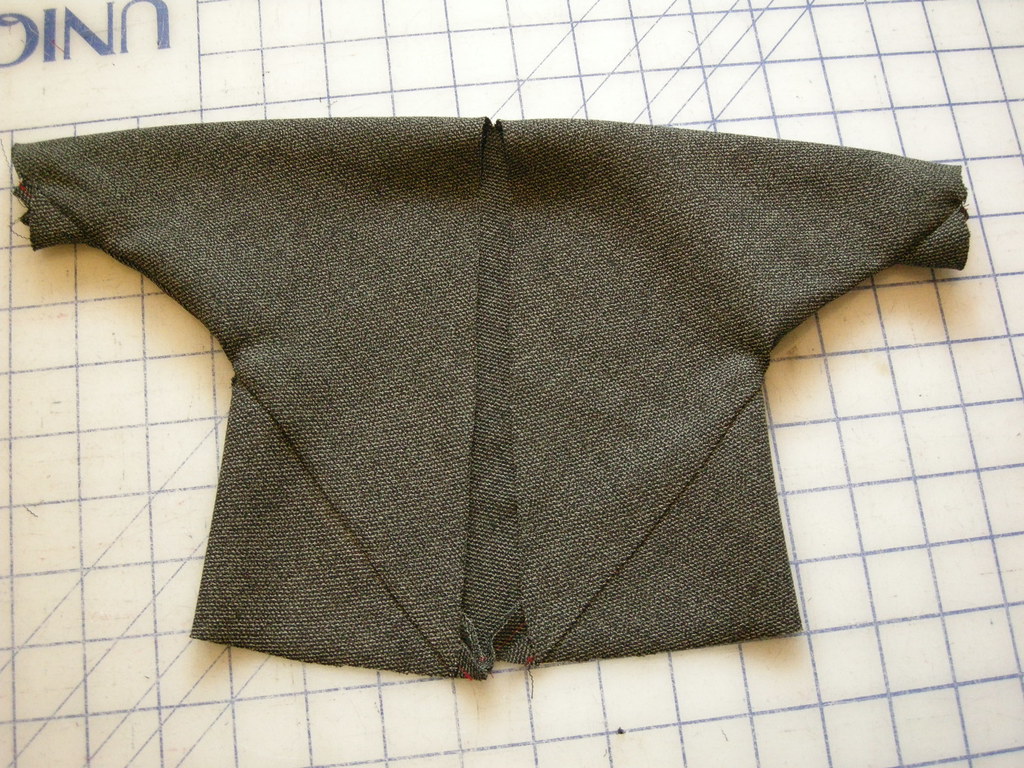
 Here's what the jacket looks like, in basic outline. Try it on now to check that the neckline works. You may need to cut it further into the back, and you may need to widen the opening.
Obviously, for a real garment you would, once satisfied, finish all the edges using a narrow rolled hem.
 But my client insisted on trying her jacket on, right away!
This jacket design was attributed by my friend to Carter Smith, an American fibre artist who specializes in shibori dying. There's more about him here.
Shibori is a "Japanese term for several methods of dyeing cloth with a pattern by binding, stitching, folding, twisting, compressing it, or capping. Some of these methods are known in the West as tie-dye", to quote Wikipedia.
 The jacket design takes advantage of the type of fabric Carter Smith tends to work with - drapey silk with beautiful pattern or surface design. This is because it's made with only two (2) pieces, and each of them is just a big square.
So, do you want to know how to make the jacket?
Instructions for a bias garment like this jacket were published in issue no. 143 of Threads Magazine ("Get biased - create a bias topper from two squares of fabric"). However there is a serious error in the article as published. It said to adjust the size of the smaller square according to your hip measurement - and that the diagonal measurement on the small square should be 1/2 your hip measurement. In the next issue, after several people complained that this made a garment which was much too small, Threads acknowledged that each side of the small square should be 1/2 your hip measurement. (Or, more straightforwardly, each side of the large square should be the same measurement as your hip circumference...) My jacket squares are 40" and 20".
(If you click on the pictures, they should enlarge.)
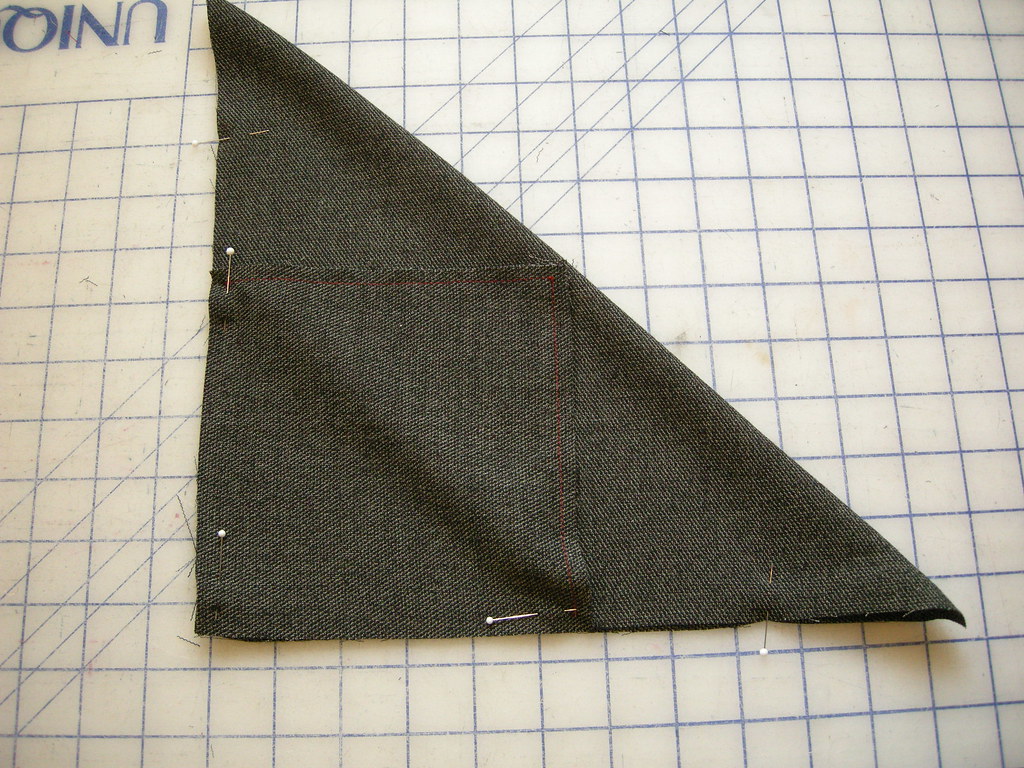
Sew the right angle of the triangle from one marked point to the other, i.e. leaving the pointy ends unsewn.
At this point you have a fully enclosed thing which is vaguely triangular with a square bottom. To turn it into a wearable garment you have to cut openings at the bottom, sleeve ends, and neck. A front opening is optional since you can make this as a pullover.

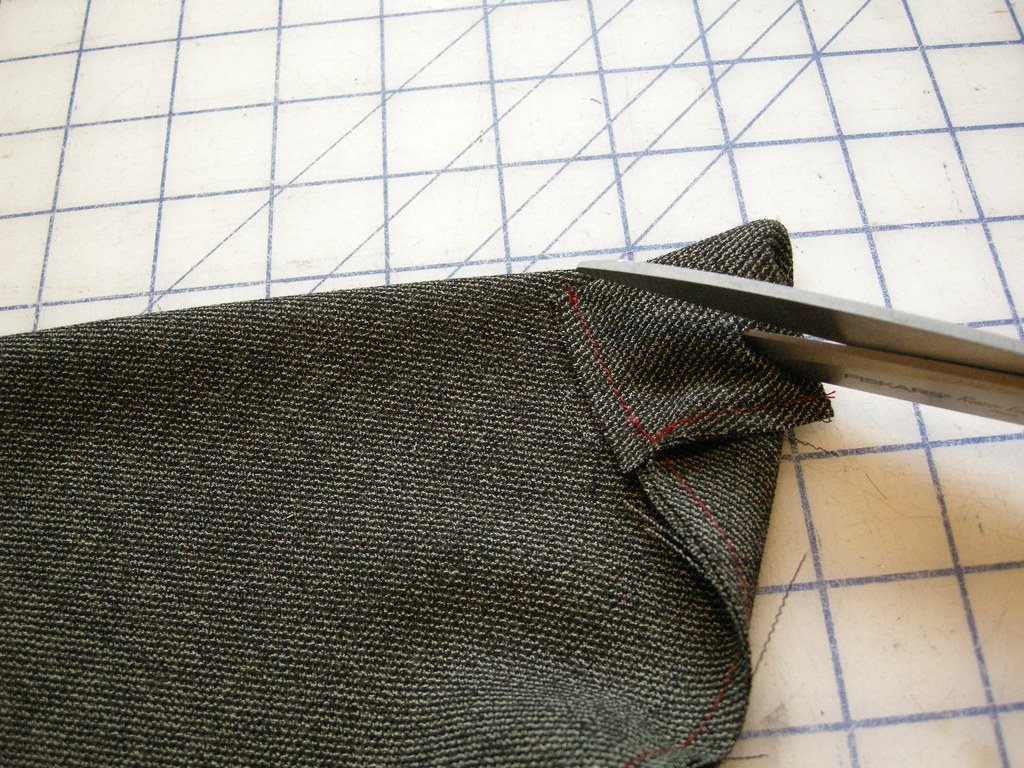
This is a different sleeve finishing method than in the Threads article - they want you to just cut the pointy end off. This method makes a neat little gusset instead - it fits better and I think looks better than a batwing shape ending right in the cuff.
Obviously, for a real garment you would, once satisfied, finish all the edges using a narrow rolled hem.

Subscribe to:
Posts (Atom)


