Showing posts with label tutorials. Show all posts

Tuesday, September 17, 2024

Ridiculous pants (and matching jacket!)

 Without further ado, here are the pants I made to go with my garden camo jacket.


They may never be seen in combination again, so enjoy!

Fly front - with snap!

This is yet another iteration of the Shop Pants from Open Studio Patterns. I mean, once you adjust a pattern to fit, why not make it to death?

There are lots of details, but they are totally invisible.

Topstitching!

Pockets!

Fly front!

As the linen fabric is a bit scratchy and underlining helps with wrinkling, I underlined the main body pieces with the cotton lining fabric from the original curtains. I also used the cotton for the pocket bags and to face the  waistband.

They look good with this extremely monochromatic top. Which was the entire plan. 

I continue to tweak the pattern. After assembling, I scooped the crotch a bit for more sitting room (maybe 1cm). I also added fusible stay tape on the upper edge of the waistband to shorten the upper edge (eased waistband as I was fusing) because it needed to be a bit more curved than it was. 

I didn't adjust the upper edge of the front and back pieces but I think I could handle a tiny bit more height in the centre back. Like maybe .5cm.

I didn't do any further adjustments to the paper pattern. (Hope I remember to check this before making again...)

At the waist, I installed a snap closure (because I could not make a buttonhole with the available machinery in the thickness of this waistband). 

I used a green plastic snap leftover from when my son (now mid-30s) was a toddler. They go in with the red tool as pictured in the following photos. (This is 100% written about so I will be able to refer back the next time I get a hankering to put one of these snaps onto a garment. My blog is my external memory.)

The first step is to punch a tiny hole in the overlap and underlap in the correct places. I marked a point on the outside of the waistband (overlap) with a marking pencil, then punched a hole in that layer. Holding the waistband closed as it would be when worn (zip up), I punched the underlap layer through the hole in the overlap layer. I have a Dritz snap plier tool, which didn't work directly with these snaps (different brand). However, it works fine for hole punching!

At left are the tools and instructions that came with the snaps. 

To apply these snaps you need to hammer the bits together on a firm surface. You don't want rebound and you want to use a decently heavy hammer. No messing about!

To apply the the visible part, place the plastic button face down in the little cup. Put the RIGHT SIDE of the overlap side of the garment against it so that the centre of the button, which pokes up a tiny bit, is visible through the little hole previously punched in the correct place.

Then place the socket (female part of snap) over it, so it is centred.

Place the pointy bit of the red tool into the socket. It will snap down into the hole.

Give the assembly a good few whacks with the hammer. 
For the underlap side, reverse the round disc so the flat part faces up and put the tall part down on it.

Put the WRONG SIDE of the underlap down so the tall part (post) pokes through the previously punched hole. 

Put the male bit of the snap (the stud - truly the technical term!) overtop the post and press down. It will sort of snap onto the post. 

Take the cup end of the red tool and place over the stud. 

Give it a good few whacks. 

Done!


Tuesday, March 1, 2016

The sewing-knitting lawyer's methodology for converting a hand-knitting pattern for the machine

And of course I also have another knitting project on the go too! Gotta get it all done before I go back to work (in two weeks, sniff).

I am making a shawl collared cardigan. I'd say it's my own design except that is not completely true. I'm way more comfortable starting with an existing base and modifying it than designing a garment from the ground up. In this case, I started with the schematic drawings for a cardigan of about the shape I wanted from a Bergère de France knitting catalogue (Créations 2014/15) that I bought a while back.

Incidentally, these publications are really great value. The current catalogue is 288 pages and contains 144 patterns for garments and accessories for men, women and children, as well as toys, blanket and pillow type projects. Only $12 CAD, which is practically free in $US...

I really like the fact that every pattern has a really clear schematic drawing. I'm working from pattern #887. But I'm completely ignoring the fancy stitch pattern and the sideways-knitted collar piece.


How do I convert this to a machine knitting pattern? I'm sure there are high tech ways to do this but I haven't figured them out yet. (If you have suggestions, please by all means make them in the comments!) Here's my non-digital method.

First, knit a swatch in your chosen yarn. In this case I am using the same yarn (down to the dye lot#) as I used to knit my son's zipper cardigan. So I already knew what stitch size to use on my Passap. If I was starting from scratch with a different yarn I would knit a big swatch of plain stockinette.

Telling me I have 18 stitches in 10cm
Like this one, which is the swatch I used to determine the stitch size for the sleeves of my recently-completed red cardigan. I knit this using my worsted weight yarn on my mid-gauge machine (a Singer LK150). You cast on 50 stitches and knit segments of 40 rows in different stitch sizes. In the middle row, you attach a contrasting yarn tag on the needles that are 16th from the centre, on either side (making 30 stitches really obvious). Separate the sections with a couple of contrasting rows. Then take the knitting off the machine, block it (ideally wash it and let it dry) and then measure using the handy-dandy stitch gauge ruler that is appropriate for your machine. I found a really great explanation of this process on Ravelry if you want to know more about measuring gauge.

My swatch
You should also knit a swatch that includes details like your ribbing. Because I already knew my gauge, that's all I did for this project. I decided on 2x2 industrial ribbing because it's really springy and thick, and it looks identical on both sides.

Once you have decided on the density of fabric you like and you know your gauge of stitches and rows in 10cm, print off some gauge-specific knitting graph paper. Make sure you print it without scaling! I like to use it at half size (so the "10cm" squares are actually 5cm on the page) because this is big enough to see the detail but not so big as to be unwieldy.

Then transfer the schematic to your paper. This is easy if you have an engineer's or architect's scale that is metric. Use the 1:20 edge if you have printed your graph paper at half size. An accurate metric ruler will also work but you'll have to do the mental math to get half scale. If you don't have the right kind of ruler, you'll have to use a calculator to figure out how many stitches or rows are needed for each segment of the schematic and count out the right number of tiny boxes on your graph paper - doable but a bit more painful.

Use a pencil or Frixion pen or some other erasable (very important!) writing implement.

At left is my graphed version of the Bergére de France schematic for the left front. The original information from the schematic are in orange Frixion pen and my changes (extending the front into a shawl collar) and key details are mostly in blue. I've taped two pages together to get the length I needed.

I've written key information on the chart - the dimensions of the finished piece, the ribbing pattern, the number of stitches I need, the row numbers in which changes like increases or decreases are made, precisely how many stitches are increased or decreased, etc.

I've also used the original pattern instructions to plot the shaping at the armhole edge. I could do this because the gauge for the pattern was very close to my actual gauge; if it hadn't been, I would have drawn a curve that looked about right and then charted the specific decreases. On the schematic the edge looks like a smooth curve; on my graph it is a steps and stairs effect; on the finished knitted piece it is again a smooth curve.

Speaking of the finished piece, I have now knitted both fronts (mentally mirror-imaging all the steps as I knit the right front) and I do believe my project is going to work!


Saturday, April 5, 2014

Mitred hems made easy

Working for a living has its good and bad features.  On the plus side it provides an income with which to purchase fabric, patterns etc.  And it gives The Sewing Lawyer a venue in which her custom-made suits, dresses and other items of clothing can be worn.

The negative of course is that working full time means The Sewing Lawyer has less time for sewing and knitting and ... blogging.  Even though the skirt to match the latest jacket creation was in fact complete before work resumed (3 weeks ago) and this blog post planned well enough that all the in-progress photos were taken, life intervened and you all had to wait.  I'm sorry about that.

The skirt is really profoundly uninteresting as a fashion object.  It's made from the same OOP Vogue pattern as the skirt in this post.  Except I did not shape the waistband so it's even plainer.  However it makes a good foil for the jacket and someday, I promise pictures of the entire ensemble along with the silk blouse to match that is stalled and waiting only for its baby hems.

In the meantime I offer a photo tutorial on mitering corners.  It's my preferred method for a super-neat finish on a skirt with a back slit, but it can be used any time you have to sew a corner where two folded or faced edges, such as the slit facing and the skirt hem, meet.  No pattern fudging required; you do it on the fly.

Start by pressing the facings that are going to be mitered.  At right is the inside of my skirt hem at the CB.  I've made sure the corners are exactly in line.

Next, mark on each fold separately the point where the inside edges of the two facings intersect.  In the photo at left, I've done this with pins.


Unfold the edges, and refold with right sides together so that the pins meet.  As you can see in the photo to the right, the pressed corner is exactly on the fold line.  That is where you want it to be.


The line between the pins and the pressed corner is your stitching line.  Mark it.

Sew along the line.  Do the other side of the slit.  Then turn the corners right side out and press.  I find that I do not need to trim away the parts of the facings that are  inside the mitered corner, unless the fabric is very bulky.  On this skirt, they fit in there very neatly and give weight to that part of the hem.


Friday, March 7, 2014

Matchy matchy

Sometimes The Sewing Lawyer actually remembers to use those neat tips and tricks she has heard or read of, or even possibly dreamed up independently in the long-distant past.  Here is one of those.

Waaaay back in 2006 I made a jacket out of fabric that had a little woven pattern.  It was so tiny that it was basically impossible to cut the pieces so they would match, but nevertheless I decided it would look best if it matched horizontally at prominent seams.  I cannot remember where I came up with this idea (or if I got the idea from someone else) but I wrote a PR tip that even got published in Deepika's book (1,000 Clever Sewing Shortcuts & Tips).  It's tip #742 on page 115, if you have the book.

Today, I was trying to figure out how to match the lines in my fabric at the seam between the bodice and the peplum.  Of course, it is impossible to match everything but I had attempted to cut the peplum so it would match vertically and horizontally at CF and CB, where both pieces are on a straight grain in both directions.  However, when I provisionally pinned the pieces together in the conventional way (lining up the cut edges), I discovered I hadn't done such a great job.

My first problem was that I had to re-sew the CB seam in the jacket bodice near the waist/peplum seam so that it would lie exactly in the middle of a square and match the peplum, which has no CB seam, horizontally.  The second problem was that my cutting was off vertically.

Then I remembered this tip.  I'm happy to report that it worked even better today than it did in 2006.  Here it is, for you to use.  That is, if you remember it when you need it.

Start by folding back and pressing the seam allowance on the lower edge of one of the pieces you want to match (here, the jacket bodice).  Make sure that the folded edge looks right in relation to the pattern.  My goal was to have the seam at the same point in the pattern on each side of the jacket at key points (like the side front and side back seams, and both front edges).  I think that as long as you make a good effort in cutting to keep the pieces symmetrical in relation to the pattern, the tiny variations in the width of the SA that may result from this are not that important.

Then lay the pressed edge over the other piece (here, the peplum), and pin them together from the outside through all layers so that they match.  At left is the back.  If you click on the photo you can see how the matching is done.  I started at CB and pinned outward from there, matching the lines vertically and horizontally until the curve of the peplum took over, and then keeping the seam line at the same point in the check pattern of the peplum on either side.

In doing this I pretty much ignored the 5/8" seam allowances on the peplum edge.  The visual symmetry seems more important to me, and I can keep the peplum of a constant width by adjusting the hem line later.

Then, I went to the sewing machine and sewed the pieces together from the right side, using a zig zag stitch that is centred on the seam line.  You can see my stitching was 2.5mm in width and 3.0mm in length.  The goal is to have the needle piercing the folded edge (the jacket bodice) on one side but only the flat piece (the peplum) on the other.  You can do this by eye, but I used a presser foot that has a blade lined up with the needle (I think it is called the narrow edge foot).

Then check your results.  I ripped out some of the stitching where the matching wasn't to my liking, and re-sewed.  Once I was satisfied, I flipped over to the wrong side and unfolded the bodice seam allowance.  The zig zag stitching will allow the piece to lie flat, but the fold and (if you are lucky) a dotted line from the zig zag stitches are both visible.  Sew along the fold, over the visible stitches.

Finally, rip out the line of zig zag stitches.  Now it would have been better if I had researched my tip BEFORE I started because I overlooked one point that would have made this easier:  for the zig zag stitching, use thread of a contrasting colour!  Oh well.

Front - the pocket flap also matches

Back


Behold the results.

Friday, December 13, 2013

Keeping the kid's head warm

I'd like to say that I've been too busy sewing to blog, but it would be far from the truth. However, I have just finished a project and I'm so pleased with it that I am presenting it publicly to you, even before I give it to its intended recipient for Christmas.


It's a shearling trapper's hat.

I had a skin of lamb shearling  and a finished hat to use as a model, as well as all the information that could be gleaned from the pictures of the various versions on the www by UGG, among other vendors.  They're expensive, these hats!

So I made a pattern, and then I made a "muslin" using some leftover very thick Berber style fleece fabric, and then I made a hat.

And because of some online interest when I posted an in-progress shot of this hat on Facebook, let me try to give you the pattern so you can make your own.

I tried to take the photos of the pattern pieces from straight above, but if I messed up, you can use the 1" square grid of my cutting board for guidance.  (Click on any picture to make it a lot bigger.)

Sizing

This is a VERY roomy hat, if you make the pattern to the dimensions below.  I made it without the recipient available for measuring or try-ons.  It is too big so I am spending part of Christmas Day taking it in.  For your info, his head measures 23.75” (60cm) and I am reducing about 1.25" (3cm) of width through the seam at CB, tapering back to the original seam line smoothly over the top of the hat. 

Definitely the easiest place to take it in (or let it out if you have a truly gigantic head) is the seam at the centre top of the crown.  Just remember that if you do this you should divide the amount to take in by 4 and reduce the width of each crown piece by that amount (that is, my 3cm reduction would translate to a narrowing of .75cm on each seam allowance for a total of 1.5cm at CB and the same at CF).  I am taking it in at CB only and leaving the front alone because I am not taking the entire hat apart! Of course you will also have to change the length of the ear flap piece at CB and perhaps the brim at CF (though here you can fudge) to correspond. 

The Pattern
Crown - Centre piece - cut 2

Centre Crown - This piece started life as a rectangle measuring 7.25cm (2 7/8") by 31cm (12 1/4").  As you can see, I added some shaping by slashing it in 4 places and spreading to add 1cm (3/8") at each point.

You need two of these.

Crown - Side piece - cut 2
Side Crown - To complete the crown of the hat, cut two of these side pieces.  The important measurements are the base of 19cm (7 1/2"), the height of 11cm (4 3/8") and the outer curved seam line of 31cm (12 1/4") which is identical to the length of the concave edge of the centre piece of the crown.  Curve the ends of the base up slightly as you can see in my photo.

By the way the seam allowances shown in the photos are 1cm (3/8") .  No seam allowances are needed along the lower edge of the ear flap piece or the outer edge of the brim if you are using shearling leather.
Ear Flaps - cut 1

Lower Back/Ear Flaps - This piece measures 46cm (18 1/8") along the top edge.  The flap is 20cm (7 7/8") deep at the longest point (measured from the seam line) and 7.75cm (3") deep at CB.  The upper edge is very slightly curved by slashing in two places and overlapping the tissue by approximately .6cm (1/4").  You could overlap more, in which case you might not need the elastic I added at the lower CB to cinch the hat in at the back neck.

Brim - cut 1
Brim - Finally, you need a brim.  The base should be the difference between the complete bottom circumference of the crown, minus the top length of the ear flap piece. In other words, it should completely fill the gap at the front of the hat from ear flap to ear flap. Add a bit for insurance. As you will read below, I had to do some fudging to fill in a little gap. The height of the brim doesn't matter so much. Mine is about the same as the side crown pieces. 

Sewing Tips

I referred to an article in Threads 104 (January 2003), p.42, on sewing shearling.

I used ordinary thread, and had the best luck with a jeans needle.  Lighter needles caused skipped stitches.

Mostly I used a 3mm stitch length.

To topstitch, cut away as much of the fleece as you can in the seam allowance of the side that is being turned under, to reduce bulk.  You can topstitch on either side of the seam or (as I did) fold both seam allowances to one side.  If your topstitching will cross intersecting seams (i.e. the seam attaching the ear flap piece to the crown) do additional trimming to reduce the bulk of 7 layers at these seams.

If you  have a Teflon presser foot, so much the better.  I don't and my topstitching is less than even.

Uneven stitches are happily quite invisible.  They sink into the leather and totally disappear in the fleece.  To further hide the stitching in the fleece, use an awl to pull the hair out of the stitching and fluff it up around any stitching.

This hat took less than one lamb skin and scraps of lamb leather.

Sewing Instructions

1. Sew the two centre crown pieces together along the outer convex curve.  This seam runs up the CF, along the top of the head, and down to CB.  Topstitch this seam.

2.Sew the crown side pieces to the crown top.  Topstitch, folding the crown pieces under (i.e. toward the top of the crown).  

Leather edging strip on brim
3.  Make the brim. Because I wanted the brim not to be limp, I cut one layer from shearling and one from some leftover lamb leather that I interfaced with fusible weft interfacing (use clean paper as a press cloth, normal heat and NO steam).

Sew the shearling and the interfaced leather together along the rounded edge, WS together.  I added a nice leather edging to the outer edge of the brim by cutting a strip about 2.5cm (1") wide, sewing it (stretch slightly) about .5cm in from the edge, and then wrap it around and sew in the ditch more or less.

4.  Sew the lower edge of the brim to the front of the hat, centring it at CF.  The seam allowances are between the brim and the outer front of the hat.

5.  Sew the ear flap piece from the edge of the brim on one side to the other, centring at CB.  The seam allowances are inside the hat (you need to clip the crown seam allowances at the point between the brim and the earflap on each side).

If you have a gap between the brim and leading edge of the ear flap (I did) you can fill it in nicely by sewing a strip of fleece (hair side out) around the leading edge of the flap.  To do this, sew the strip to the flap, leather sides together, with a zigzag stitch (about 2.5mm wide).  Sew at the extreme edge for a very narrow seam, with the zigs in both layers of leather and the zags falling off the edge.  Then fold the strip back and around to the outside of the flap.  Stitch it down at its very edge to the ear flap, using the same zigzag stitch.

6.  Trapper hats are usually made so that the ends of the ear flaps can be attached to each other, holding them up on top of or at the back of the head.  This can be done with any type of buckle, snaps, or even tie ends.  I had some plastic clips in stash.  I made two short leather straps to fit and attached one strap to each side of the clip.  Sew the straps at the lowest edge of the ear flaps.  They need to be just long enough to hold the flaps securely out of the way, but not tightly.

7.  Finally, I cinched the CB in a little bit with some elastic under a leather patch.  I used beefy elastic and pulled it in about 2.5cm (1").

8.  Tack the brim to the crown of the hat in a few places.


That's it!  If you have any questions ask away in the comments.  If you make this hat, please post a comment to let me know how it went.

Merry Christmas!


Saturday, March 16, 2013

Piping!

I love sewing with cushy textured wool.  It's so forgiving!  This fabric is so thick and resilient that I decided it needed minimal interfacing on the under collar and stand, the front edge of the jacket, and the skirt waistband pieces.  I'm using Pam Erny's Pro-Weft fusible.  It stabilizes the fabric (which has quite a bit of natural give) without changing its hand appreciably.    

I quickly assembled the jacket fronts and backs, and then paused since I'm planning to make three bound buttonholes.  One has to fortify oneself for bound buttonholes, although I'm confident that in this fabric, I could make many mistakes and no one would ever notice.

In the meantime I decided to test out the piping on the skirt.  This caused me to stop and ponder sewing order.  Burda instructs sewing the lower front skirt (with pockets) first, then the lower back (which has no CB seam).  The right side seam is sewn.  Then the waistband is constructed, except for the left side seam (which has the zipper).  The entire waistband is then sewn in one pass, and the left side seam with zipper is constructed last.

Phooey to that I say!  First, I find it easier to insert the zipper in the relatively straight CB so I made a seam there.  This also allows me to make a back vent, for walking ease.

A brief word on fitting:  This pattern is meant for quite stretchy cotton/lycra twill and as designed it has almost no ease.  All the PR reviews showed it was very tight.  Based on flat pattern measurement, I added a 1cm strip down the CF and CB (4cm or 1.5").  This gives about the right amount of ease.  Then all I had to do was fine tune the shape of the side seams.

Back to construction.  I like to put in the zipper flat, then sew the side seams last.  This allows me to do fine changes to improve the fit as I sew.  Normally I would make the front starting with the pockets, then apply the waistband in one pass, as illustrated in green at right.

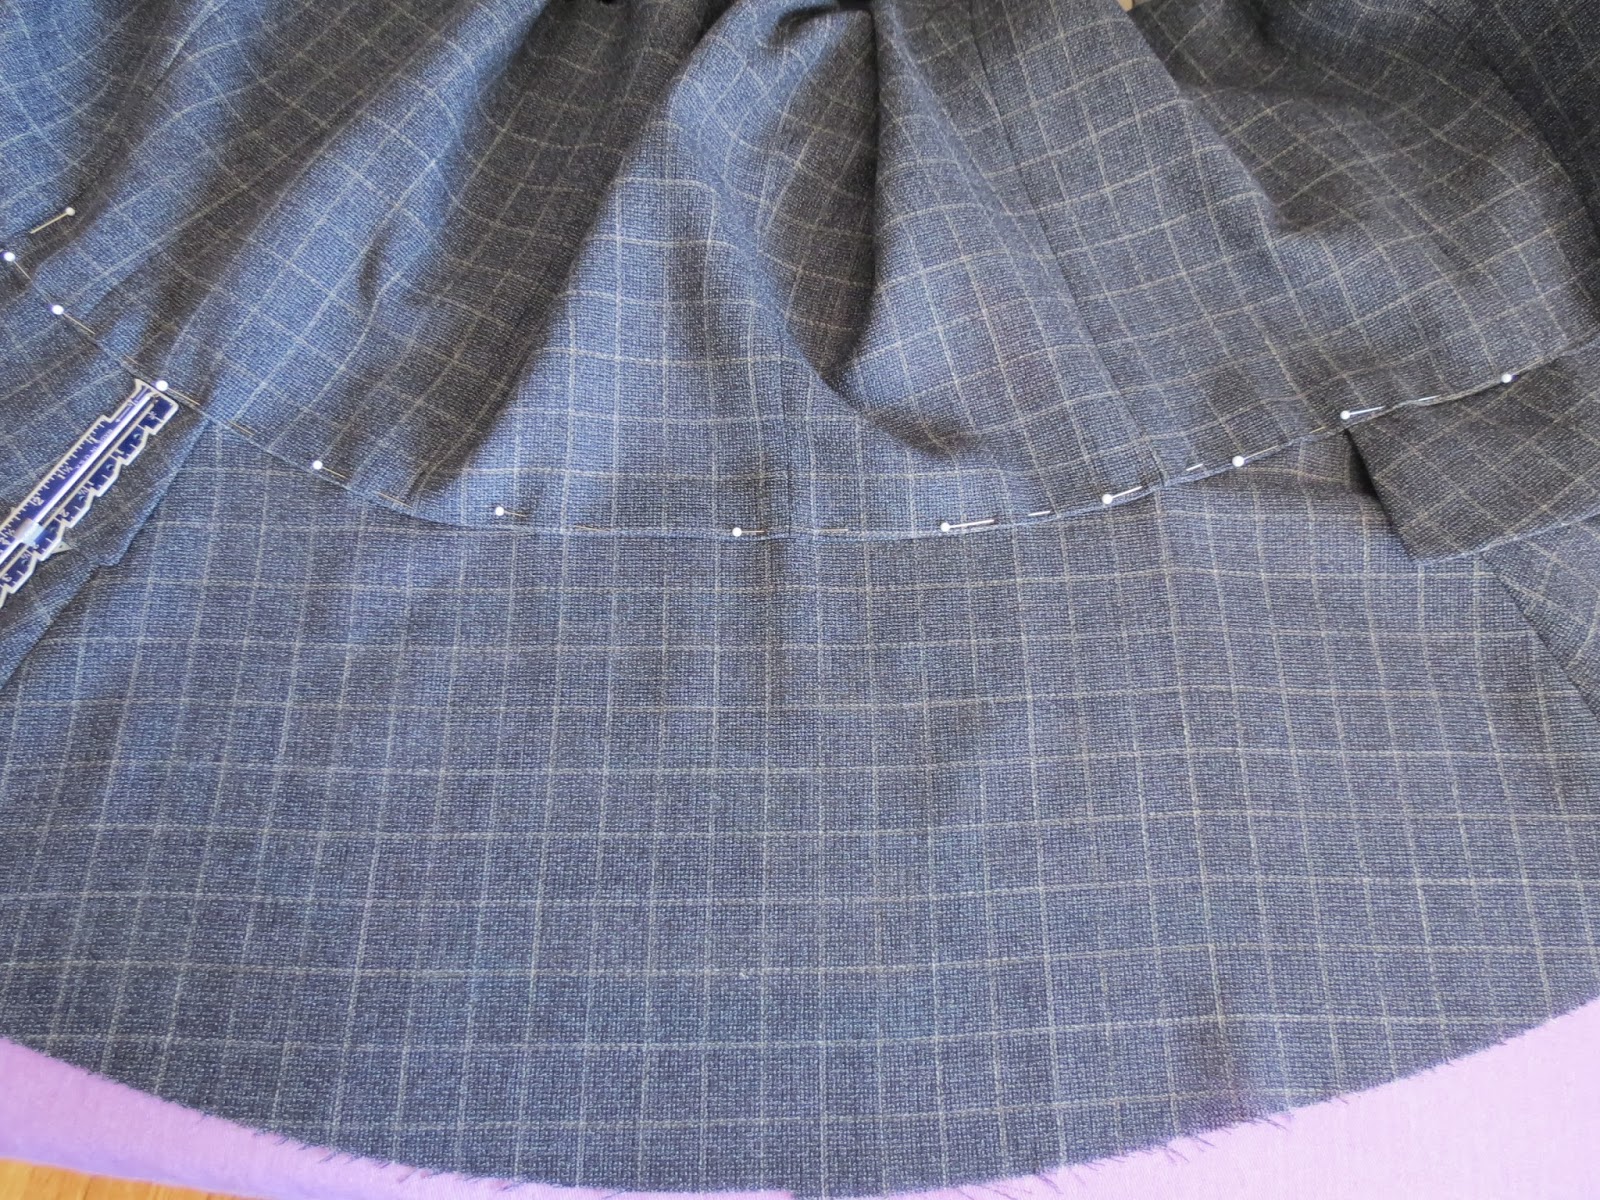
However, I'm piping the seams shown in pink at left.   I wanted a continuous line of piping which would be impossible if I sewed the waistband seam last.

So I changed the sewing order.  It isn't all that hard.

First I sewed the CB waistband to the lower skirt front (the curved waistband seam between the lines of piping).  Then I piped the edges in a continuous line.

Then I attached the pocket facing piece, but stopped sewing at the waistband seam.

Next, I attached the side waistband at the piped seam, again stopping sewing at the waistband seam.  Ideally there is no more than a tiny gap between the two.

Finally, I attached the side piece, which forms the back of the pocket.  I sewed the top seam first, again stopping at that point (or as close as I could get to it) where all the seams meet.  After that it was an easy task to sew the pocket bag.

The last step was to anchor the waistband seam through all layers by stitching in the ditch (did I say this fabric is very forgiving?) for a centimetre or so.  It's invisible.

For piping and the pocket facings, I'm using left over black wool fabric from these pants. I'll do the bound buttonholes in this too, as narrow and unobtrusive as I can make them.  Later.

Sunday, January 27, 2013

The Sewing Lawyer tries something new

In response to the post about my orange cashmere skirt, Steph A asked a question about the little thread chain I made to keep the lining fabric from peeking out below the skirt hem when I sit down.  It's a great question, and led me to think perhaps I could answer it with a little video.

As I had mentioned, I miscalculated in placing these chains so I needed to redo them anyway.

Without further ado...


I noticed that I said I would pull "the chain" through - but I meant I would pull the doubled thread through - to make the chain.  

Essentially, this is like single crochet, but you use your fingers and thread.  Easy peasy.  

If I do this video thing again, I'll try to be a more polished performer.  

Sunday, September 2, 2012

Bound buttonholes

I bought some different trim and buttons, but on getting my purchases home I'm not so taken with them, and I cannot convince anyone who has seen them on the fabric in real life (except the probably slightly biased owner of the shop in which I bought them).  So I took some time off my search for the perfect trim, and actually sewed instead - what a concept!

Let's play "spot the buttonholes"!
Since the placement of the buttonholes and CF on this pattern are dictated by the size of the buttons and trim intended, and since I intend to buy the right size, I figured I could go ahead and make the buttonholes.

Now this pattern calls for hand-worked buttonholes and The Sewing Lawyer has a confession to make. I have NEVER made a hand-worked buttonhole.  And from the start, a decision had been made that this jacket wasn't going to involve my first attempt.  However, I have made quite a few bound buttonholes and, despite departing from the Chanel path as taught in the extensive instructions in V8804, bound buttonholes will have to do, and in fact they will do just fine.

In fact, I just made three (practice) buttonholes, and took pictures.  Exhibit A, to the right.  What do you think?

So, my super-duper no-windows never-fail patch buttonhole tutorial follows.  (NB:  these instructions are slightly simpler than the tutorial I previously posted on Flickr.)

Step 1 - Marking

Carefully mark your buttonholes.  This involves several steps.  First, determine exactly how far from the edge of the piece each buttonhole should start, and exactly how long they will be, and exactly how far apart from each other they will be.  Mark these dimensions with pins.

Then, with a stitch length of 3 or 3.5 mm, mark the dimensions with thread.  I used a contrasting thread (black) which will be visible on both sides.  I stitched the practice buttonholes in black because I forgot to rethread my machine so you can see my stitching easier in this tutorial.  To sew the actual buttonholes, I'll switch to the right colour.

Double-check that your thread lines are in the right places!

A couple of other things to note about preparation.  The pattern calls for non-fusible interfacing for this piece and I am using a rather stiff silk organza rather than hair canvas or some other interfacing.  It's gray.  However, Claire Shaeffer suggests fusing a patch of interfacing at each buttonhole site.  Given the loose weave of my fabric, this was a must.  These patches are fused directly to the fashion fabric, so lie under the organza.

Then mark the long sides of the buttonhole.  On my sewing machine, I can move the needle R and L by 0.5mm increments.  This is an extremely useful feature for this part of the job.  I was able to align the presser foot so it was accurately centred on the originally-marked CL of the buttonhole, and sew a parallel line on each side, at the chosen distance away.

(NB my finger is there to highlight the needle position only!)

A word on buttonhole dimensions:  In The Sewing Lawyer's not-so-humble opinion, thick/fat bound buttonhole lips, especially if they are lumpy and/or uneven, scream "happy hands at home".  (A recent Threads article on bound buttonholes therefore made me wince - it's in #140 at p. 16, if you want to see what I mean.  I simply cannot believe that "industry" uses the method the author proposes, or would put up with the results pictured there...)  [Rant over]  The Sewing Lawyer says:  make your buttonholes as thin as possible given the characteristics of your fabric.  The thinner the fabric, the thinner you want the lips to be.  I moved my needle 5 clicks away from the CL, and the finished dimension of my buttonholes is 5mm or about 3/16".

After completing this step you can remove the basting marking the CL of the buttonhole; you don't need it anymore.


Step 2 - The patches

Cut bias patches that are bigger than the finished dimensions of the buttonhole - you will need approximately 1" (2.5cm) on either side and a bit more at the top and bottom.  Don't skimp.  The patches can be trimmed down to size after the buttonholes are sewn.  Centre the patches over the markings for the buttonholes, right sides together, and pin in place.

For my practice buttonholes, I decided to try using two different fusibles and to sew one buttonhole without any interfacing.  Don't ask me to tell you exactly what kind of interfacing they are - all I know is that the one with lines (on left) probably came from Fabricland.  I have no idea if they still sell it.  I fused so that the interfacing was most stable along the length of the buttonhole.


Step 3 - Sewing the patches

Working from the wrong side so you can see your thread markings, and using a small (2mm or so) stitch length, sew along the outer marked lines, backstitching as precisely as possible at the lines marking the end of the buttonholes.

I find it useful to stitch a hairs-width beside the basting rather than trying to sew directly on top of it.  This makes it SO much easier to remove the basting afterwards.

Speaking of which, you can now remove the lines of basting along the top and bottom edges of your buttonhole, and the CL basting too (if, like me, you didn't do so already).


Step 4 - Cutting etc.

Simple:  cut down the middle of the buttonhole, through all layers, but stopping short of the ends.  Then cut at an angle exactly into each corner, as close as you can without cutting through the stitching.  You should have little triangles at each end of the buttonhole.  You need these.

Then carefully pull the patch through the hole.  This is where I started to get a sense for whether I wanted interfacing (I do) and which one (the softest).

After you do this the buttonhole will look all weird and hopeless (from both sides).  It isn't.


Step 5 - Whispering to the buttonhole (with heat and steam)


The next step is to fold the patch back and press open the teensy little seam allowances in the seam along each edge of your buttonhole.  Finding them and holding them open for the iron may not be easy, but it can and must be done.  Use an awl if you have one.  Press FIRMLY, but just the sewn part of the patch.  Do the other side too.

The Sewing Lawyer's humble opinion:  This is the step that makes these buttonholes non-bulky and flat, and therefore what marks this method as superior.  When the lips (the patch) are folded back, one side of the open seam allowance is inside the buttonhole and the other is outside it.  Other methods open a window and leave ALL the SAs outside the actual buttonhole.  This means that the actual buttonhole is 2 layers of fabric but the surrounding area has 5 layers (jacket front, 2 layers of window SAs, 2 layers of lip fabric).  Lumpy!  Hard to press evenly!  Harder to avoid "happy hands at home" look!

Then flip your piece over and start manipulating the lips with both hands until they are evenly filling the rectangle.  Keep the little triangles folded back so the buttonhole retains its rectangular shape.  Once you have it how you like it, press it into position.  Be firm!  (I find it easiest to do this job on a sleeve roll or other pressing aid rather than on the flat ironing board.)

Step 6 - The pesky triangles


You have already pressed them into place.  The very last step is to secure the little triangles at each end of the buttonhole with stitching. To the left, you can see what they look like after being flattened.  Notice that the patch is pleated where it forms the lips.  VERY CAREFULLY transfer your pressed buttonhole over to the sewing machine.  Take care to preserve the pressed shape of the lips. With the right side up, fold the fashion fabric back, exposing the triangle and the patch.


Using a short stitch length, sew through all layers, as close as possible to the basting which marks the end of the buttonhole, and forms the base of the triangle. Sew back and forth to anchor all layers of the triangle to the patch.

After stitching, your patches look kind of strange from the back.  The only visible stitching relates to the triangles.  This will be covered up (and would in any case be practically invisible if I'd used the right colour of thread) by the facing.

At left you can see what the interfacing did.  The top patch (uninterfaced) is very soft and draws in.  The middle one (firmest interfacing) is almost square.  The lowest retains the softness of the fabric, but is more stable.  I like it best.


That's all there is to it.  Now, I have to replicate these excellent results five more times...  Wish me luck!