Sunday, September 25, 2011

Simplicity 2369 - Reprise

Here's the dress I finished yesterday.

The pattern is one of those reliable ones where the pictures on the pattern envelope are what you get.  No fuss, no muss.  Consequently, there's not too much to say about it!

I made this before.  This time I used the shorter skirt and longer sleeves.

I used one of those soft rayon knits; you know - the ones that stretch longer and eventually pill and look like crap.  But before then, they are soft and luscious, and supremely comfortable to wear.  This is, consequently, a dress for only one season, or with luck two.

I love the print.

There is a CB seam, but it's pretty much invisible.


My pattern review is here.

Saturday, September 24, 2011

Trying not to post just for the sake of posting

The Sewing Lawyer does not think that she should start this post by apologizing for the fact that her last post was TWO weeks ago, do you?  

In the interim, there was sewing of panties.  Which shall not be shown on this blog.  I have my pride.

The bra also got finished, although I haven't yet sewn the tiny little ribbon bow on the centre front so maybe it's not quite finished.

Thanks very much to all of you who left such informative comments on sizing, and more practically, on what the heck to do with the too-long ends of the underwires.  I had never heard of Plasti Dip before but it looks like a very interesting product.  I was not too thrilled at the idea of forking over $25.00 for a gigantic amount of the stuff when I only needed a tiny bit, so I was a little bit relieved to find out that my local hardware store had stopped carrying it.  I defaulted to plan B, Liana's suggestion:  epoxy.  It worked.

Having a nice new bra that fits well has made me realize that all the rest of them are pretty dowdy.  I am now quite motivated to make more.  Today, quite fortuitously, Kwik Sew 2101 came into my possession.  So there are lots of choices for patterns, and the stash seems to contain more possibilities too.

I made a knit dress.  No pictures yet, however.  I'll do a quick post tomorrow.

I have been musing about my next project.  I think it's time for something a little more complicated i.e. a lined jacket.  I like sewing for fall and winter!  (It's a good thing, since we have a good 8-9 months of somewhat-cold to very-cold weather here.)

I've had the fabric pictured to the right for a couple of years.  It's wool blended with something - maybe acetate?  The square motifs that look like script (but which I hope don't actually say anything) are woven in. This summer I bought enough red lamb leather for another jacket.  They are the same colour!

Dress and jacket, coming up ... sometime.

Sunday, September 11, 2011

Hooked?

One of the anxious-making things about sewing a bra is that you can't try it on until it's finished.  So they say.  But there was no way The Sewing Lawyer was going a centimetre farther along in the construction process without having at least a pretty good idea whether hers was going to take pride of place in the undies drawer, or languish, finished but unworn, in a dusty pile on the sewing room floor.

This morning the front was done, more or less, and the back was at the point of paralysis where I needed to know (a) how big around it should be and (b) how long the elastic straps should be.  I managed to get it whacked together in an approximate sort of way, but definitely unpickable, so I could try it on.

I'm using one of Beverley Johnson's patterns - "Amanda" of the "Pin-up Girls" line.  This pattern uses a foam cup and is pretty similar to some RTW bras I wear.  The website says it has dramatic push up effect but that remains to be seen.  I also bought the "Sharon" which is a front closing partial-band "demi-cup" style.  It's going to be the next one I make.

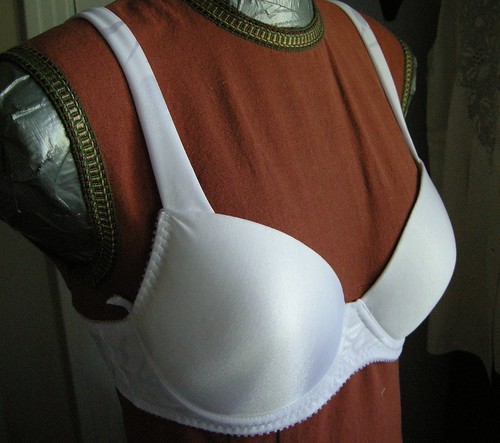
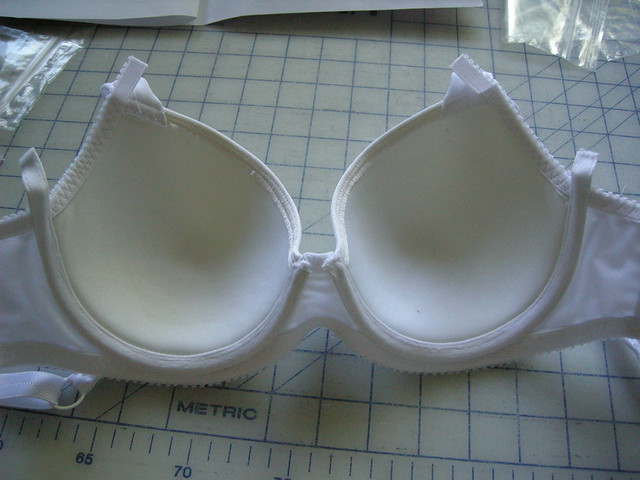
Let me introduce you to Amanda, finished enough so that I could verify its wearability, and make some informed decisions about band and strap length.

The foam cups are covered with a very stretchy and thin tricot from stash.  The front band, straps and back are made from a firmer lycra-and-something, also stash.  I used one of the bra findings kits from Bra-Makers Supply.  It has plush elastic for the top and bottom bands, strap elastic, hooks and sliders, underwire channeling, and some little decorative bits.

When I was at the store, Beverley turned her practised gaze to my upper half and guessed, correctly, that a 36 cup would be right.  She checked the 34 too (what I thought would be my size) and indeed they were noticeably too skimpy.


I did not purchase underwires, thinking I could repurpose some wires from old RTW.  Wrong! Do you know what?  34 wires just won't go around a 36 cup.  The curvature is definitely not the same.  So I bought size 36 wires from Fabricland, but they are too long for this cup, and stick out about 1cm.  I am going to have to cut them off and attempt to  file/cover/treat them in some way so the ends are not razor sharp.

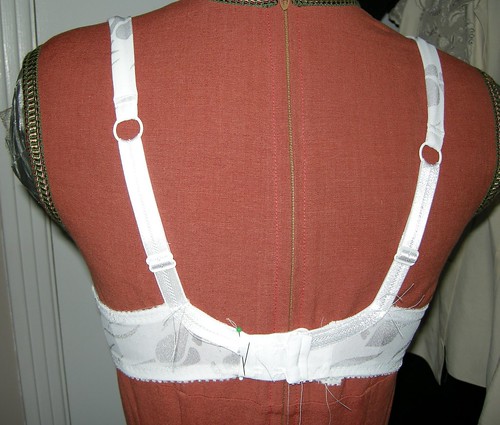
The straps are sewn fabric in front, and attach to an adjustable elastic strap in back.  The strap elastic is continued on the upper scooped edge of the back.  Here, I've just sewn it on any-which-way to check fit, and verify that the hook and eye bits will attach properly.  However, the picture shows the general idea.

Below you can see the inner construction.  Washable Wonder-tape is an essential tool in attaching the stretchy fabric to the cup.  The instructions are very clear and good for this process.   The band/bridge piece is stabilized with a very non-stretchy layer (the pattern does not suggest this but I intuited that the piece should be as stable as possible and my fabric had, I thought, too much stretch).  The sticking-out ends will be resolved, some time soon I hope.

Sewing a bra is a little tricky but not as intimidating as it may look.


However, the sizing thing is really confusing.  All my life I've worn a 34B bra and here I was confronted with a 36 cup.  Not only that, but the band size and the cup size can be mixed and matched.  I measured myself according to the instructions in the Amanda pattern, the Sharon pattern, and for RTW as described in Beverley's book which I also purchased.

Amanda puts me at 36.  In actual RTW I am a 34B.  The book and the Sharon instructions put me at 32B (??!!).  I know these are just numbers, but for heaven's sake!!

Anyway, there is an error in the pattern.  The instructions say to trace the band size according to the cup (36) but with its length based on the under-bust ribcage measurement.  They say:  "If you measure 75cm (34"), trace the 75/34 line on the pattern size.  If you measure 78cm (35"), trace the 80/36."

Okey dokey.  I measured myself:  72.5cm around my ribcage.   And checked my tape measure which conveniently has both metric and imperial measurements printed on it.  72.5cm is 28.5".  I stared at the pattern and the instructions, and then back at my tape measure.

So here's the problem.  The numbers in the instructions are wrong in every way.  75cm is not 34", it's 29.5".  34" corresponds to 86.5cm.  And these numbers don't match what is printed on the pattern pieces.  The pattern piece for size 36 has lines on it which are labelled 70/28", 75/30", 80/32" and 85/34".   These number combinations somewhat closer to real metric/imperial equivalents but they are still off by enough to make your bra fit badly.  Which number to choose?  Accurate metric?  Accurate imperial?  Measuring the pattern pieces does not help because the bra has negative ease and  the band length will be extended by the hook and eye pieces, in some hard-to-verify amount.

To make a long story short, I initially cut the band pieces on the 85/34" line, based on the theory that I could make too-long pieces shorter.  Then in construction, I compared the in-progress bra to a RTW bra and got all over-confident and cut the bands down 2 sizes.  Then later in construction, I realized the band was sure to be too short, and added a little extender piece at CB on the right side (to which the shorter hook bit will be attached).  I figure the extender piece adds back almost as much as I cut out in the over-confident part of this story, and based on my almost-done fitting, I have to take most of it off again.  But not all of it, so I still don't know what size I should have cut.

Next time (there will be one; I have another set of the foam cups) I should ignore the numbers and re-trace the pattern piece based on the length I actually needed for this one.

There is a similar dithery story that goes with trying to figure out how long the elastic strap extensions need to be.  I won't bore you with the details.  However, the principle which is guiding me in relation to both band size and strap length is that the bra will not get snugger as time goes on, all other things being equal.  Therefore, I should determine lengths based on what feels reasonably snug but comfortable now, with everything positioned so I can tighten it up in future, if needed.
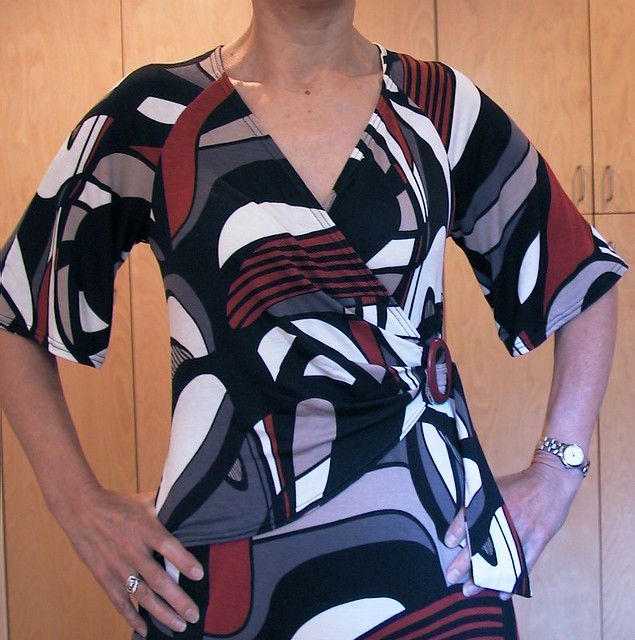
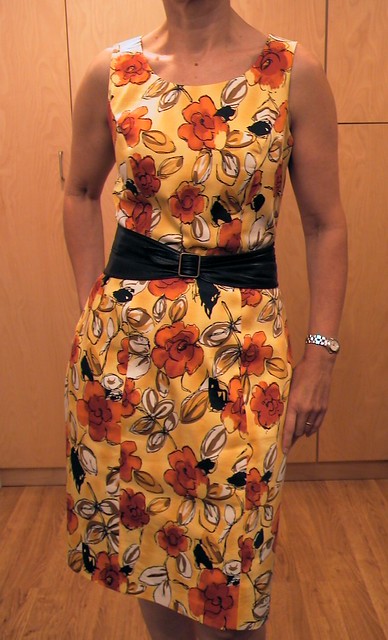
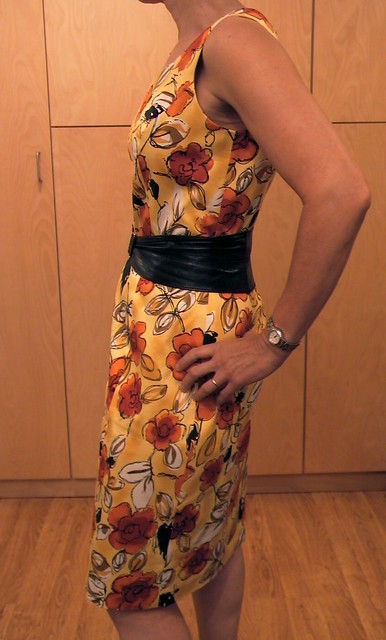
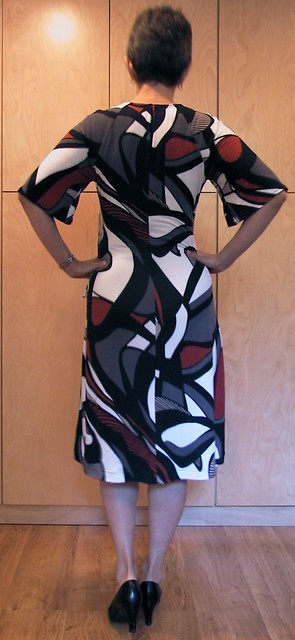

Tuesday, September 6, 2011

Amazing Fit Dress - Simplicity 2648

Simplicity has this line of patterns called "Amazing Fit".  They seem to be a collection of good basic designs whose main distinguishing feature is that they include multiple versions of each piece for (above the waist) different cup sizes and (below the waist) for a "slim", average or "curvy" fit.  I'd been meaning to buy #2648 since my friend and enabler G started raving about it as a great pattern.  When G makes a recommendation, The Sewing Lawyer listens.  (Not just for sewing patterns either. Snap major household appliance decisions have been made based on G's seal of approval.)

So it is entirely predictable that Simplicity 2648 did indeed turn into a very nice dress that fits rather well.  The only drama relates to how long it took me to get around to actually sewing this up.  I cut it out along with the grey summer suit on June 12, for heaven's sake.  

It's not that I'm having a bad hair day. Rather, the headless photos turned out sharper so are better pictures of the dress.  Which is what you are really interested in anyway.

This is the last of the true summer sewing for The Sewing Lawyer.  Maybe there will be one or two warm days in September suitable for wearing such a sunny summery dress.

Oh all right.  More sewing details.

The dress is made from a somewhat substantial cotton/lycra woven.  I hope it won't be too warm to wear, but its relative stiffness means it'll never cling.

There are princess seams in front and darts in back.  And there's a waist seam.  But you can't see any of them in this busy print.

I cut the B cut bodice and the "curvy" bottom.  The entire difference between the average and curvy bottom is that the curvy back has 4 waist darts and the average only two.  There is an extra .5" at the hip in the curvy fit.

I've had the belt I'm wearing for (conservatively) 25 years, and it wasn't new when I got it.  I haven't worn it in years but would wear it lots now, if it hadn't shrunk in my closet.  I'm going to clone it in a bigger size.


Saturday, September 3, 2011

OOO RAH Wallet

As promised,  here it is.  A green lamb-leather folding wallet.  It measures 6" x 4.25" (approximately).

I considered doing the topstitching to complete it, but after eyeing the thickness in the middle of one side (10 or maybe more layers of inner cotton, 2 layers of padded snap tab, and outer leather layer, doubled because turned in on itself) I decided discretion truly is the better part of valor, finger pressed the edges as much as I could, and called it done.

Debbie suggests using quilting cotton for all layers, and cutting the pattern from three fat quarters.  The Sewing Lawyer has heard this term "fat quarters" before, but not being a quilter, isn't 100% sure what they are and wasn't about to go out and buy fabric for this little item, since there is a fabric supply to last several lifetimes within reach at home.

And the stash came through.  This cunning print, miracle of miracles, coordinated perfectly with the green leather.

Chickens?

Yes, those are chickens.

The wallet has many many pockets for the numerous credit, debit, library and other cards a person seems to need these days.  In addition, there are pockets under the pockets on either side, and a deep pocket opening at the top, which is the full size of the wallet.

The lower right slot has a vinyl insert for your most used ID.


It has a zipper coin pouch at the back.

It's bigger than my last wallet effort.  Maybe surprisingly, they both hold the same stuff.  It's nice to have alternatives, don't you think?


I've stuffed it here, to illustrate.  A person could go shopping.

Good Job, Debbie!  (Click on this link to buy the pattern.)

Miscellany

First, an apology for not posting much in the past few weeks. It's a source of continual amazement to see that people do continue to visit this blog daily, and that the number of followers here continues to rise even in my absence.  Almost 300!!!

During her absence in the real world, The Sewing Lawyer seems to have been busy.  Although there isn't much production.  Actually, if I am honest, there hasn't been any.  The Sewing Lawyer's sewing room has mostly been dark and neglected.  Too bad the cleaning fairies didn't take advantage of the opportunity to get in there and do some serious organizing.

Really the machine has only been running in connection with a little project which is (sort of) for someone else.  If you hang about on sewing sites, you will have come across Debbie Cook of Stitches & Seams.  Recently she's turned her considerable talents to producing a pattern and I volunteered to help test it.  She kept up her end of the arrangement admirably by sending me the pattern (PDF) and then e-mailing updates on its development in real time.  I'm not so sure I've performed adequately as a tester as the item is languishing, almost finished, in the messy sewing room.  I did send Debbie feedback on the pattern as I went, anticipating that this might happen, but I'm still hanging my head in shame, and hoping I'm not too deeply entrenched in Debbie's bad books.

On the positive side, the pattern (which is for a wallet) is for sale in her Etsy store where I seriously hope it is selling like hotcakes.  It's very professionally-done, IMHO.

On the negative side, The Sewing Lawyer (as usual) has made things difficult for herself by choosing to make the wallet out of leather. My machine is struggling through the layers in places even though the innards are cut out of the intended material - quilting-weight cotton.  I think I see some difficult hand-sewing in my near future since there is no way I am attempting to topstitch this baby by machine.

Perhaps in my far-distant future, I see a sewing machine that can power through layers of leather without faltering and skipping stitches.

Pictures to come (I promise) this very weekend.  Which is a long weekend in Canada!  Yay!

Other things to know, which have something to do with sewing.

While doing laundry today, the evidence clearly indicated it was time for new undies.  Not only does The Sewing Lawyer have a guilt-inducing pile of bra patterns with all needed materials sitting on the cutting table, the stash contains all the stuff for making panties, including a TNT pattern (before you ask, it's cloned from a pair purchased in the far distant past, then tweaked through several home-factory panty-making sessions over the years).  My version looks (sort of) like Jan Bones "smoothie" panties.  But it has a lower rise.

If you are inclined to make your own underthings, not only are there commercial patterns out there (this one from Jalie, for example), there are several for download on the www.   I first saw the "cheeky panties" pattern on Burdastyle, but today Google turned up this site which has a link for the graded version as well as the original instructions by Burdastyle member EmilyKate.  This pattern intrigues me but having traced it out and compared it with the TNT, my strong suspicion is that it's best reserved for teenagers or those with figures like teenagers.  In short, the TNT looks more like a TeNT.  I console myself with the thought that the back piece has to be big because it wraps mostly around to the front.

If I blog about making undies, the posts may very well not be illustrated, if you know what I mean.

Finally, I got an iPad for my birthday last month.  Being new to Apple (I'm a confirmed PC user) it's taking me some time to get comfortable with and understand how I ought to be using this intriguing little machine.  Please help!  What are your best recommendations for apps and content?  How do you use your iPad in the sewing room?