Wednesday, December 30, 2009

Sewing in (my) history

The idea for this post, which will perhaps be the first of a series, is my husband's.  He found me wasting time on the www trolling for vintage patterns.  It's all Carolyn's fault... well, for today, that is.  I have several "vintage" pattern websites bookmarked which I look at compulsively.  I'm searching for the patterns from my past, you see.

I made my first garment (a dress, pattern lost) in grade 8 which was many decades ago.  Through high school, I sewed and sewed.  At the very beginning, I favored Simplicity patterns.  It was the late 60s and they were fresh and cute.  Later on into the early 70s I made Butterick patterns - the ones designed by Betsey Johnson and Kenzo were my favorites but I continued with Simplicity, especially the "Young Contemporary" ones.  Only later, in university and beyond, would I graduate to the occasional Vogue.  I can only remember ever making a couple of McCalls patterns and I don't know why they didn't grab me.  That was my entire world of possible sewing patterns, then.

I have many of my patterns from the university days but unfortunately, most of the ones I made before then were lost when my parents moved (sniff, Mom & Dad, maybe I'll forgive you someday...).  They would have been gone forever but the internet gave us all a way to reacquire the ephemera of our past lives.

Here's a little dip into my sewing memories and my collection.

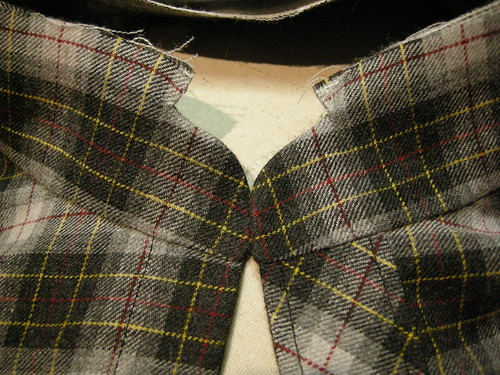
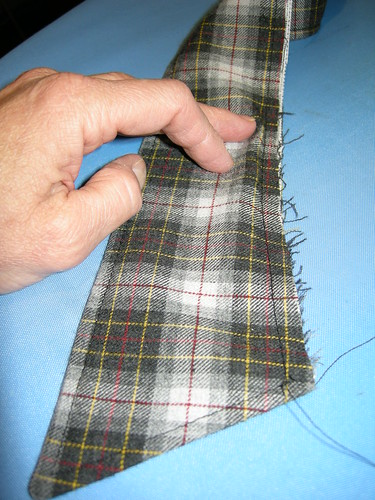
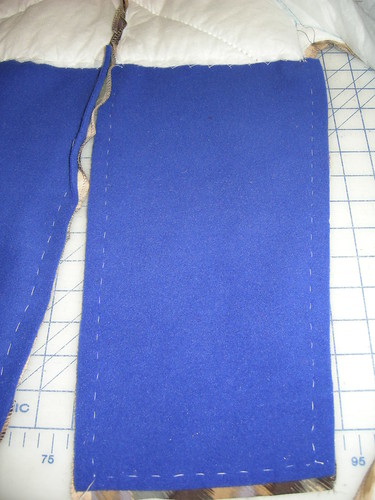
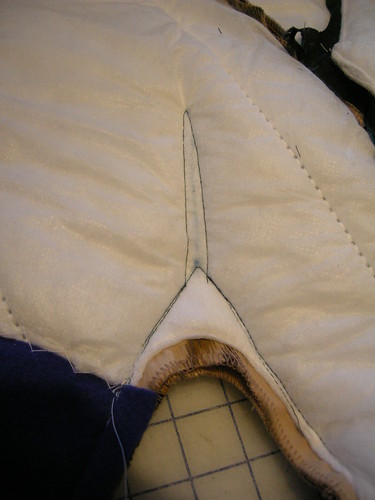
I'm still looking for the very first dress pattern I ever made.  It was ca1968 and it was (natch) a mini dress.  I made it out of a lurid cotton print featuring hot pink flowers, which had a nice substantial weight and texture.  It was A line with puffed sleeves, a square faced neckline and big patch pockets.  But the most astonishing feature of the design (I can hardly credit that I chose, and successfully made this pattern for my FIRST EVER garment project) was the bust darts.  They originated in the side seams, charged out horizontally at a level just below the bust and then took a hard (square) turn upwards.  CUTE!  But DIFFICULT for a beginner, no?  My Home Ec teacher must have sighed deeply when she saw it, but kudos to her for not insisting that we all make the same boring and ugly navy blue cotton top with back zipper and V neck that would never be worn.  I wore that dress a lot, and the positive charge I got out of making it set me on my way as a lifelong sewer. 

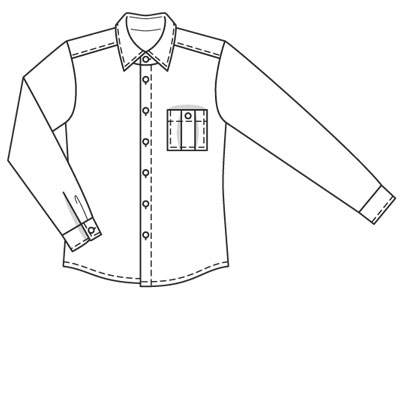
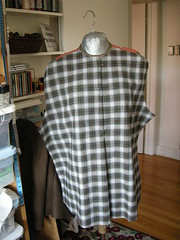
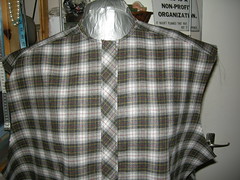
While I can't show you the 1968 dress, I can show you another pattern which was perhaps the 2nd or 3rd one I made, and has the same kind of darting.

You can best see the darts on the pink dress but the great shape they gave to the dress is more evident on the white one.  Every time I look at this picture, I smile.  I remember those flippy hairstyles (which my hair would never ever do) and those little skinny knees (unlike mine at the time) and the cute girls in grade 9 (which I wasn't).  I remember that I made this dress twice.  I vaguely remember that there was a first pink version but my total favorite was another substantial cotton print with a warm mid-beige background and abstract print in yellow, a nice fresh green, white, black and perhaps other colours.  I think the coordinating scarf was green poly chiffon (way to go ME for tackling this difficult fabric, if I made it, which I can't remember).  I must have made that dress in 1970 since I think I was wearing it for my grade 10 photo.

My memory of the cute girls in grade 9 has had a serious boost recently as my mother found and returned to me my yearbook of that ancient day, only this Christmas.  She gave it to me along with my report card from grade 1 (where is the museum conservator for this ancient paper?).  I got a huge laugh from the report card when I read as follows:

ART
Shows self-expression ... yes
Evidence of particular talent or unusual ability ... no


MUSIC
Enjoys musical activities ... yes
Evidence of particular talent ... no


Can you who are parents imagine reading this about your little darling, whose every accomplishment is a marvel and whose lives and futures stretch out, unblemished and full of promise?  Boy, they really knew how to throw cold water on creativity in those not-politically-correct days at the Mountainview Elementary School!  (To their credit, I don't think my parents put any stock in the artistic judgment of my grade 1 teacher, and I like to think she was a little bit wrong.)

Since I am reminiscing about grade 1, there I am, sitting nicely in the front row of my class picture in regulation navy box pleated tunic and white shirt, complete with skinned knee.  I didn't realize I was doomed to have no artistic or musical talent! 

Anyhow, Simplicity 8805 was lost to me until I acquired it from one of my favorite vintage pattern sites, Lantez Living.  I have considered making it again, though a bit longer.  What do you think?


One more for today, accompanied by a photo of yours truly wearing it at her high school graduation (with BF of the day). 


OKAY YOU CAN STOP LAUGHING NOW!

For your information, the dress was made from a soft and beefy but seriously synthetic knit fabric in shades of off-white and dusty rose.  One side was a check, and the other was a heathery solid.  I used the contrast for the collar and cuffs.  Looking at the photo, I believe I would have thought the dress a little on the long/modest side.  I used to measure the "right length" in those days by whether the tips of my fingers brushed the hem, and I have short arms(!).

I didn't like this pattern enough to buy it again (and it was the wrong size by a mile) but I saved the image. 

Tell me if you found this post (a) illuminating or inspiring, (b) amusing, or (c) embarrassing.  Based on your responses, I'll decide whether to share more of my ancient sewing history, or sulk and keep it all to myself.

Tuesday, December 29, 2009

Launch of a new label?


Woo hoo!  Now, how do I attach a picture to this blog instead of the canned masthead provided by Blogger?

Monday, December 28, 2009

Update

In the latest sewing news chez The Sewing Lawyer ...


The Christmas shirts were well received.  The boy's shirt fits as intended.  I made him a 52 (Burda equivalent to US size 42) which I figured would be a size too big.  Now having measured him, it's 2 sizes too big but just the way he likes it - loose. 
Same for the Trilobite shirt.  I knew exactly how it would fit, having made this pattern gazillions of times before.
In other developments, my husband's legendary shopping skills turned up an astonishing "Hawaiian" print at one of his favorite thrift stores.  There's enough for another Aloha shirt, at least.  Look closely.  Evolution?


I am avoiding working on my coat.  Sometimes this happens.  Often it ends well.  If I persevere, and finish the project, it may defy my worst fears and become a loved and much-worn object.  I pride myself on the fact that I VERY rarely end up with UFOs in the sewing room.  However, keeping at some projects is a serious chore, and I'm afraid this is one of them. 

My last-week-of-2009 resolution is to finish it well before January 1, 2010 so I can start another more fun project.  I had better get on with it!

Next up is this jacket from the January 2009 issue of Burda, which I am going to make in a loud orange plaid.  There.  If I say I'm going to do it to a big enough audience, I'll have to, right?


Surely that will be more fun than my coat...


In the non-sewing-related category, this is the closest I'll get to the 2010 Winter Olympics that get underway soon in Vancouver, British Columbia.  At my brother's house, one of his guests had been selected to carry the torch in the Olympic relay.  There are 12,000 people participating in this rather strange exercise which sees the torch carried through more than 1,000 communities over 106 days.  Each participant gets a white track suit, hat, mitts and the torch he or she carried.  The runner I met brought her torch to the Boxing Day party and of course, I had to have my picture taken with it.  (I'm wearing a blouse I made from a sari - reviewed here.)

Wednesday, December 23, 2009

Christmas ornaments???

In wasting time on the www this morning I was looking through Spoonflower's Flickr album and came across this astonishing example of what to do (or what not to do) with Spoonflower fabric.


More like Voodoo doll! 

Turns out there are a lot of sites which give instructions for making crafty tree ornaments.  Maybe some day when I turn into Martha Stewart I will remember to look for these bookmarks and do up my house (HA!). 

I don't like the excruciating how-to videos (skip the introductory ad - an AD on a craft video??).  However there are many tutorials out there. 


Sewing/crafting is a logical choice given the target audience for these (Country Stitcher's Ornament).  However I find them a bit "Becky Home-Ecky"...


Winter themes are also logical (Better Homes & Gardens).  These are particularly *cute*.


These paper snowflakes are quite lovely. 


If anyone is out there reading, I hope your holidays are happy and safe.  See you in 2010 (or maybe there will be another post before the end of the year, who knows?).

Sunday, December 20, 2009

Trilobite Shirt - completed!

I'm checking back in with some pictures of the completed trilobite shirt and to put in another plug for Spoonflower

 My husband has wanted a trilobite-print-fabric Aloha shirt for some time and since he was able to supply the fabric, I cooperated by making it up - it'll be formally presented on Friday as a non-surprise Christmas present. 

As for Spoonflower, what a concept:  "a website that gives you the power to print your own designs on fabric". If you can come up with an image or design in a suitable e-format (TIF, JPG, PNG, GIF), you can upload it, preview how it will look printed on yardage (play with different tiling of the design), and order it printed on one of six different types of fabric: quilting cotton, linen-cotton canvas, upholstery weight cotton twill, organic cotton sateen, organic cotton interlock knit and 60-40 bamboo-cotton rayon. It's wise to order a sample size piece (8" square) first to see how it will look "in real life" for $5. The fabric sells at between $18 and $32 per yard.  I think I already mentioned that my husband got 2 yards of the cotton-bamboo rayon printed up.  It crocked a bit in the washer & dryer, and in the sewing, but this just adds to the slightly distressed and rock-like appearance of the dark background.  


I've made this pattern, long out-of-print McCalls 4115, many times before both as a Hawaiian or Aloha style shirt as designed, and with long sleeves as the top for seriously goofy but classic PJs.  Check these out!


The blue ones are a Joe Boxer print of breakfast items, including a frying pan with eggs and bacon, and a pound of lard (!). The colourful ones on the right are festooned with all manner of vegetables.  It's hard to believe that the commercial fabric printing companies could come up with these designs, and yet they didn't have a single trilobite print in their catalogues!


Details:


Spoonflower sent us a coordinating label so I added a back facing I could sew it to.  Even though I was short of fabric I was able to match the patch pocket perfectly.  All seams are flat-felled so the inside is as nice as the outside.  


More details and links can be found in my review on PatternReview.


Maybe now I'll have to get back to my winter coat.  


Happy holidays, everyone!

Thursday, December 17, 2009

Another one done!

I'm not sure why sewing this shirt was such a prolonged effort.  I finally girded myself to sew the buttonholes and attach the buttons, and now it is done.  Hooray!  On to the next one.

Here are some pictures of the completed shirt.

The bias cut placket looks pretty good, and nicely disguises the fact that my cutting was off-centre at the CF.

The back is very plain - no pleats or gathers at the yoke.  The pattern called for 2 vertical darts but I did not sew them.


I am pretty happy with the way the collar turned out.  I used techniques from David Page Coffin's book Shirtmaking.  I heartily recommend this book if you don't already have it.

I cut the sleeve placket on the bias to continue the theme.  The pattern and instructions are found in the DPC book.

Full review is here

Next up...  the trilobite shirt.

Sunday, December 13, 2009

Ssshhhh! Don't tell anyone!

(I'm sewing presents.) 

First up, I made silk chiffon scarves based on the "Quick to Make" feature of Threads Magazine in the October-November 2003 issue.  I've scanned the instructions and they can be found here:  Page 1; Page 2.  The Threads instructions are fine if your 2 fabrics are the same width.  However, if they are not you have to sew them together before making the centre loop.  I did it this way:

  • Choose 2 coordinating silk chiffon fabrics - you will need 2 40cm lengths.  
  • Sew the pieces together along one selvedge edge giving you a 40cm wide scarf whose length is the width of each fabric added together. 
  • Fold this long scarf in half to locate the mid-point, which will not be at the seam if your fabrics are different widths to start.  Mark this point.
  • Now fold the scarf in half lengthwise, and sew a seam 30cm long at the centre of the entire length (i.e. 15cm to either side of the mid-point you marked at the last step).
  • Turn the scarf right side out.  It will have a 30cm long tube in the middle.  
  • Continue as per the Threads instructions, step 4.  
I used a short 1.5mm stitch length to sew the seams, then sewed a second line of stitches parallel to the first, approximately 2-3mm away from it.  Then I trimmed the seam allowances very close to the 2nd line of stitching.  For the hems, I used a narrow 2-thread rolled hem sewn on the serger.


I had fun choosing the chiffon fabrics to coordinate. 

When worn, the look varies pending on which side of the scarf is worn "out".


Here are the other two.


I am also almost finished a shirt for my son.  I picked up some lovely plaid Viyella (cotton & wool) at the Fabric Flea Market this year.  I'm using a pattern from the March, 2009 issue of BurdaStyle (as they now insist on calling it).  Here's the line drawing.
It's a perfectly ordinary men's shirt.  It's described as "slightly fitted" and has 2 vertical darts in the back, which I did not sew.

Now my fabric is an even plaid and I carefully matched it while cutting - except I FORGOT to think about how there should be a smooth match at the CF.  ACK!

So here's the shirt fronts showing how the unmatched fronts end up with two heavy dark vertical lines running together.

And here is my fix/disguise.  I cut a bias band for the CF which fills the space between two dark vertical bands perfectly, and disguises the fact that the whole thing is off centre.  HA!  When the buttons are on, the disguise will be perfect!


 I used David Coffin's Shirtmaking book for better instructions than Burda's.

I like the collar technique from this book - for once the collar stand curves smoothly down to the front edges - no ugly lumps and bumps. I'll post pictures of the finished shirt with details soon, but here is the method.

First, you attach the collar stand to the shirt body, and the inner collar stand to the inside of the shirt body.  Then, carefully rolling the shirt inside the collar stand, right sides together, you sew around the leading edge of the stand ending at the exact point where the collar will attach to it.  Trim and grade those seam allowances very close to the stitching.  If you trim down to 3mm or so, there is no need to clip in the curved area. Clip to the point where you stopped stitching, however.   Then turn the whole thing out and admire your handiwork.  Here's a picture of the collar stand at this stage.


Nice, huh?

Next, sew the collar.  I used 1cm seam allowances around the entire collar, collar stand, and neck edge.  Of course, I then promptly forgot and sewed the collar (the first one) with 1.5cm seam allowances.  DOH!

I did the second one properly, and I even remembered to scootch the top collar down so there would be room for the turn of cloth once it was sewn into the stand.


Here's a picture.  Hopefully you can see that the top layer is bigger than the bottom layer.  When this is folded down inside the collar stand it lies perfectly smoothly with no rippling and no bulk underneath.  Magic!

The collar is then sewn to the inner stand (top collar to inner stand) and the outer stand seam allowance is simply pressed down and the whole thing is edgestitched.

At this point  I have the shirt mostly finished - just the buttonholes and buttons to do. 

I used my seam ripper A LOT while sewing this shirt.  However, it is turning out well.  I SURE hope it fits and he likes it!


Sunday, November 29, 2009

PatternReview - Fibre-filled weekend in Montreal with friends

I've been a card-carrying member of PatternReview since January 2005.  I was inspired to join so I could write a review of a Vogue designer pattern (now out of print) that was making steam come out my ears at the time.  Writing a PR review was instantly gratifying, since quite a few members took the time to comment that (a) they sympathized and (b) they thought I had done a good job despite the nasty pattern.  It's also addictive and I now have over 100 reviews on the site. 

The internet and sewing is a strange combination, but it works.  I credit PR with making me more aware of fashion, showing me a huge range of patterns sources from around the world, teaching me a lot about fitting and techniques, and introducing me to some very nice people.  Specifically, thanks to the fact that I'm part of the organizing committee for the first Canadian PR Weekend - to take place in Montreal, Quebec next June - I have met new friends Anne-Marie (Mahler) and ConnieBJ, (who could not join us this weekend), Rhonda (with her lovely Foksy keeping her company), Claire,  Margaret and Alex.


I drove to Montreal this weekend to continue the planning process, and to check and make sure the Montreal stores hadn't run out of fabric.  I'm so happy to report that the planning did progress, and that there is fabric to be had.  I finally got to visit the fabulous Madeleine Soie et Laine where I found:

Amazing sheer but substantial Armani wool (black).  


Silk chiffon.


And at my other favorite store, Couture-Elle, I found a lovely piece of suiting - mostly wool but Mr. Couture-Elle's expert burn test revealed this one also has some silk and rayon in it:

On my way home in the car, this one revealed to me that it wanted to be this Burda jacket.


Wednesday, November 25, 2009

Warning - no sewing; filler topic!

I seem to be in a slump at the sewing machine.  I'm spending a lot of time working, and exercising (I swim 2x per week, have taken up curling and Pilates 1x per week each, and have signed on with a personal trainer).  I guess I'm a bit tired (strange, that...).  Anyhow, it's easier to sit here at the computer these dark pre-snow November evenings than to actually get off my duff and do 30 minutes of sewing.  Also, I still feel stalled on the coat project but Christmas sewing projects loom large.  I sure hope a surge of adrenaline gets me going, and soon!

In the meantime and to emulate another blogger (Johanna Lu) I hereby present to you my new/old pincushion in before and after state.  I got this at the Fabric Flea Market a month or so ago. 

Before: 


After:


This was originally stuffed with sawdust with some very tired velvet-like fabric holding it in.  The "shoelaces" were just twine.  I replaced the stuffing with a wadded up piece of polar fleece, after carefully threading some braided cord through the eyelets of the shoe.  Easy!

Here it is with its sewing room friend - the other shoe!


Sunday, November 15, 2009

Back where I started

Ripping and testing and re-sewing are not my favorite sewing activities, but sometimes you just have to force yourself to do them.  In fact, I rip and re-sew quite a lot because I'm a perfectionist.  However the ripping done on this coat is far beyond what I'd normally expect to do in a given sewing project.

I basically wasted 2 sewing days ripping out what I had sewn, making changes and then advancing back to where I should have been last week.  Now I have a functional gusset and a lining that shows more of the promise of the coat-to-be.

After I figured out, using the muslin, where the gusset needed to be and how big it should be, I transferred the necessary details to my pattern and then to the side fronts and backs of my partially-sewn lining.  Of course, this meant I had to rip.  While I was taking out the side/underarm seams, I decided that at the same time I would have a try at fixing another problem with the lining as first sewn - the sleeves felt too bulky and too narrow.  So I also removed the Thinsulate from the sleeves.

I decided to replace the Thinsulate with some 200-wt polar fleece.  Here you can see the new pieces, hand-sewn into place.  Yes, you read that right!  The sewing lawyer (who has been known to wonder what those thin and sharp metal objects known as "needles" are for) basted these babies in by hand.  I did it because the sleeves, which are slightly on the bias since they're cut-on, were stretching longer and narrower when machine-basted to the underlining.  When I realized how much narrower they were than the just-cut pieces of polar fleece, I knew I would get better control and have less reason for more growling in the sewing room, if I just bowed to inevitability and basted them in by hand.

I recently bought a life-time supply of white basting thread from a charming lady who runs a tailoring supply store in Montreal.  I own needles.  I have no excuses!  I didn't even mind the hand-sewing activity.  I laid the very bulky coat out on my cutting table, as you can see in the picture, and did the sewing while standing there.  It was quite Zen...  Changing the underlining to a less-bulky one, and paying attention to the stretch factor solved my too-narrow sleeve problem very nicely.

I then stitched around where I would alter the underarm area to insert the gussets.  Pictures speak louder than words, and here is one that will explain what I did.  Between the lines of stitching, you can see the gusset marking.

I sewed the new underarm seam up to but not over these lines of stitching.  Then, I slashed up between the lines of stitching. 
After that, it was relatively easy to sew the gussets into place.  Don't be fooled - I didn't do it in one pass.  I went over the pointy ends several times to ensure that on the inside, there were no little raw edges peeping out.  I am relatively confident they will hold, and if they don't I have that "needle" thing and am not afraid to use it!

And look, now I can move my arms!  This modification should be invisible in the finished coat.  But what a difference it will make...