Showing posts with label gussets. Show all posts

Tuesday, February 9, 2021

I'm back ... but I didn't really go anywhere (like the rest of the world)

Yikes, what a year 2020 was.

My last few posts almost 12 months ago were written in a state of denial; recalling what had been normal. I reread how I expected to be working from home for a few weeks or months "at most" and chuckled ruefully. That silk shirt? Worn (maybe) once. Those wool trousers? More often, but fewer than 10 times (they are very comfortable). In the fall, I went through the formality of moving my winter clothes out of the storage closet for ready access, but most of my jackets and dresses languish unworn. Even that nice wool knit dress I made a year ago isn't getting much love, although I do love it. I'm now living in jeans and comfy stretchy clothes like everyone else, and wonder if I will be OK going back to my structured professional wardrobe. 

I previously mentioned how my work exploded with COVID. It calmed down (somewhat) but I'm still working from my sewing room so the space is tainted by too much time spent there not sewing.  Too much inactivity (still standing at my ironing board standing desk, though it is now augmented with a gas lift table top for better ergonomics). Too many screens. Too little time.

But I've been a bit more creative lately and was feeling bad about my neglected blog.

So here is a project I completed recently. I have a pair of MEC pants (lightweight nylon, 0 stretch, many pockets) and for a few years have been musing to myself that I should clone them. They are very comfortable (see above re comfy clothes). I found an article in (I think) Threads Magazine on how to make a pattern from an existing garment. Now that I'm looking for it again of course I can't find it. But here's the gist. 

EDITED - I still can't find it but there is a YouTube video by David Page Coffin that more or less illustrates the method.

Use foam mats as a base (I have some that I use for blocking knits), cover with paper. Use pins to pierce the paper along the seam lines of the garment. Obviously you have to keep it as flat as possible. Once you have put enough holes in the paper to see the lines, use a pencil and ruler/curve to mark the seam lines. Repeat for all pieces. Check dimensions. Guesstimate grain lines. Sew a trial muslin to see if it worked.

It was ridiculously easy and surprisingly I got a quite accurate pattern on my first attempt. 

Here are my finished pants. The fabric is a woven cotton with no stretch, but it has more give than the original nylon. The pants are very much the shape of the original. I have already modified the front to be higher at the waist for my next version. 

(Notice The Sewing Lawyer's longer hair "style"...)

The most interesting features of these pants are impossible to see in these photos. 

They have a gigantic crotch gusset. It's completely invisible when the pants are being worn, however it is so deep that it's practically the entire lower part of the crotch curve. To the right is a photo showing the resulting shape. It reminds me of the talk about square crotch curves a few years ago and how they fit a flatter bottomed person very well. 

The pants also have lots of pockets. The two hip pockets are standard construction, but very deep and anchored in the fly front. 

The back pocket has a zipper that's inserted in a separate strip of fabric separating the lower pants back from the yoke. 

A zippered side leg pocket is similarly inserted into a strip of fabric sewn in between the front and back side seams. 

I go back and forth on whether to copy all these features in my next version (winter outdoor pants) but on balance think I will take the trouble, just because. 


Back zipper pocket, left.

The waistband, very fortuitously, matches vertically at the front very well. It's curved as you can see. 

The zipper tape fills in the width of the strip of fabric (approximately 1/2"). I just used cheap skirt zippers from Fabricland. 

Here's an inside shot. I made the pocket bags from an athletic knit. Obviously, the colour is all wrong but it does make the detail easier to see in these photos. 

The original pants had mesh knit pockets. 


I've been doing some machine knitting too, so stay tuned. 


Sunday, November 27, 2011

PINK

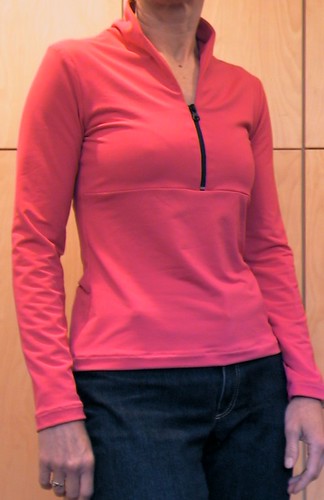
Remember the pink zipper?  There is a tiny bit of method at work.  The Sewing Lawyer has a new pink top to match.  Actually, it makes the zipper look a little ... dull.

For anyone who was at PR Weekend Montreal, the pink fabric was purchased at Suzie Stretch.  It has a nice smooth jersey face and a loopy wrong side.  I'm hoping that makes it a little bit warmer than simple jersey.

But will somebody please remember to remind me to check the direction of most stretch BEFORE cutting?  This top (Jalie 2682) has a double layer upper front and it's straining a bit.  I think it would have been more comfortable cut on the crosswise grain.  Since I have two more vivid colours of this same fabric (turquoise and bright yellow!) there is a chance that I'll get to test this theory out.  I like this pattern a lot.

Gusset
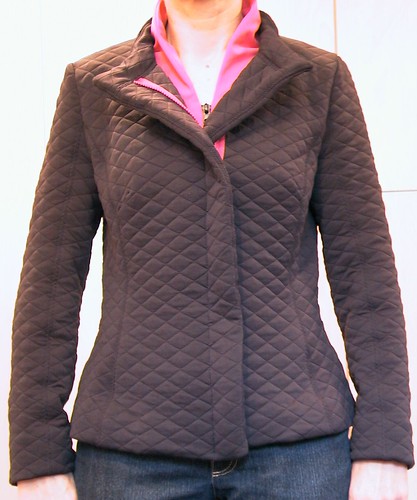
The jacket got retrofitted with a little underarm gusset to help with the mobility problem.

It went curling on Wednesday.

I'm pleased to report that the gusset works and the jacket was cozy warm.

I'll try it with the pink top this week.  Maybe the vivid colour will psyche out the opposition!


In the meantime, The Sewing Lawyer finished this lacy scarf and is itching to try a new knitting project.

What do you think of this sweater/jacket?  I love its texture and structure.

Monday, August 2, 2010

The sweatshirt version ... meh

How do we choose our projects?  As previously explained, I had this teal ponte de roma knit and had thought to make a simple, unlined jacket.  Something I could throw on when the AC was too frigid, or to dash across the street to get a coffee.  It would look good with some dresses in my closet, and (of utmost importance) it would be easy to wear.  I was leaning towards making Simplicity 3631 when suddenly, and without warning, Vogue 2942 leapt out at me.  I had to make it.  I'm not sure why.

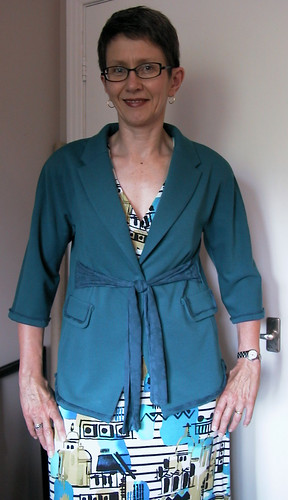
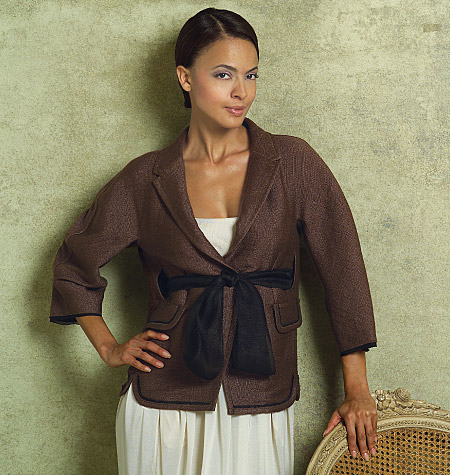
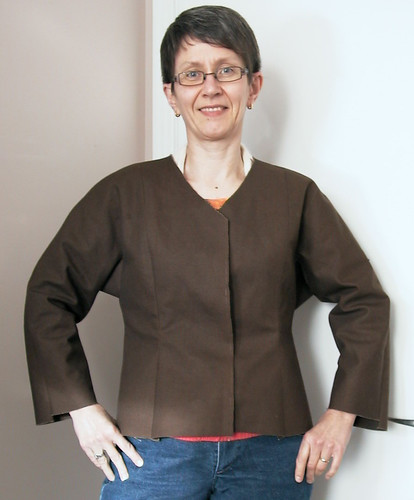
Well, it's done.  Meh.  As you can see at right - Exhibit A - my version (MV).  Below - Exhibit B - is the Vogue version (VV).

I do believe Vogue has engaged in a little pattern manipulation to ensure that MV does not bear enough similarity to VV to be cute and perky instead of .... bathrobe-ish.

The VV is visually square and blocky - looks fresh.  The MV not so much.  It is rectangular and droopy.

Both jackets are cut in the middle by the tie belt, but the MV tie is lower on the body.  The pocket flaps are higher on the VV.  The tie belt is shorter on the VV.

Partly this is explained by fabric choice - the VV is evidently made of a crisp silk whereas I chose a drapey knit.  But I think the proportions are off.

The VV is a veritable sampler of weird sewing/finishing techniques, some of which I chose to ignore.  Thinking about trying to describe them all makes me tired.  So here are some details of MV:

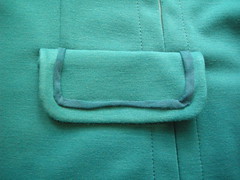
Pocket flap - This is a single layer of fabric with an applied facing edge, into which the trim is inserted.  The edge of the edge is raw, the trim has raw edges (VV had bias-silk Gazar; I used a thin jersey knit).

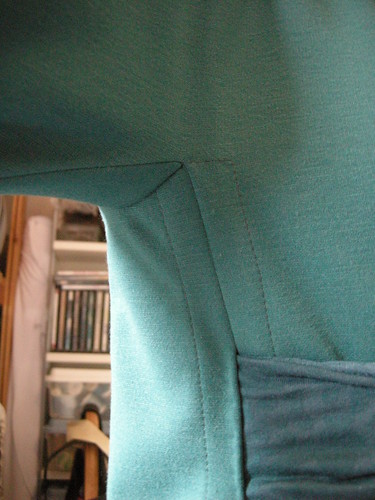
The underarm gusset and side panel.  The latter has wide 1" (2.5cm) seam allowances which are topstitched (I used a triple-stitch about 4.5mm long).  You leave two openings in this seam - the upper for the belt and the lower for the pocket (the flap is decorative).


I had to tack the belt to the back of the side seam opening to keep it from rolling down to the bottom of the opening, making the jacket look even more bathrobe-ish.


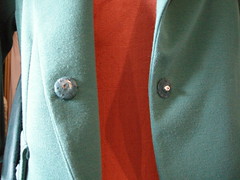
A covered snap at CF.


I'm moving on.  Time to tackle the Jalie jeans pattern, and I need a nice pair of shorts.

Sunday, November 15, 2009

Back where I started

Ripping and testing and re-sewing are not my favorite sewing activities, but sometimes you just have to force yourself to do them.  In fact, I rip and re-sew quite a lot because I'm a perfectionist.  However the ripping done on this coat is far beyond what I'd normally expect to do in a given sewing project.

I basically wasted 2 sewing days ripping out what I had sewn, making changes and then advancing back to where I should have been last week.  Now I have a functional gusset and a lining that shows more of the promise of the coat-to-be.

After I figured out, using the muslin, where the gusset needed to be and how big it should be, I transferred the necessary details to my pattern and then to the side fronts and backs of my partially-sewn lining.  Of course, this meant I had to rip.  While I was taking out the side/underarm seams, I decided that at the same time I would have a try at fixing another problem with the lining as first sewn - the sleeves felt too bulky and too narrow.  So I also removed the Thinsulate from the sleeves.

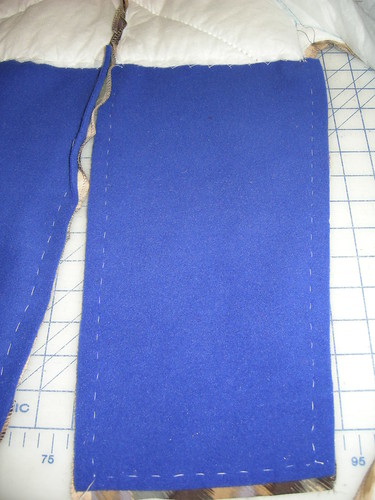
I decided to replace the Thinsulate with some 200-wt polar fleece.  Here you can see the new pieces, hand-sewn into place.  Yes, you read that right!  The sewing lawyer (who has been known to wonder what those thin and sharp metal objects known as "needles" are for) basted these babies in by hand.  I did it because the sleeves, which are slightly on the bias since they're cut-on, were stretching longer and narrower when machine-basted to the underlining.  When I realized how much narrower they were than the just-cut pieces of polar fleece, I knew I would get better control and have less reason for more growling in the sewing room, if I just bowed to inevitability and basted them in by hand.

I recently bought a life-time supply of white basting thread from a charming lady who runs a tailoring supply store in Montreal.  I own needles.  I have no excuses!  I didn't even mind the hand-sewing activity.  I laid the very bulky coat out on my cutting table, as you can see in the picture, and did the sewing while standing there.  It was quite Zen...  Changing the underlining to a less-bulky one, and paying attention to the stretch factor solved my too-narrow sleeve problem very nicely.

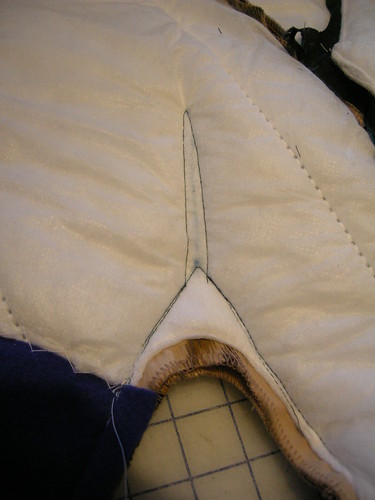
I then stitched around where I would alter the underarm area to insert the gussets.  Pictures speak louder than words, and here is one that will explain what I did.  Between the lines of stitching, you can see the gusset marking.

I sewed the new underarm seam up to but not over these lines of stitching.  Then, I slashed up between the lines of stitching. 
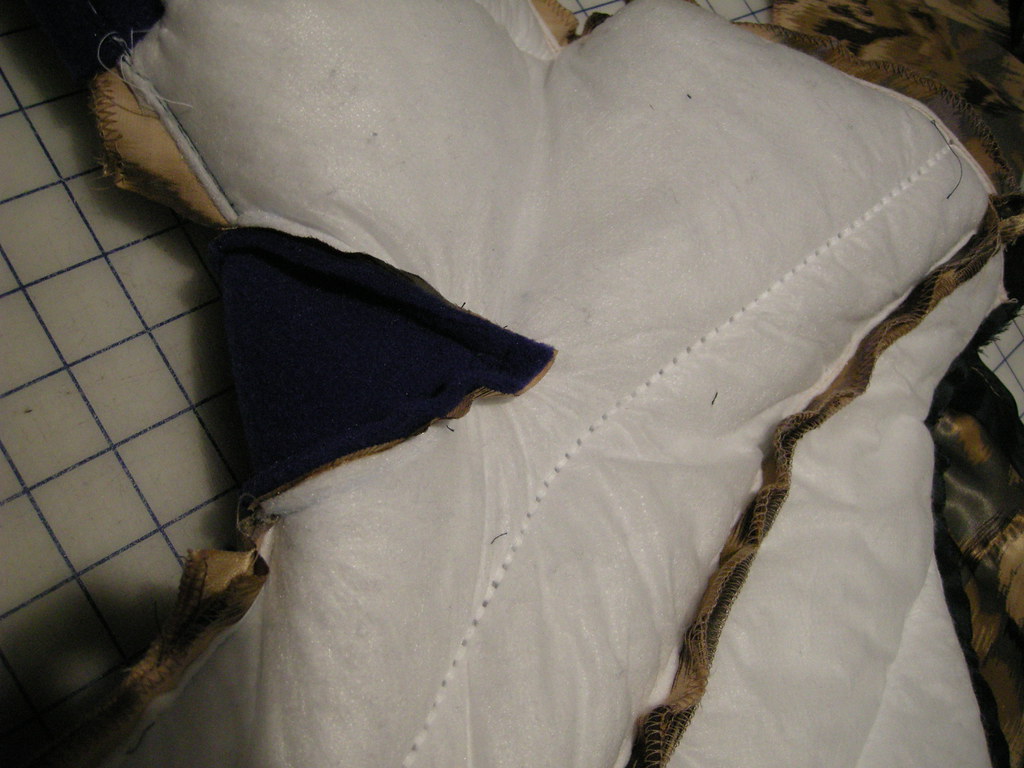
After that, it was relatively easy to sew the gussets into place.  Don't be fooled - I didn't do it in one pass.  I went over the pointy ends several times to ensure that on the inside, there were no little raw edges peeping out.  I am relatively confident they will hold, and if they don't I have that "needle" thing and am not afraid to use it!

And look, now I can move my arms!  This modification should be invisible in the finished coat.  But what a difference it will make...

Wednesday, November 11, 2009

Retrofitting the coat pattern - next time, make the muslin first!

In response to my plea for help, several of you responded (thanks!!) to reassure me that gussets are not really all that mysterious and that I could do it.  I am not all that afraid of the sewing of the gusset - what has required more mental effort is the notion of exactly where the gusset should go, and what shape and size it should be to make this coat actually wearable.  This problem brought the sewing on the actual coat to a crashing halt.  I backed up to muslin stage.  If only I had started with such a step, instead of having to down tools in mid-project to "fix" a bad pattern!  (Will I ever trust Burda again????)

I assembled a muslin out of a rather stiff canvas-y fabric so that I could test my gusset-making skills.  I've taken photos along the way to document my attempts, failures and "progress".  It does not really feel like progress when you start to progress from 3 steps back!

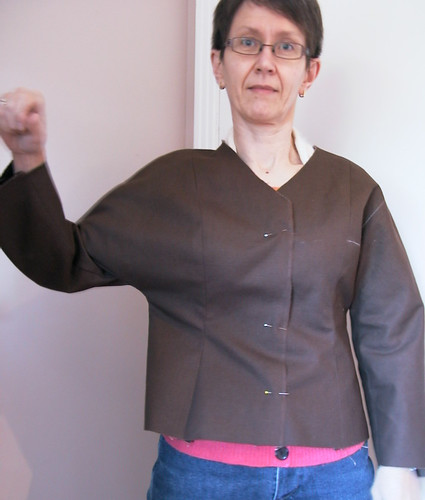
Here are my muslin demo pictures:
On the right sleeve (to the left in the photo) you can see the original design.  I have no range of motion because the arm attaches to the body of the jacket far too low.  When I try to lift my arm, the body of the jacket comes right along.

The next step was to figure out how far into the jacket body to slash so that I could insert a gusset.

I did this very unscientifically!  Wearing the muslin and looking in the mirror, I took a white marking pencil and located the top of the slash by feel/instinct where it seemed that if opened up to that point, the "hinge" connecting the sleeve to jacket body would give me enough room to move.  Then I had my husband figure out where the corresponding point would be on my back.  
This turned out fine, somewhat to my surprise.

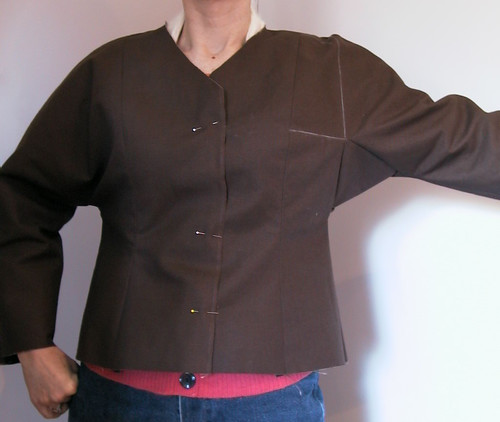
On the left sleeve (right of the photo) I have inserted a gusset which turned out far too big.  I did not modify the original underarm seam.  With that very low underarm, I needed the gusset to be this size to achieve an acceptable range of motion for my arm.  However, it is UGLY!


On to my next experiment.  I realized I could turn the original upside-down U shaped underarm seam into a higher pointy-cornered seam.  In the next photo you can see my pencilled changes on the pattern piece for the back, including the line up into the body of the piece, which marks the slash where the gusset will be inserted. The effect of this change is to raise the insertion point for the gusset, meaning the gusset will not have to be quite so wide to give the same range of motion.

And here you can see the result of the smaller gusset (inserted in the right sleeve, to the left of the photo).  It's a little cleaner looking than the big gusset on the left sleeve.

I look a bit happier with this experiment now.

Wish me luck translating this change, and a few others I thought of while puzzling over this problem, into my actual coat.

Sunday, November 8, 2009

We have a problem!

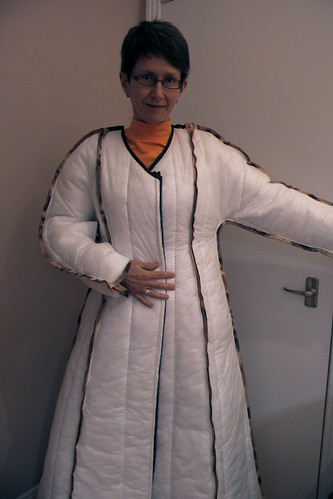
My husband says my latest project, in progress, looks like a cartoon drawing of a coat.  Proof is in the picture to the right. 

I'm not so troubled by the look - what you see is the Thinsulate, which has been sewn to the lining and facings.  It'll be covered by the fashion fabric, once I get further along.

My problem is the fact that the sleeves leave me with virtually no mobility.  The depth from shoulder point to underarm is about 11" (28cm) which is FAR too much.  The arm parts from the body just a bit higher than my bottom rib.  Methinks I will have to insert a gusset.  This does NOT make me happy!

I'll have to read up on gussets.  To free up the sleeve from where it is tethered next to my ribs, I figure I'll need to slice at least 9cm (3.5") up on either side of the underarm seam.  I'll first open the seam, figure out the placement for the cut, and sew a line of stitching on either side to anchor the lining fabric and Thinsulate.  I'm not looking forward to the sewing of the gusset.  I think I'll underline it with something less bulky than the Thinsulate - perhaps some 100 weight Polartec. 

What say any of you experts reading this?  All advice including references to articles or books will be gratefully received.