Tuesday, May 28, 2024

The completed Olya Shirt - along with some more observations about the drafting and instructions


Aaaaand here it is. 

Disclaimer - the shirt might look better if I had chosen a drapier fabric, perhaps linen. This is fairly stiff chambray from deep stash (chosen to test the pattern and not because I love it) and I doubt it's pure cotton. However, this fabric, being less forgiving, highlights some features (issues) of this pattern arising from the unusual draft.

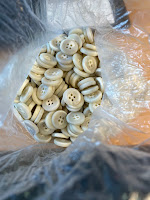
I could also probably have chosen nicer buttons in a better colour but ... stash. I have a million of these. 


So let's talk about these features.

After I let loose my frustrations regarding the pockets, I moved on to the "interesting" task of assembling the sleeve/yoke/body combination. 

The back pattern pieces (yoke and lower back) look about how you'd expect for any shirt pattern. However, the lower front and yoke/sleeve combo do not.

You can see how the yoke piece and lower front join up above the pockets. And that inside corner? Well, it wraps around the shoulder seam and armscye edge of the back yoke piece. And then, the sleeve does a bit more wrapping under the arm until the pointy bit at the top in this image joins along the veeerrrrry tiny armscye curve of the lower front and then operates as a continuation of that yoke seam. It extends right to the shirt cuff. 

So there are a couple of tricky bits of sewing associated with this. The first is joining the inner corner of the yoke/sleeve piece to the outer corner of the back yoke. 

I have joined this type of seam many times in my sewing career. In fact, there was the same type of inside outside corner in the dart of one of the first dresses I ever made

Until now, the instructions I've seen go like this: 1. Sew a line of stay stitches just inside the seam line (on the piece with the inner corner) for a few cm either side of the corner. 2. Clip from the inner corner up to the pivot point of the stitching, but without cutting the thread. 3. Line up the pieces with the edges even. Sew along the seam line, pivoting at the corner. 

Sometimes, especially if the inner corner is sharper than 90 degrees, you are told to reinforce this with a tiny square of bias cut fabric. Here is a Style Arc tutorial adopting this method and one from Threads Magazine

A key element is that during sewing, the stay-stitched inner corner is on top so you can see what you're doing. I usually put a pin at the pivot point and sew (carefully) right to the pin before removing it and (with needle down) turning the corner. Or you can do this in two passes, as Kenneth King instructed for Threads Magazine.

Cranky old lady warning!

I do not understand why the Paper Theory abandoned this tried/true approach in their instructions for the Olya Shirt.  

They tell you instead to sew this seam without any form of stabilization for the inner corner. Moreover, they think you ought to sew it with the yoke (outer corner) on top. Sew merrily along until you get to the (concealed) pivot point. Then, with needle down, "rotate the whole garment until the next seam is lined up in front of the presser foot in the correct position to sew. You will then need to cut a small slash line from the inside of the bottom corner. Don't cut it right to the needle, stop about 1-2 mm away from the needle."

The photo is from Paper Theory's sew along tutorial.

No thank you. The likelihood of sewing in a hard little pleat or (worse) leaving a small hole at this critical point is far too high. 

The other "interesting" bit in the Olya pattern is its very small (really vestigial) front armscye. This is a truly atypical underarm/armscye. 

In a typical garment (illustrated at left) the lower front armscye and the lower back armscye may look a bit different but they each feature a right angle corner at the side seam. Once the seam is sewn, there is a smooth continuous curve under the arm. 

Then the armscye continues its curve up towards the shoulder. In the front, the inset of the armscye recognizes that your arms take up space at the side of your body, typically more space in the front than the back. Moreover, they move most naturally forward. So the inward curve of the front armscye lets your arms move naturally while you are wearing the garment. 


In the Olya, the lower back armscye looks pretty normal. 

However, the armscye in the lower front is a really tiny and barely curved indent. It looks nothing like the back. When you sew the side seams, the front armscye is so minimal that it practically disappears. Where there would usually be a somewhat horizontal curve under the arm in a typical garment, in the Olya there is an acute angled corner. 

In the photo at left, the lower front pattern piece is sitting on top of the lower back. The front armscye is barely there.

Initially I thought it would be impossible to sew these two pieces together to produce any kind of armscye that would work. The front armscye curve is so shallow that it's less than the 1cm seam allowance in depth. In other words, if you ran the side seam straight up from the bottom of this curve, you would still be sewing on the fabric of the front yoke. 

I went to the trouble of drawing the seam lines on both pieces and measuring the length of the entire armscye seam and comparing it to the length of the sleeve cap seam from the pivot point. They matched, so I proceeded, suspending judgment.

At right is a photo of the two pattern pieces with the side seams aligned, on top of the actual shirt body after the side seams were sewn. 

See what I mean about an acute corner under the arm?

To sew the sleeve around that corner without puckering was not easy. If memory serves, I did a line of stay stitching along the armscye and then I needed to clip into the bottom of the underarm "curve" near the side seam to facilitate sewing the relatively much shallower curve of the sleeve. 


The last thing to do in assembling the shirt body is to sew the rest of the yoke/sleeve seam. 

The lengths of these pieces matched (thankfully) but the front yoke/sleeve nevertheless seems to me to have too much fabric relative to the back. Have a look at these photos of the shirt when it is spread flat on the floor.

This first picture is lined up just like the line drawings in the pattern. The front yoke is perfectly flat. The lower back sleeve wraps up under the armscye to the lower edge of the perfectly on-grain edge of the front yoke/sleeve piece. 

But notice where the side seam is. It has wrapped around to the front of the shirt. The line drawing does not show this happening. Presumably, the illustration is meant to show the shirt folded flat along the side seam.


If I reconfigure the shirt so it is folded along the side seam, see what happens in the front yoke? It bubbles. It will not lie flat. This seems to me to demonstrate that the upper front of this shirt body/sleeve is actually wider than the back. 

Which would be exactly opposite to the usual human body (anyway, mine), which needs more width in the back than the front (because arms typically sit forward of the midline and mostly move forward).  

Maybe the pattern could be adjusted so that the front yoke/sleeve seam would be shorter than the back sleeve seam. Or maybe there could be some kind of fisheye dart that would remove fabric in a vertical line from the point of my shoulder down to the bottom of the front armscye. 

OH WAIT! That would start to look like a conventional sleeve/armscye combination. Which would kind of miss the apparent point of the Olya Shirt pattern.


Which brings me to the question. So Olya, what about the fit? 

Well, it's a baggy shirt. Which is as advertised. I will probably wear it open most of the time, as an overshirt. 

It looks OK. I like the collar. The cuffs/plackets turned out well. The length is right.

But there's definitely extra fabric in the front sleeve/shoulder area. It generates diagonal folds in the sleeves. Even when I am sort of trying to hold my arm out straight and slightly back I can't really get the yoke to lie flat.

The sleeves are too long for me, but this is normal. I can roll them up, and probably will. I could shorten them, if there's to be a next time. 

The back looks like a normal loose fitting shirt. 

By the way, I sized down and made the smallest size (6) even though my bust is closer to the body measurements for size 8 and my hips are closer to size 10. 

The final verdict is that I do not love the Olya Shirt anywhere near as much as some others apparently do. It is merely OK. Too bad. 


Monday, May 20, 2024

Oh dear - Paper Theory Olya shirt pattern

So I'm making the Olya Shirt pattern in trial fabric found in stash. As with my last foray into indie shirt-land, I fell for this pattern as a result of seeing really lovely versions on line. Such as this one, from Love, Lucie.

I'm not finished yet, but felt moved to write about my experience wrestling with making the pockets as per the instructions. On further investigation, I realized that the vast majority of the versions out there (not Lucie's) had omitted them. Hmmm there must be a reason for that?

Yes! There is! The pocket instructions are (to put it charitably) almost incomprehensible as well as physically very difficult to accomplish. And yes, I do realize that there are tutorials and videos out there. Even on the Paper Theory website. But they did not help. 

This doesn't need to be so, surely. The first time I made a blouse with pockets of this type was in the 1970s, using a Vogue American Designer pattern (#2281, Scott Barrie). I remade the same blouse in 2013. I sewed these pockes with French seams! Both times! With no problems!

The key difference between the Vogue pattern and the Olya shirt is that the Vogue pocket bags were cut on to both the yoke and lower front pieces, whereas the Olya shirt has separate square pocket pieces that have to be sewn to the yoke and lower front pieces. 

So the Vogue instructions (pictured) were to sew these pieces together around the pocket bag. When assembled, the lower front pocket folds down, the upper pocket hangs down, and the seam allowances lie nice and flat all around the pocket and the yoke seam, pressed towards the hem of the shirt. The pocket is very fluid because there is no seam along its upper edge. 

That's not what happens in the Olya shirt. Because it has separate pocket pieces, there are two separate seams at the top of the pocket. One seam is between the lower front and the pocket bag sewn to the lower front, and it is edge stitched on the pocket bag side and folded in on itself (seam allowances caught between the lower front and pocket bag. 


The other attaches the second pocket bag piece to the yoke. The Olya illustrations say that after sewing these seams and understitching the lower front pocket bag, you are to sew the pocket itself WRONG sides together (sewing right up to the upper edge of the pocket bag) and then turn the pocket so the seams are enclosed within it. Then you are to sew the yoke seams (either side of the pocket opening). And then, somehow, you press the seam so that all seam allowances are ABOVE the pockets, where they will later be topstitched in the manner shown in the line drawing. 

Okay, but this (at right) is what happens if you sew the pocket bags wrong sides together all the way to the top of the pocket bag, and then turn the pocket so the seams are enclosed within it, and then sew the yoke seam to either side.

We're looking at the yoke/pocket seam. The lower front/pocket seam is underneath. The pocket is to the top right of the photo and the yoke piece is on the lower left. 

There is some nasty folding/wrinkling happening at the junction between the pocket bag and the yoke seam. There is no way that little sucker is going to lie nice and flat, even with careful pressing (which I admit to not having done for this photo).

Now the instructions say that you "might" need to clip into the seam allowance "for this to lay all flat and in place". But they are much less than clear as to what exactly you need to clip. Clipping wasn't going to solve the entire problem. Plus, as far as I could tell, the instructions wanted me to clip into the exact point where the yoke seam and pocket opening joined. I was worried this would weaken this critical point. 

My fears were not allayed by further investigation on the Paper Theory website, which has a long set of tutorials on sewing this shirt. Here is their photo - sewing that seam after clipping right to that point without leaving a little hole at a critical point is not going to be easy. 

So what did The Sewing Lawyer do?

The first step was to unpick the sewn-wrong-sides-together pocket bag. While I can appreciate the beauty of a pocket that has no cut edges visible on the inside, I couldn't see the point here, especially since the cut edges are not enclosed by a second line of stitching around the pocket bags. Rather, the seam allowances would be inside the pocket. I'd rather have them on the inside of the shirt. 

The second was to serge the yoke seam edges because my fabric frays and I wasn't sure I was going to get a second chance. 

Then I sewed the pockets right sides together, serged the pocket bag edges, and considered. 

As you can see, the inner pocket bag (attached to the upper yoke) is lying nice and flat with its upper edge above the yoke seam. But the seam itself is open. What did I need to clip to get the seams to lie flat so they could be pressed up, ABOVE the yoke seam?
Just this. So simple. Clip into the seam allowance of the lower front piece, a bit to the side of the pocket opening. No stress on any critical point. No bubbles. No worries. Why couldn't Paper Theory just say so?



Wednesday, May 15, 2024

Another pair of Shop Pants

 
"Muslin"

I'm pretty sure that loosely woven wool tweed isn't a suitable muslin fabric for a pair of jeans, but whatever. I was confident enough of the fit of the Shop Pants pattern to go ahead and cut it out of rigid denim this time. I'm much happier with these than my expression would suggest. 

Silly me, it was only when I got to the step of sewing the side seams (FYI that's after finishing the front and back pockets and the fly, and stitching and topstitching the inseam and crotch seam) that I discovered I had not fully adjusted my revised pattern and the side seams didn't match! The front was approximately 2.5 cm longer than the back. 

Whoops! But The Sewing Lawyer does not easily back down when confronted with a sewing setback.

I briefly considered redoing the back with a narrow yoke but then figured I could shorten the front a tiny bit at CF and more at the side seam (like maybe 1cm), and then sewing the waistband on with a really uneven seam allowance (normal 1/2" in front, much less in back) and it would all come out in the wash.

And so it was, although honestly, when seated I feel like I could use that extra bit of length in the crotch depth, at least until the denim does its thing and stretches out. (For future reference, self, I adjusted the paper pattern to add enough length in the back so it matches the front.)

And so I have new jeans! These are absolutely rigid, very dark indigo (blue fingers dark). The pocket bags and waistband facing are leftover fabric from my newest pajamas. As you can see in the photo at right.


I didn't even think about trying to make a buttonhole in the waistband. I just got my trusty Dritz heavy duty snap pliers out, and went to it. First time! I love these snaps.


I'm happy with the fit and shape of these jeans. They look good in the front and (if I say so myself) in the back as well.