Showing posts with label sports gear. Show all posts

Saturday, August 29, 2015

Jalie hits it out of the park - again!

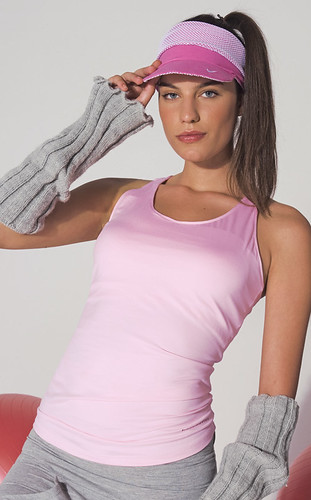
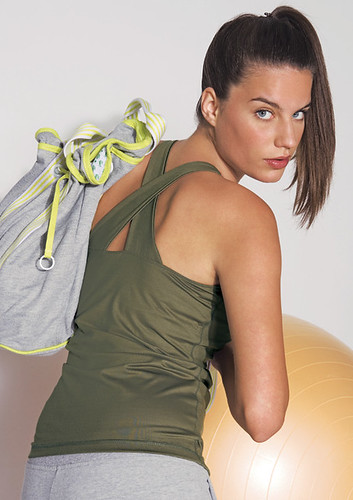
More new workout clothes for The Sewing Lawyer. And this is a great workout top! I know because before I took photos this morning, I did an hour of yoga, and the top performed like a champ.

Jalie 3463 has 2 basic shapes - a flared mini-length dress or top, and a slimmer fitting top. This is the slimmer fitting top.

I'm not totally sold on my colour-blocking choices. When worn with black bottoms, the black lower side panels disappear and make it look like I'm wearing an odd apron.

There's an elastic-topped pocket in back, which I may never use.

Hmmm don't get the idea that I'm less than thrilled with my new Anne-Marie. That would be wrong because it is actually a perfect design - it fit me right out of the envelope (size R per my bust measurement) and it's supremely comfortable. I'll be making this again, soon.

Don't forget, The Sewing Lawyer has an extensive stash. I've got a black/red combo in mind for my next effort.


Sewing details, you ask?

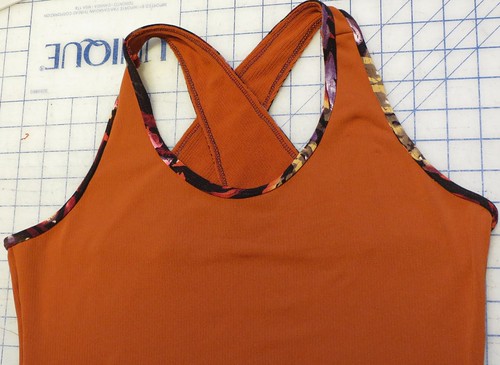
Inside front
Inside back
It has a built-in bra which due to my fabric choice (power net) and the fact that I doubled the front with the 2 pieces cut in opposite directions) is extremely secure. I also lined the upper back with the power net to ensure it had the same degree of stability as the rest of the shoulder area.

The instructions to put the top together are pretty incomprehensible until you have the bits in your hands. Just follow the words and don't try too hard to decode the drawings. They are accurate, but I didn't find them that helpful because it just looks complicated.

The trickiest part is when you are sewing the second shoulder seam and arm opening. There is a definite risk that you'll end up with something that is literally impossible to turn right side out. In these situations I find it helpful to lay the item down flat on a table or my lap with the right side out and all the bits you have to sew together (in this case the side front, strap and back parts along with the inner bra structure) in the configuration you want them to be in after you have sewn them. Then I pick an easy spot on the garment (I picked the princess seam in front) and its matching spot on the thing you need to sew it to (the inner bra), turn them RS together at that point, and pin. Then you can work your way along the seam you have to sew. In this case you end up, as the instructions say, with the garment "sandwiched" inside the strap you are sewing. Just go with it and keep pinning. Then sew (if you don't trust it, sew a straight stitch that can be pulled out if it didn't work).

I used my serger (3/4 safety stitch with woolly nylon in the loopers) to sew the seams and my coverstitch machine for the under-stitching. Hopefully practice will eventually make perfect - I'm not there yet but the hem worked pretty well.

The only change I made was to under-stitch the elastic at the side/back as I found it was not lying flat without this. If I was seriously considering using the pocket I might try to make it into two compartments because it's pretty big.

Saturday, August 22, 2015

Negative! (Ease, that is)

I've been working out regularly for 6 years or so. With a personal trainer. And with weights. I wish I had started earlier because it would have helped to prevent my bones from deteriorating (which they are doing, damn them). You younger ladies, pay attention! There's lots of good information here.

But I digress. Working out is not a lot of fun in my opinion, but it is ever so much more bearable if you are wearing comfortable and stylish workout clothes. There are so many more options now than there were the last time The Sewing Lawyer made such items in 2010. The shorts and tops I made then are still in regular rotation and look pretty good, but to be honest they don't fit all that well (since I lost 15 lbs a few years ago) and I just want new stuff.

I still have my Kwik Sew patterns from the 80s but last week, I bought two of the newest Jalies - the "Cora" tights and the "Anne-Marie" top. It was definitely time. Plus, I have to keep up my relationship with my Coverstitch machine.

Stash diving was productive - in 2010 I bought quite a lot of stretchy stuff at Susie Spandex at PatternReview weekend Montreal. Plenty to cut out a new pair of shorts to test out the Cora pattern.

Back - inside out
Front - inside out
They are very plain given the number of seams and opportunities for colour blocking, but I decided to make these mostly black. The only shot of colour on the outside is the pocket backing, in turquoise. My little surprise.

The inside shots do a better job of showing the construction of these shorts than the modeled photos, because my wooly nylon thread is grey rather than black. There seems to be a little shaping built into the seams, but most of the fitting work is done by the lycra.

I'm pretty chuffed at my stitching on these for two reasons. First, I stuck with the woolly nylon in the loopers through numerous tests (during which the upper looper thread broke again and again) until I figured out that I had to loosen the looper tensions ... a lot ... to keep the thread happy. No breaks were experienced during actual construction (YAY!).

Second, I maintained my state of non-intimidation with respect to my coverstitch machine. I started with the black on black shorts rather than the more colourful Anne-Marie top (to come) so that my mistakes would be totally invisible as indeed they are. Stay tuned to see if I can maintain my track record with the top, where I've chosen to use more colour.

I made size T based on hip measurements and was pretty skeptical that I'd be able to fit into these as they appear, off the body, to be big enough only for a child. I kept the faith in the negative ease though, and look!

The only change I made to the basic pattern was to cut 25" of elastic for the waist rather than the 22" Jalie thought would be A-OK for a size T person with a 29" waist. Seriously? A 6 year old has a 22" waist (according to Jalie's size chart). The extra 3" was a little bigger than the actual circumference of the waist band piece so it was a little awkward to sew, but once I put it on it all expanded nicely and without cutting into my much more than 6 year old flesh.


Thursday, November 29, 2012

New machine

It was switching my serger back and forth from serge to coverstitch that did it.  Remember, the swimsuit?  I broke down and bought a dedicated coverstitch.  It's the Janome 1000CPX.  Does one thing with three variations, and does it well.

Of course I had to try it out right away.  Of course, I didn't pick an "easy" project.  I made a fleece yoga top from the November, 2007 issue of Burda Magazine.

It's simple enough to put together. Front, back and straps.

But the fun part was adding a jersey fabric binding at all edges.  It's the technique I wrote about here.

I had to do quite a lot of practice strips to get the hang of coverstitching through 2 layers of fleece and 3 layers of jersey.  The needles were not  consistently picking up the lower looper thread.  This is a problem because a coverstitch is an elaborate chain stitch, and any open loop means the whole shebang can pull out.  Experimentation revealed that it is important to use heavier needles and pay attention to the tension settings for heavier fabric.  Also, using woolly nylon thread in the lower looper produced more consistent results.

Anyway, this is my first effort.  Don't look too close.  I used scraps leftover from this top for the binding.

Experiment no. 1

Then I made another, using fleece scraps leftover from the jacket blogged here for the body, and jersey scraps leftover from the faux-wrap dress blogged here for the binding.  It's very cozy.  And I did a better job.  But I'm not showing you the hem.  It's not up to my usual standards.  

Experiment no. 2

They'll be nice and cozy as an under-layer for curling and skiing ... that is, if we ever get any snow.  


Sunday, November 4, 2012

Ready to make a splash!


Yup, The Sewing Lawyer has a new swimsuit, just in time for next week's two swim practices.  I'm very pleased with it - it's functional, feels comfortably long enough, and is snug without being too tight in any direction.

The fit and style are very similar to expensive RTW suits (i.e. Speedo, Tyr brands) except that those would have more contrast trim.  Of course, I could have jazzed my suit up as per the pattern but I didn't have any plain black or navy in 100% polyester in my stash, and refuse to consider a swimsuit with any lycra because they disintegrate far too fast.

The threads at CB are evidence
of the last basted fit 
While it's not particularly fancy, I expect this suit to be functional.  At 6AM it's only important that it covers what it needs to cover, and doesn't bind or shift.

After the adjustments I made to the pattern (detailed here), I proceeded cautiously because I figured that after adding the lining fabric to the front pieces the body would be less stretchy and after adding the elastic, the length would be less stretchy.  So I basted it together at least 3 times while in progress.

The elastic makes a huge difference to the security of the suit.  For next time, I'm going to try to remember that if the unelasticized suit feels sloppy and too long, it'll be just fine once an appropriate amount of elastic is applied.

I'm not 100% taken with the angle of the leg opening at front, but the back coverage is perfect with the width I added.

Innards - showing the front seams
My only complaint is that switching my serger from 4-thread safety stitch to coverstitch is a pain, and I had to do it about a million times.

Sunday, October 28, 2012

Bring it on Sandy!

So I needed a new swimsuit, but in view of the impending "storm of the century"* I REALLY needed a new pair of waterproof pull-on pants.  I bike to work.  I really hate taking the bus, and at this time of year I don't relish getting soaked to the skin.  I can keep myself (relatively) warm and dry with the right gear and my old pants had lost their ability to keep me dry some time ago.

Enter Kwik Sew 2841.  Published, the envelope tells us, in MCMXCIX (1999), this is a reliable recipe for non-sexy pull-on pants or shorts, which I already used to make my no-longer-waterproof pants.  The pattern has front and back pockets and a drawstring waist and lower leg finish.  Last time I added the hip pockets but left off the rear pocket, and used elastic instead of a drawstring.  This time I further simplified and omitted all the pockets.

I had traced the medium, which is roomy enough to fit over jeans (as shown below), let alone tights, which are my usual bike wear.  I knew from experience that the pants generally fit me for the intended purpose, but that I wanted the pleated knee to fall a bit lower, and more length generally in the leg.  So I added about 2cm at the lengthen/shorten here lines both above and below the pleats and the finished length is exactly what I wanted.

Without further ado, I introduce my extremely uninteresting but (I hope) very functional and long-lasting Gore-tex pants (shown with my more interesting and very functional Gore-tex bike jacket).

The pants are made from single layer Gore-tex which is probably no longer made or sold - its membrane is exposed and anything made from it must be fully-lined to protect the membrane from wear.  I bought this fabric from an on-line coop a while back.  I've been very pleased with its performance in my jacket.

Knee pleats in "action"
I had some iron-on seam sealant tape which I used up on the pants.  They are lined with some sort of horrid athletic mesh from my stash.  I didn't quite have a long enough or wide enough piece, so the back crotch is pieced and there is a "decorative" band of bright yellow horrid athletic mesh at the bottom.  It's our little secret. 


The only remaining question is whether I should attempt some kind of shoe cover out of the remaining goretex, or if the X-country ski gaiters in my closet will keep the worst of Sandy's rain out of my shoes.

* For anybody who is, as of the time I write this, living in a cave, or for those who are reading this post a long time after it was written, Hurricane Sandy is now forecast to combine with some sort of early winter storm and hit the east coast of the USA sometime early in the week.  It's also supposed to track north into Canada, where it will in all probability dump lots of rain on my city.

Tuesday, October 23, 2012

This could be boring

I swim regularly and a couple of weeks ago I lost my swimsuit when I absent-mindedly left it at the pool.  Who would take a used, wet swimsuit, you might ask?  I'm asking too, because someone did.

So I have fabric, a pattern, and elastic, and I'm not letting myself set foot in a store to spend money to buy more of the same, assembled into a bitty little scrap of a garment.  No-sirreee!

Instead, I spent an inordinate amount of time  assembling a muslin swimsuit from my pattern, Jalie 3134.  It took so long because my fabric (from Speedo according to the selvedge, 100% polyester, will wear like iron) has less stretch in the length than Jalie wants, so I had to guesstimate the length.  I'm wary because I used the fabric once before, to make a bodysuit, and it was too short.

Inevitably I overcompensated, and this post is intended, in part, as a personal note so I will remember what I did, should I ever decide to make this pattern out of similar fabric again.

I traced size R on top, S on the bottom, and used size V length.  I discovered that the inset on the front hip has no shaping in it and since I'm not using any contrast fabric, I have stuck the two pieces together.

I made my muslin out of slightly stretchier 100% poly and the length was fine.  Comparing the traced pattern and the pattern for my bodysuit, I found they were the same length so I added an inch of length to all pieces and cut out my suit.  So now I'm taking about half this extra length out on the fly.  I slid the centre front piece down by that amount and cut off the top and upper side and I did the same with the lower back piece.  I plan to adjust the side front in sewing, by sliding it down and cutting off the extra length at the leg edge.  I think there is enough wiggle room because of the straps to adjust the final fit once the elastic is installed.

Two more adjustments were needed for fit.  I took a wedge of approximately .5" (1.5cm) out of the inner edge of the lower back piece.  You can see why in the photo at right (published in the interests of science but with some trepidation, I must say).  Ignore the interesting moebius strap effect please.  (I'm wearing my ancient suit underneath to compare the shape and placement of straps etc.)

And to improve coverage at the side/back leg, I'm adding extra width there.  You can see the reason why at left.  That model has no butt at all.

Pink palm trees.  Probably not to be finished...


Sunday, November 6, 2011

I want to wear these forever

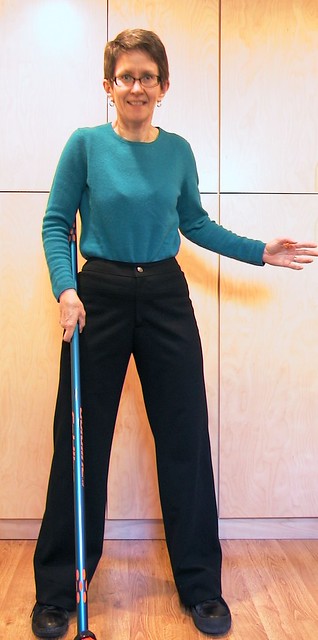
What's that, you ask?  The curling pants are finally finished.  And even though they haven't been tested in the large fridge that is the curling rink, The Sewing Lawyer predicts that they will be quite up to the task of keeping her warm, and not gapping or binding while the curious posture required in curling is attempted.

Behold
I've been wearing a pair of cast-offs since starting to curl a couple of years ago.  They are RTW, ripstop nylon lined with some kind of black synthetic knit fabric with a plush surface.  These pants sport a gathered elastic waist and cuffs, and have side zippers.  Ick.

Last year at Fabricland, the great Canadian chain store, they had a rather nice and very beefy ponte-type knit.  I couldn't resist and a pant length came home with me.  In stash, a mistake from on-line shopping years ago at Wazoodle, was quite a lot of of black synthetic (supplex nylon) knit fabric with a plush surface.  It's softer than the lining of my RTW pants, by a factor of 10 or so.

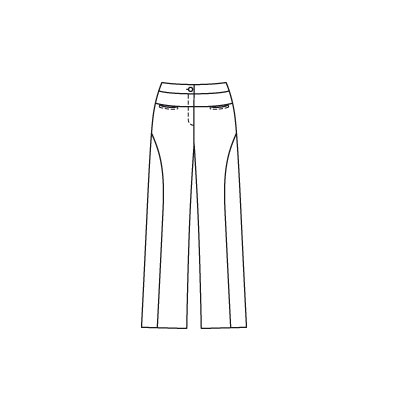
I muslined the interesting pants from the December, 2009 issue of Burda Magazine.  Here's the line drawing.

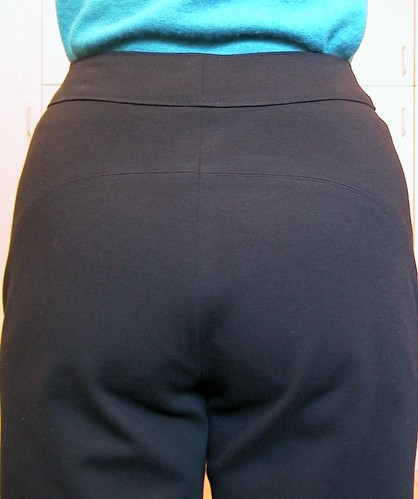
The curved seam goes around to the back where it incorporates the dart shaping needed, and makes a little yoke.

I left off the pockets.

The biggest challenges in making these were to ensure the seams would stay flat and smooth in both lining and outer fabric.  I sewed the pants entirely on my sewing machine, using a 1.5x1.5mm zig zag stitch which is stretchy but thin enough to press open.

For the outer layer, I topstitched using the same tiny zig zag stitch before trimming the seam allowances.  In the lining, I flattened the seam using a 3-step zig zag, and trimmed the seam allowance very close to the stitching.  This worked really well.

It's hard to take a good picture of a really black garment, and the camera finds every bit of lint!

To keep the waist and fly front relatively bulk-free, I used a cotton woven fabric for the waistband and fly facings, and the fly shield.  I also interfaced the outer waistband to reduce stretchiness almost to zero there.

Pretending to skip
This pattern has a nicely contoured waistband pattern with side seams and CB seam for fitting. I used my fold before stitching, always-perfect waistband technique, illustrated here, except this was the quick and dirty (i.e. not couture, no hand-sewing) version.  After the facing is pressed and folded as illustrated in the earlier post, pin it securely to all edges, and simply topstitch around the entire waistband by machine.  I used the little zig-zag again for consistency.

A jeans button (hammered in, no sewing!) and machine sewn hems through all layers completed these pants.

They are warm.
And they are SO COMFY!
I'm ready!


Sunday, October 2, 2011

Calvin Klein PJs

Bright red with fun jungle animals
This is fabric well aged, and used for exactly the intended target.  It's just a decade (or maybe 15 years) late in the arrival.  Now there's a bit more room in the stash containers.


Aside from the fact that the fabric was purchased in Europe (Grenoble, France, at Toto Soldes, which was lots of fun), the most interesting thing about these PJs is that I made the top from this Vogue Calvin Klein pattern (ca. 1979).

Obviously I took liberties with the sleeve length in the interests of night-time warmth, but more fundamentally with the attitude (suave, sophisticated) of this pattern.  Silk charmeuse?  Heavens no.  The Sewing Lawyer's Calvin Klein PJs are made of luscious 100% cotton jersey.  Printed with fun jungle animals (many upside-down) to boot.

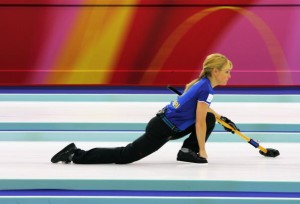
In other news, the curling season has started.  Which means three occupied evenings per week, so maybe even less sewing than before.  Curling is lots of fun for young and old, and involves moderate exercise which is countered by immediate post-game consumption of the drink of your choice and snacks.  It also involves periods of intense activity (trotting alongside rocks and sweeping like mad) but more time standing around in a fridge-like atmosphere.  This will be my third season as a curler.

Why am I telling you this?  Because I need to make myself some new curling clothes.  The pants I have been wearing for this activity ... I can hardly find the words to describe them.  It may be enough to say that they are RTW and handed down from my son when suddenly he got much larger.  He wore them long enough to wreck one of the snaps at the waist, which has not stopped his mother from wearing them for two long curling seasons.  And for cross-country skiing.  They are functional.

Famous Norwegian men's curling team pants from
the 2010 Winter Olympics
I am determined this year to kick things up a notch.  If not my game (my skip can count on me to be inconsistent), then my curling wardrobe.
The 2010 Canadian women's team,
skipped by Cheryl Bernard

#116 from November, 2009
There is one older woman in my ladies' league who always wears a deeply pleated kilt with black wool tights.  It moves wonderfully when she delivers the rock.  Everyone else (well, except the Norwegians) wears black pants.  My old ones are ripstop nylon, lined with some kind of synthetic knit.  It would be nice to have pants with more give to them.  Since they don't need to be windproof, I'm tending towards some thick and stretchy ponte-like knit in my stash, which is probably a rayon-poly-lycra blend.  I made my bike shorts from it and they are standing up very well.

After leafing through my Burda Magazines, I found a few pattern possibilities.  So far my favorite is #116 from December, 2009. It has some neat seaming. The back is also interesting - the curved seam turns into a back yoke, and there are vertical seams down the centre of each leg.  However, I think I'd do some major pocket modification.  Perhaps modest zipped side pockets instead of the "Look! Hips!" flaps.

If I had spiffy new pants, I might have to make a new jacket too.


Saturday, October 30, 2010

I made the same mistake ...

as Cidell.   All together now:  AAAAAARGH!

I made Kwik Sew 1680 (now oop).  

I didn't forget to check the stretch of the fabric against the little "stretch to here" diagram on the pattern envelope.  It passed in both directions.

I read Cidell's post and thought ... hmmm better check this so tried it on without elastic.  Seemed OK.

In the end (oooooh bad pun!!), it was too short.


My fix (no I don't think I'll be modelling it here).  Let's just call it a design feature.

This fabric is a swimsuit polyester made for Speedo but I won't wear this in the pool.  (The Sewing Lawyer feels it's her obligation to keep her personal trainer awed by her vast wardrobe of exercise togs.)  Inside is a shelf-bra made from the same super stretchy stuff (acquired in Montreal on PR weekend) that was used to line several sports bras, one of which can be seen here.

The fabric came from the Fabric Flea Market (you can find anything there, it seems).  Here's a tour through my FFM acquisitions.

 First, proof that this fabric really is Speedo, to the left.  $5 per metre.

Right, some regular nylon/lycra.  Same price (not as nice though).

 To the left is a soft shell fabric (I think probably Polartec).  It's a deeper colour than shown (at least on my monitor).  I have enough for a jacket.  Hello Jalie 2795!

This is a prize!  It's silk from Thailand, 3.5 metres for all of $25.  I thought it was an allover print (as below) but when I opened it up, turns out that half of it is a coordinating border print.  Need I add that it's entirely hand-painted?  Clearly it's intended for a specific type of use but I'm not sure exactly what.  Any ideas?


To the right is a lovely knit print.  I did a burn test which showed it is 100% natural, and washed/dried it in the machines without any change at all. It is definitely not rayon.  It seems too fine to be cotton.  I dunno.  It's pretty.  I seem to remember paying $15 for the piece (3m).
This one to the left isn't fairly represented because it's a really lovely deep purple rather than grey, in real life.  100% wool, lightweight and soft, $20 for the piece (another 3m).  A dress?
I could also join the white shirt sewing brigade with these two.  Pure cotton to the left (voile with more opaque woven-in floral pattern); lustrous cotton/silk to the right, also with woven-in pattern.  $30 for the 2 pieces.


Gotta get sewing....

Wednesday, July 21, 2010

More stretchiness


OK, I’m clearly running out of catchy names for this spate of exercise-related sewing I’m doing recently.  Here’s evidence of two more jacket-and-iron-avoidance projects.  I have finished my Champion technical T-shirt knockoff and made a pair of snazzy new bikeshorts. 

There’s not much to say about the bike shorts.  I used an ancient (ca 1989) Stretch & Sew pattern  which, by some miracle, is still on their website here.  This is the 3rd pair I’ve made.  If (as I do) you choose not to make the contrast side stripe, you can construct them from a whopping 2 pattern pieces.  Not front and back, but front/back (no side seams if you so choose) and a crotch gusset, which runs from left shorts hem to right shorts hem.   

I add another piece – a casing for the waistband elastic.  S&S says just to fold the top edge over too-thin elastic.  I’m either very long through the crotch as compared with S&S’s ideal figure (which is possible) or these bike shorts are meant to be a lot lower-slung than I prefer.  This is also possible, though doubtful, given the date on this athletic wear classic.  

One of my few fabric-purchasing goals for PR Weekend Montreal, since I knew we’d be visiting the favourite stretch-fabric buying haunts of Jeanne Binet (Jalie), was to buy a good beefy black something-or-other with lycra for new bike shorts.  My other pairs are very old and tired.  I found this absolutely fantastic bottom-weight which I think is RPL.  It’s very firm in its negative ease – easily the most comfy girdle-like garment I’ve ever worn!

The S&S pattern also has pieces to make your very own “seat padding” which I have done in the past.  However for this pair I installed a commercial pad (all curvy in 2 directions, laminated foamy stuff etc.).  I swear my bike goes faster when I’m wearing these shorts, so mission accomplished.  I’m going to make another pair while I am in the mood and will have to make the padding myself, so stay tuned for a post on that.

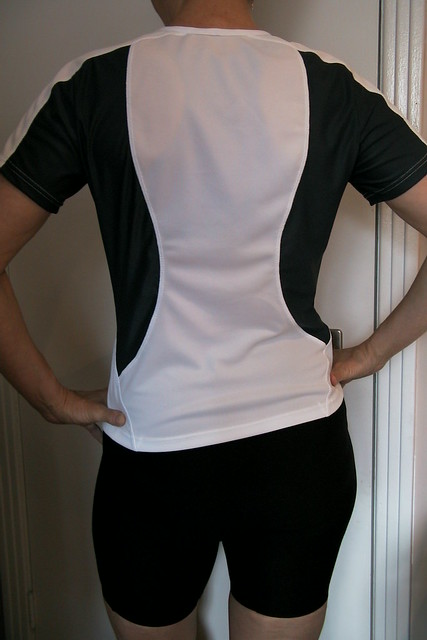
The shirt is one of 2 I’ve completed (a third is cut out) which combines a very stretchy mesh for the dark grey side panels and under sleeve, with a polyester athletic knit purchased some time ago from Wazoodle.  

To the right is the completed PMB pattern which turned out just as I wanted.  That is, it fits exactly like the original plain T-shirt before I started slicing and dicing it, and its style lines are more or less mimicking the commercial shirt I was trying to clone.  For once I got smart and drafted .65cm (1/4") seam allowances like Jalie does - this uses less fabric and I can sew with my serger by letting the blades just skim the cut edges.  The tiny seam allowances make it easy to sew the curved edges without puckering.  

I used the Jalie neckline technique  and it works marvellously even with the rather non-stretchy poly knit.  The stretchy panels stretch when I’m hunched over on my bike, so that the whole shirt doesn’t ride up.  To jazz it up and get rid of the puckering at the seams, I used a quasi-utility quasi-decorative stitch on my sewing machine.   

Tuesday, July 13, 2010

Still stretching

It is hot here!  Being inside, in non-air-conditioned discomfort WITH a hot steam iron going next to me, wasn't my idea of fun, which meant that very little sewing got done last week.  When the temperatures dipped, slightly, I got started on my knit jacket.  But the dratted thing is complicated!  I'm sure it'll go faster once the fronts are completely done.

In the meantime, I made two more sports bras.  They are ridiculously easy, take virtually no fabric at all, and don't require the iron.  Plus they are more comfortable than most things to wear these hot nights.  And the thought of working out in anything with more coverage is just not too interesting.  If this heat keeps up I may make a few more.

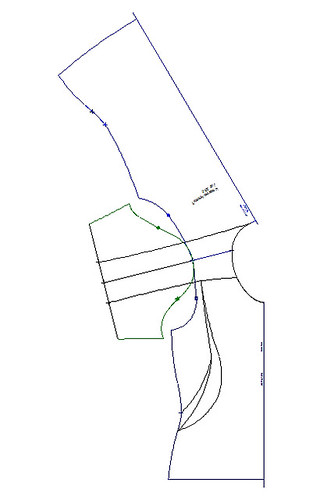
Tonight I took an break to monkey with a pattern I made for a T-shirt, using PatternMaster Boutique.  This is a software program that drafts patterns.  However, for me the real value is that it has a CAD (computer-aided design) component called Pattern Editor (PE for short).  Once you have chosen the various pattern elements you like in the pattern-drafting part of the program, you can tweak it using PE.  So fun!

(edited to answer Gail's question below)  My goal with PMB is to develop patterns for true basics that fit well.  I used it to draft (with PE to refine) a basic T-shirt pattern that fits quite well.

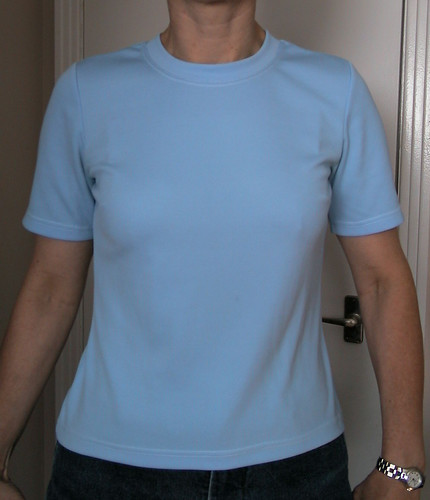
To the left you can see the very plain-jane shirt I made myself from this pattern a while back.  It's OK but not very flashy, and also it's a bit too tailored (in a not-really-stretchy athletic fabric).  I ride my bike in it and I want more room/more stretch across the back.  And more ventilation.


I went prowling on the www looking for more flash athletic wear and came up with the very technically-named Champion double-dry vented burnout shirt, shown here.  The main panels are probably similar to the fabric I used for my blue shirt (100% poly) and the side panels are a mesh fabric.  I have more of the poly which I purchased from Wazoodle several years ago and some stretchy mesh acquired in Montreal at PR Weekend.


So far my computer pattern looks like this.  Those multiple lines on the front will go - I took several tries to mimic the curve of the side panel.  Once I like the lines, I'll separate the bits, add seam allowances, print it, and sew it up.