Showing posts with label Vogue 2770. Show all posts

Saturday, March 19, 2016

Coat of many colours

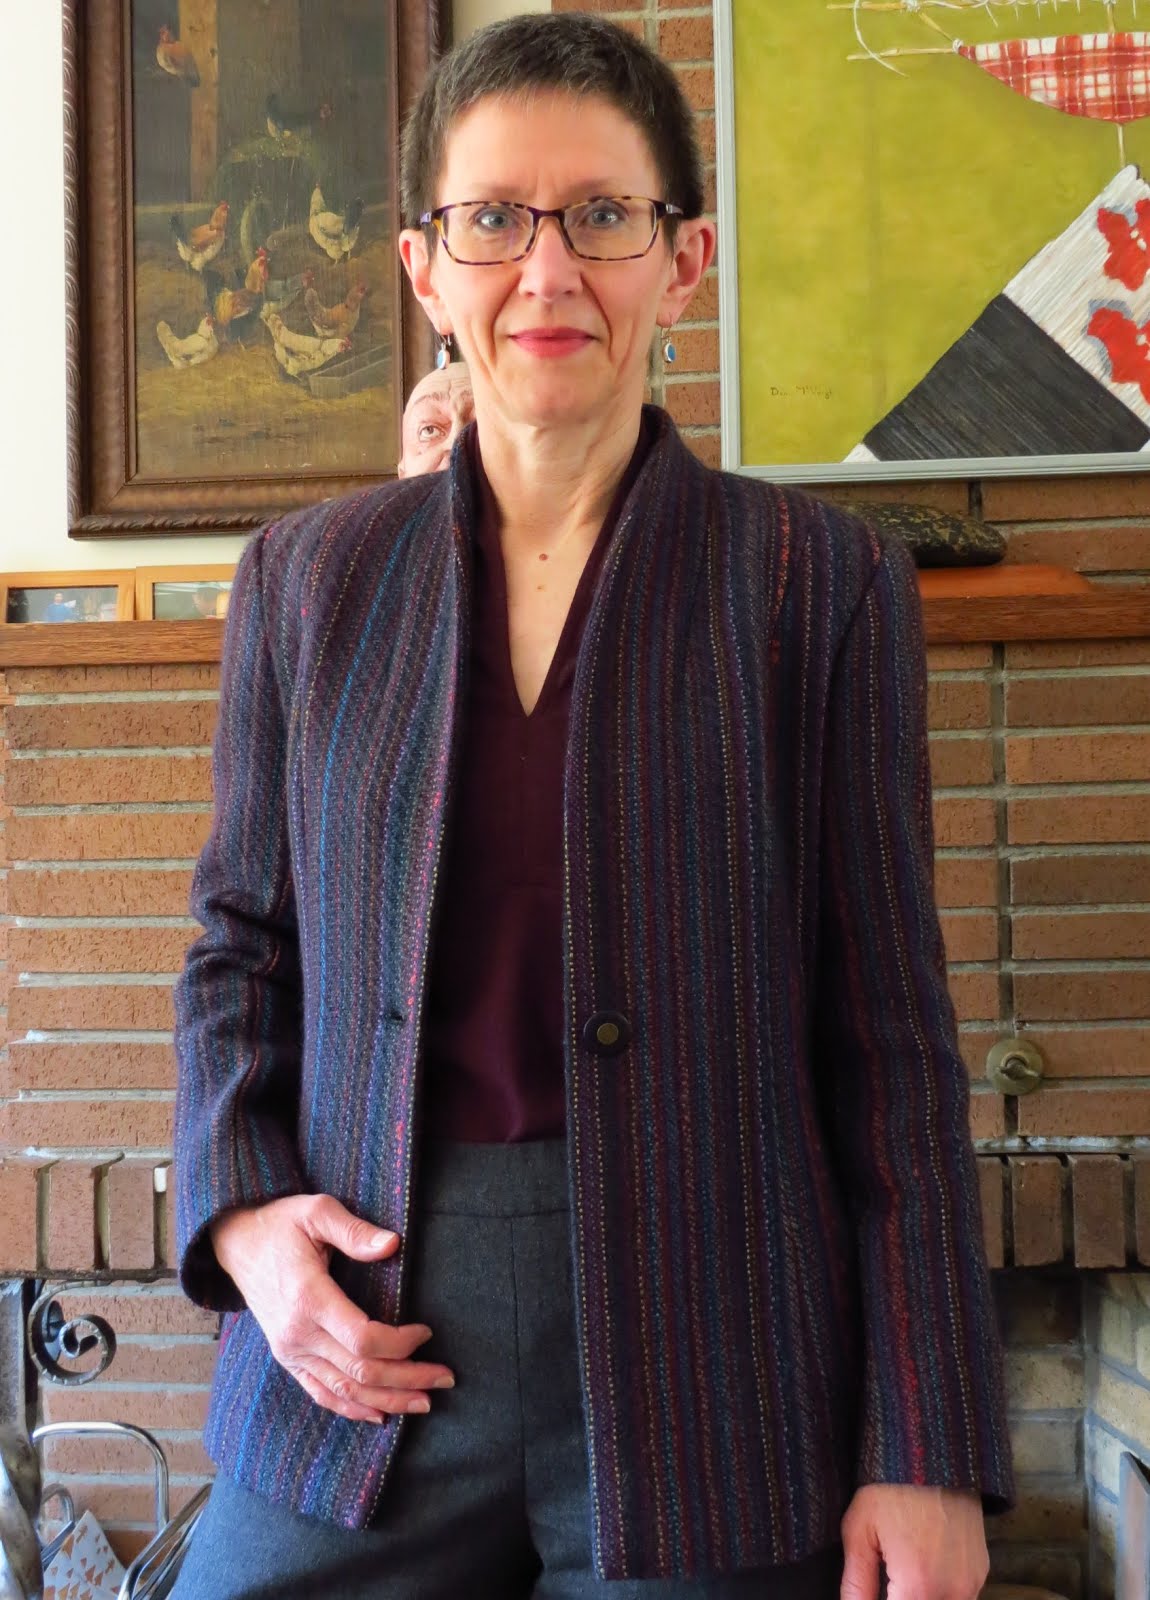
The photo at left is reasonably accurate in depicting the crazy colours in The Sewing Lawyer's recently completed jacket, and she likes all of them!

The jacket doesn't go with everything in my closet, but there are quite a lot of choices.

To the right, here it is with my new grey pants and a teal sweater (which is however hiding from view under the buttoned jacket).


Aubergine top
Or how do you like it with an aubergine wool top (Jalie 2682) and the same pants?


Or we could go with a dress. My new grey one, from BurdaStyle (August, 2012), is a natural.


Grey dress
Or a black dress (BurdaStyle, February, 2012).  I even tried it with a bright turquoise dress (Burda, February 2012).
Turquoise dress
Black dress

I do like what the crazy stripes do in the back.


It occurs to me that there is a hole in my wardrobe that could be plugged with a new pair of dark navy pants. You may not be surprised to learn that there is a pant length of such fabric in The Sewing Lawyer's stash. And something in a nice cherry red... So many possibilities, so little time!

Monday, March 14, 2016

Productivity

Sadly, my annual five week sewcation is over. Happily, it was more productive than ever, resulting in a swimsuit and exercise top, dress pants, a knit dress, two knitted cardigans (one by machine and one mostly hand knit) and the pièce de résistance, my new jacket. It was hardly a sweatshop, however, as I found time to do lots of other fun things too.

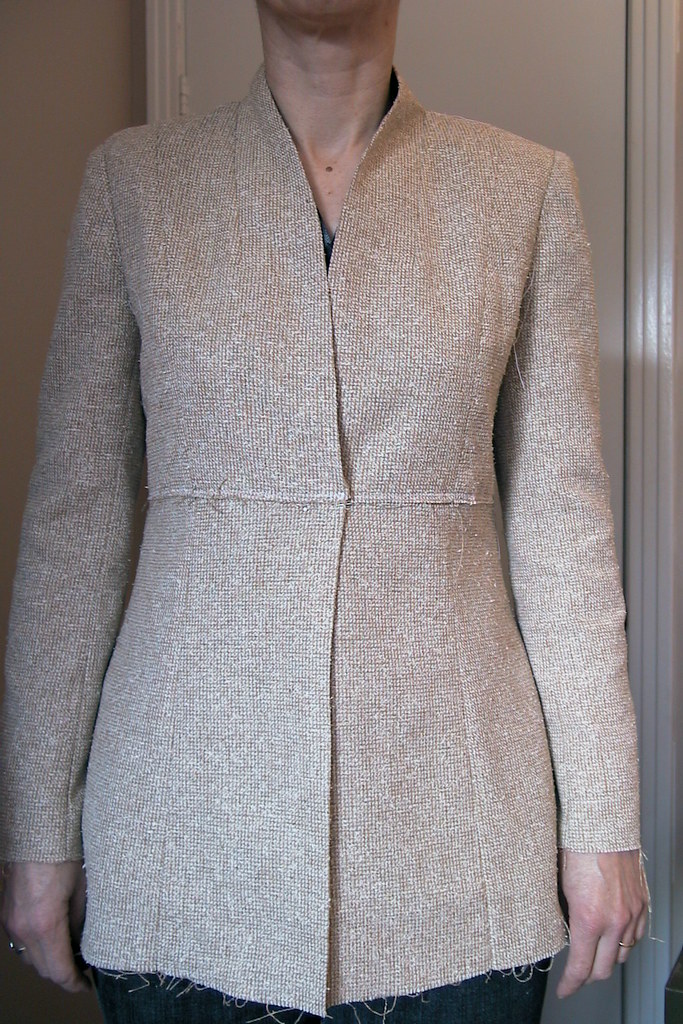
I'll post modeled shots of the jacket when I have time at home during daylight hours. But this is it. Vogue 2770, OOP, a Tamotsu designer separates pattern.

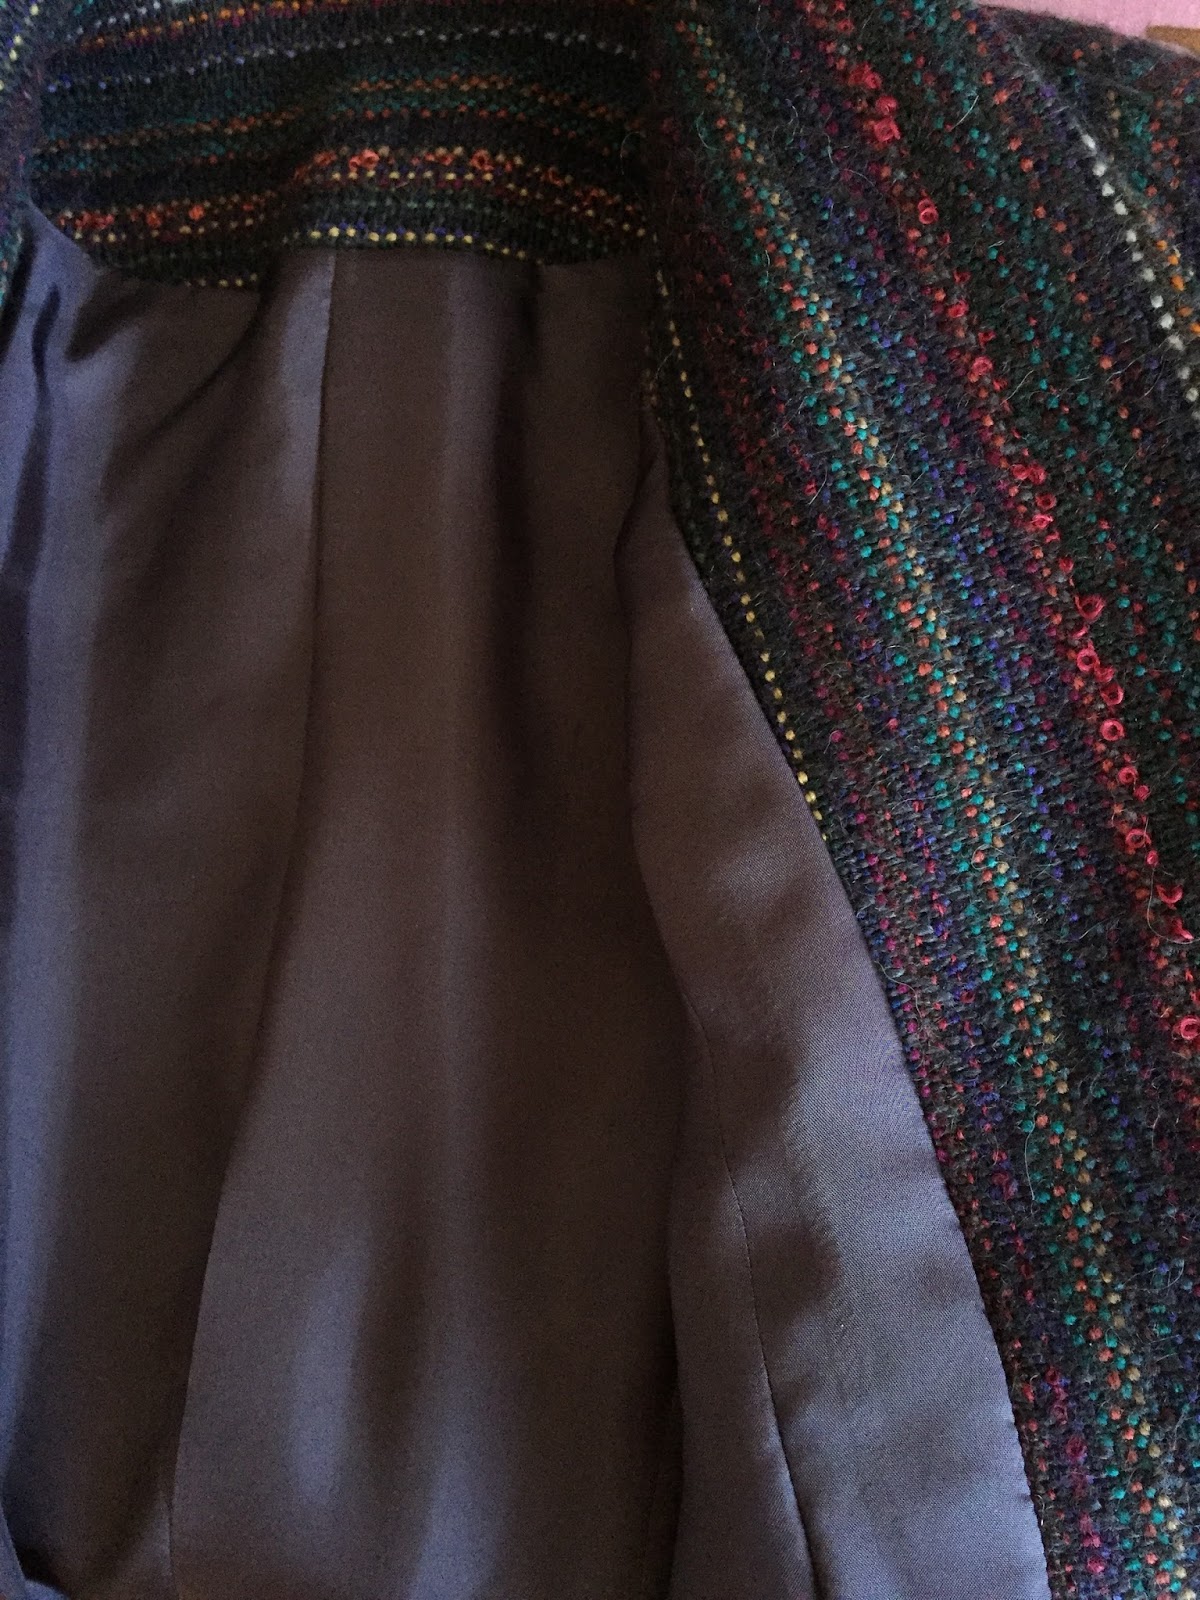
Sweet and simple and striped in multi colours. Light and soft and warm.

Making up a pattern that I had already adjusted for fit was a treat.

I kept the construction fairly simple and the jacket has minimal structure.

Fusible underlining; serged SAs
I underlined all body pieces with an extremely light weight fusible interfacing, to give some body to the very soft and loose-woven fabric, but also to minimize its inherent stretchiness (mostly in the length, surprisingly). I underlined the sleeves with silk organza cut on the bias as I wanted to keep them light.

All seam allowances were serged to control the tendency of the fabric to fray.

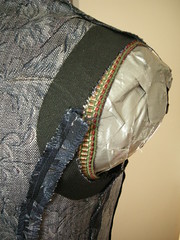
The sleeve caps were eased with a bias strip of wool which also serves as a light sleeve head. I inserted shoulder pads.

The jacket is fully lined with Bemberg. I went with this weird purply-grey colour.

The buttonhole was made with my vintage Singer buttonholer (perfect every time).

All this goodness, including wool, lining, interfacing, thread and button, came from The Sewing Lawyer's imperceptibly diminishing stash.

I have enough of the fabric left to use it as an accent on another piece (a yoke for a skirt?). Maybe I should check stash for coordinating fabric or leather... Who knows what's in there?

Tuesday, March 1, 2016

Vogue 2770 encore

Way back when I spent a lot of time altering the pattern for the jacket from Vogue 2770 to fit me perfectly. Why waste all that work? I'm making it again.

Out of this unique and irreplaceable fabric.

I got it at the Fabric Flea Market (where else?) in 2009. The vendor told me she had raised the sheep (merino), sheared the wool, spun and dyed it, and then wove it (together with a few novelty yarns) into this luscious and completely irregular stripe.

The fabric is only 98cm wide and the vendor had cut it into skirt lengths of around 1.5m. I bought two, which are enough for the princess seamed jacket.

Sunday, May 30, 2010

A potpourri

Like a potpourri, this is a mixed bag.  

First, I'm sorry for being absent - last weekend we were entertaining house guests and then Mother Nature decided that we should all be reminded what it is like to suffer through a heat wave (in May!!).  So not much sewing has been going on here in the Nation's Capital, and since this is a sewing blog, there hasn't been anything to blog about.

Second, I have now finished the woolly skirt to go with my woolly jacket which I could only model today because Mother Nature decided that today would be slightly overcast with more seasonable temperatures.  Needless to say, I won't actually be wearing it for months until Mrs. Nature returns us to the fridge.  (If any of you notice me tending to want to sew tailored wool suits next spring, could you pipe up to tell me I'm falling into that trap .... AGAIN??  It would be a great service to the Sewing Lawyer to be reminded that the seasons do change; she seems to forget annually.)


So here it is - the completed ensemble.  I am going to love wearing it!

The skirt is a reprise of the high-waisted skirt I made recently.  I am thrilled with how it looks and, more importantly, with how comfortable it is.  Remember I added an inner structure with 4 pieces of spiral steel boning?  I did it again and it is like magic, I tell you - the waistband is not tight but it doesn't flop down, ride up, twist around my waist, or do anything it is not supposed to do.  Totally secure, totally comfortable.  Boning rules!  The next time I run into this stuff, I'm stocking up.  

This one was made in identical fashion, but I used a sturdy muslin for the inner structure.  It is lighter and more flexible but will do the same job. 

So here's the skirt with high waist revealed (worn with my recently-completed Jalie lace T).

The wool fabric almost totally hides the princess seams in the skirt and waistband, and I like how the lower edge of the waistband is visible mainly as a change in texture. 

Last, in other sewing news, I'm working hard on my Kay Unger Dress (Vogue 1182).  I completed a muslin which was blissfully free of bad surprises (in other words, all the usual things had to be done, including taking 2 cm out of the front neck length).

I have purchased the most amazing silk dupioni for this dress which shall be revealed in the fullness of time.  So far, the dress is cut out and underlined with silk organza.  I'm going back to it now.

Sunday, May 16, 2010

Responding to comments

Now that I've finished the jacket, I'm  coming up for air to respond to comments and a few questions about the internal padding.  They were prompted by this post.

First, thanks all for reading and being interested!  

lin3arossa asked whether the internal structure meant that I would only dry-clean the jacket.  Oh yes!  I take dry cleaning as a given for any tailored jacket.  Immersing the jacket in water would be a sure-fire way to ruin it.  Wool is washable, but I have not pre-treated this fabric by washing it because the garment will never be washed.  I steamed the fabric to shrink it somewhat but washing would change the hand completely, making it thicker and fuzzier.  I don't want that.  Further, washing any tailored garment, assuming it has an inner structure that depends on materials like those I have used, will cause unattractive lumpiness.  Maybe some tailored jackets are washable.  But I doubt it.

Nancy K asked about the design of my shoulder padding.  Frankly, Nancy, I'm feeling my way on this one!  But I don't think a really stiff layer is needed anywhere.  The top layer in my shoulder area (right under the wool) is the thin cotton quilt batting.  Under that is the soft wool fleece.  I put it on the fused fleece mostly to give it a real base - it's not very stiff at all. 

I find pre-fab shoulder pads sometimes to be too stiff, especially if they use foam for padding - their edges may poke through the fashion fabric, and they will not mold to the shape of your own shoulder.  Hopefully my softer padding will.

j.kaori wanted to know if my shoulder "yoke" was meant to stabilize the shoulders.  Not really.  It's mainly to provide soft support for the fashion fabric to prevent my bony shoulders from poking through, and to prevent the relatively soft wool from collapsing in areas such as between my shoulder blades.

 Vicki had it right when she said that "the important thing is to get the look you are after. It doesn't matter so much what you use as it is hidden."  On this theory, I encourage anyone who is interested in sewing a tailored jacket to experiment with different types of shoulder padding or inner structure.

Just in the nick of time - Vogue 2770 jacket is finished!

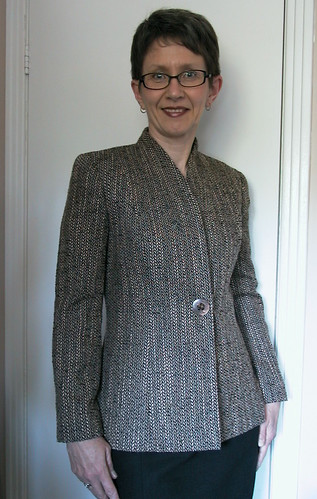
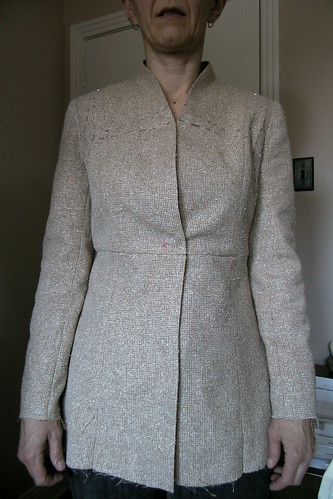
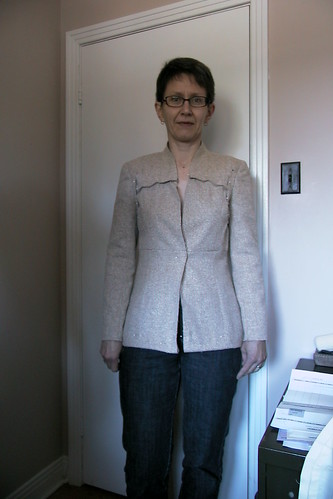
Stop the presses!  The Sewing Lawyer has finished a fully-lined, long-sleeved wool jacket, just in time for ... summer.  I do it every year, it seems.  Today, the sun is shining and it is a beautiful 21 degrees (Celsius) so my jacket is truly unseasonable.  Plus, it's black and several shades of brown and cream.  Hmm.  Not really summery at all.

On the plus side, it fits me really well!  All that pattern adjustment really paid off.


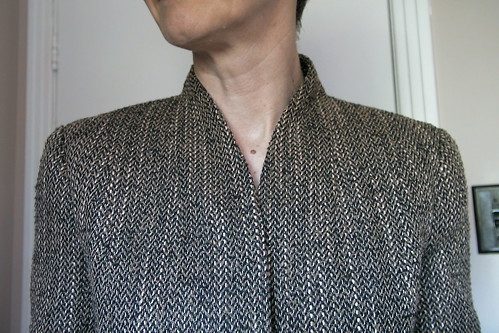
And the shoulder shaping seems just right to me.  Look how nice and square they are, but not extended at all. 
I especially like how it fits at the neck and around the armscye.  Narrowing the front at the shoulder level really worked!

Only one slightly negative note - this jacket has very narrow sleeves.  The high armscye is wonderful and the shoulder fits very well, but wearing anything with sleeves under this jacket will feel a bit constricting.  It is truly designed for that cute little top.  

I guess I should try to remember how well this pattern fits - I could use it to develop other styles... 

Before I move on to the next season, I'm going to finish a coordinating skirt.  Up after that?  My very special dress.

Saturday, May 15, 2010

Hand Sewing

What is it about hand sewing?  I'm at the point of inserting the lining sleeves and I'm going to do it by hand.  So I've paused (or am procrastinating) to write this blog entry instead.  In my youth, I hated the hand-work that went with finishing a garment so much that most of my "finished" garments required at least one safety pin...  I still yearn after beautiful machine techniques that substitute for hand stitching and count it as a victory if I only have to wield a needle to sew on the buttons.  However, sometimes, I come up against it, and I choose to use hand-sewing for certain tasks. 

For instance, I've already inserted the shoulder pads in my Vogue 2770 jacket with hand stitches as seen in this post.  I like to bag the jacket body lining (without sleeves) by machine, then hand-baste the lining around the armscye of the jacket.  Sewing the sleeves this way ensures the lining will not budge inside the jacket.  Then, you stitch the sleeve to the lining using more-or-less invisible stitches.  The sleeves likewise will never budge.  If there is the correct amount of ease in the lining, all will be well. 

I did this on my orange plaid jacket as you can see in this post, and I like how it looks, once done.  But hand-sewing is definitely not my favorite part of sewing. 

Which may also explain why I signed up for a class on PR with Susan Khalje.  The class name is "Couture Hand Stitches" and we're supposed to learn these ones:

  • The Basting Stitch
  • Hand Overcasting
  • The Catch Stitch
  • The Slip Stitch
  • The Fell Stitch
  • The Invisible Hem Stitch
  • The Back Stitch
  • The Prick Stitch
  • The Thread Chain
  • The Thread Bar
  • The Blanket Stitch
  • The Buttonhole Stitch 
I downloaded the first lesson today but haven't had time to read through it.  I did spot a very definitive statement to the effect that the "only" satisfactory way to underline anything was to hand baste the two layers together at the seamlines.  Harumph I say.  We'll see if she can make a convert of me. I will review the class once I'm done with it - it's my first on-line class outing and Ms. Khalje seems to be very well-regarded generally on all things "couture". 

Random information:  "couture" is a pretty ordinary word in its language of origin, which is French.  It simply means "sewing".  "Haute couture", on the other hand, was a very formal term which designates those design houses which are formally designated as members of the French Chambre syndicale de la haute couture.  According to Wikipedia, to be eligible for this they must:
  • Design made-to-order for private clients, with one or more fittings.
  • Have a workshop (atelier) in Paris that employs at least fifteen people full-time.
  • Each season (i.e., twice a year), present a collection to the Paris press, comprising at least thirty-five runs/exits with outfits for both daytime wear and evening wear.
Sigh.  Even Wikipedia acknowledges that this lofty élite term has been watered down and confused. Simple French words may tend to have a certain je ne sais quoi about them - thus prosaic "sewing" has become something elusively elegant and (perhaps) unattainable. 

If only, after (virtually) rubbing shoulders with Ms. Khalje, my hand-sewing will have this je ne sais quoi too.  Right now, my stitching is rather utilitarian... (and I don't much like the process either). 

Jacket is almost done ...

Saturday, May 8, 2010

Wooolllly Goodness!

I'm working away diligently on my jacket.  A few days ago I was despairing because I feared I was being overcome by weather.  I'm working on a wool suit ... and it's coming into mid-May, and temperatures have been unseasonably warm.  In past years, I've bagged up more than one such project to wait for 6 months when the weather becomes more appropriate for it.  Is there anything sillier than finishing a beautiful winter coat just as spring blossoms are all around you, or completing a linen suit with sleeveless shell as the leaves start to fall (I did that in fall'09)?  Especially when you have that feeling (as I seem to every spring when it really warms up) that I have NOTHING suitable to wear!  But just now, I've had a reprieve.  Mother nature has decided to return us to the deep freeze for a few days.  A frost is forecast for overnight and tomorrow, they're saying it may SNOW!  I'm staying inside and I'm sewing!

I thank you all for your valuable insight in the matter of buttons.  The too-big brown button wins the informal poll, with the black glass one in second place.  I will now disclose that I like the big brown button but my husband voted for the glass.  I've decided to hedge my bets.  One of the problems with the big one is that the button hole would be ginormous.  So I'm going to use a big snap for the real closure, and the button on the outside for camouflage.  Then, I can change it up if I don't like it or find something I like better. 

But today's subject is luscious, slightly lanolin-y wooliness.  In the matter of internal padding, I'm experimenting. 

In a tailored jacket, no matter how sleek and natural the shoulder line, I think SOME padding is beneficial.   This need not add bulk - even a single layer of needle-punched batting will support the shoulder area and create a smoother line (I have bony shoulders).  I also like to use a fleece sleeve head.  I do not buy these internal padding alternatives - I make the patterns from my jacket pattern.  The general approach is illustrated here.

My Vogue 2770 jacket calls for 1/2" shoulder pads (it's a 2003 pattern), and I knew from the muslin that it did need actual shoulder pads.  I have a plastic tub filled with the darned things, but I really prefer making my own.

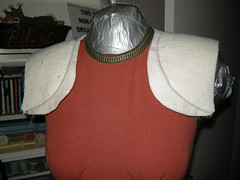
For this jacket, I'm using a cotton quilt batting called "Warm & Natural" for the base layer of padding.  It is very thin and supple. I made the pattern piece for the padding from the jacket pieces, eliminating all seams and seam allowances (this process is illustrated here).  The resulting piece looks like this (neck edge and front extensions are at the top):

The neck edge will be hand sewn to the neck/collar seam on the inside, and the front edge is tacked to the dart which extends down from the neck point.  The armscye edges are sewn invisibly along the armscye edge, again by hand. 

But first the sleeve head.  Again, I cut it from Warm & Natural, using the sleeve cap pattern.  It extends from notch to notch (well, it actually ends above the notches which seem very low on this pattern).  The sleeve heads need to be in place before the shoulder padding can be installed.  I used my sleeve board to steam the seam allowances and sleeve head so they will stay nicely in the sleeve cap.

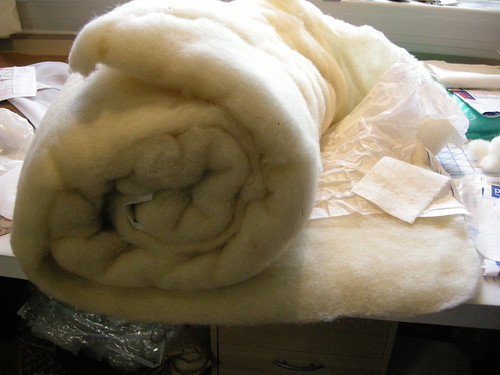
My great innovation for this jacket is that I used luscious 100% wool batting for the shoulder padding.  I came across an online vendor of wool quilt batting - Cedarview Farms.  I purchased a lap size quilt batting (55" x 74").  It was very reasonably priced, I thought, and they were having a 20% off sale at the time.  The batting arrived very promptly, neatly packed - loosely folded around tissue paper to keep the layers separate and then rolled.   It is absolutely scrumptiously woolly - soft, light and smells faintly of lanolin.


You know that I don't knit.  I also don't quilt.  I bought this batting to add to my considerable stash of padding-materials (though I think it would make a pretty awesome duvet).  Today I tried it for my intended purpose and I am pretty happy with the results.  Here's what I did. 

I cut the pad shape out of a thin fusible fleece (a Pellon product) and the wool batting.  Then I "feathered" the curved edges of the pad by pulling some of the fleece away, so the pad edges will be thin and invisible inside my jacket.  Once I was satisfied, I recut the shape according to the pattern.

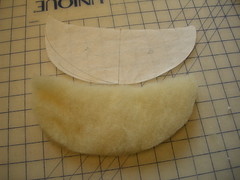
Then I put the fusible fleece (fusing side up) over my pressing ham and placed the wool on top.  I steamed the two layers to fuse the wool lightly to the padding, and to further flatten the leading edge of the pad, as you can see on the left. 

In the picture to the right you can see how thin the fusible fleece is, in relation to the wool fleece.


Then, I sewed this layer underneath the single padding layer shown above.  I pinned the layers to ensure that they stayed curved, then zig-zagged the leading edge of the pad and used big hand stitches through all layers to loosely anchor the rest of the padding.


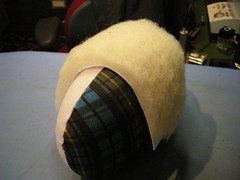
To the right is the finished item from the front.


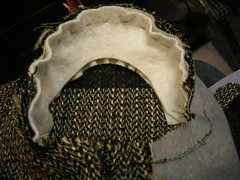
And, once installed in the jacket, this is what it looks like from the back:
Onward!

Sunday, April 18, 2010

Answering questions

I'm just popping in to answer a couple of questions posted by commenters on last weekend's Vogue 2770 Jacket Progress post. 

Carrotsandsmarties asked whether I have a helper to help me fit myself.  Nope - I do the first pinning on my handy-dandy duct tape double, and then when it looks weird (as it invariably does) I put the muslin on for a double-check.  This process confirms that the weirdness is truly my own.  So I don't have to put it on and take it off a million times, as Carrotsandsmarties feared - just once or twice.

Vicki asked if taking length out of the CF is a normal adjustment for me or whether it's peculiar to this pattern.  Well, it's not something I have to do all the time, but I have done it before.  It seems more pronounced in a garment which has a V neck and no lapels, for some reason.  I think it is a combination of somewhat forward and somewhat square shoulders, coupled with a forward neck, but I'm not really sure.  All I know is that I've come to trust the evidence of improved fit from various tucks.

NancyK asked if I had seen the series of articles on alterations that Kenneth King has written recently in Threads.  This series is very interesting but I have not attempted to follow his instructions.  I did spend quite a long time poring over his diagrams and text, trying to understand exactly what he was doing.  It was certainly not self-explanatory, at least to me.  I concluded that this is the method that works for Kenneth King but it wasn't going to work for me.  That said, his articles perhaps served as inspiration to me in my own quest for better fit, and helped me figure out how to "read the muslin" to decide where I need to add, subtract or redistribute fabric for better fit. 

And Nancy, re the fit of my jacket, the pattern is REALLY long (2003-style)!  It might not look so long on the envelope but then the model is probably six feet tall...  I'm 6" shorter and it wasn't doing much for me, I confess. 
The good news on the progress front today is that I've cut out the jacket, and have lots for a skirt, and enough besides for a short vest, if the fancy takes me. 

Sunday, April 11, 2010

Vogue 2770 Jacket Progress

I didn't get a lot of sewing done this weekend, but did make progress on my Vogue 2770 jacket pattern.  Again, I'm muslining (if that's a word) and altering the pattern for better fit.  The fabric I'm planning to use is a really great wool blend purchased at Couture Elle in Montreal, and I want the garment to measure up to the fabric. 

This is a straightforward shoulder princess seamed jacket with a sort of a combo-stand-shawl collar.  The darts which extend from the shoulder-neck point make it appear that it is a banded collar.  It is very simple. 

However, just as with the little top that is included in the pattern, a muslin revealed some fitting problems that needed correction. 

Here is the un-altered pattern without sleeves, cut out of a suitable jacket-weight "junk" fabric (and this one really is headed straight to the garbage after I'm done with it).


This muslin reveals again that the CF area is too long for my body.  See how it falls away from the CF at the hem?  That's the clue.  If I pin it at the waist, as if buttoned, I can make the front edges vertical, but then it sags unattractively above the waist, as you can see in the next picture.  I need another of those tucks in the neckline area (just like I did in altering the little top).


Also, it is too wide across the front at the shoulder level - see those vertical wrinkles?  The shoulder pads are too big, but there's a lot of extra width and the wrinkles get worse when sleeves are added.


What appears (at left) to be a seam at waist level is actually a tuck - the hip shaping on the jacket was too low, and since the jacket itself is extremely long, I shortened it by taking it up 2cm (.75"). 

To fix the sagging and excess fabric, I started pinning out tucks.  To the right you can see what it looked like when I had finished doing that.

The horizontal tuck takes a whopping 3cm of length out of the CF above the bust!  The vertical tucks (parallel to the armscye) take out another approximately 2cm of width on each side.

This photo also shows how long I plan to make the jacket.  What do you think?

I marked these tucks directly on the muslin fabric again (as you can see in the first, saggy picture).  Then I transferred them to the pattern tissue.

Here's how.  (Click on any of the pictures to biggify them.)

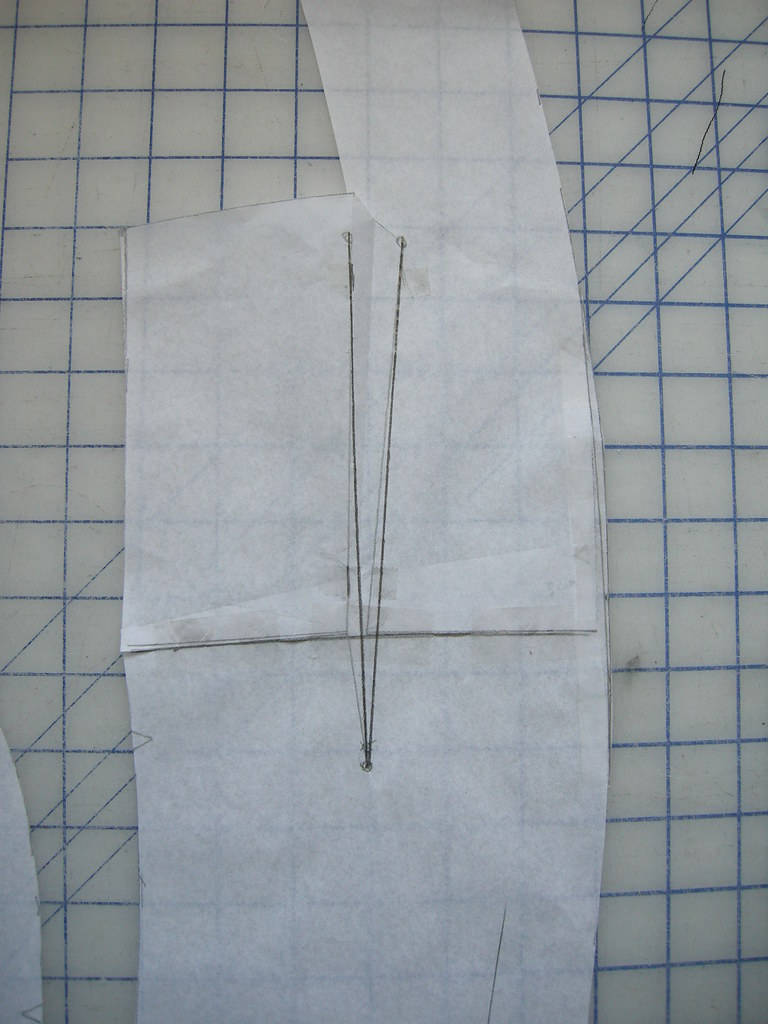
First, I traced the upper part of the front pieces.  On the CF piece, I started by folding the dart closed and marking the tuck/wedge.  I then opened the dart, overlapped the tuck, and re-drew the dart so its legs were straight, as you can see in the photo to the right. 

I also had to take care of smoothing out the neckline to a pleasing curved shape, and cut off the little point at the princess seam that was created by folding out the wedge. 

That was easy!  The side front alteration is way more complicated.

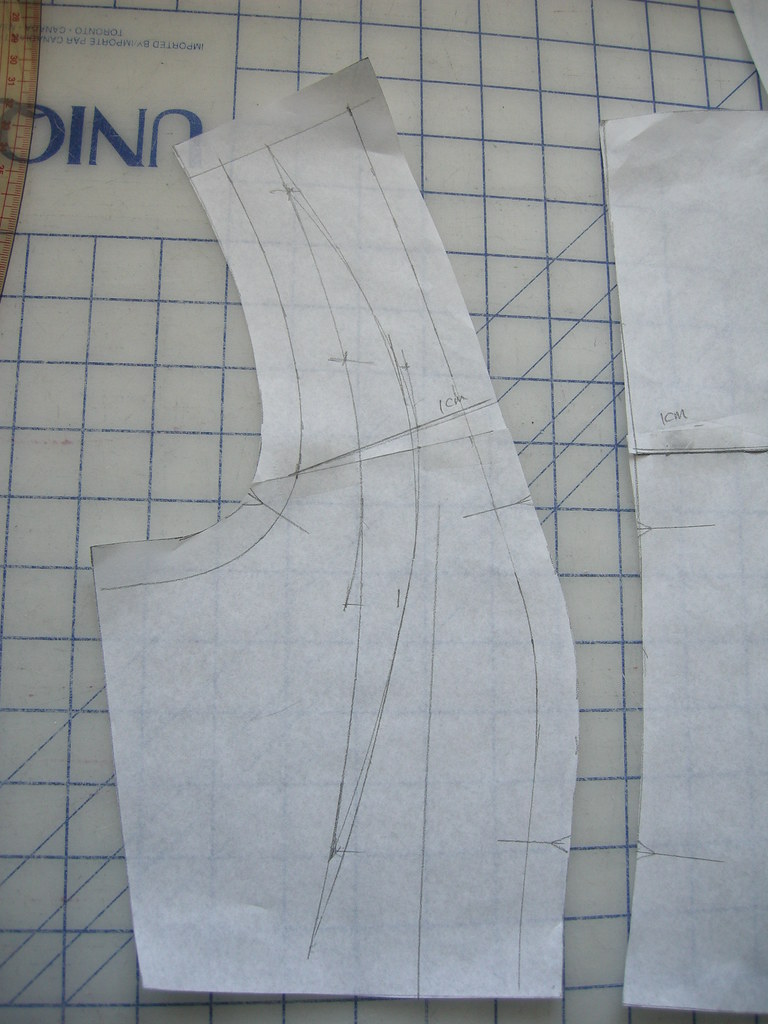
Again, I started by drawing the shape of the tucks I had pinned out onto the tissue.  The crescent tuck is rather bizarre looking!

The next step (at right) was to cut along the marked lines.

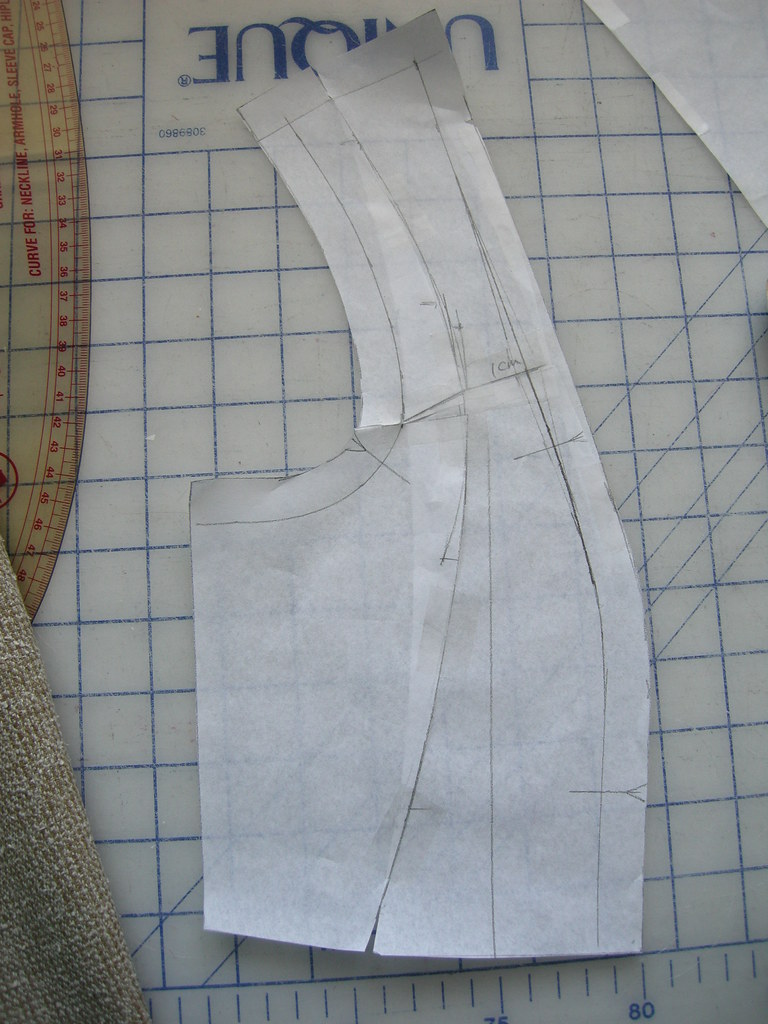
Then, I overlapped the pieces. Moving the armscye towards CF meant that the leading edge of the marked crescent had to open, while overlapping the horizontal tuck meant the two pieces were again the same length.  Like magic, I tell ya!

Again, I had to true up the princess line.  The little bit I had to add here was about equivalent to the little V I had removed from the CF piece. 

I knew this ought to work, but wanted to test it in fabric before cutting into my good fabric.  So I took the muslin apart enough to sub in new upper front pieces. 


The fit is pretty good, if I do say so myself - I think I'm about ready to take the pattern to the good stuff!

Saturday, April 10, 2010

(Sewing) Happiness is...

New patterns and fabric chosen. 

I took advantage of a Vogue sale at the Fabricland last week to acquire the two new Kay Unger dress patterns.  One of them is destined to be my "not-necessarily-black-not-necessarily-a-dress cocktail outfit" for the upcoming PR Weekend in Montreal.


Very Special Fabric has also been purchased.  So exciting!  All shall be revealed in due course.  I think I'll blog about my muslin/fitting but maybe not about the dress itself until after it has been duly unveiled at The Event.  Is that silly?

I also bought two of the newest Jalie patterns - the famous and, by all accounts, fabulous 2908 (women's stretch jeans) and the almost equally highly-regarded 2921 (scarf-collar tops).   I still have enough heavy blue denim for a pair of jeans, if not two, and multiple rayon jersey prints.  The hardest part will be choosing which one(s) to use.

But first, I'm muslining the jacket from Vogue 2770.  I'll post some progress photos later in the weekend, so stay tuned.

Monday, April 5, 2010

Cute little top

I decided to try my adjusted pattern using some "junk fabric" before cutting into anything good, and part way in I decided I could really get to like it so should do it properly. After all, it's really only "junk" because of its provenance (thrift shop find).  I might actually have bought it if I'd seen it in a fabric store (soft rayon, nice blues, acceptable floral print over an interesting herringbone weave). 

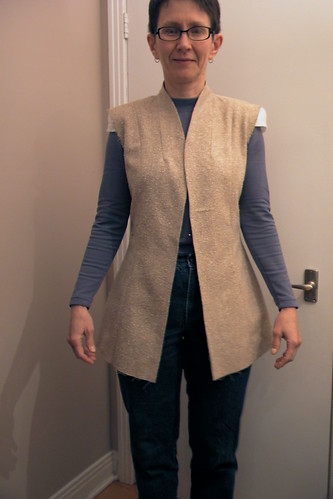
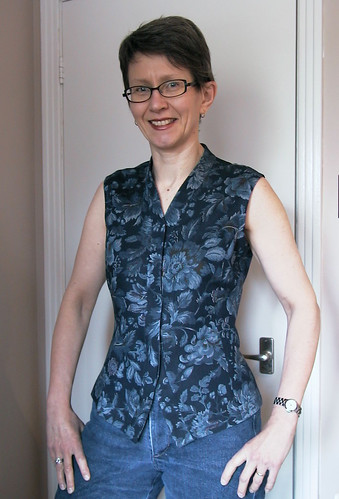
I present to you - the properly-fitted Vogue 2770 vest-like top:


Overall, it's unfortunately a little bit longer than the jacket I was thinking I'd wear it with.  I will shorten it slightly when I make it again.  I have some really great tie-dyed cotton of African origin that suddenly shouted that it could be this top.


Now for some more details.

The front alterations were a success.  The V neck is now the right length and doesn't cause gapping, after I took that little 1.15cm wedge out of it.

Also, the excess fabric at the front princess seam is a thing of the past.

The armscye was stabilized with a 3cm strip (cut to match the armscye curve using the pattern pieces) of fusible interfacing, as you can see in the next photo.

To finish the armscye, I cut strips of bias from the fashion fabric (6cm or  2 3/8" wide).  These are folded in half lengthwise (wrong sides together), and then sewn to the armscye with cut edges aligned.  After trimming the bias facing is pressed to the inside and topstitched down by machine.  This is such a better finish than facing.  (The pattern calls for a full lining which also finishes the armscye nicely, but I wasn't about to line this one.)

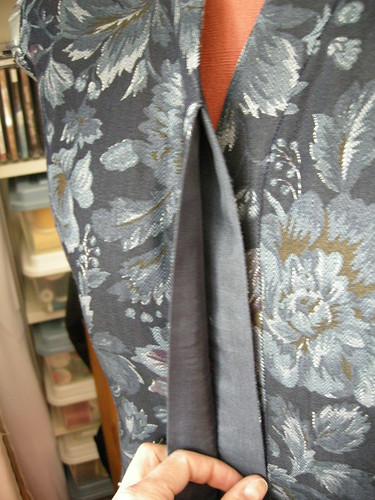
The other noteworthy feature of this little top is the concealed button placket.  To the right is a picture, before the buttonholes were installed. 

I used silk organza for the inside finish because it would add no bulk.


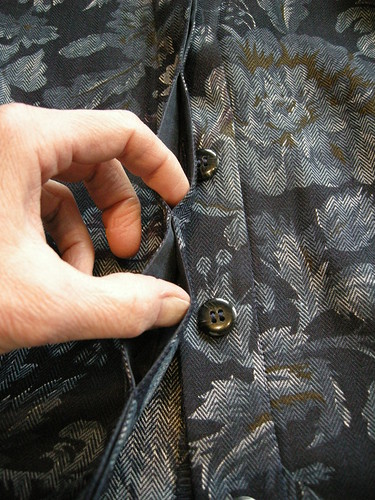
To the left is a view after the buttonholes were installed.  I also tacked the edges together between buttonholes to prevent gapping.

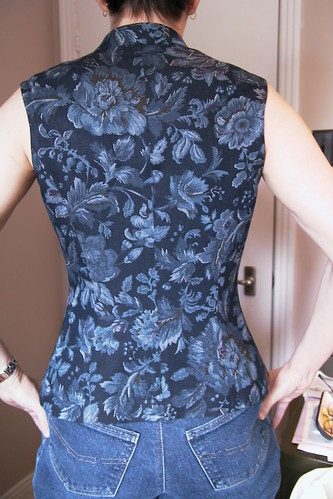
Finally, the back.  The darts worked brilliantly to eliminate the gapping at the armscye.

Sunday, April 4, 2010

Pattern Alterations

I promised to show you how I transferred the changes I noted on my muslin for the Vogue 2770 top. 

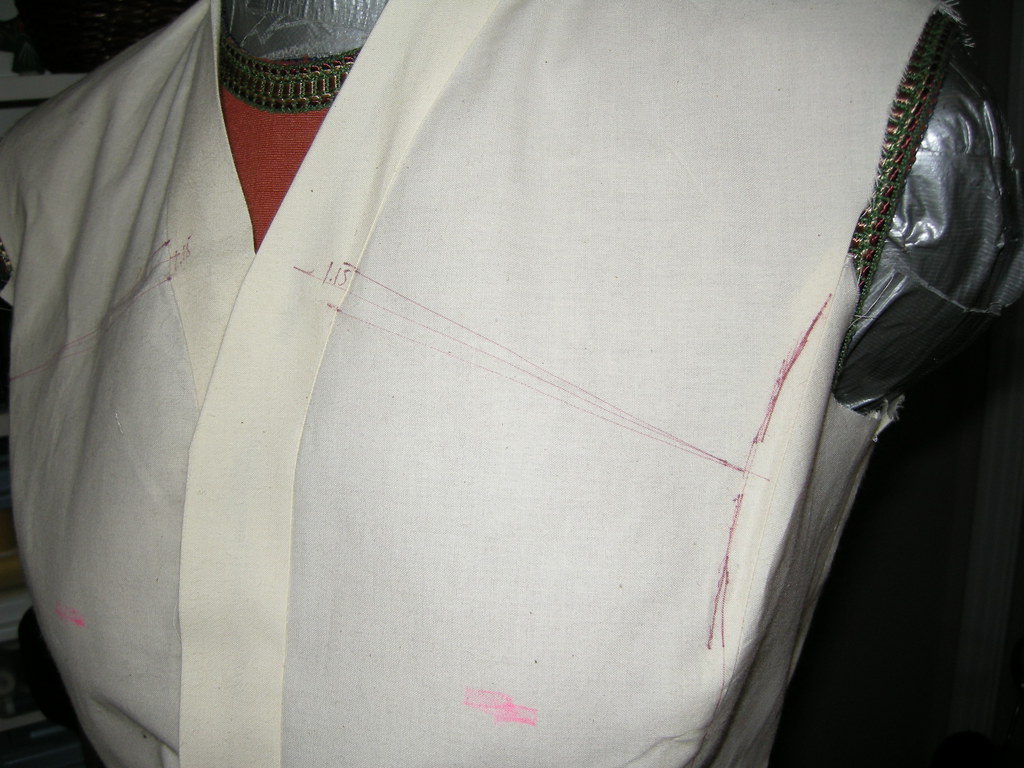
In the front, recall that I pinned out a wedge with the wide end at the V neckline and the point at the princess seam.  This is to shorten the gappy front neckline.  The other change was that I pinned out a little of the extra fullness above the bust, at the princess seam where it curves into the armscye.

Here's how these changes were marked on the muslin (click on the photo to enlarge it so you can see the detail).

I used a fine marker to draw the wedge and fisheye shape directly on the muslin fabric.

When you're pinning out extra fullness on the body, the changes are not necessarily symmetrical.  I drew the changes I had made on both sides and, where they weren't quite the same, I made the smaller of the changes on my tissue.  You can see I noted the size of the wedge at the front band (1.15cm). 


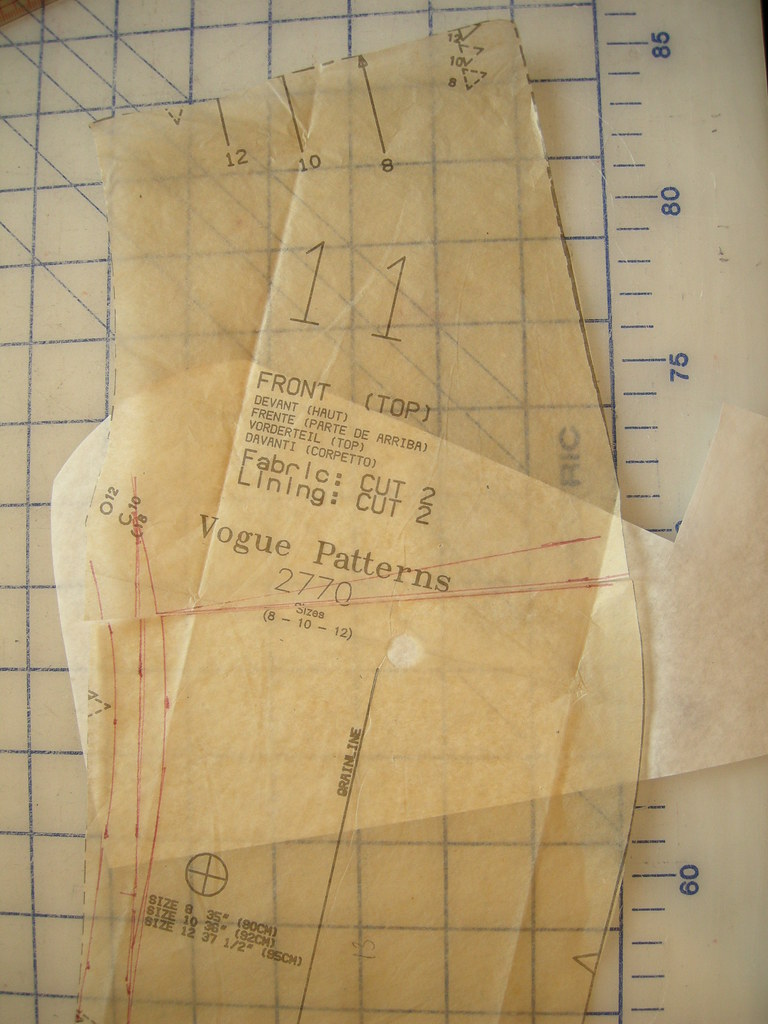
On this next photo, I've transferred the changes to the tissue for the front piece.

I also cut through the piece at the lower edge of the wedge.

The next step is to close the wedge by overlapping the lower line on the upper one, and taping the tissue in the new location.  The effect is to shorten the front edge by the desired amount, while leaving the princess seam length the same.

The other thing I did on this piece was to add a smidge of length over the bust, because the muslin was tight.

I did this by opening up another wedge, but this one has its point at the front edge and its wide end at the princess seam, making it longer.  This extra length will be eased into the side front piece which I left unchanged. 

You might ask, doesn't this wedge undo the effect of the other one?  It does not!  In each case, I'm reducing length or adding it where it is needed to fit my body. 

In this photo you can see I've added tissue where needed.  After I cut the new fisheye above the bust I didn't like the line of the seam so I made it a little less indented there.  I also added a thin piece of tissue at the CF, since the slight rotation to add length at the bust meant that the line was no longer straight.

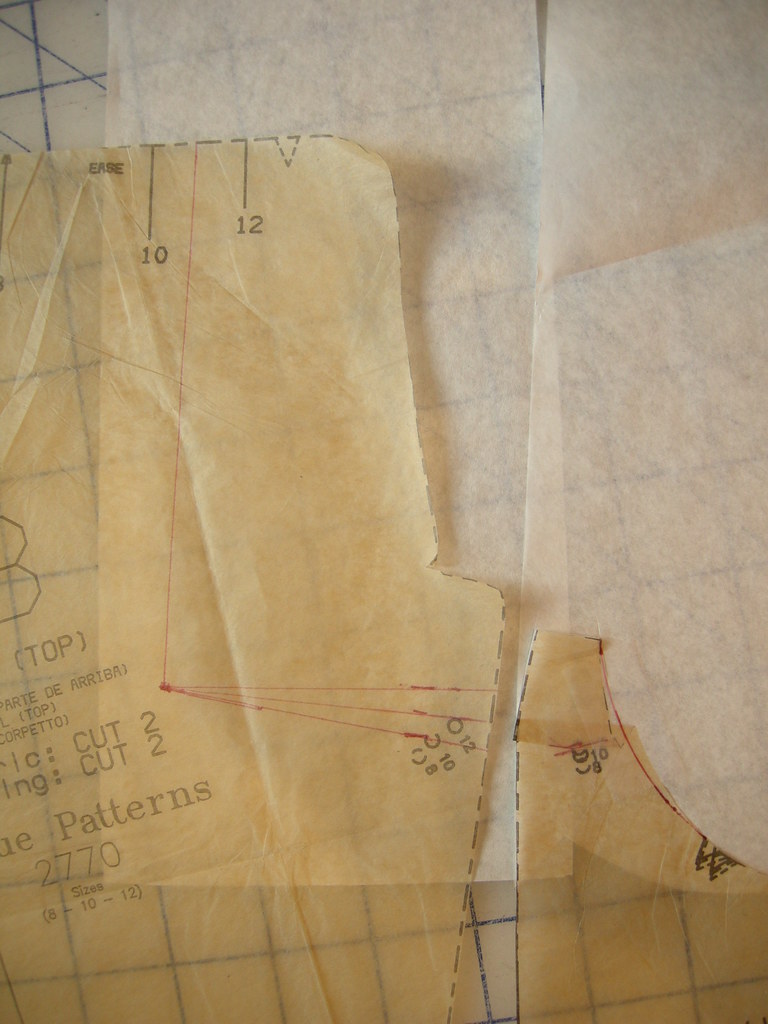
Recall that in the back, I had a little excess length at the lower armscye which I had pinned out.  Here are the changes I made to the back pieces.

In this first photo, I've already overlapped the wedge I drew on the side back piece, and have taped it down.  The rest of the alteration appears as a dart at a corresponding place on the CB piece.  Now, I could actually sew that dart, but it's a pretty strange place for one.  I'm going to rotate it to the shoulder instead.

You can see I have drawn a line heading up from the point of that dart to the shoulder seam.  The next step is to cut into the pattern along that line, and then out to the princess seam along the upper leg of the marked dart.


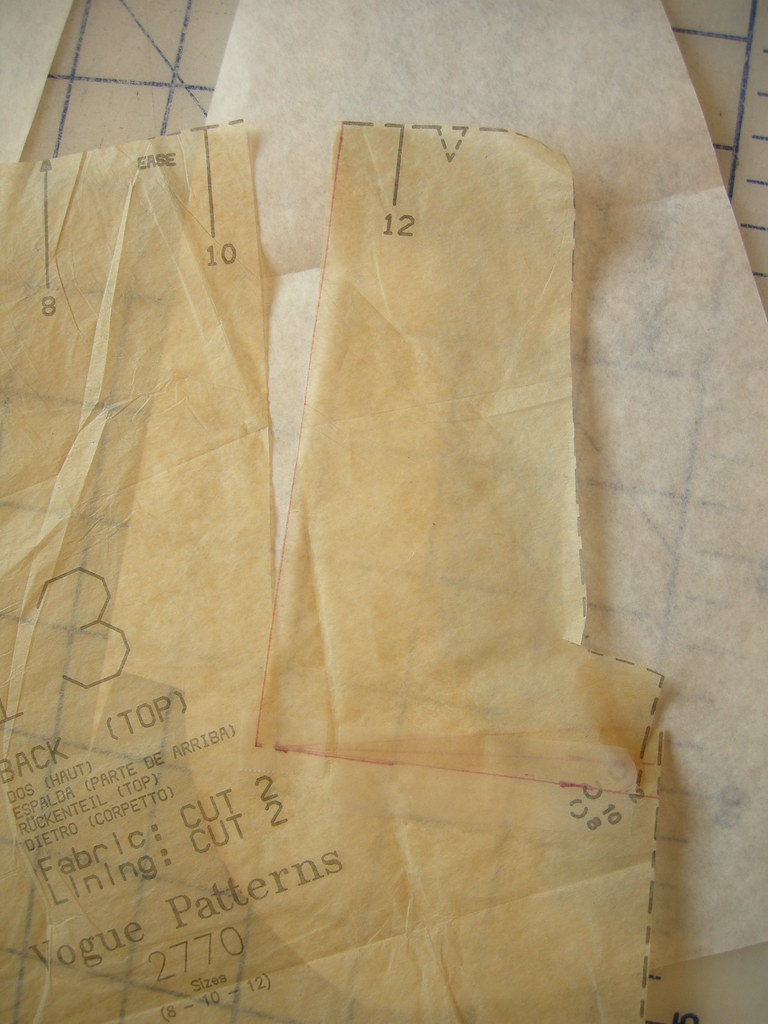
Here is the result.  I have overlapped the dart which opens up an apparently much bigger dart to the shoulder line (it is bigger at the upper edge, because it's longer, but the angle of it is the same).

I've reduced the size of it slightly by moving the corner piece in, towards CB, so that the corner overlaps the rest of the tissue by a small amount (click on the photo and you'll be able to see what I mean).


The next step is to tape some extra tissue underneath the new dart, and draw it in.  I've made it slightly shorter than the actual wedge.

The resulting piece is the same width as the original, and the new dart eliminates the gappy little wing effect I had at the back armscye. 

I'm mostly done sewing the top using this adjusted pattern, and I'm very pleased with the fit!