Showing posts with label tailoring. Show all posts

Tuesday, March 10, 2015

In progress shots of Lekala 5054

The Sewing Lawyer must return to lawyering as of next Monday (sniff!).  I want this suit done by then.

So here are some drive-by photos of the jacket progress with random comments.  I hope looking inside is of interest to you my dear readers :-)

I used Pro-Weft fusible interfacing from Fashion Sewing Supply (site for international customers) to stabilize the entire front and the under collar.   You might be able to see that the lapel has an extra layer of Pro-Weft.  So does the collar stand.

I used a different interfacing (softer, fluffy texture) to provide a bit of extra oomph to the upper collar, front and sleeve hem facings,  sleeve and jacket back hems.


The upper back is stabilized with a layer of cotton shirting.


Chest shield/shoulder pad piece
The shoulder area is lightly padded with a combined chest shield/shoulder pad of my own invention.  The piece is drafted using the jacket pieces (front and back).  I overlap the shoulder seams and trace a piece that follows the neck edge, roll line and armscye.  The front is full width (roll line to armscye) and ends above the bust.  It fills in a hollow without adding bulk.  The back is more like a standard shoulder pad.  It's cut from one layer of Warm and Natural cotton quilt batting, with a smaller shoulder pad shape cut from fusible fleece.  I fuse them together over my pressing ham to build in a bit of shape.


 I also use Warm and Natural to cut a sleeve head, using the jacket upper sleeve pattern as a base.


And here is an incomprehensible inside photo.  At left is the back (blue cotton gingham back shield.  At the centre is the sleeve cap with sleeve head installed.  I use a catch stitch to attach the chest shield/shoulder pad piece loosely at the armscye, neck seam and roll line.  The sleeve head is attached with a running stitch to the seam allowance at the sleeve cap.

Not a bad result, if I do say so myself...


Thursday, March 6, 2014

Moving right along

I have to go back to work in a week and a bit.  This reality has pushed me to up my rate of creative output. Remember Burda 7576?

Well, I finally started it.  Now it looks like this:


More or less (I later sewed the side back seams).  But the point is - I did the collar and lapels!  A big step, as anyone who has made a jacket will attest.

By the way, I did reduce the size of the collar and lapels but not as much as I was toying with in my previous post on this jacket.  In the end, I was convinced by my friend G that big lapels would make the jacket.  However, they were so out of proportion on me.   I compromised, and brought the points in by 3/4" (2.8cm).  

The construction is interesting.  The jacket has a dart under the lapel.  Its function is to help the lapel (front facing) roll properly over the under collar (jacket front).

See how the dart continues into the seam between the jacket front and undercollar?  That is a neat feature.  To attach the under collar to the jacket body, you first slash the upper inch or so of the dart, then sew the collar end to the lapel at the gorge line (starting and stopping at the seam intersection point rather than the cut edge).  This is the blue line in the marked up photo on the right.  Then you sew the seam that starts with the dart point, goes around the back neck, and ends at the dart point on the other side.  (I actually sewed the darts first and then joined them to the collar seam; it seemed safer somehow.)  This is the pink line in the marked up photo.

Other info.

To assist me in maintaining complete symmetry, as well as in plaid matching, I cut the bodice pieces single layer.  I left the pocket flaps and sleeves to be cut later once I could see how the bodice was shaping up.

Front interfacing
This is a quick fusible tailoring project.  I used a weft insertion interfacing for the entire front and under collar, and cut an extra layer for the lapel and the collar stand.  You can (maybe) make these out in the next photo.

I used a softer fusible for the facings, upper collar, and side piece.

Back shield
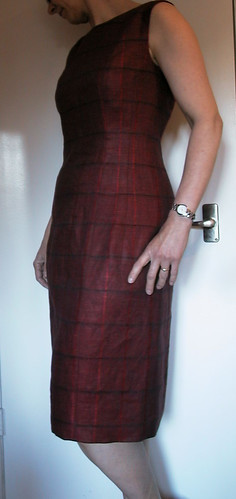
The back is not interfaced, but I decided it needed a little something to beef it up in the shoulder/back neck area.  I used some leftover wool from this dress to make an upper back shield.  I sewed it in by hand because I had already sewn the shoulder seams and installed the collar by the time I decided it was needed.  I got the idea to install the shield in two independent pieces that overlap somewhere-or-other.  It's cut on the bias.  It does help pad the upper back in a nice way.

So far my plaid-matching plans are working out.

More later.


Sunday, July 25, 2010

Planning for fall

It's still July but I'm thinking about wool - specifically, a scrumptious piece of feather-light wool/cashmere blend of which I have just enough for a sheath dress, and a coordinating, amazing, hard but light and airy pure wool for a jacket (I probably have enough to eke out a skirt as well).

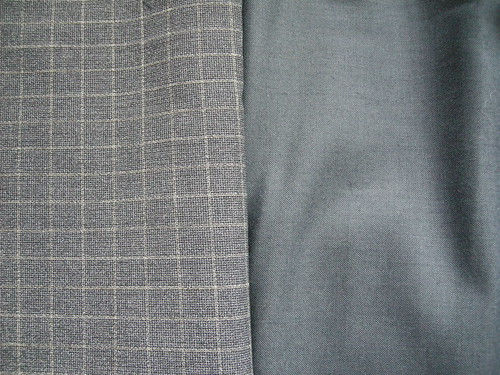
The colour is blue - a greyish but still blue blue.  I purchased the cashmere blend in Toronto at the Wool House on Queen Street West (highly recommended, if you're in Toronto) and the coordinating fabric in Montreal at PR Weekend at Couture Elle (highly recommended, if you're in Montreal).  I gave my little swatch of the Toronto wool to the guy in Montreal and asked him to recommend a coordinating fabric (finding coordinating jacket fabric for 2 dress lengths was another of my shopping goals for the weekend).  He strode decisively to a high stack of bolts, pulled one out, placed the swatch on top and ... TA DA!  Perfect, first time.  This guy is amazing.


Is it true that real blazers are in style for fall?  I'm not very good at sussing out trends, but what I want to make is a traditional, single-breasted, long and lean jacket with tailored shoulders, and a slightly peaked lapel.  I found this in the new Burda envelope patterns.  What do you think?  It's #7421.  (Sorry for the fact that this is not an English page.  Thankfully, Burda's unbelievably inept decision to migrate ALL of its English content to the inane "Burdastyle" page, from which it is impossible to find any of the actual corporate content - i.e. its magazine and envelope patterns - has not yet affected its French site).  

But no - the dress and boots would not be part of my wardrobe plan, though they are utterly cute on this 20-something model.  You'll just have to imagine the jacket on top of something more sleek and age-appropriate.  

Much like this, in fact.  (It's a PatternMaster Boutique pattern reviewed here.)   Shorter??  

In the meantime, I'm finishing up another pair of bike shorts today, and really ought to finish the knit jacket so I can wear it ...

Sunday, May 16, 2010

Responding to comments

Now that I've finished the jacket, I'm  coming up for air to respond to comments and a few questions about the internal padding.  They were prompted by this post.

First, thanks all for reading and being interested!  

lin3arossa asked whether the internal structure meant that I would only dry-clean the jacket.  Oh yes!  I take dry cleaning as a given for any tailored jacket.  Immersing the jacket in water would be a sure-fire way to ruin it.  Wool is washable, but I have not pre-treated this fabric by washing it because the garment will never be washed.  I steamed the fabric to shrink it somewhat but washing would change the hand completely, making it thicker and fuzzier.  I don't want that.  Further, washing any tailored garment, assuming it has an inner structure that depends on materials like those I have used, will cause unattractive lumpiness.  Maybe some tailored jackets are washable.  But I doubt it.

Nancy K asked about the design of my shoulder padding.  Frankly, Nancy, I'm feeling my way on this one!  But I don't think a really stiff layer is needed anywhere.  The top layer in my shoulder area (right under the wool) is the thin cotton quilt batting.  Under that is the soft wool fleece.  I put it on the fused fleece mostly to give it a real base - it's not very stiff at all. 

I find pre-fab shoulder pads sometimes to be too stiff, especially if they use foam for padding - their edges may poke through the fashion fabric, and they will not mold to the shape of your own shoulder.  Hopefully my softer padding will.

j.kaori wanted to know if my shoulder "yoke" was meant to stabilize the shoulders.  Not really.  It's mainly to provide soft support for the fashion fabric to prevent my bony shoulders from poking through, and to prevent the relatively soft wool from collapsing in areas such as between my shoulder blades.

 Vicki had it right when she said that "the important thing is to get the look you are after. It doesn't matter so much what you use as it is hidden."  On this theory, I encourage anyone who is interested in sewing a tailored jacket to experiment with different types of shoulder padding or inner structure.

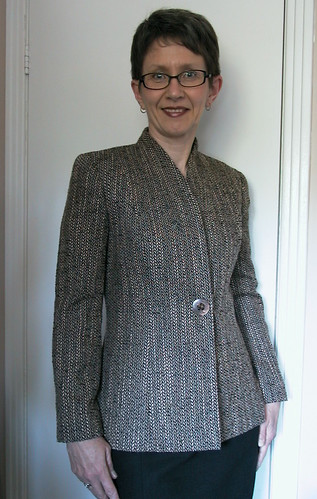
Just in the nick of time - Vogue 2770 jacket is finished!

Stop the presses!  The Sewing Lawyer has finished a fully-lined, long-sleeved wool jacket, just in time for ... summer.  I do it every year, it seems.  Today, the sun is shining and it is a beautiful 21 degrees (Celsius) so my jacket is truly unseasonable.  Plus, it's black and several shades of brown and cream.  Hmm.  Not really summery at all.

On the plus side, it fits me really well!  All that pattern adjustment really paid off.


And the shoulder shaping seems just right to me.  Look how nice and square they are, but not extended at all. 
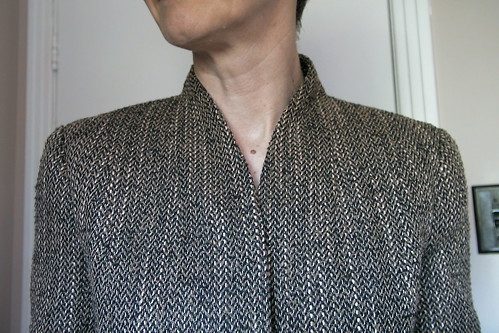
I especially like how it fits at the neck and around the armscye.  Narrowing the front at the shoulder level really worked!

Only one slightly negative note - this jacket has very narrow sleeves.  The high armscye is wonderful and the shoulder fits very well, but wearing anything with sleeves under this jacket will feel a bit constricting.  It is truly designed for that cute little top.  

I guess I should try to remember how well this pattern fits - I could use it to develop other styles... 

Before I move on to the next season, I'm going to finish a coordinating skirt.  Up after that?  My very special dress.