
However, just as with the little top that is included in the pattern, a muslin revealed some fitting problems that needed correction.
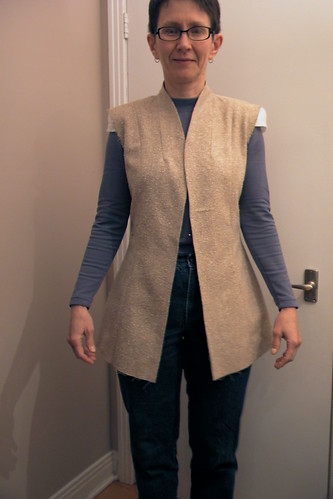 Here is the un-altered pattern without sleeves, cut out of a suitable jacket-weight "junk" fabric (and this one really is headed straight to the garbage after I'm done with it).
This muslin reveals again that the CF area is too long for my body. See how it falls away from the CF at the hem? That's the clue. If I pin it at the waist, as if buttoned, I can make the front edges vertical, but then it sags unattractively above the waist, as you can see in the next picture. I need another of those tucks in the neckline area (just like I did in altering the little top).
 Also, it is too wide across the front at the shoulder level - see those vertical wrinkles? The shoulder pads are too big, but there's a lot of extra width and the wrinkles get worse when sleeves are added.
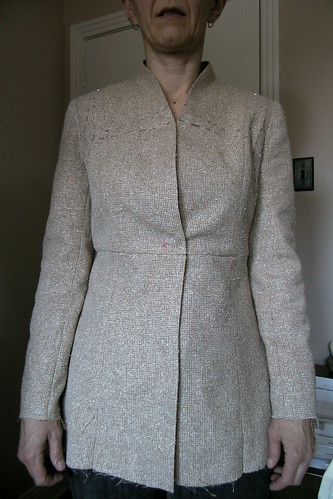
What appears (at left) to be a seam at waist level is actually a tuck - the hip shaping on the jacket was too low, and since the jacket itself is extremely long, I shortened it by taking it up 2cm (.75").
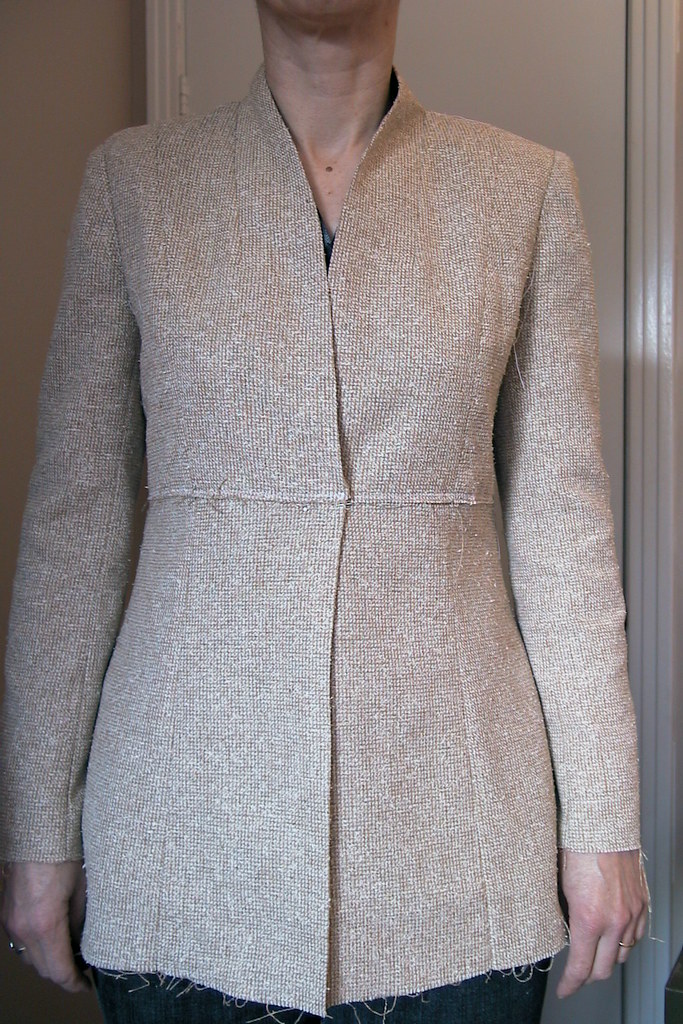
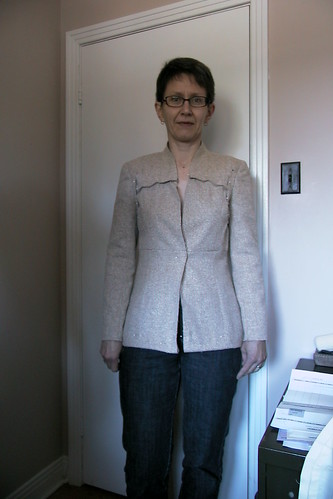 To fix the sagging and excess fabric, I started pinning out tucks. To the right you can see what it looked like when I had finished doing that.
The horizontal tuck takes a whopping 3cm of length out of the CF above the bust! The vertical tucks (parallel to the armscye) take out another approximately 2cm of width on each side.
This photo also shows how long I plan to make the jacket. What do you think?
I marked these tucks directly on the muslin fabric again (as you can see in the first, saggy picture). Then I transferred them to the pattern tissue.
Here's how. (Click on any of the pictures to biggify them.)

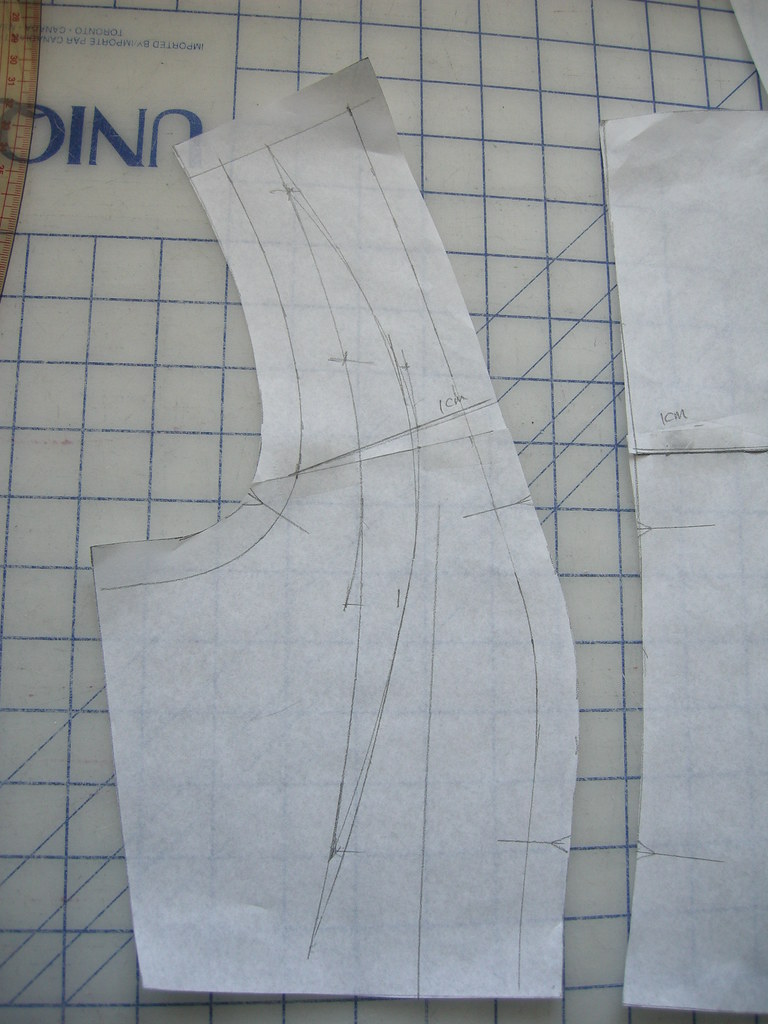
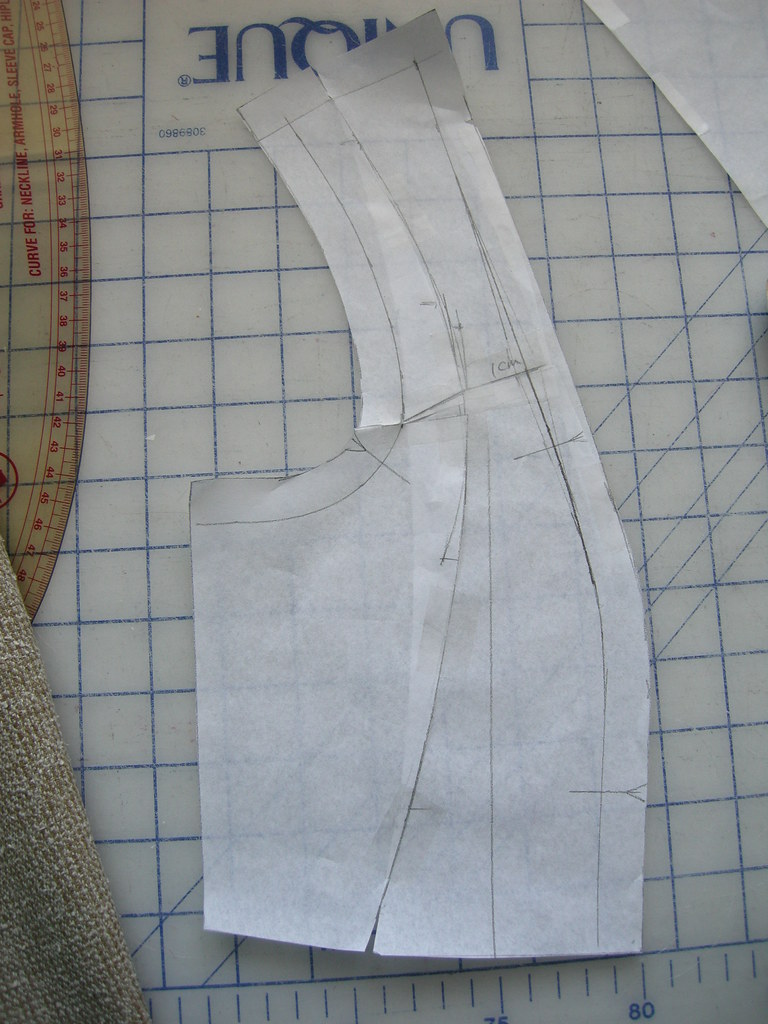
 First, I traced the upper part of the front pieces. On the CF piece, I started by folding the dart closed and marking the tuck/wedge. I then opened the dart, overlapped the tuck, and re-drew the dart so its legs were straight, as you can see in the photo to the right.
 I also had to take care of smoothing out the neckline to a pleasing curved shape, and cut off the little point at the princess seam that was created by folding out the wedge.
That was easy! The side front alteration is way more complicated.
 Again, I started by drawing the shape of the tucks I had pinned out onto the tissue. The crescent tuck is rather bizarre looking!
The next step (at right) was to cut along the marked lines.
Again, I had to true up the princess line. The little bit I had to add here was about equivalent to the little V I had removed from the CF piece.
I knew this ought to work, but wanted to test it in fabric before cutting into my good fabric. So I took the muslin apart enough to sub in new upper front pieces.


I'd say you've gotten the fit perfect - do you conscript help when you are trying to pin out the tucks, or do you do what you can by yourself and put the jacket on and off a million (more or less) times? I have this pattern myself, but have never made it - but as always, your work is inspiring.
ReplyDeleteThanks
I can appreciate the time you take to do the fit. I think your "finished" muslin has appropriate proportions. I'm looking forward to seeing and feeling the finished product at PR Montreal! (only another sewist understands the tactile of that!)
ReplyDeleteBrenda
Great fit now. And I like the length. Are these normal type of adjustments you make? Or more percular to this pattern? Taking out length from just centre front seems unusual. Thanks for taking the time to post all this. Even though I don't have the same adjustments (but I do have the petiting you have)it is good to see the process.
ReplyDeleteThose tucks you made on your muslin really do make the fit much better! I have to tell you that I really admire you that you take such time with muslins and work out all of your fitting challenges. I'm envious of your ability to do that.
ReplyDeleteI agree with Vicky, you have a great fit now. The real one will be wonderful !
ReplyDeleteFantastic. Always look forward to one of your new projects as I learn so much. Like the length too. And, like Brenda above, would love to see and feel the finished project. ;-)
ReplyDeleteGreat job on the pattern alterations, Kay!
ReplyDeleteThis is going to be another gorgeous jacket:)
I agree with Carolyn...I too am very envious that you take the time to fit a muslin. That jacket fits you perfectly!!! Looking forward to the finished product...
ReplyDeleteThanks so much for posting the photos of exactly how you transferred your muslin alterations to your pattern. What a difference they make in the fit! I learned from this post!
ReplyDeleteYou are really good at fitting your body. Are you that short, or is this jacket just badly proportioned? I do like it at the shorter length. The other was too overpowering for your figure. Nice simple lines on this, but the neckline makes the difference. Very elegant for the sewing lawyer.
ReplyDeleteHave you seen the last two issues of Threads? Kenneth King works in a very similar manner but he removes the excess differently than you do I think.
ReplyDeleteThank you for sharing how you transfer your alterations to the pattern. I have a similar build and find myself doing similar adjustments and really appreciate seeing the detailed photos you provide of the process. A picture is truly worth a thousand words when it comes to patternmaking/adjustments!
ReplyDeleteThe fit looks wonderful, Kay. Honestly, comparing it to the original fit, it looks like a completely different jacket. I know that this phase is time-consuming when you would rather be sewing on your fashion fabric, but you have demonstrated once again how important it is to get the fit right before progressing. I can't wait to see the final product!
ReplyDeleteKathryn
Beautiful fit! This style is perfect for your line of work too.
ReplyDeleteSmashing!
ReplyDelete