Showing posts with label Spanish snap buttonholes. Show all posts

Sunday, September 16, 2012

Where I'm at

Real life intervened in the sewing of the V8804 Chanel jacket, as driving 1,000 KM and helping no. 1 son get settled into his first apartment robbed The Sewing Lawyer of a valuable weekend for stitching activities.  (The payoff will come in future months as said son's childhood bedroom is taken over to be mine, mine, MINE! minimally redecorated to be suitable for use as a sewing studio.)

As well, interference came in the form of a couple of knitting projects ... small ones.  I'm trying to make knitting a way to occupy breaks from sewing, rather than the alternative.  I think it's going to take some time.  

So, how are those socks going anyway?

Here's the one complete one for my MIL, otherwise known as the sock from hell.  This because it insisted on being started three times, if memory serves (though I'm trying to forget) because each time it was too large.  And at least once because I messed up the heel (though I only frogged back to the beginning of the heel, not to the bitter beginning).  I'm almost to the heel (starting toe up) on sock #2, and so far it is much more cooperative than its sibling.  I'm quite smitten with the eye of partridge stitch for the heel.  Very cushy.

Yes, it's an unusual shape.  She is plagued with swollen feet and ankles.

And here's the first one of my own pair.

Both are based on the "upstream architecture" from Cat Bordhi's brilliant exposé on how to knit socks, New Pathways for Sock Knitters, Book 1.  Curiously, despite the fact that the main goal of this book is to reduce your dependence on actual patterns, my sock is presented as a complete pattern, which seems divorced from the underlying logic of the upstream model.  I almost got sucked into following it blindly which would have resulted in my making a sock that would have been too big for me.  Then I got over it, started thinking for myself, and saved it.  No frogging required! (Except when I made the exact same mistake on the heel that caused the frogging of the heel on the sock from hell...)

But now I'm back at it.  Back at the sewing, that is.  Knitting is for my breaks.

And I've started attaching the lining fabric to the front and back pieces, and even did all the afterthought darts in the fronts, shrinking the fashion fabric on the outside to match.

Afterthought bust dart
For those of you contemplating this pattern:  You do not need to treat the bust darts in the lining as afterthought darts (pinched in and sewn by hand as shown in steps 34 and 35 of the pattern instructions).  In fact you can't really treat them this way.  And it makes no sense.  You need those darts no matter what, and you will have had to figure out whether an adjustment is needed for fitting long before you get to this point.  Do yourself a favour.  Just sew them by machine while you are assembling the front lining pieces.

The vertical darts, however, have to be sewn as afterthought darts after you have machine-quilted the lining to the fashion fabric.  The pattern tissue has four of these in the back and one in each front, and you can make as many or as few of these as you need for fitting and as can be accommodated by shrinking your fashion fabric with steam.

Before - lining fabric is darted
After permanently attaching the lining fabric to the fashion fabric with machine stitching you pinch out a dart of the desired width in the lining only.  This is hand sewn with tiny fell stitches.  It makes a bubble in the fashion fabric, as at left.

Then you get the fabric all nice and hot and steamy, and pat, beg, and cajole it until its fibres shrink into the available space.

The flat plain at right is indeed the same piece (showing the same seam) as in the bubbly picture at left, but after I had whispered to it, begged it, steamed the heck out of it, patted it gently into place and finally gave it a good pressing.  In the distance you see the differently-shaped bust area.


The other progress made this weekend (so far) was to make Spanish snap buttonholes in the lining.  It's a marvelous thing to be able to make an elegant, functioning and reasonably sturdy buttonhole in a single non-reinforced layer of thin China silk lining.  If you haven't tried this yet, I recommend my copiously illustrated tutorial for the technique.

I finished the lining at the buttonholes WAY ahead of when Claire Shaeffer and Vogue thought I should tackle it (the very last think before sewing on the buttons), but these buttonholes could not be done after the jacket is finished.  And I think the Spanish snap buttonhole is a vast improvement on cutting a hole in your lining and then turning the edges under, finishing by a double round of slip stitches (steps 90-92).

Saturday, November 20, 2010

A new trick - Spanish snap buttonholes

It's good to stretch your skills by trying something new, right?  The Sewing Lawyer challenged herself by trying the "Spanish snap" buttonhole technique today.  The instructions can be found in Roberta Carr's book Couture:  the art of fine sewing.  Or, read on...

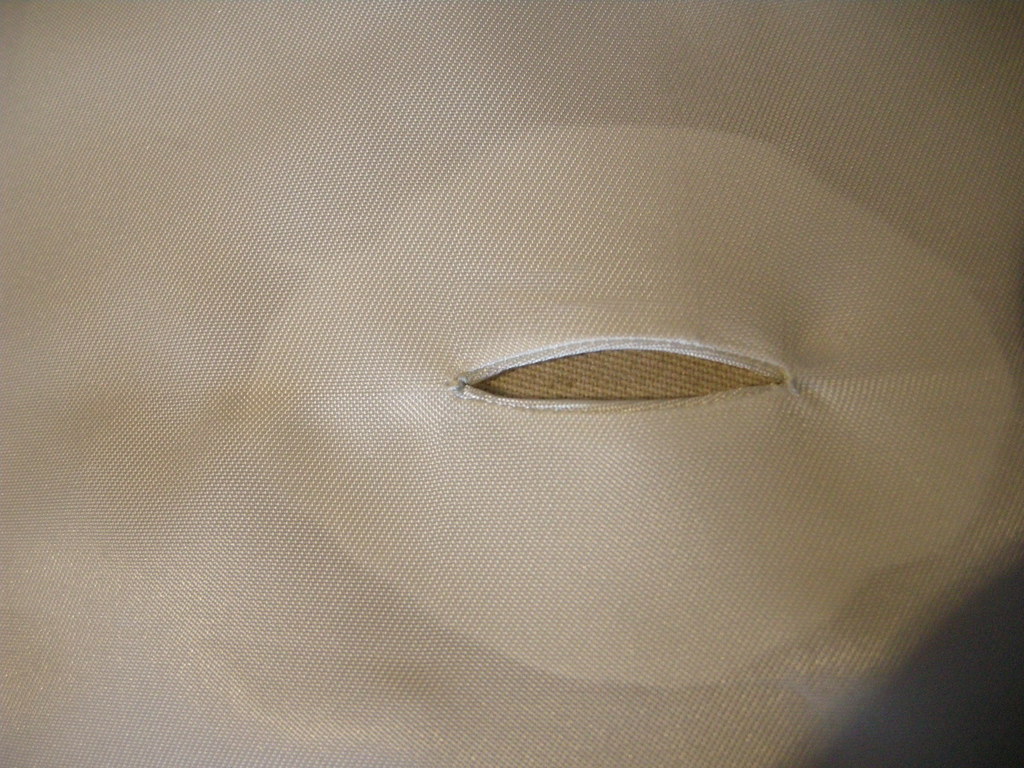
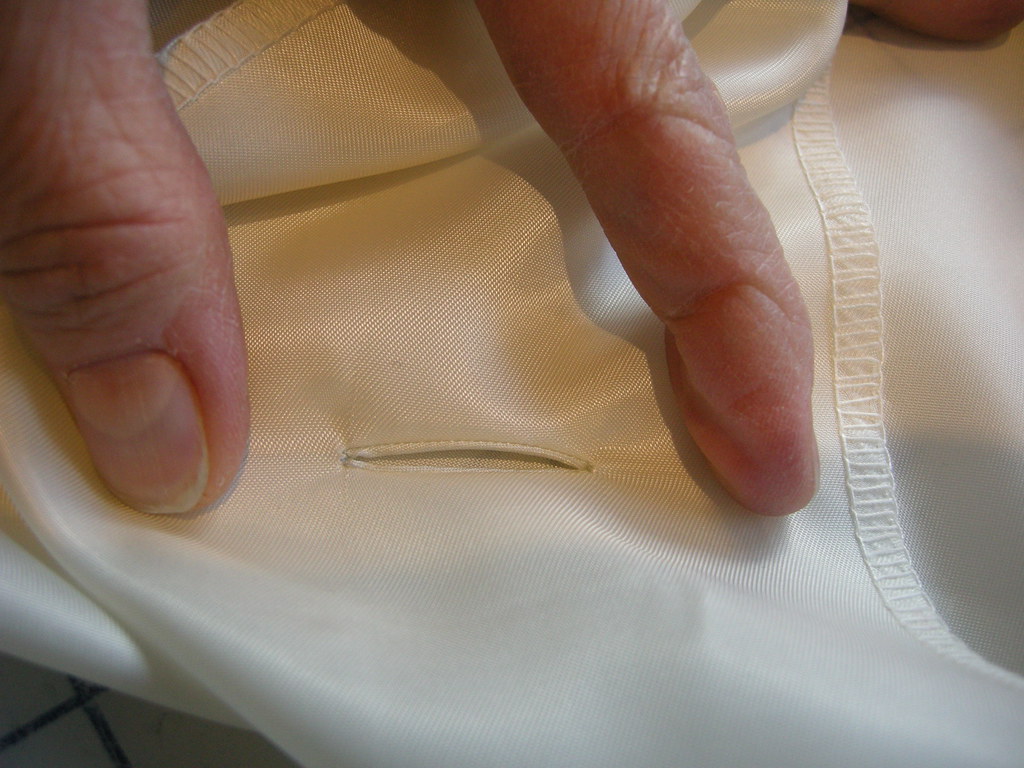
First, here's what a Spanish snap buttonhole looks like (click on the photos for eye-popping close-up detail).


This technique came to mind for the project of re-lining my Auckie Sanft jacket.  One of this jacket's fantastic features is that it's lined to the front edge.  But... that meant that its buttonholes were originally sewn through both the fabulous Linton tweed, and the lining fabric behind it.  Removing the lining meant literally cutting the lining fabric out of the buttonhole stitches.  I needed a way to make buttonholes that would lie behind the original ones and look good from the inside.  The latter requirement meant that sewn buttonholes were instantly rejected.   (Sew buttonholes in one layer of lining fabric?  No thank you!)

Then I remembered reading that Chanel jackets sometimes had bound buttonholes made in the lining to back sewn buttonholes in the outer jacket.  And I dimly remembered the Carr technique.

Ms. Carr wrote:  "Frequently used by the designers, this buttonhole has very thin lips that can hardly be seen.  I like to call them 'invisible' bound buttonholes.  The advantage of a Spanish snap buttonhole is that it can be made very small - as one might use on a silk blouse.  On the other hand, Spanish snap buttonholes are equally effective used on a tweed or nubby fabric with the lips made from wool flannel or worsted."

What's not to like?  Here's how to make them.

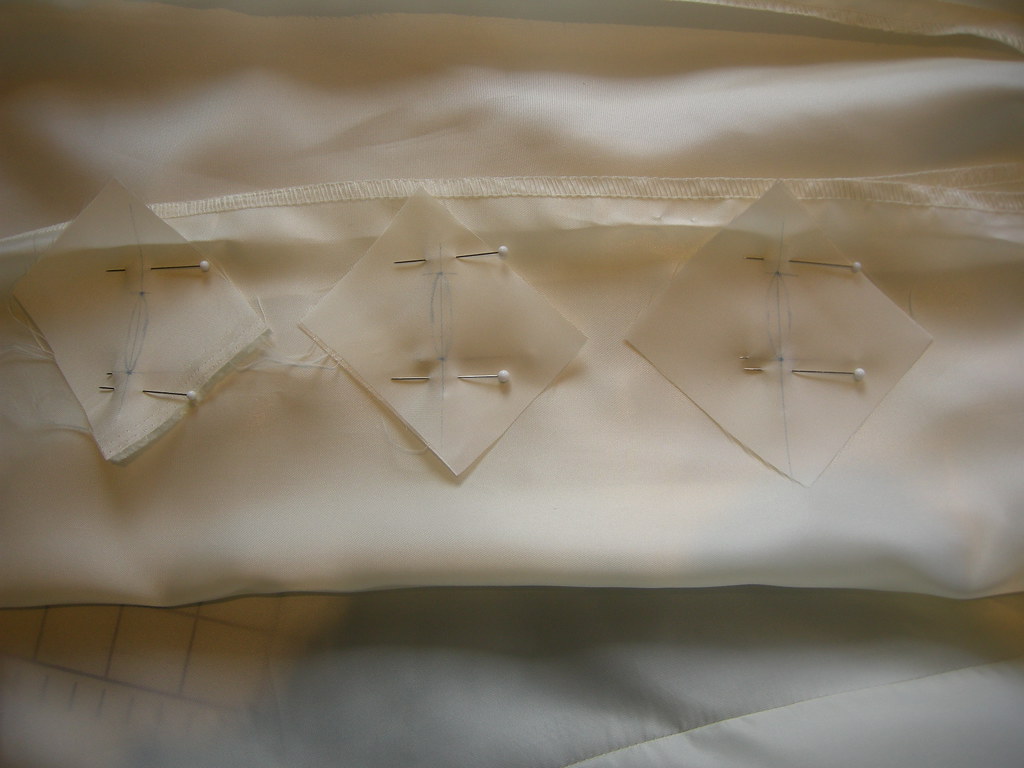
First, mark your buttonhole placement on the fashion fabric.  Then cut little patches that are big enough so that ON THE BIAS (this is important!) they are as long as your marked buttonholes, plus about 2.5cm (1") on either end.  Mark the patch (wrong side) with a line that represents the centre line of your buttonhole, and the ends of the buttonhole.  Then draw (lightly) a pointy oval shape (like a flattened football) that is about 6mm (1/4") wide at its widest, centred on the marked line.  Carefully pin your patch to the markings for your buttonholes, right sides together.

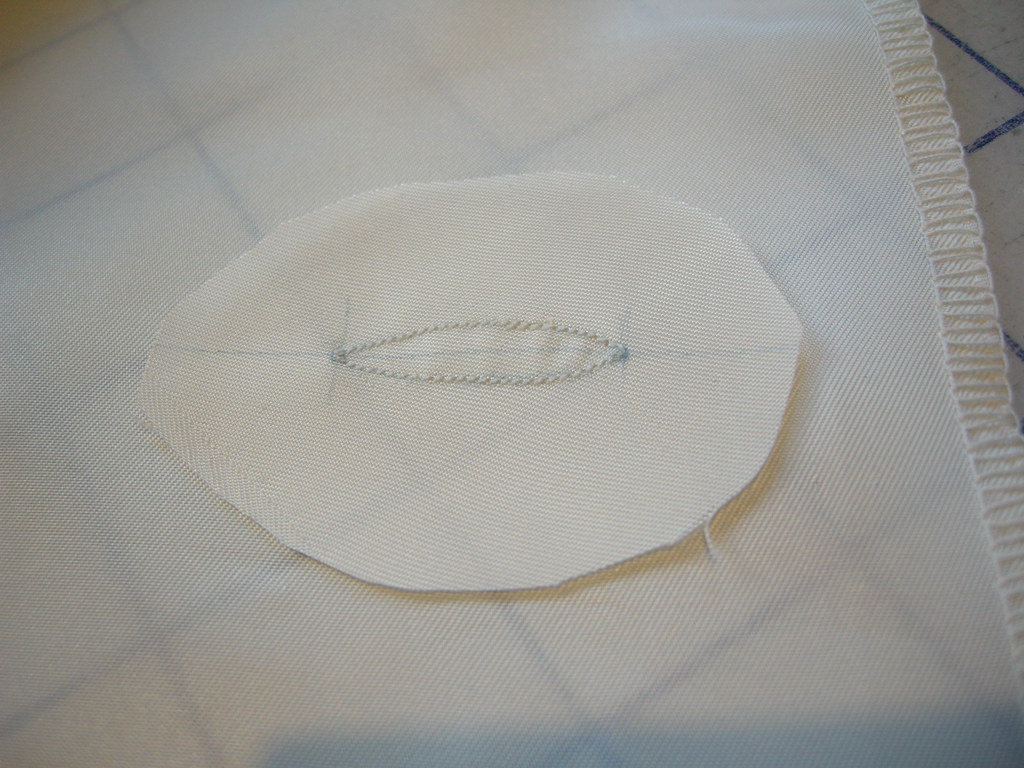
Sew around the marked football, pivoting at the pointy ends, using teeny-tiny stitches (1mm on my machine).  Here's a close up of the stitched patch.  You can see I've trimmed my patch to an oval shape. Ms. Carr suggests starting with this shape but it really doesn't matter. 

Snip carefully along the marked centre line to (but not through) the stitches at the pointy tip.  Then pull your patch through to the wrong side.

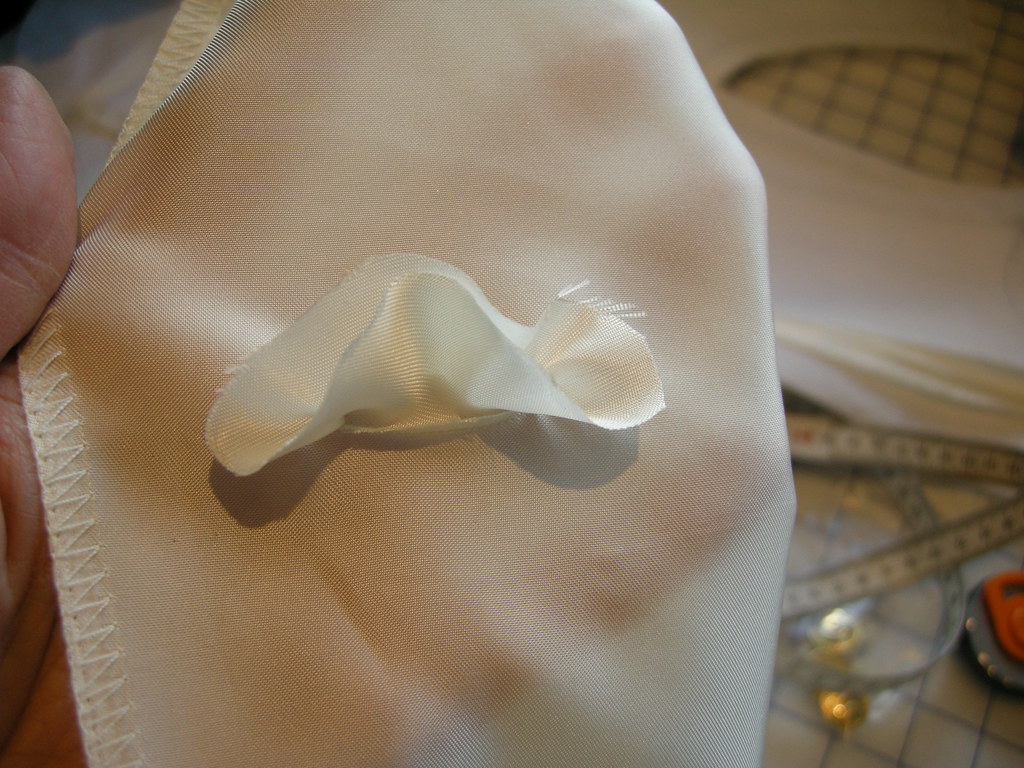
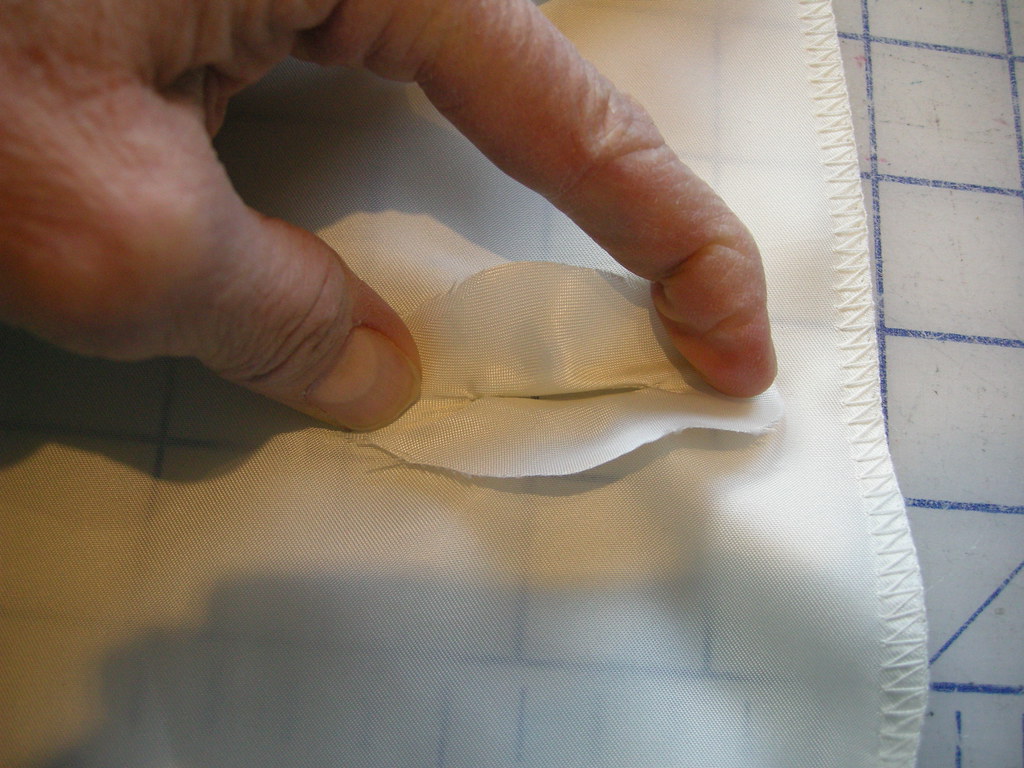
Next comes the magic, ineptly illustrated here because I was holding my camera with one hand.  To quote Ms. Carr:  "Holding each end of the egg shaped patch with the thumb and forefinger, pull in a snapping motion.  One good 'snap' and the bias will wrap around the 1/8" (.3cm) seam allowances and automatically create tiny narrow lips."

This is the right side, even before pressing!  

Magic, I tell ya!

No additional sewing is required - Ms. Carr says you can use a tiny bit of fusible web at each end to keep the patch in place.  (I will however tack the patches to my jacket to keep the buttonholes in place.)


In other news, I had approximately 50 minutes while in Toronto to shop, and I wanted to do two things:  visit Perfect Leather at 555 King Street West; and look for waterproof (or water-resistant) fabric for the fur coat.  


Guess which one prevailed?  (This photo from Perfect Leather's website.)  All I can say is WOW!  I think you can find any kind of leather; any colour; any finish; any size; any combination.  Needless to say there is a very intoxicating and leathery perfume in the place.  I bought 4 sq.ft. of orange goat leather for a little project...
