Showing posts with label Auckie Sanft Jacket. Show all posts

Saturday, November 20, 2010

A new trick - Spanish snap buttonholes

It's good to stretch your skills by trying something new, right?  The Sewing Lawyer challenged herself by trying the "Spanish snap" buttonhole technique today.  The instructions can be found in Roberta Carr's book Couture:  the art of fine sewing.  Or, read on...

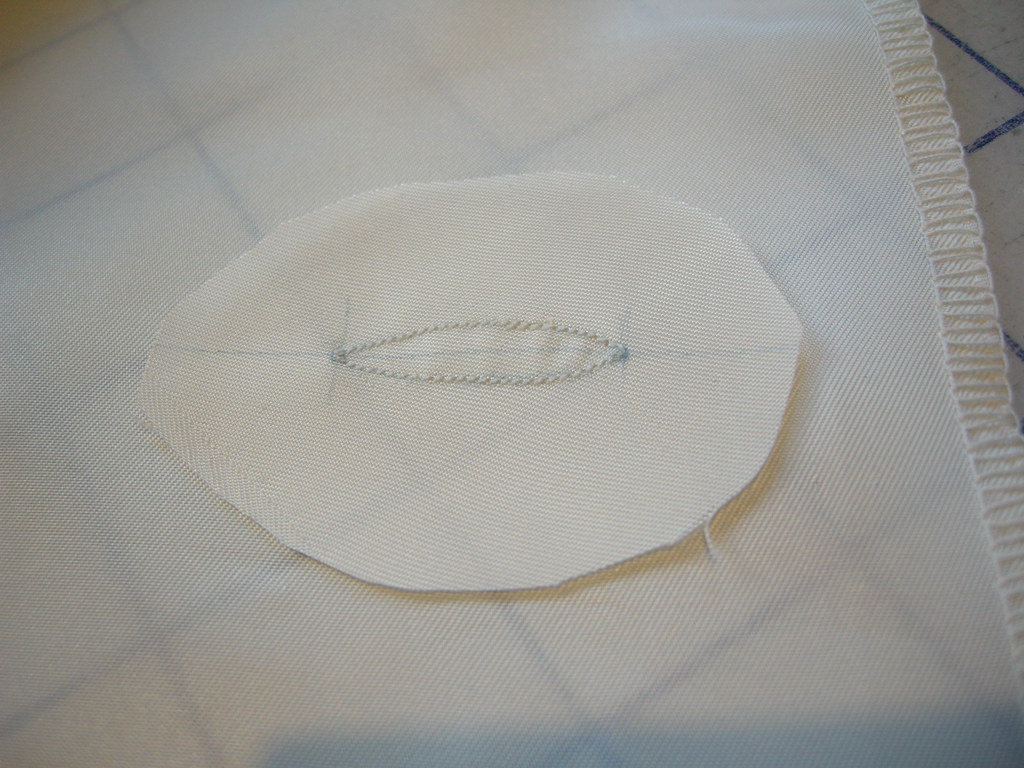
First, here's what a Spanish snap buttonhole looks like (click on the photos for eye-popping close-up detail).
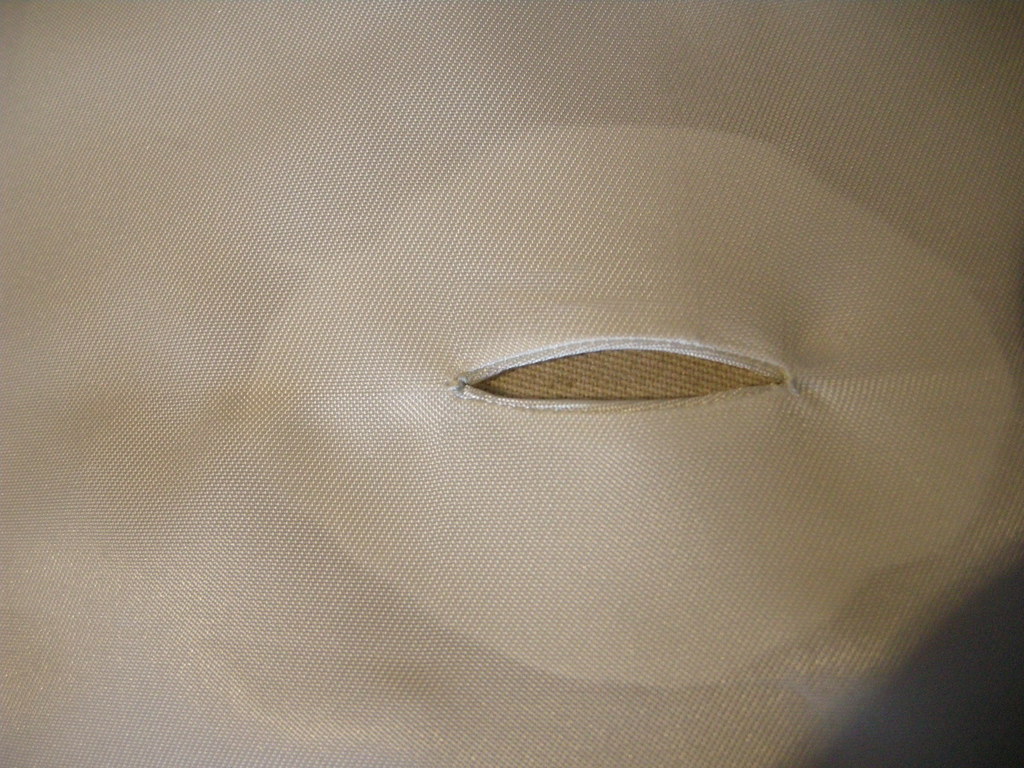

This technique came to mind for the project of re-lining my Auckie Sanft jacket.  One of this jacket's fantastic features is that it's lined to the front edge.  But... that meant that its buttonholes were originally sewn through both the fabulous Linton tweed, and the lining fabric behind it.  Removing the lining meant literally cutting the lining fabric out of the buttonhole stitches.  I needed a way to make buttonholes that would lie behind the original ones and look good from the inside.  The latter requirement meant that sewn buttonholes were instantly rejected.   (Sew buttonholes in one layer of lining fabric?  No thank you!)

Then I remembered reading that Chanel jackets sometimes had bound buttonholes made in the lining to back sewn buttonholes in the outer jacket.  And I dimly remembered the Carr technique.

Ms. Carr wrote:  "Frequently used by the designers, this buttonhole has very thin lips that can hardly be seen.  I like to call them 'invisible' bound buttonholes.  The advantage of a Spanish snap buttonhole is that it can be made very small - as one might use on a silk blouse.  On the other hand, Spanish snap buttonholes are equally effective used on a tweed or nubby fabric with the lips made from wool flannel or worsted."
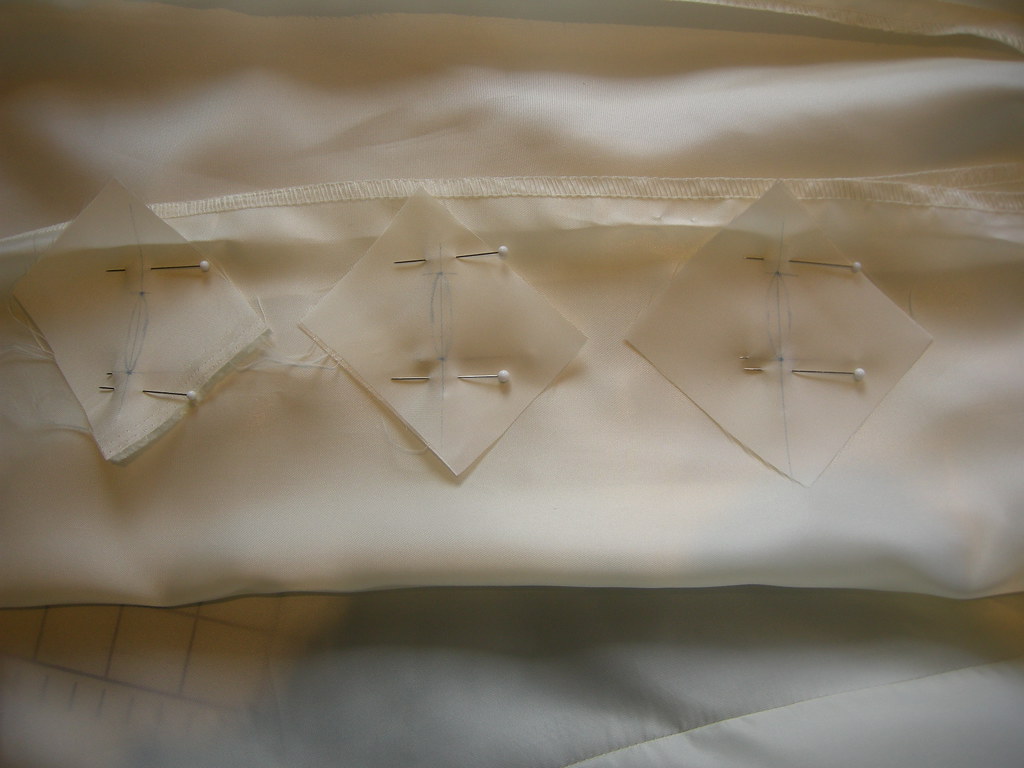
What's not to like?  Here's how to make them.

First, mark your buttonhole placement on the fashion fabric.  Then cut little patches that are big enough so that ON THE BIAS (this is important!) they are as long as your marked buttonholes, plus about 2.5cm (1") on either end.  Mark the patch (wrong side) with a line that represents the centre line of your buttonhole, and the ends of the buttonhole.  Then draw (lightly) a pointy oval shape (like a flattened football) that is about 6mm (1/4") wide at its widest, centred on the marked line.  Carefully pin your patch to the markings for your buttonholes, right sides together.

Sew around the marked football, pivoting at the pointy ends, using teeny-tiny stitches (1mm on my machine).  Here's a close up of the stitched patch.  You can see I've trimmed my patch to an oval shape. Ms. Carr suggests starting with this shape but it really doesn't matter. 
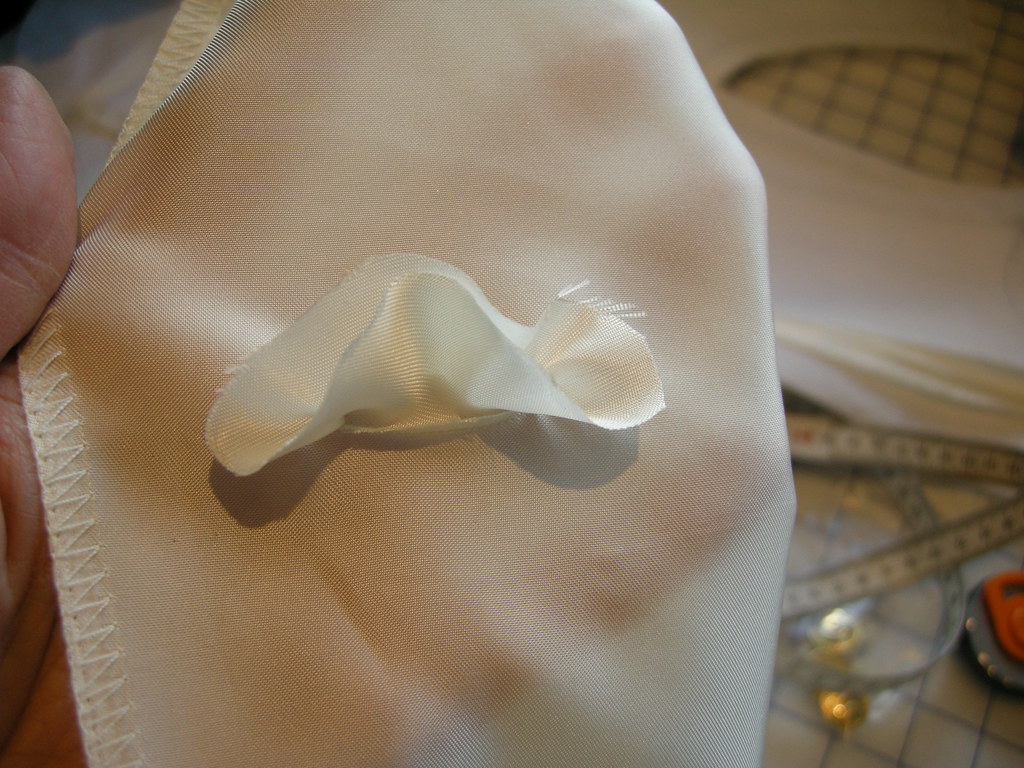
Snip carefully along the marked centre line to (but not through) the stitches at the pointy tip.  Then pull your patch through to the wrong side.
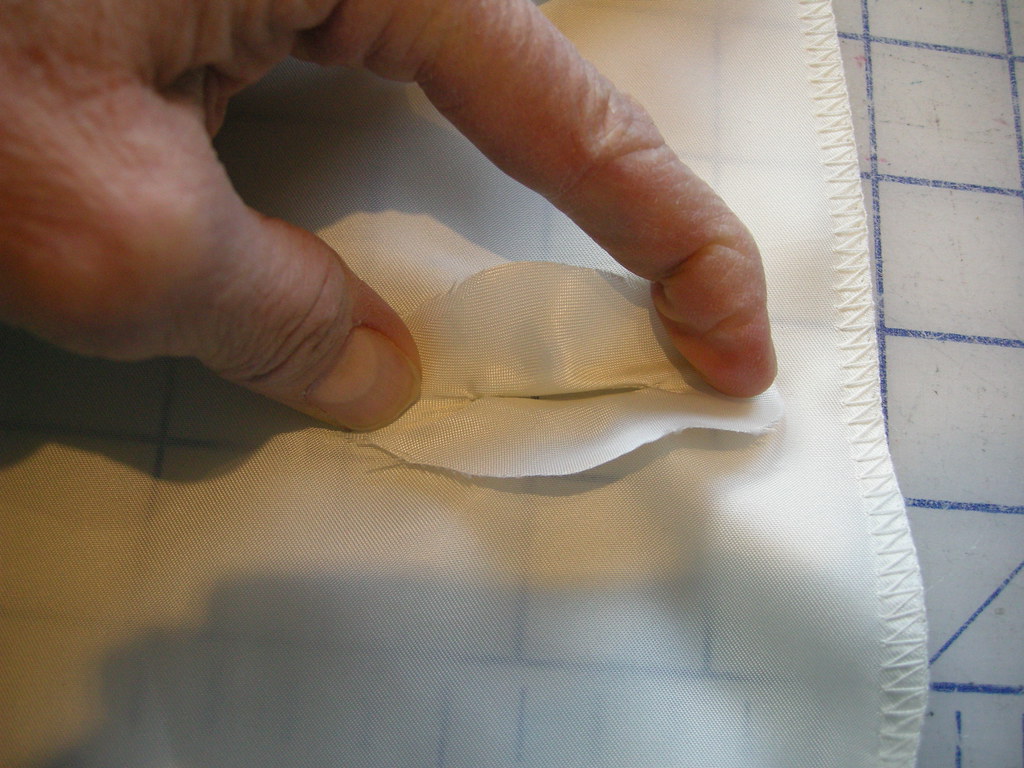
Next comes the magic, ineptly illustrated here because I was holding my camera with one hand.  To quote Ms. Carr:  "Holding each end of the egg shaped patch with the thumb and forefinger, pull in a snapping motion.  One good 'snap' and the bias will wrap around the 1/8" (.3cm) seam allowances and automatically create tiny narrow lips."
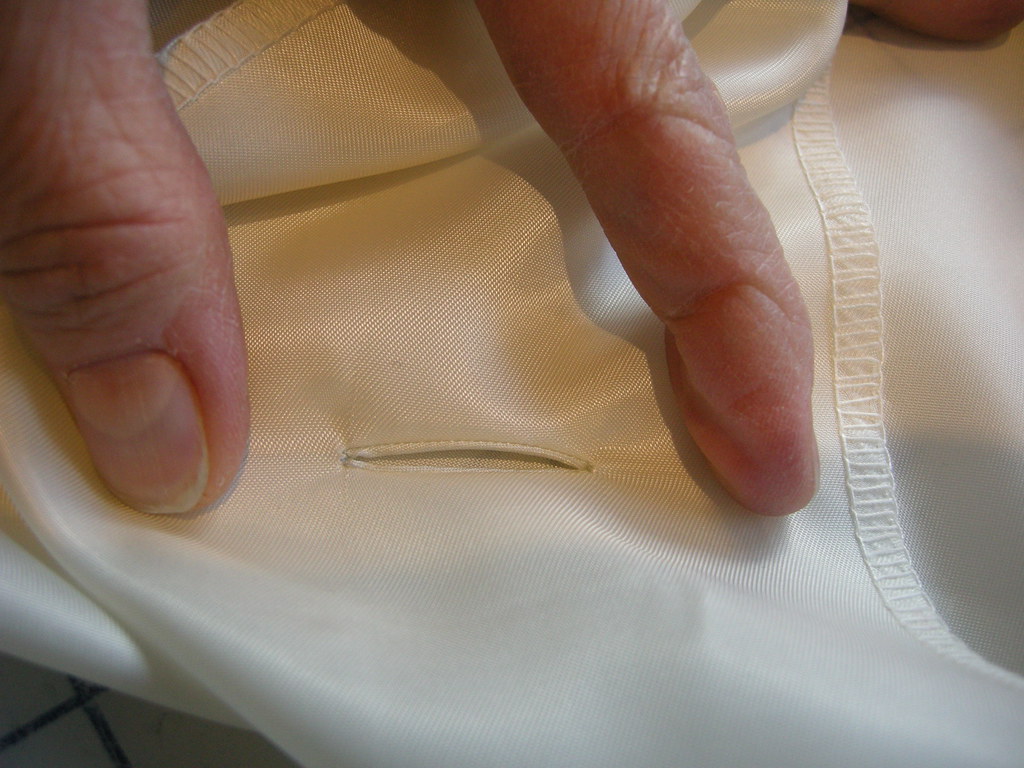
This is the right side, even before pressing!  

Magic, I tell ya!

No additional sewing is required - Ms. Carr says you can use a tiny bit of fusible web at each end to keep the patch in place.  (I will however tack the patches to my jacket to keep the buttonholes in place.)


In other news, I had approximately 50 minutes while in Toronto to shop, and I wanted to do two things:  visit Perfect Leather at 555 King Street West; and look for waterproof (or water-resistant) fabric for the fur coat.  


Guess which one prevailed?  (This photo from Perfect Leather's website.)  All I can say is WOW!  I think you can find any kind of leather; any colour; any finish; any size; any combination.  Needless to say there is a very intoxicating and leathery perfume in the place.  I bought 4 sq.ft. of orange goat leather for a little project...  


Sunday, November 14, 2010

The edges of sewing

By which The Sewing Lawyer means an activity that has something to do with sewing but doesn't involve the actual activity of putting cut pieces of fabric together with thread.  It includes choosing fabric (in a store or from the stash) and patterns, thinking about sewing, reading about sewing, and tracing patterns. More constructively, it may involve shoveling out the sewing room.   This is a (rarely-seen) variation of sewing around the edges because it tends to result in recently-acquired fabric being handled, thought about, and put away, and leads to unfinished projects being unearthed, thought about, and sometimes even advanced (without actual sewing).

Because I feel I have truly started to "sew" until the machine has been turned on and a bobbin wound, I also include cutting out projects in this category, if I'm pretty sure I'm not going to turn the machine on and wind a bobbin imminently after cutting out the last piece.

Right now, I am marking time while waiting for my teflon foot to arrive so I can get back to the leather jacket.  It's going to be a bit of a pain to translate the very precise settings I had been using (on Kathryn Brenne's Bernina) to the very imprecise settings available on the Featherweight, but I am determined.

So in recent days, quite a lot of stuff around the edges of sewing happened here.  This included:

  • taking the lining out of the mink coat pictured in a recent post, reading Kathryn Brenne's article in Vogue Pattern Magazine several times, studying the construction of the coat, identifying Vogue 1083 as the perfect pattern for its transformation, thinking about the kind of fabric that would best complement it, rejecting every piece of fabric in my stash as unsuitable; shopping several websites without success, and trying to figure out if I'll have enough time to seriously look for fabric on my work-related trip to downtown Toronto later this week;
  • making the lining pieces for my leather jacket (after all the adjustments it was easier to make the lining patterns from my altered pieces than to alter the included lining pieces);
  • (finally) finishing the lining pattern for my Auckie Sanft jacket which was enthusiastically disassembled for this very purpose more than a year ago; 
  • cutting Jalie 2795 out of cushy blue-grey Power Stretch; 
  • washing and drying recently-acquired fabric; and
  • putting fabric away (!) which is always a challenge chez The Sewing Lawyer due to an overabundance of fabric and an underabundance of storage locations.  

Today I feel like more, maybe to include tracing Jalie 3024, which I think I'll shorten for now to another top suitable for exercise wear.


Monday, November 2, 2009

An Amazing Jacket

A friend of mine actually likes to shop, and she finds the most astonishing things at thrift shops. Today, I'm going to show you one of her finds. She bought it because it was too good to leave in the store, even though it didn't fit her. I'm the beneficiary and have had the pleasure of owning this jacket for several years. I'm now in the process of replacing the lining, which was shredding. I thought to document the jacket before proceeding.

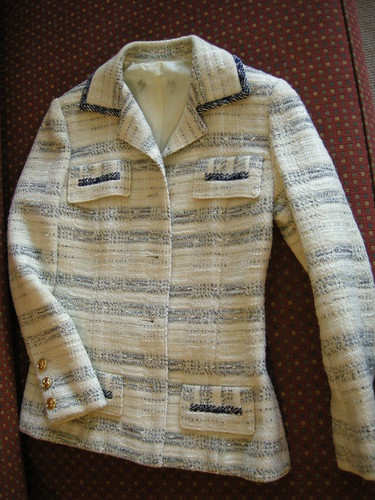
So, I introduce to you my vintage Auckie Sanft jacket. I can't say exactly when this was made but it was probably the mid-1970s. It is very close fitting and came with a mid-knee length, matching A-line skirt with a plain back and large box-pleated front. The skirt never fit but I have worn the jacket a lot.

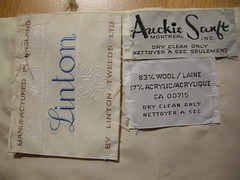
Auckie Sanft was a high-quality Montreal manufacturer. Perhaps this jacket was designed by John Warden, though maybe not, as it seems Warden did not work with Auckie Sanft for long. Whoever was responsible for it was a master.

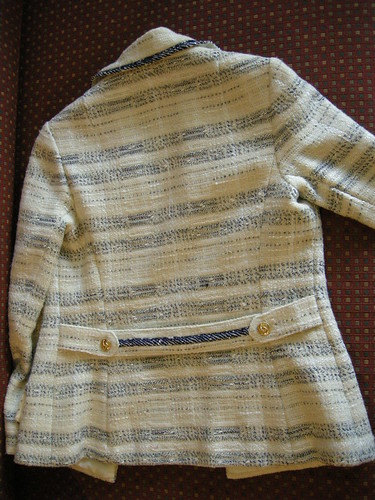
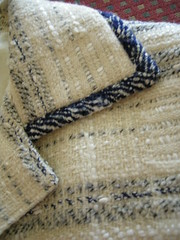
There are several things about this jacket that are special. First, the fabric. This jacket is made from beautiful Linton Tweed. "There has never been a Chanel collection without Linton tweeds", apparently (according to a 2004 story on Scotsman.com News). I believe it! This fabric is absolutely luscious. It's predominantly cream, with novelty threads in silky/shiny white, dark blue and white, and soft grey woven through it to create an irregular plaid. The label says 83% wool, 17% acrylic. From a distance, a little unfortunately, it looks like a horizontally-striped jacket. No matter, it's gorgeous! Here's the back.

The stripiness of the fabric tells an interesting story. First, it's beautifully matched at all body seams, and the sleeve cap matches perfectly, but only in the back. Hmmmm. In the front, the sleeve cap is not matched to the jacket at the armscye, but the sleeve and body do match lower down.

This is a mystery! The solution is that the upper pocket flap disguises a little seam which does not match. It has something to do with the bust shaping provided by the princess seam.

The designer used what I believe was the darker blue selvedge edge of the fabric to provide a coordinating trim found on the pocket flaps, collar and back belt.

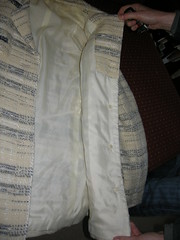
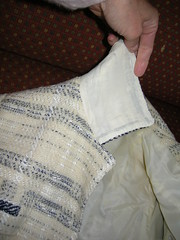
The next feature of the jacket is that the maker has reduced bulk almost everywhere by using lining fabric as facing - the collar, pocket flaps and front are lined to the edge.

There is also very very little internal structure in the jacket. There is a very light shoulder pad and very light-weight and supple canvas (possibly linen?) at the front edges, around the armscye, and behind the pocket flaps. The chest area has a single layer of a slightly stiffer woven interfacing. The back shield and hem interfacing are the softer canvas, cut on the bias. I believe there is no interfacing at all in either the collar or pocket flaps!

Here are some photos of the details.


Only the lapel area, sleeve hems and vents are not faced with thin lining fabric. The sleeve hems are bulky! But check out the Chanel buttons. Are they real??

Check out all photos in more detail at my Flickr page.