Showing posts with label machine knitting. Show all posts

Wednesday, July 8, 2026

I went on a knitting retreat

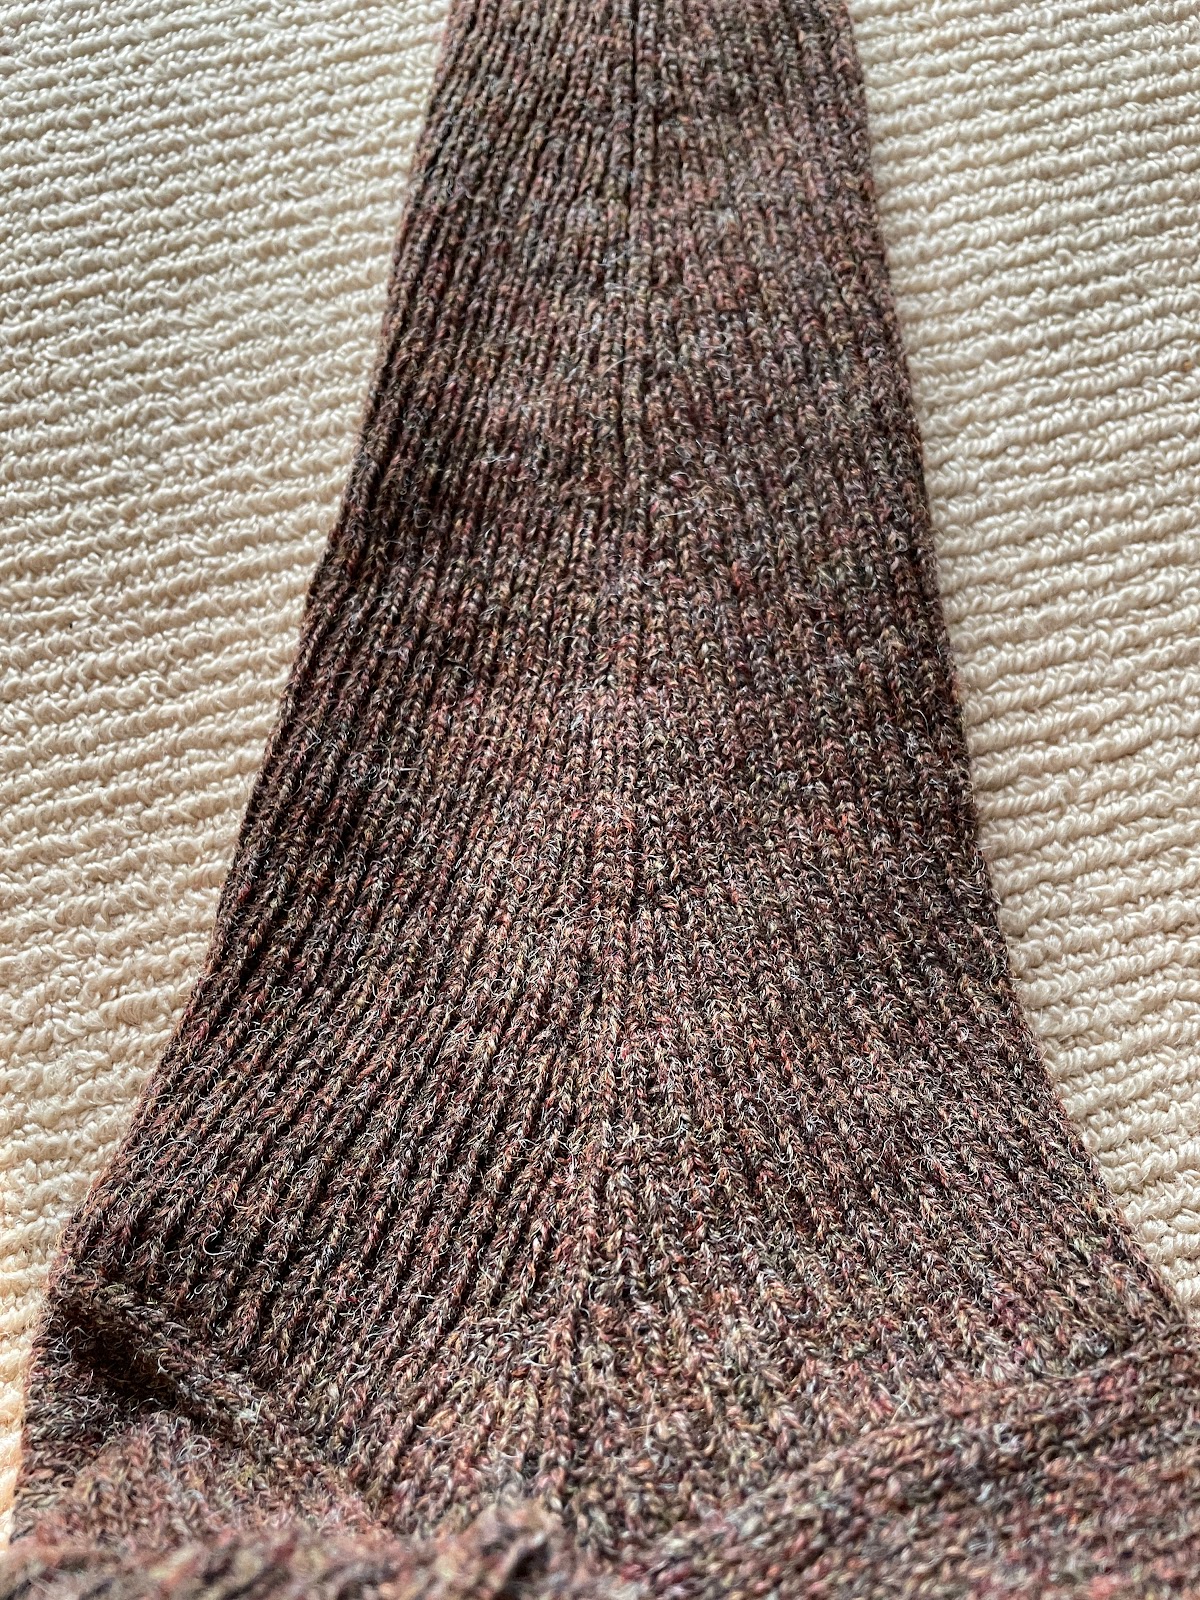
And I made this cool sweater (mostly) in four days! It's a new pattern by Nic Corrigan of the Machine Knit Community (it was an MKC retreat) - the Garnet Gansey. 

Everyone who makes this pattern (it will be available for purchase soonish) will post a photo of their armpit.

Because, as you can see, it has this cool gusset.

It helps with fit because this pattern is basically a bunch of rectangles. 

There are other interesting features. No ribbing is involved. 

However, you have to have your garter bar at the ready. By the end of this project I had become quite friendly with this tool. 

The lower edge of the sweater is a cute little roll of stockinette that is immediately tamed by a garter ridge. 

I am looking forward to cooler weather when I can actually wear this sweater.

It's made of luscious Koigu fingering weight yarn - from their "solids" collection. The colours are not actually solid though - they are wonderfully variegated. I chose the 4 colours from the "rust" group and I'm very happy with my choice. 

The venue for our retreat was the Walters Falls Inn near Owen Sound, Ontario. We had the entire hotel to ourselves from Sunday to Friday - in between weddings, I suspect. It was grand. Great food, comfy accommodations, nice scenery (it's near the Bruce Trail and I went for a walk each morning) and time spent with new and old knitting friends. 


On the last day, we visited the Koigu farm, which is just down the road, and do you know? They had yarn for sale! I think they did rather well from our group. Previously, I had two or three tiny skeins of Koigu in my "too good to use" stash. Now I have a lot more and some of it is seriously colourful because they specialize in wild variegation. 

I think some swatching is up next. 

Saturday, June 20, 2026

Knitting - a succession of complicated projects

I want to be sewing a bit more but my serger has gone in for sergery (hahaha). It needs new blades. Apparently if you sew a million miles, the blades wear out and stop working. I am looking forward to getting it back.

In the meantime, let me bring you up to date on a bunch of machine knitting I have done in the last ## months.


About a year ago I purchased some software that has been a total game changer for me. It's called DesignaKnit (affectionately also known as DAK). For years I scoffed at this program. I had a number of tools I could use, including some software (Garment Designer, Img2Track) and some more old-fashioned tools (pencil and gauge specific graph paper) and I made a number of things, quite successfully, using these tools. 

DAK looks clunky if you download the demo version. I was primarily interested in how it could develop patterns (2D shapes) for garments and I couldn't (or didn't figure out how to) see these in the demo version. Instead I saw the extremely ugly "standard garment styling" module. The graphics are completely horrible! It put me off. 

It's also stupidly expensive. You need not only the software but also the cable and sensors that will allow your computer to interact directly with the knitting machine. 

Luckily, I found someone who owned a licenced copy that she wanted to sell, and got the software plus cables for a reasonable price. 

DAK has multiple modules. The aforementioned ugly standard garment styling is good only to get started on a sweater design. The game changer is the Original Pattern Drafting module (OPD). This is a very powerful but also completely open-ended drafting platform. Unlike Garment Designer, it has no preconceived ideas about what a sleeve shape might be and thus generates no annoying error messages when you change things around. 

Then there's the Stitch Designer, which allows you to graph out your preferred stitch design (whether knits and purls, cables, fair isle, or double bed jacquard). You can integrate your stitch designs with your shape files and see how the pattern will look on the pattern pieces. If your machine is electronic, DAK will allow you to download your stitch patterns directly to the machine. Or you can use it to develop a punchcard. 

And there is the Interactive Knitting module. With an appropriate cable, you can use your computer screen as a guide in real time to what you need to do on the machine, whether it's placing an intarsia image, reforming stitches or increasing/decreasing to shape the piece. This is a superior type of "knit radar" (a device that uses schematic drawings on a mylar sheet to provide a visual guide to shaping). 


My first DAK project was this hood. I used OPD to alter the pattern piece for better fit. In Stitch Designer, I changed the colour scheme of the fair isle stitch patterns. Then I further adapted the stitch pattern and applied these variations to my mittens and headband (pictured in the grid above). 


My first DAK garment was this cardigan. I conjured up a V necked cardigan with set in sleeves in the standard garment styling module and then adjusted the pattern using OPD. 


These are screen shots of the Stitch Designer module, which I used to develop these Christmas stocking patterns for my son, daughter-in-law and grandson. It was fun to find stitch patterns that suited each of the recipients and demonstrate what is unique to them and what they share. 

Interactive knitting helped me do the colour changes as I knitted the stockings. 


Then there were these fun hats. I made the first one for grandson Sam using simple dinosaur shapes I found on Ravelry. Then his parents wanted their own versions. Sarah's Triceratops and Jack's T Rex stitch pattern designs are personalized for them but use the same yarn, colour scheme and basic design (check out this brilliant Earflap Hat Pattern Generator). 


This purple number may be my favourite knitting project to date. It is adapted from a hand knitting pattern. I used OPD to translate the hand knitting instructions to flat pattern pieces. 

I could not have confidently knitted the cables (all hand manipulated on the ribber bed) without the interactive knitting feature of DAK. 


DAK is great for adjusting a specific pattern for gauge. My version of Rebecca Yaker's astonishing Equilibrium Jumper is knitted with yarns that are finer than the intended yarn. I developed a shape file (pattern pieces) for the upper portion of the sweater and plugged in my finer gauge to get stitch and row counts so I could use the yarn I had to knit her design. 


The last sweater in the grid is a sneak peek of a just-completed project that I ought not to reveal just yet. I will give it its own post in a month or so...


Next up is an interesting slip stitch cardigan designed by Halyna Shemchuk. I have to get swatching. 

Wednesday, July 16, 2025

Can I post retroactively? Filling in a gap from 2021

A friend told me she couldn't find the post on my blog about an epic machine knitting project that I completed on Christmas day in 2021. Nor could I, because it didn't exist! Poor, poor neglected blog.

To recap, one day in late summer of 2021 I got the totally idiotic idea to knit my husband a vest using left over bits of sock yarn in my (ahem) extensive stash. In intarsia. Based on a hand knitting pattern by Kaffe Fassett. 

Here is the photo from the original pattern (Ravelry link), which is in a book I happen to own. 

Of course, all the yarn that was originally recommended is long since discontinued. However, this is the type of project that practically begs you to use whatever you have on hand. 

I had so much miscellaneous fingering weight yarn, even including some orphan discontinued Rowan skeins sourced by my husband at thrift shops. How fitting to include them in my project.


Husband and I went stash diving and came up with a palette that worked.

I ended up using most/all of these yarns in the finished vest.

The pattern looks complicated but breaks down into understandable chunks. 

If you squint at the pattern photo, it resolves into a quilt-ish looking pattern of hexagons against a neutral background. The hexagons are comprised of 6 triangles each and the background is also triangles. Each triangle is 16 stitches wide at its horizontal side (base or top, depending on whether it is point up or point down) and 16 rows high. 

I decided that each hexagon needed to have two dark triangles, two warm coloured triangles, and two cool coloured triangles. I had two different neutrals (a warmer and a cooler beige). Other than that, my only colour rule was not to repeat the same colour in the same orientation too closely together. It had to look kind of random, but kind of ordered at the same time. 

This is what intarsia knitting looks like while on the machine. 


I used "butterflies" of yarn wound on my left hand - a butterfly wrapped about 20 times was more than enough for one triangle. Plus, the dangling butterfly was about the right amount of weight on the yarn to keep it from jumping off the needles during knitting. The clothes pins are holding down the end of the yarn at the very beginning of each triangle; the butterfly hangs from the last knitted stitch in each colour. The other things hanging off the knitting are claw weights, which help keep the entire knitted piece on the machine. 

And here's a video on how to knit intarsia on a machine. It's not rocket science, but it does take concentration. I started with the fronts on the theory that they would ease me into the process (half the width, half the number of different colours in a single row). The photo above is of the back. Even after knitting both fronts without serious incident (that I now recall), I found I could only knit two rows of triangles (total of 32 intarsia rows) at a time before needing a break. 

Long story short, Ravelry tells me that I started this project on August 29 and finished it on December 25, 2021. 

It took forever to weave in all the ends on the back of the knitting. 

Once the ends are woven in, the back is almost as neat as the front.


And now for some finished photos.

With a pipe. Because male models in knitting patterns are often holding a pipe, if not a gun of some kind. 

You can readily see the hexagon quilt-like pattern in the back. 


It has pockets!


Monday, October 28, 2024

Best sweater so far!


Why am I so happy with this sweater? Let me count the ways. 

  1. It's cozy and warm.
  2. I love the cables. 
  3. It's better than the photo I used as inspiration.
  4. It's exactly the size I wanted it to be.
  5. Technically, I did a good job.
Proof of magenta threads!
Why is it cozy and warm? 

Because I used aran-weight yarn that's a blend of 50% wool and 50% alpaca. It's loosely spun, heathered yarn in a luscious turquoise that's threaded with magenta (which only becomes visible in bright light). 

This yarn came from my stash. My Ravelry notes indicate it was a birthday present from my husband, which means it was thrifted. It's Estelle Yarns Ultra Wool. Ravelry says this was a limited run that ceased production in 2010. Too bad, it's beautiful yarn!


What about those cables? How is it better than the inspiration?

My inspiration photo came from an ad. This is an extremely cheap acrylic number. While the look of it appeals to me, anything I made would be nicer than the original. The elements it had to include were - it had to be a bit oversized, have a deeply cabled yoke, and have cables that continued up into a high and otherwise ribbed collar. 

Some investigation revealed that the cables in the inspiration sweater were probably 5x5, which would be hard for me to knit on a knitting machine. This is because the needles are fixed in position and so you can't, as in hand knitting, squish the stitches together to cross a big number of them. There are ways to do it, but they are a little complicated. Plus, I lacked the tools (transfer tools with more than 3 prongs) to accomplish a 5x5 cable. So I looked elsewhere for a cable pattern I could use. 

I decided to knit a pattern of 3x3 cables. The chart came from the Harmony Guide to Machine Knitting Stitches, a great resource. 

I really like the bumpiness of this cable pattern. My yarn has great stitch definition, and I think the finished cables look even better than the photo in the Harmony Guide. 

This chart works because it creates an allover cabled texture that could continue up into the high neck. I realized I could place the cables so that I had 4 columns of cables (24 stitches in total) with 2 on either side of centre. These 4 columns line up to look (sort of) like braids, as in the inspiration sweater.


What about sizing?

Just slightly oversized - that was my goal. I made a sweater last year that fit just right. I seem not to have blogged about it (my bad). Here is a photo. (More details on my Ravelry project page.)

This sweater was knitted from yarn that was just a bit lighter in weight than the Estelle Ultra Wool, but it's still fairly thick. Its shape is super basic - it's a gansey. The front and back are rectangular and the sleeves have a very shallow cap. I added a gusset under the arm for better fit and comfort. 

Nevertheless it has a fairly deep round front neckline, which works well on me because I have a forward neck. 

I designed this sweater in Garment Designer, so I had the pattern pieces. All I had to do was adjust for a different gauge. 

Here's a photo of the 2 sweaters - they are almost exactly the same size! 


Last but not least - the technical details

I knitted swatches of stockinette, ribbing and the cables. The gauges for each were different. 

The difference between the stockinette and the cables was dramatic. I knit the cables at a bigger stitch size to make it easier to cross the stitches, but still, in order to have no difference in width between the cabled yoke and the rest of the front, I had to add 20 stitches across the front! I did this increase using a garter bar, which allowed me to take all the stitches off the needles and put them back in a different, more spread out configuration. 

The added stitches are completely invisible in the finished piece, which is, as intended, completely straight up the sides. 

I also had to calculate the length of the yoke using the cable specific gauge. I made a separate pattern piece in Garment Designer just for the yoke. 

Because the gauges were so different, I decided not to do shaping for the neckline or shoulders on the machine. This was because shaping would interfere with the cabling and so I would end up with a lot of uncabled stockinette, including all those extra stitches. They would flare out, probably in an unattractive way. 

To avoid flaring in the neck and shoulder areas, I decided (first time ever) to use a cut and sew technique. I took the centre 24 stitches off on waste yarn, and knitted the cabled pattern straight up on either side of these stitches to the length needed for the highest part of the shoulder. 

Then I rehung the centre 24 stitches and continued the cable pattern up for the high neck. I added a stitch on either side for seaming. 

I then used thread basting to identify the lines for the shoulder slope and side neck shaping. I ran 2 lines of straight stitch along the basting to secure the knitting. 

The back of the collar is knitted in rib, which has (luckily) a similar row gauge to the cables. I figured out the number of ribs I needed to get a piece that would be 85% the length of the neckline, minus the centre 24 stitches. The rectangular piece was knitted with open stitches at the top and bottom, as I had decided to attach it to the neckline with hand stitches, and wanted flexibility to rip back a row if needed to make the upper edges of the back collar even with those of the ribbed portion. 

At left, the collar was sewn on. That orange yarn is the waste yarn that secures the top and bottom loops. 

I didn't cut anything until after I had attached the back and front at the shoulders, and attached the back collar. 

I decided to further secure the cut edge by encasing it in bias strips of tricot (similar to Seams Great) from my extensive sewing stash. the tricot on one side using a zig zag stitch, then cut ... very carefully ... before encasing the narrow edge in the tricot with another line of stitching. It isn't particularly beautiful on the inside, but it works and I think it is secure. 


The hand-stitched collar looks pretty fabulous, if I do say so myself. 

I used a backstitch. It looks like a line of purl bumps.

In the end, the back and front of the collar were just the right heights, and I did a similar back stitch finish on the open loops at the top of the collar, all the way around. 

The back hem is a bit longer than the front, and there's a little slit at the side seam. 

The only thing I'm not 100% satisfied with is that the top edge of the cables at the collar curls a bit. I will live with that for a bit before deciding whether it needs fixing. 

Friday, August 30, 2024

Taking on a technical challenge - Tide Loop Top knitted by machine

At left, my latest machine knitting project. This is a mostly self drafted top that is based on a hand knitting pattern that references the ripples left in wet sand by departing waves.

At right is the inspiration, the Tide Loop Top pattern by Other Loops. 

But I wanted to make it by machine, to use different yarn and to reimagine the shape.

The original pattern called for two yarns to be knitted together - one alpaca, the other a blend of linen and cotton. I chose a mystery cone of yarn from stash, which I think is cotton. It wanted to be knit at a much smaller gauge (30s x 41r in 10cm) than the pattern called for (24s x 32r), but it was more or less the colour of sand. 

I completely redesigned the shape of the top. The original has a deep scoop at the back and is quite high in the front. Mine has a reasonable scoop at front and is quite high in the back.  

I used the pattern (sort of), knitting size XL to get a circumference approximating size S. But above the armholes, I made up the shaping as well as the patterning. 

My edges are also different from the pattern. It called for a sewn hem and I did ribbing. It called for the neck and armhole openings to be finished with 3 rows of stockinette that would roll towards the RS. I finished these edges with iCord, knitted by machine.

Knitting it took a while (read on to understand why) but I am super satisfied with this project!

What was the technical challenge?

The defining characteristic of the fabric of the Tide Loop Top is the uneven horizontal stripes of reverse knitting, creating irregular textured stripes or ripples. In this top, most of the stitches have their purl side facing out, but the recessed stripes are the opposite (knit side facing). This apparently simple texture is quite hard to create on a knitting machine. Purls have to become knits, but not an entire row at a time. And the patterning is quite irregular across the rows as well as between the rows of recessed stripes. The in and out texture combined with the irregularity means that this is the hardest type of fabric to knit on a domestic knitting machine.*

The U100E is a tool that helps make this type of texture. It is a transfer carriage. All it does is move stitches from needles on one bed of the machine to needles on the opposite bed. Once moved, the (formerly) "knit" stitch can be worked as a "purl" or vice versa.

It works with Passap knitting machines. It didn't come with my machine, and I no longer remember where/how I purchased it or, for that matter, how long it had sat on a shelf. I had bought it, but I had never used it.


In more detail (possibly TLDR, you can skip to the next section if you want)

The Passap is a "true" double bed knitting machine, which means it has two functionally identical beds of needles that sit at a fixed angle. Each bed is equipped with almost 200 latch hook needles. 

The beds are oriented as in this diagram.


Because the hooks of the needles on one bed face in the opposite direction from those on the other, stitches made on one bed are the physical reverse of the stitches made on the other. One side makes the knits and the other side makes the purls. 

On a double bed machine, you can use needles on two beds (as in the diagram) to knit a tube - first the machine knits all the needles on one bed and then it knits all the needles on the other bed, and then it repeats. This is the same as knitting in the round in hand knitting. 

Or you can use both beds at the same time to make a ribbed fabric. This involves knitting a few stitches on one bed and then a few on the other and repeating so that the yarn zigs and zags between the two beds along a single row. You can do the same thing with hand knitting needles. There will be some knits, and then some purls, and some more knits and purls along the knitted piece. 

When knitting by hand, it's quite easy to make fabric that isn't ribbing, but has a texture created by both knits and purls in a single row. You can work either a knit or a purl into any stitch along the needle. You can do this either in the round, or when turning the knitting between rows. Garter stitch is made with only the knit stitch, but when you turn the knitting and work knitted stitches on the back side of the fabric, you are always working a knit stitch into a purl stitch (the back of a knit stitch).  

Making some knit/some purl fabric (other than ribbing, which lines the knits and purls up vertically) is not at all straightforward on a machine. You need a mechanism for transforming a stitch (physically turning it around so what was front is back, or vice versa). This can be done completely manually - unravel the knit stitches that you want to be purls, hook them up backwards and rehang. Or you can use a double eye transfer tool to switch stitches, one by one, from one bed to the other. 

If you want to knit garter stitch (knit rows and purl rows alternate) you can use a garter bar to flip the fabric, physically, before knitting every single row. Other, more complex types of patterning can be done automatically with a garter carriage (only Brother machines). Or, if you have a Passap, you can use the U100E to transfer all the stitches in a row to the opposite bed, or just some of them.

For all readers

This knitting project provided a perfect opportunity to finally learn how to use my U100E. 

This wasn't entirely smooth, at first. The U100E initiates a physical process requiring some pressure and determination. There are a series of steps that had to be completed in order to do the transfer. There were a series of things that could go wrong. It liked me when I approached the task with confidence. Even pressure, proper alignment of the beds and assertive movement of the carriage from side to side, and the U100E would bend to my will. Any hesitation, and I, or the stitches, or the needles themselves, could be lost. After the transfer was complete, I had to make sure that all empty needles were removed from working position. Then I had to remember to actually knit a row before setting up for the next one. 

My swatch (at right, especially the first bit at the bottom) looked pretty bad. 

But it turns out that repetition does eventually turn into knowledge and/or skill. I dropped fewer stitches, had to un-knit fewer rows, and generally got a better result as I continued to use the U100E. 

At the end of the day, I have a nice tank top with an interesting texture. 


* Of course, there are knitting machines used by manufacturers that have automated knitting for this type of thing. They are far out of reach, price wise, of the average hobby knitter. 


Friday, October 6, 2023

Lumb Bank cardigan


We (the retreaters) have revealed our finished and mostly-finished cardigans to each other and to Nic Corrigan and are cleared to show them to whomever we please. So here is the cardigan I mostly made while in Yorkshire, but finished here at home. There, I used the assigned machine, which was a Silver Reed punchcard (a Zippy plus, which is older than a SR 360 I think). Here, I used my Brother KH965i. 

The Lumb Bank Slipover pattern is named after the location of the retreat (the steep hill) and Nic designed it with or without sleeves and with 3 different stitch patterns that evoke different aspects of the location - a leafy canopy, library bookshelves and mullioned windows. These designs can be used in whichever locations the maker wants - the entire sweater, panels, single motifs or otherwise. 

Even though all of us were working with a limited colour palette and the same pattern, every cardigan was totally different. This is a pattern that allows you to really make it your own. 

I chose to place the leaf pattern on the centre fronts and at the lower edge of the side fronts and back. One punch card repeat perfectly aligned with the pocket opening and continues around the back. 

I didn't know (or possibly had failed to notice or forgotten) that stranded knitting is always longer than the equivalent number of rows in plain stockinette. I found I had to unravel about 10 rows of my centre fronts and re-cast off by hand to even them up with the side fronts.

As you can see, this is a boxy design with relatively narrow 1x1 ribbed sleeves. There is virtually no shaping in the body - no back neck drop, no armscye shaping. The shoulders are shaped with short rows. 
We were able to examine and try on some samples at the retreat, and based on my assessment I made some changes so it would fit me better. 

There is a V neck at front, which is fully fashioned. As designed, it is quite a bit lower than the front of my cardigan. I knit extra rows to raise it up by about 10cm. 

I also decreased the width of the back by approximately 4cm (there is a centre back seam) because my back is narrow. 

Finally, I lengthened the back overall and added a back neck drop. This helps the cardigan sit correctly on my shoulders. 

I did a couple of things differently in the construction as well. 

The samples had seams sewn with wrong sides together. I made mine the conventional way. 

The instructions asked for all body pieces to be taken off the machine on waste yarn rather than cast off, and then seamed using a linker. I wanted the stability of a cast off edge at the shoulder and back neck. Also, I was taking the pieces home in my luggage and wanted the stitches to be extra secure. So I cast off around the gate pegs on all but the sleeves. I left the sleeve stitches live but cast off the waste yarn for security.

I totally recalculated the neck band so that it had a seam at CB rather than (as designed) two seams above the V crossing of the front neck. The structure of the band is many stitches cast on in full needle rib, and then every 2nd stitch transferred on the ribber bed. It looks like 1x1 ribbing on the ribber side, which is the public side once attached, and like FNR on the main bed side. It's OK but not my favourite ever neck band technique. My thought was that it needed to be stretched much more than the pattern indicated - i.e. that the pattern instructions would produce a neck band that is overall too long for the opening. I am glad I shortened it and think I could have been even more aggressive as it is not sitting quite flat at the side neck. 
I made the pockets exactly
as the pattern instructed. They are just an extra length of knitting within the side fronts (knitted with the few stitches to either side in hold). I made them in the contrasting colour. 
I attached the lower corners to the seams so they don't flip up (copying what I saw in Nic's samples).
I assembled the cardigan mostly on my linker but had to attach the band by hand due to technical issues too tedious to describe. 

New features/experiences associated with this project:

  • Intensive knitting experience - no time to ruminate, had to make quick decisions, jump in and just knit. That was surprisingly tiring!
  • Properly fully fashioned ribbing (behold at right the underarm seam). 
  • Put almost the whole thing together using my linker, which hasn't been my favourite piece of kit. 

BTW the actual colour of this cardigan is somewhere between how it appears in the inside and outside-in-the-sun photos. The yarn is very heathery. It's Gardiner Yarns SS11 Shetland, 100% wool. I'm not convinced I got all of the spinning oil out of it when I washed it and may attempt to rough it up some more to make it a bit softer. 
Once I finished it I realized I didn't have a lot of tops that would look good with this. I'll have to make something!

Sunday, October 1, 2023

First ever MKC retreat

Last month, I went to a machine knitting retreat. It was AMAZING! 

Five days in a beautiful house perched halfway down a steep hill (Lumb Bank) outside a quaint, tiny village (Heptonstall) outside a quaint small town (Hebden Bridge) in the Calderdale district of Yorkshire, England, with 15 like-minded knitters, 3 wonderful hosts and 2 expert instructors. 

I'm still processing it. 

For now, enjoy these photos.


Here is the house. It's the Ted Hughes Arvon Centre at Lumb Bank. I took this photo from across the very steep valley. The house is an 18th century millowner's house that once belonged to Ted Hughes, who was for a time the poet laureat of England and the husband of Sylvia Plath. 

Another view of it from the "road" that leads to it. It's really not more than a track. 


This is the view from the front lawn of the house, looking out more or less in the direction from which I took the first photo. 

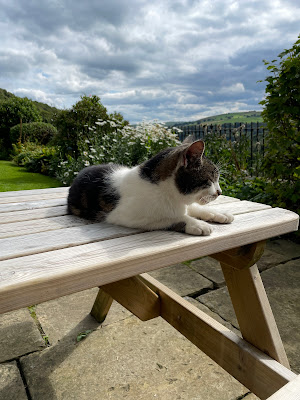
And here is the cat, Ted Hughes, who is not allowed in the house at all.


Our knitting room was in "the barn". 


This was before we started, which explains why it is so neat.

On day 1, we were introduced to a forthcoming pattern (holding a retreat seems an elaborate way of finding pattern testers LOL) and got to choose our yarn.


My knitting throne. I lucked out!


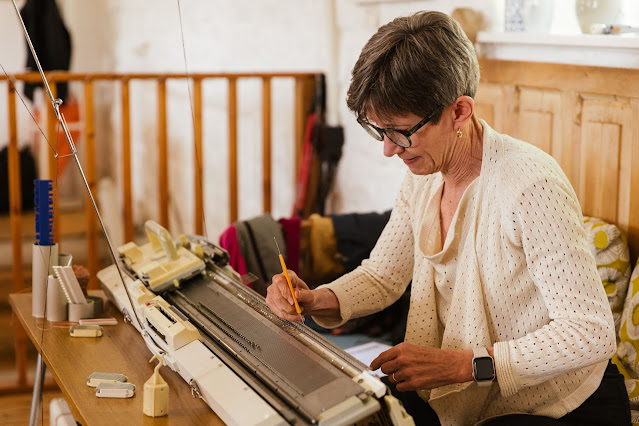
Proof that I sat there and worked. I was concentrating!


In four very intense days I knitted all of the pieces of my (secret project). It is now finished and this coming week, we retreaters are meeting up by Zoom to unveil our finished items to each other. Afterwards, Nic (Corrigan, founder of the Machine Knit Community) will release the pattern to the world.