Sunday, May 29, 2011

Who am I kidding?


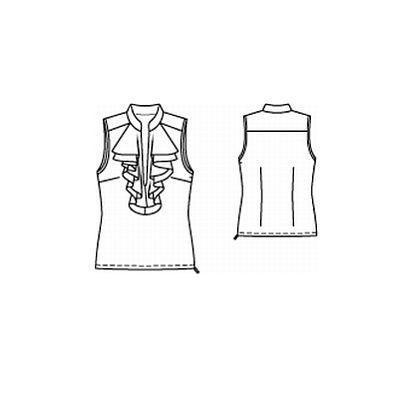
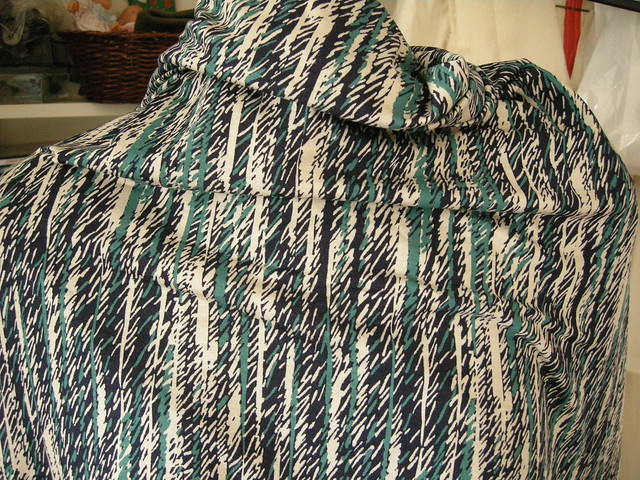
I hate the ruffles.  They're coming off.  Now.  


Slow going

So I'm working on a blouse.  I gave you a hint here.  It's the recycled skirt, which I am aiming to turn into something like this, a ruffled blouse from the April, 2010 issue of Burda Magazine.

Except that it will only have a single ruffle and it will have a button & loop centre front closing instead of a side zipper.

The fabric is blouse-weight Thai silk - not the floaty chiffon that Burda used for their version.  So the ruffle is a little stiffer.  I could leave it off.  However, then I'd have less camouflage for this.

For what?  I hear you ask.  Well, for this:

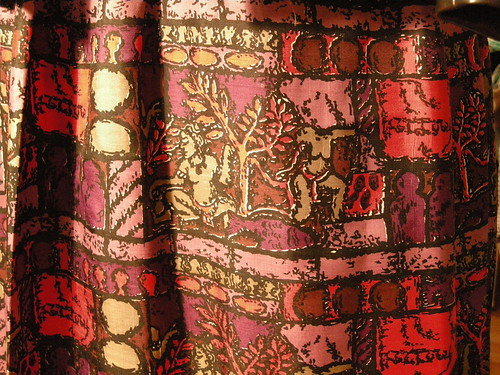
They are not doing anything lewd, but there they are.

It's slow going because I'm not quite sure about them.  Or the ruffle.

Monday, May 16, 2011

Two dresses

Just like I said, I made two dresses - in tandem, from the same pattern, McCalls 5974.  Luckily, I could use navy blue thread for both.  If I had really tried I could probably have finished them in a day.  I took my time and finished them on a rainy weekend, between household chores.

Without further ado, here's version 1 (view B, but with 3/4 length sleeves).  This is my Chicago rayon-lycra jersey.  It's very soft.

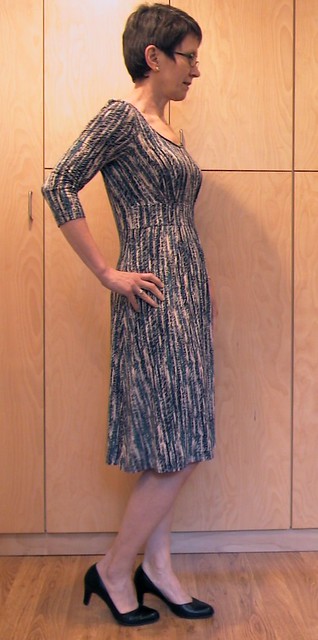
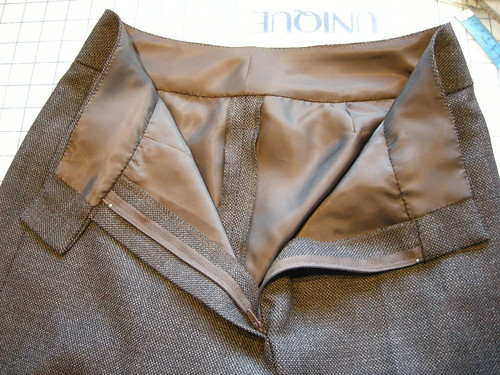
The front has an inset midriff band, the bottom edge of which is slightly above the waist.  The bodice and skirt are each pleated into the band.  There isn't too much bulk.

The back, however, is totally plain.  I think I would like the back view better with the midriff band.  If I was going to make this again (I probably won't) I'd consider modifying the back.  Coffin clothes.  Harumph.

I can't complain about the fit.  I cut a straight size 10.  Palmer & Pletsch wrote all kinds of detailed instructions for fitting this pattern but really?  It's a knit dress.  Knits are pretty forgiving.  I liked the side seam insurance they built into the pattern, however - 1" side seam allowances.  I dutifully basted and tried it on - then sewed the seams permanently exactly as drafted.

BTW I used my sewing machine to do the construction.  I like using a tiny (1.5mm x 1.5mm) zig zag stitch.  The seams press open nice and flat, and there is a lot of built in stretch.  I used my cover hem stitch on my serger to finish the neck, using that great Jalie no-elastic self-fabric binding technique.  Here's a close up view of the scoop neck.  It adds just the right amount of stability to the neckline.  I cut the binding 85% of the length of the neck edge; with this soft fabric I could have cinched it in some more, but it's ok as is.

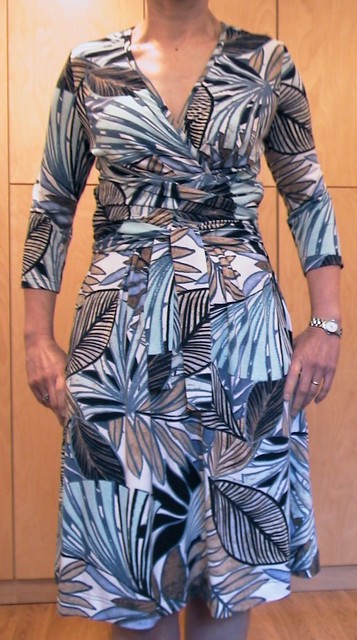
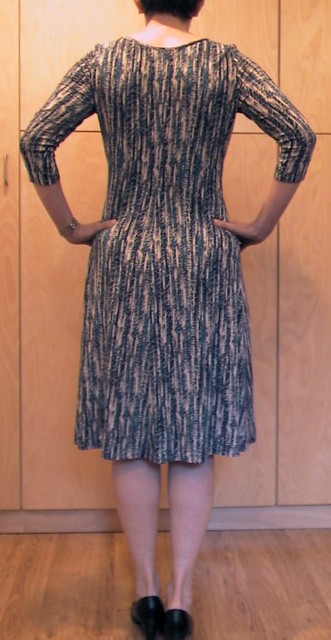
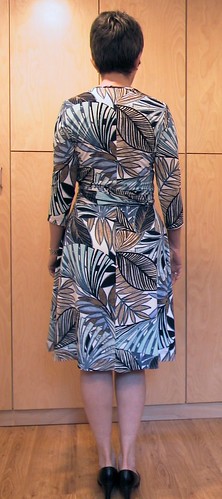
And here is View C which I prefer.  The waist ties give it more interest, and cover up the plain back.

The front midriff band is completely hidden by the ties, which are constructed in a strange way.  Here I am before wrapping...  Those ties are long enough to go around twice.

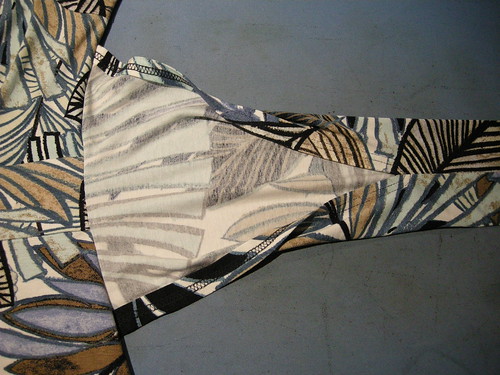
The tie is a long tapered piece sewn in the side seams single-layer, but then folded over on itself to create a finished tie.

I haven't decided which one to wear first, but I'll have to wait.  It's way too cold this week for little knit dresses!

Saturday, May 14, 2011

Throwing caution to the wind?

When I was in Chicago, I was lucky enough to spend time with the fabulous Ann of Gorgeous Things and Gorgeous Fabric and, of course, see her wearing several of her gorgeous creations, including this dress.  The pattern, McCalls 5974, was the absolute best pattern of 2010 (according to the collected wisdom of the reviewers at the PatternReview site).  Well, I didn't own it.  In fact, for some reason McCalls is probably the brand of (readily-available) pattern I own the fewest of.  And I have a quite extensive pattern collection.  

However, I do have a healthy respect for the collective wisdom of the reviewers at PatternReview, and for Palmer & Pletsch, but most of all for Ann, so I decided to go out on a hopefully-pretty-solid limb and buy it.  It certainly didn't hurt that McCalls patterns were on sale for $0.99 at Joanne's when I made a hurried tourist pilgrimage to one of the Chicago outlets of that venerable chain while en route to the airport to fly home.  In fact I do believe that all 3 of the sewers who were in the car and took the detour to Joanne's also bought it on the strength of Ann's recommendation.

I also bought some rayon/lycra jersey while in Chicago.  (Surprise!)  I had mentally set it aside for the faux wrap version that Ann was wearing, but sadly there is not enough since those ties are fabric hogs!  So I cut out the other version, which is equally highly endorsed not only by Ann but also by the PR folks.

But I really wanted that faux wrap version in my closet too, so I went digging in stash, where I found a sufficient length of another jersey print, purchased at last year's Montreal PR Weekend.  (By cosmic coincidence, this year's event is taking place right now, in Chicago and the participants were at the site of my purchase, although they won't have found any more of this print since we bought it all in April.)

So I'm cutting out the wrap version too.

Notice I haven't said anything about sewing up version 1 in my Chicago jersey.

Yes.  I am cutting two garments out at once from an untested pattern from a brand I barely have any familiarity with.  What a risk taker I am!  What could go wrong???

I've got a family event coming up next weekend in Montreal for which it will be quite nice to have a new dress.  Stay tuned...

Wednesday, May 4, 2011

Cloning a new wallet

The Sewing Lawyer has been using the same wallet, on and off, since 1984.  That's a lot of years for a little leather object.  I know I bought it in 1984, because I remember doing so very shortly after my arrival in Cambridge, UK, where I spent a glorious year as a graduate student.  I think it was very inexpensive - £5 sticks in my mind.


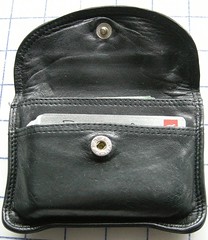
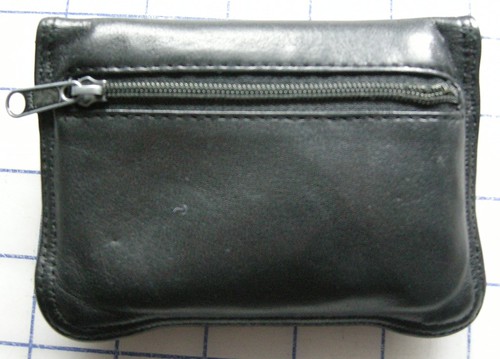
I thought it was pretty nice when I bought it, but I probably didn't come to appreciate how great a thing it is until I had used it for a while.  It's a really simple but effective design and it's extraordinarily well made.  If I had known that the leather of that wallet would stay so glossy and beautiful through moderately intensive use for more than a quarter century (ULP!), I probably would have sprung for a few of them even on my student budget.  And now, if it was only a question of wear to the leather, I wouldn't consider abandoning my old friend.  Unfortunately, however, the coil zipper of the coin compartment, at back, is about to give out.

Really, the thing only has two flaws (aside from the fact that the zipper only lasted for a couple million openings and closings).

First, it's a small black object that tends to lurk in the deep recesses of a black-lined handbag.  The Sewing Lawyer was a graduate student in 1984.  Those of you who are her contemporaries will find that enough has been said.  Those of you who are younger ... well, let me just say that the day will come when you too will curse the designer who chose black fabric for the lining of your handbag.

The second flaw is probably the reason that the zipper won't be lasting into its fourth decade.  The coin compartment opening doesn't open up very much, really. Over time,  a lot of stress has been put on the coils at the closed end where the pull is repeatedly forced (a couple million times so far) as far open as it will go, when the Sewing Lawyer's not-really very big fingers probe the innards of the wallet to find the correct change.

So thoughts turned to producing a comparable object, but without the two flaws, to replace the original.  The first problem was to get the right kind of leather.  When I visited Perfect Leather in Toronto last fall, I showed the knowledgeable lady at the desk my wallet and asked her what kind of leather it was made from.  Without missing a beat, she said "Goat .... what colour do you want?"  There was quite an array.  I came away with a couple of square feet of orange goat leather.  I used some of it to make a case for my reading glasses (not all of those were presents), which is extremely easy to find in my handbag.

I approached the design and manufacture of the orange clone as an experiment, on the "just do it" approach to sewing.  So it's definitely not perfect.  I may make a second one that will look and perform slightly better, but for now, I'll happily use my new wallet.

This pic reveals two problems.  First, the edges were too thick for my machine so I abandoned my original complete clone plan and didn't do the double row of topstiching on the original (yes, the original was sewn right sides together and turned, just as my clone is).  I had to rip out the stitches around the flap, leaving unsightly holes (sigh).  I would have to figure out how to remove a lot more bulk from the edges if I am going to replicate the original in this respect.

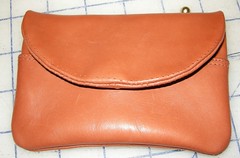
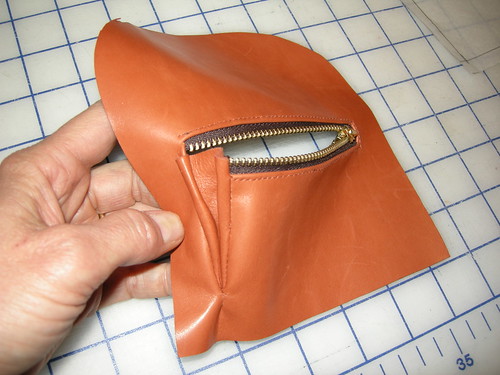
Second, I forgot to cut the outer layer of the leather flap longer than the under layer to allow for turn of the "cloth", so the seam tends to flip up in a not-great-looking way.  This would be easy to remedy.  Next time.  And I think the flap is a slightly less attractive shape than the original, even though I made the pattern by tracing around it.  This would also be an easy fix.  Next time.

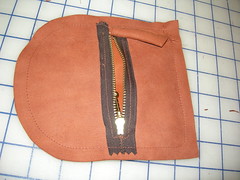
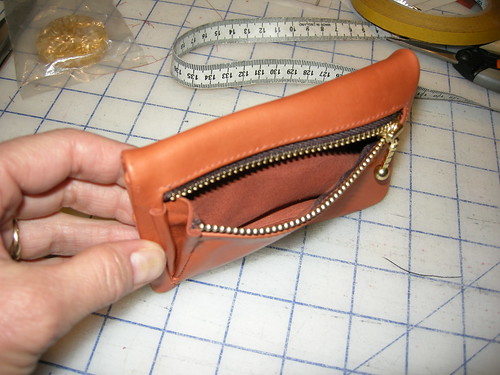
Anyhow, but for these problems which I might be able to remedy, the construction of this little project was super simple.  It has two layers - the inner layer with two pockets and the outer layer with the zipper opening.

Construct each layer.  Above you can see my functional but not beautiful gusset to remedy the second flaw.  I found a metal zipper which should be stronger.  To the left, proof that I realized I needed to build in turn of "cloth" room in the pockets, even though I stupidly forgot to do the same for the flap.

Apply the snap.  Seriously, this was the part that took the longest, since it has been many years since I've used any of these four-part snap assemblies of which I seemingly still have hundreds in my stash.  (Cleverly, the snap is attached in such a way that it absolutely does not matter if the usually-visible part matches the leather - my snap is green.  Can you tell?)


Sew the layers together around the edges, right sides together.  Trim seam allowances.  Turn it right side out through the zipper opening.

Done (except for my abortive attempt at topstitching).

The gusset works rather well.  

Sunday, May 1, 2011

Unseasonable


It happened again.

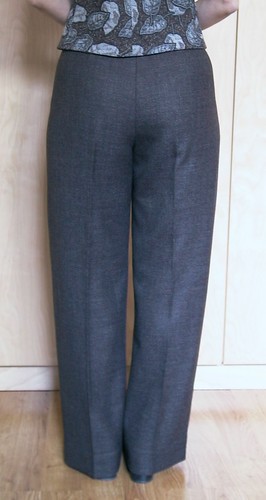
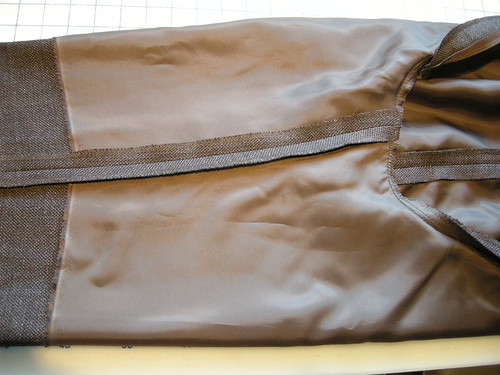
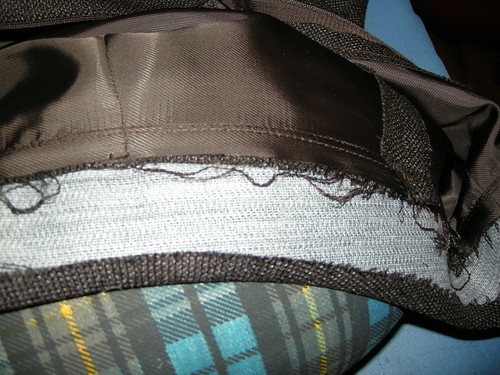
Lined wool pants just in time for ... spring.  Doh!  Oh well, maybe we will have some more unseasonable cool weather before summer hits.  Otherwise, these will wait quietly for cooler weather, and in October or so, the Sewing Lawyer will be glad to have them.

These are the same fabric as the last project: a sheath dress.  I should finish a top to wear with them before turning to summer sewing.

(I believe the legs are both the same length despite the evidence in the photo of the back.  I hemmed them quite long, so I can wear them with heels.)

These pants are at least the fourth pair in my closet made from Vogue 7881, a Claire Shaeffer pattern.

They are plain, comfortable, and versatile.  What's not to like?

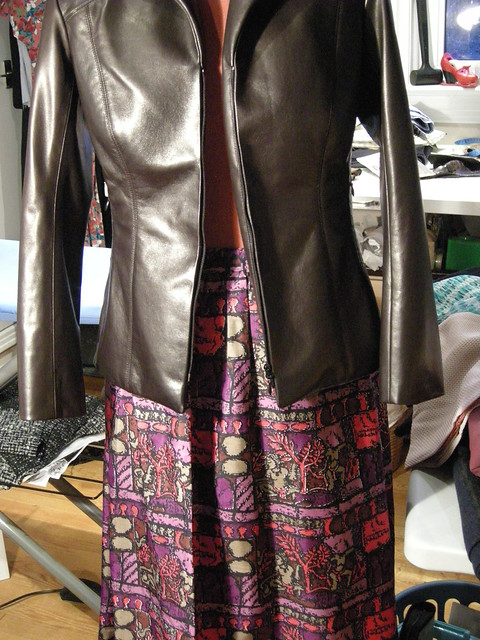
And they look pretty good with my leather jacket.


Strangely, since hand-sewing is not my favorite thing, all four pairs are from the "couture techniques" side of the instructions (which are lengthy and, like all the Claire Shaeffer patterns, very informative and helpful).  Really, the only special features of the "couture" version are that (1) the wool fabric is eased into the waistband instead of darted and (2) the zipper is sewn in by hand (yes really) and (3) the waistband is constructed mostly by hand.

The pattern does not call for lining but I added a half-length underlining of Bemberg.  I cut it on the cross grain and use the selvedge for the lower edge of the underlining.  No bulk or show-through. I don't fuss too much about how long the half-lining should be.  I just place the pattern pieces on the cross grain to get maximum length and so they have the same leg length.   It generally turns out that the lower edge hits around my knee.

Here is what it looks like at the fly.

Notice there is a tiny dart in the underlining but the outer fabric is eased only.  I did these steps separately before basting the underlining to the pants pieces, after which I treated each piece as a single layer.

I particularly like the hand-finished waistband.  You know those blumpy corners and wavery, not-square ends that result from sewing a waistband right-sides-together, and then turning it right side out?  There's none of that.  The couture technique that Claire Shaeffer teaches produces sharp corners, right angles, and uniform width.  And it's thin, flexible, and looks great inside and out.

(Later, I added a couple of pant hook and bar closures, exactly like these.)

First, interface the waistband to the seam lines only.  The  pattern includes separate pieces for the waistband interfacing but you can easily remove the SAs on any waistband pattern pieces.  (NB:  To use this technique you do need a seam at the upper edge of the waistband so would have to further adapt a pattern which has a straight grain waistband with a folded upper edge.)  I used two layers of fusible interfacing to ensure stability, since this is a curved piece with the CB area on the bias.  I cut one with the straight grain at the CF and the other with the straight grain at the CB.  As a result, the whole thing is totally stable and stretch-proof.

Press the upper SA of the waistband to the inside, along the line of the top edge of the interfacing.  Then attach the waistband to the pants by machine.  Press so that all SAs at the waist seam are facing into the waistband.  To preserve the curve of the pants at the hip I've pressed this seam using my pressing ham.

The 7881 waistband piece is extra long with about 6.5cm (2.5") extending beyond the  finished end of the waistband.  This extension is not interfaced.  Press the lower SA up on this piece as well.  Notice that the extension is very slightly tapered so that it is not as wide as the waistband itself.

Fold this extension along the leading edge of the interfacing.  See the nice square corners?  See how the slightly narrower width ensures that it will not peek out above or below the waistband itself?

Hand stitch the extension down invisibly along the 3 edges to secure it to the waistband.  This is the other end, which on this pattern has a significant overlap.

The waistband facing is cut from lining fabric.  This keeps the waistband nice and thin.  Again, 7881 has separate facing pieces.  To adapt this technique for another pattern, the only point to note is that the facing pieces need to be shorter than the waistband, because of the long folded-back extensions.

After sewing the CB seam, press the upper edge seam allowance down on the facing.  Then pin this edge to the folded-down upper edge of the waistband, keeping the facing edge a smidge lower than the upper folded edge so it will be invisible from the outside.

Fold under the leading edge SAs, ensuring the edge of the waistband extension is well covered.  Then fold and pin the lower edge along the seam line, ensuring the facing lies nice and flat.

Hand sew the facing to the waistband, using a tiny fell stitch.
Done.