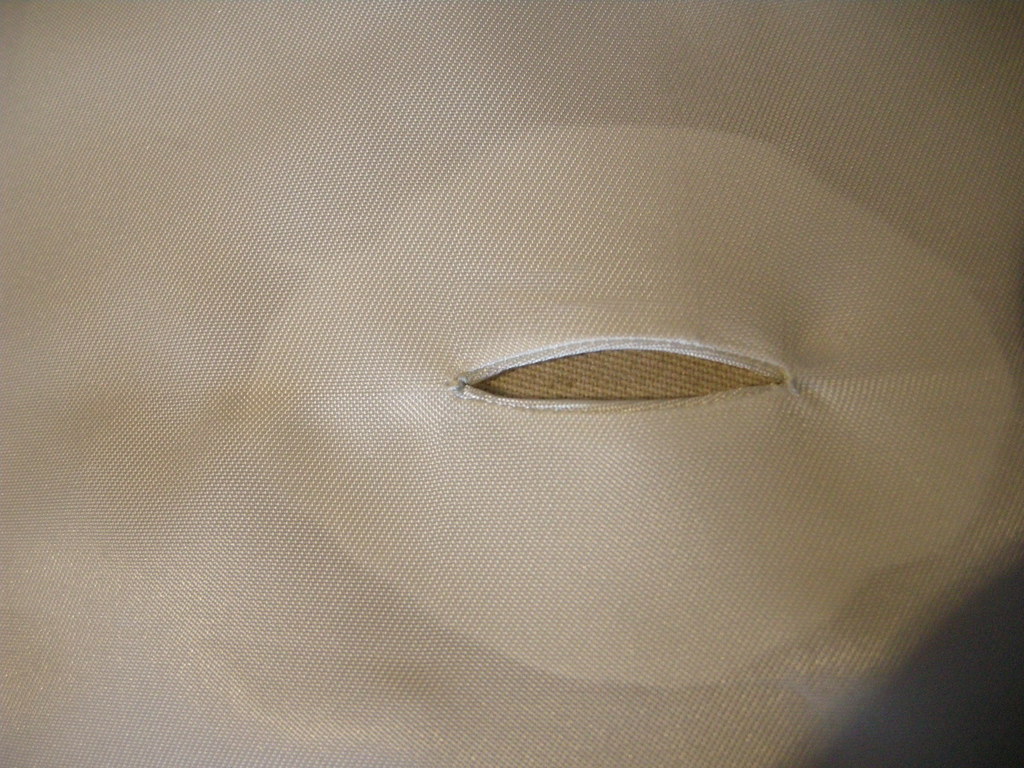
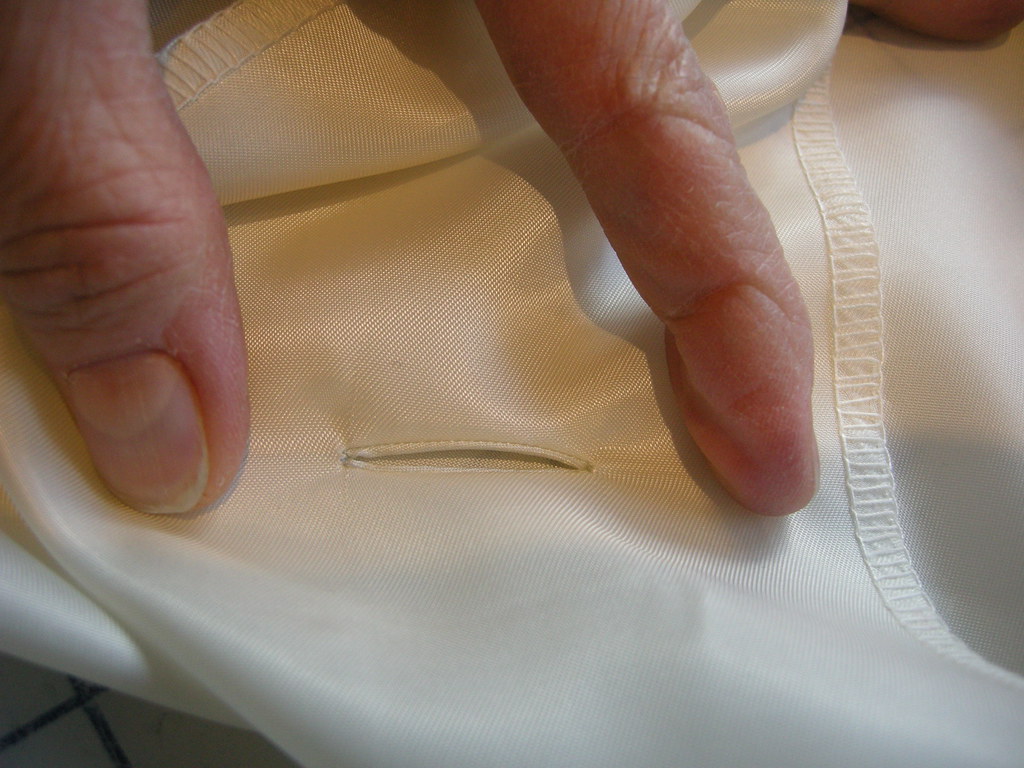
First, here's what a Spanish snap buttonhole looks like (click on the photos for eye-popping close-up detail).
This technique came to mind for the project of re-lining my Auckie Sanft jacket. One of this jacket's fantastic features is that it's lined to the front edge. But... that meant that its buttonholes were originally sewn through both the fabulous Linton tweed, and the lining fabric behind it. Removing the lining meant literally cutting the lining fabric out of the buttonhole stitches. I needed a way to make buttonholes that would lie behind the original ones and look good from the inside. The latter requirement meant that sewn buttonholes were instantly rejected. (Sew buttonholes in one layer of lining fabric? No thank you!)
Then I remembered reading that Chanel jackets sometimes had bound buttonholes made in the lining to back sewn buttonholes in the outer jacket. And I dimly remembered the Carr technique.
Ms. Carr wrote: "Frequently used by the designers, this buttonhole has very thin lips that can hardly be seen. I like to call them 'invisible' bound buttonholes. The advantage of a Spanish snap buttonhole is that it can be made very small - as one might use on a silk blouse. On the other hand, Spanish snap buttonholes are equally effective used on a tweed or nubby fabric with the lips made from wool flannel or worsted."
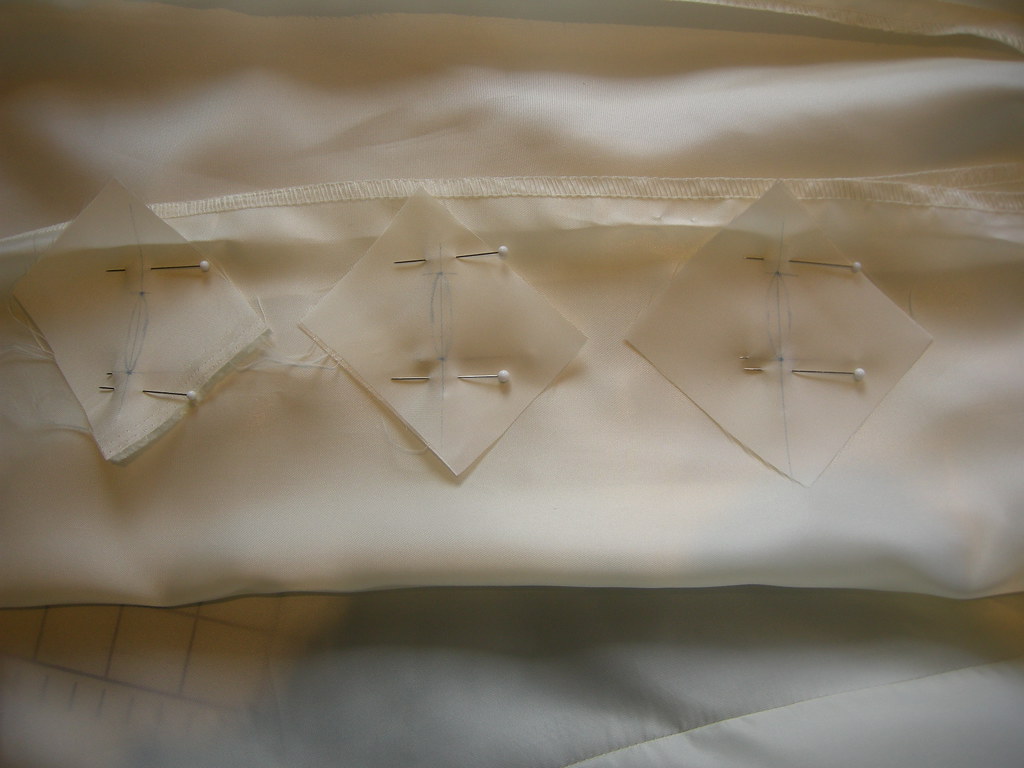
First, mark your buttonhole placement on the fashion fabric. Then cut little patches that are big enough so that ON THE BIAS (this is important!) they are as long as your marked buttonholes, plus about 2.5cm (1") on either end. Mark the patch (wrong side) with a line that represents the centre line of your buttonhole, and the ends of the buttonhole. Then draw (lightly) a pointy oval shape (like a flattened football) that is about 6mm (1/4") wide at its widest, centred on the marked line. Carefully pin your patch to the markings for your buttonholes, right sides together.
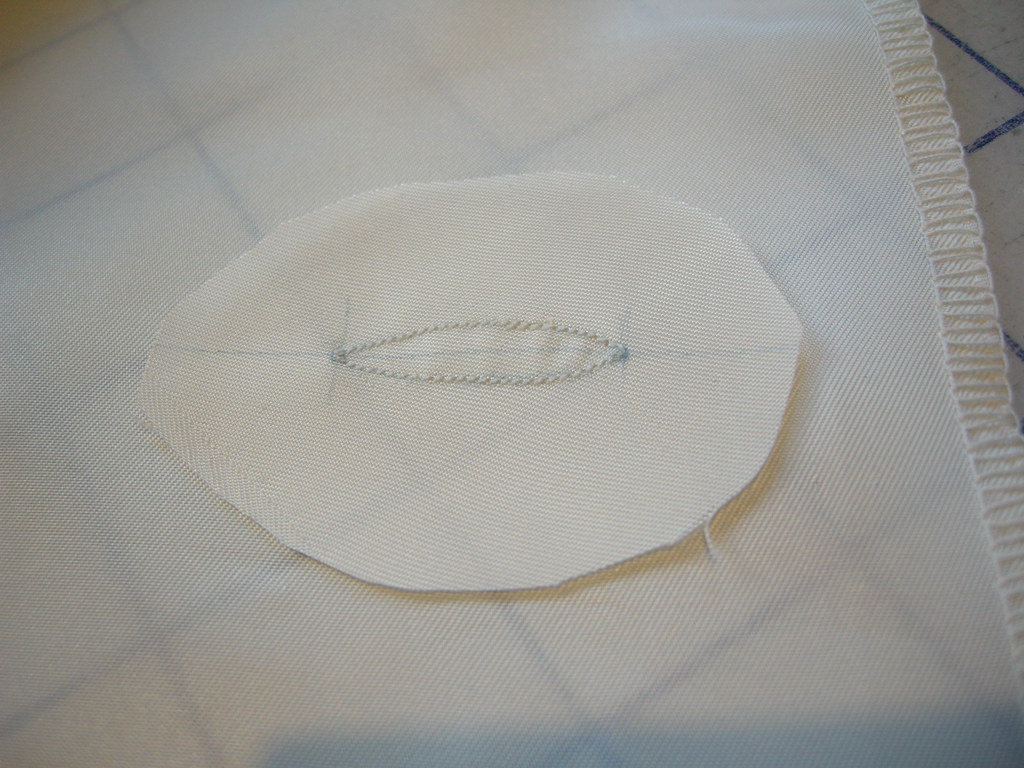 Sew around the marked football, pivoting at the pointy ends, using teeny-tiny stitches (1mm on my machine). Here's a close up of the stitched patch. You can see I've trimmed my patch to an oval shape. Ms. Carr suggests starting with this shape but it really doesn't matter.
Snip carefully along the marked centre line to (but not through) the stitches at the pointy tip. Then pull your patch through to the wrong side.
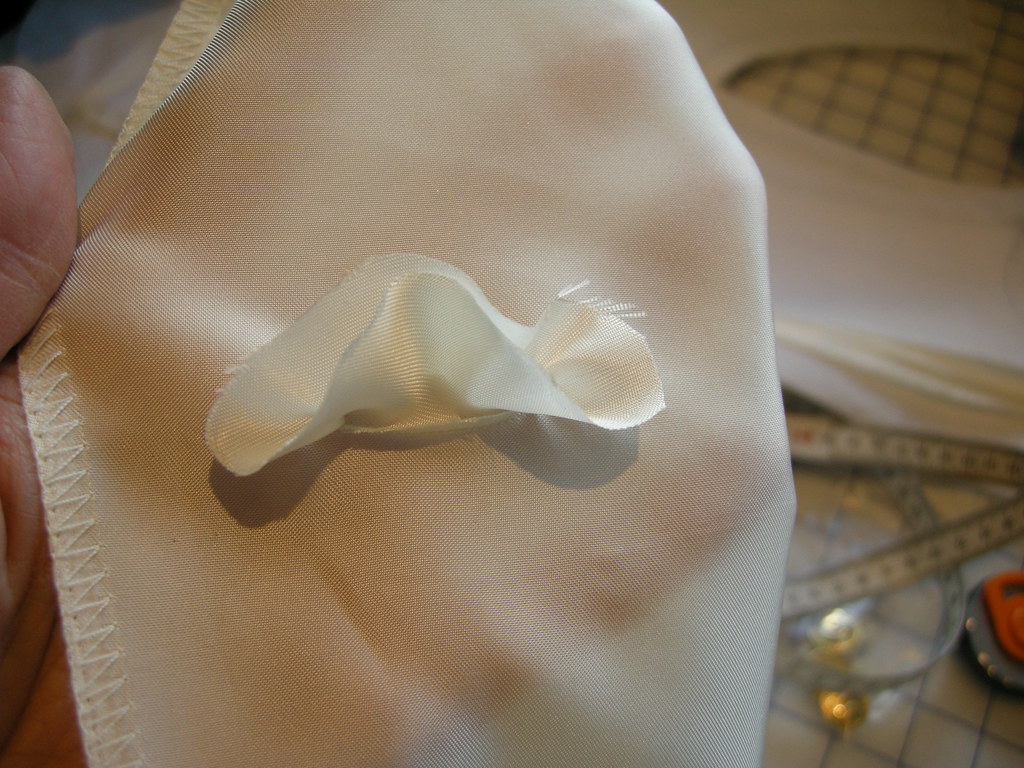
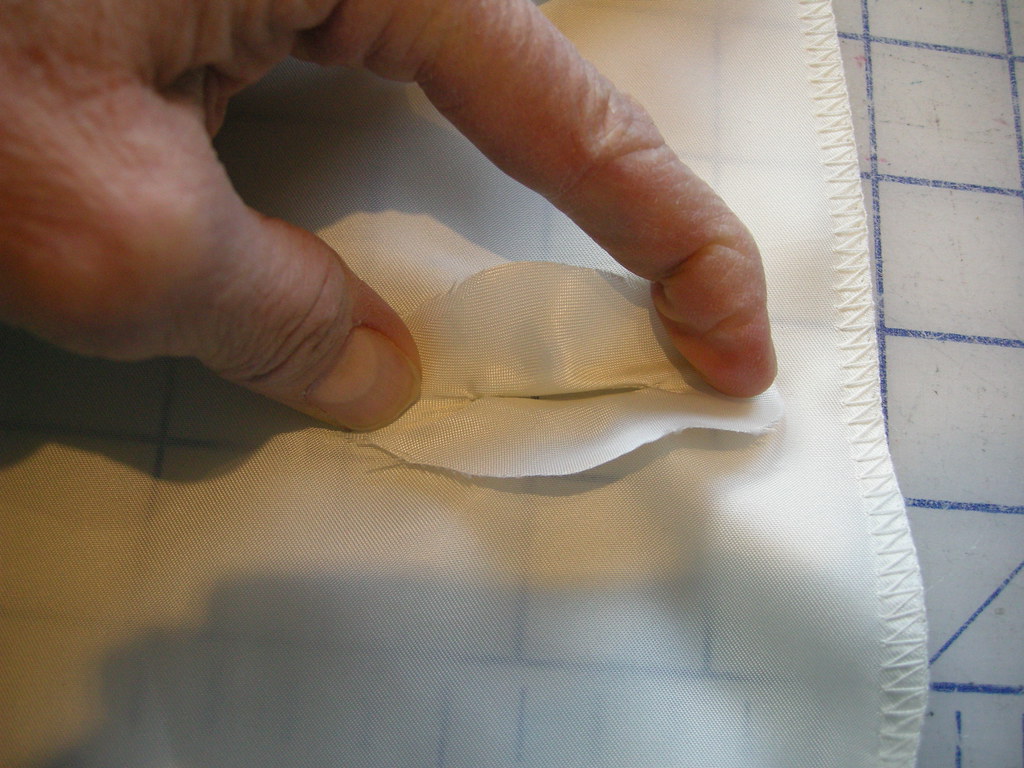
Next comes the magic, ineptly illustrated here because I was holding my camera with one hand. To quote Ms. Carr: "Holding each end of the egg shaped patch with the thumb and forefinger, pull in a snapping motion. One good 'snap' and the bias will wrap around the 1/8" (.3cm) seam allowances and automatically create tiny narrow lips."
This is the right side, even before pressing!
Magic, I tell ya!
No additional sewing is required - Ms. Carr says you can use a tiny bit of fusible web at each end to keep the patch in place. (I will however tack the patches to my jacket to keep the buttonholes in place.)
In other news, I had approximately 50 minutes while in Toronto to shop, and I wanted to do two things: visit Perfect Leather at 555 King Street West; and look for waterproof (or water-resistant) fabric for the fur coat.
Guess which one prevailed? (This photo from Perfect Leather's website.) All I can say is WOW! I think you can find any kind of leather; any colour; any finish; any size; any combination. Needless to say there is a very intoxicating and leathery perfume in the place. I bought 4 sq.ft. of orange goat leather for a little project...


Thanks so much for this perfectly clear tutorial.
ReplyDeleteWow, that store is amazing! How do they price by the skin? What can you make with 4 square feet? Sue Anfang
ReplyDeleteVery cool, Kay! Great demo.
ReplyDeleteGreat demo. I've been wanting to try this ever since I got her book.
ReplyDeleteThanks for the pictoral. Count me as another one who has wanted to try this technique and now you've supplied a great pictoral to make it easy to do!
ReplyDeleteOh my goodness, my Lala taught me that as a child! I have never used it, but looking at your pictorial brought it back. I love reading your blog as you are so adventurous in your sewing.
ReplyDeleteAren't they nice. I made some practice ones using Roberta Carr's video and love them.
ReplyDeleteI must try those cool buttonholes. Does it matter if the oval you sew is not perfectly asymetrical?
ReplyDeleteVery nice, Kay! I don't think I've ever actually used this technique, but it's always been in the back of my mind (with all the other good stuff??) since I first read Carr's book. You make it even more tempting.
ReplyDeleteThanks for great tutorial.
ReplyDeleteAwesome tute as usual. I have ordered the book. Looks very useful.
ReplyDeleteThanks for the great tutorial. I will definitely try it on my jacket.
ReplyDeleteAnother store to add to my list! Those buttonholes look very interesting. I'll have to take another look at that section of the book.
ReplyDeleteCool technique!! Thanks for sharing!
ReplyDeleteCool tutorial, thank you! Do you leave the edges of the oval large and raw? I have an obsession with finishing edges.
ReplyDeleteMy question also. Used for a silk blouse, I’m imagining turning the edges under and prick stitching around just thru itself and pressing. Will have to try this to see how the fabric lays and whether it stays put as the button goes through.
DeleteMaybe pink the edges?
DeleteThis is incredible - I have been looking for a solution for some very heavy and coarsely woven wool. Got your link from PR - thank you so very much.
ReplyDeleteI love it! I just used this technique on a girl's wool coat and my friends are asking for more details. I'm going to save time and send them to this post. Thanks! Alison
ReplyDeletei like those buttonholes, and you make it sound easy enough for me to try =-)
ReplyDeleteThank you so much for this tutorial; will definitely give this a try. Your buttonholes are absolutely perfect!
ReplyDeleteI did this on the lining of the Chanel Jacket I made..........Worked first time. They are beautiful!!
ReplyDeleteThank you so much for sharing this.
I now have the book and its wonderful.