The fact that one of my young colleagues and his wife are expecting a baby was the impetus for me to make this wonderful baby blanket pattern, the
Amazababy 3d Baby Blanket.

The pattern is really well written - it can be used on any gauge or kind of knitting machine that is capable of making a tuck stitch (probably all machines), whether it's a punchcard or electronic machine, or completely manual. I made it on my Singer 360, a punchcard standard gauge machine.
The pattern has all the information needed to punch a card to produce this pattern. It is a bit tedious to knit if you don't have a colour changer (I don't) because you have to change the yarn every two rows.
Believe it or not, this is actually a black and white STRIPED knit. The magic happens because the tucking needles don't knit off, leaving the stitch from the row below on the needles. Tucking for two rows of white stitches leaves black stitches on the needles, and vice versa.

The pattern for tucking is diamond-shaped, another mind-bending fact. It's quite similar to the pattern on page 2 of
this Studio/White pamphlet. The photo to the right shows the back of the fabric, where the diamonds of tucked stitches are more evident.
As the pamphlet says, the fabric produced by this pattern is "very raised". The author suggested it needed "firm blocking", but that would only be if you wanted it to lie flat. I didn't. This blanket is wonderfully bumpy and that is a big part of its appeal, along with the hallucinatory effect of the black and white pattern.

See what I mean? Amazing!
Because this is for a baby I made it from 100% acrylic yarn so it will be reliably machine washable and dryable. The bumps survive the machines quite nicely since they are built into the very structure of the fabric. Woolike is an extremely economical acrylic yarn from Michael's, but it's also really nice and soft, and machines love it. To make this blanket I used less than one skein (about 80g) of each of the main colours.
The pattern also provides clear instructions for finishing the edges of the blanket with a simple strip of stockinette, in a contrasting colour. Initially I was a bit unhappy with the fact that the binding was pulling the top and bottom edges in a fair bit, as well as curling under on the long edges. The above photo was taken before I somewhat aggressively steamed the long edges to make them stop curling under, and the short edges, to stretch the edging longer. Acrylic can be "killed" using heat (a process to permanently block the stitches, making it lie flat). I only wanted to beat this up since I needed those peaks and valleys to remain. I was able to convince the edges to behave with steam from my iron delivered from a few inches away.
The finished item is more of a blankie than a blanket. It measures 50 x 70 cm (20 x 27.5"). I am hoping the baby will love it and carry it everywhere. See my
project page on Ravelry for more info.

Then I decided I needed to make a little hat to coordinate with the blankie. It is the first project made on a new (to me) machine, a Brother 892 punchcard, also standard gauge. I used more of the Woolike.

This is a super simple project. As you can see, it's just a rectangle with some loops at the top. You knit a long strip for a tie, thread it through the eyelets, sew the seam and voila, a cute baby hat.

I got the idea from a
blog post which gives the method but no details. You have to figure stitch and row counts based on what size of hat you want and the gauge of your yarn.
These I fudged, since I had no model to measure, based on some other baby hat patterns. My finished hat is 35cm around (13.75") and about 15cm (6") deep. I suspect it is way too big for a newborn although by rolling up the brim it can be made shorter at least. Given the roll and the stretch, the sizing could work for years if the hat lasts that long.
My colleague very nicely said he would bring his new son/daughter (still waiting to find out) around to the office and I hope to see these items in use fairly soon.
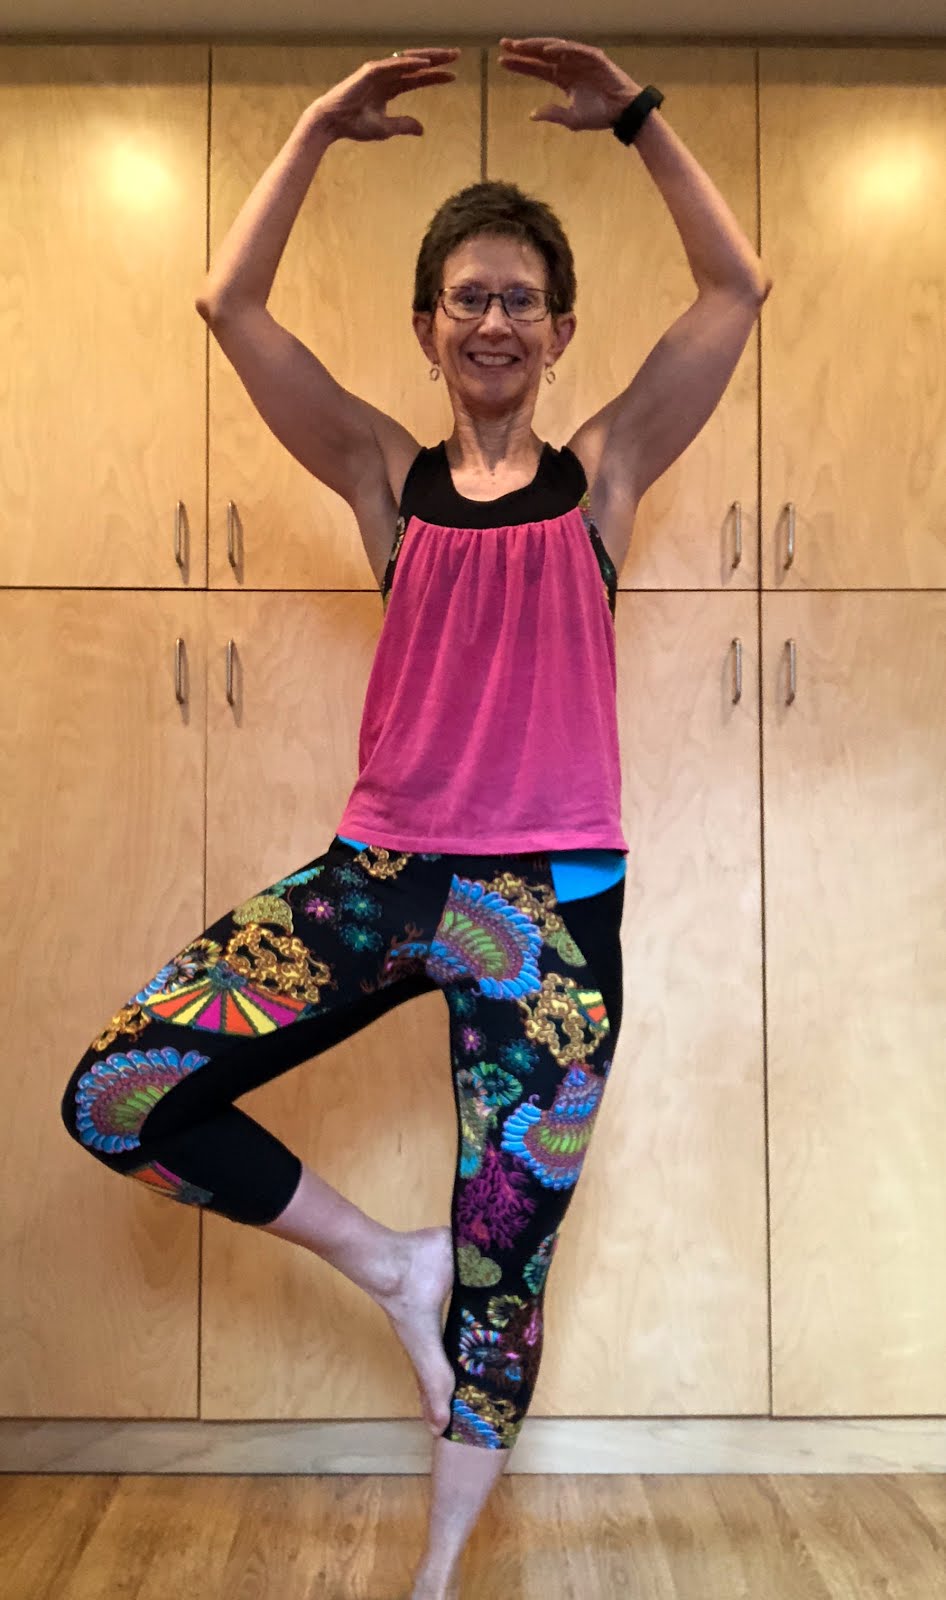 I actually made the leggings a while ago but hadn't worn them because (a) they are capri length and it's still cold around here and (b) the tops I thought would go with them really didn't. Today I finally finished the Pika and now I have an ensemble. I continue to be the best dressed person at the gym I go to.
 Between the two patterns, I find that Cora is more straightforward to sew. The pattern pieces for Isabelle are strangely shaped and several look almost identical, making it imperative to pay close attention when assembling it. The only part of the Cora pattern that is slightly complicated is the colour-blocking on the lower leg. I also prefer the pocket in the Cora (at centre back) than the CF pocket in the Isabelle, which I did not make. Both of them fit really well, although I thought the Cora was too low-waisted as designed. The Isabelle is very slightly higher I think.


