Saturday, March 19, 2016

Coat of many colours

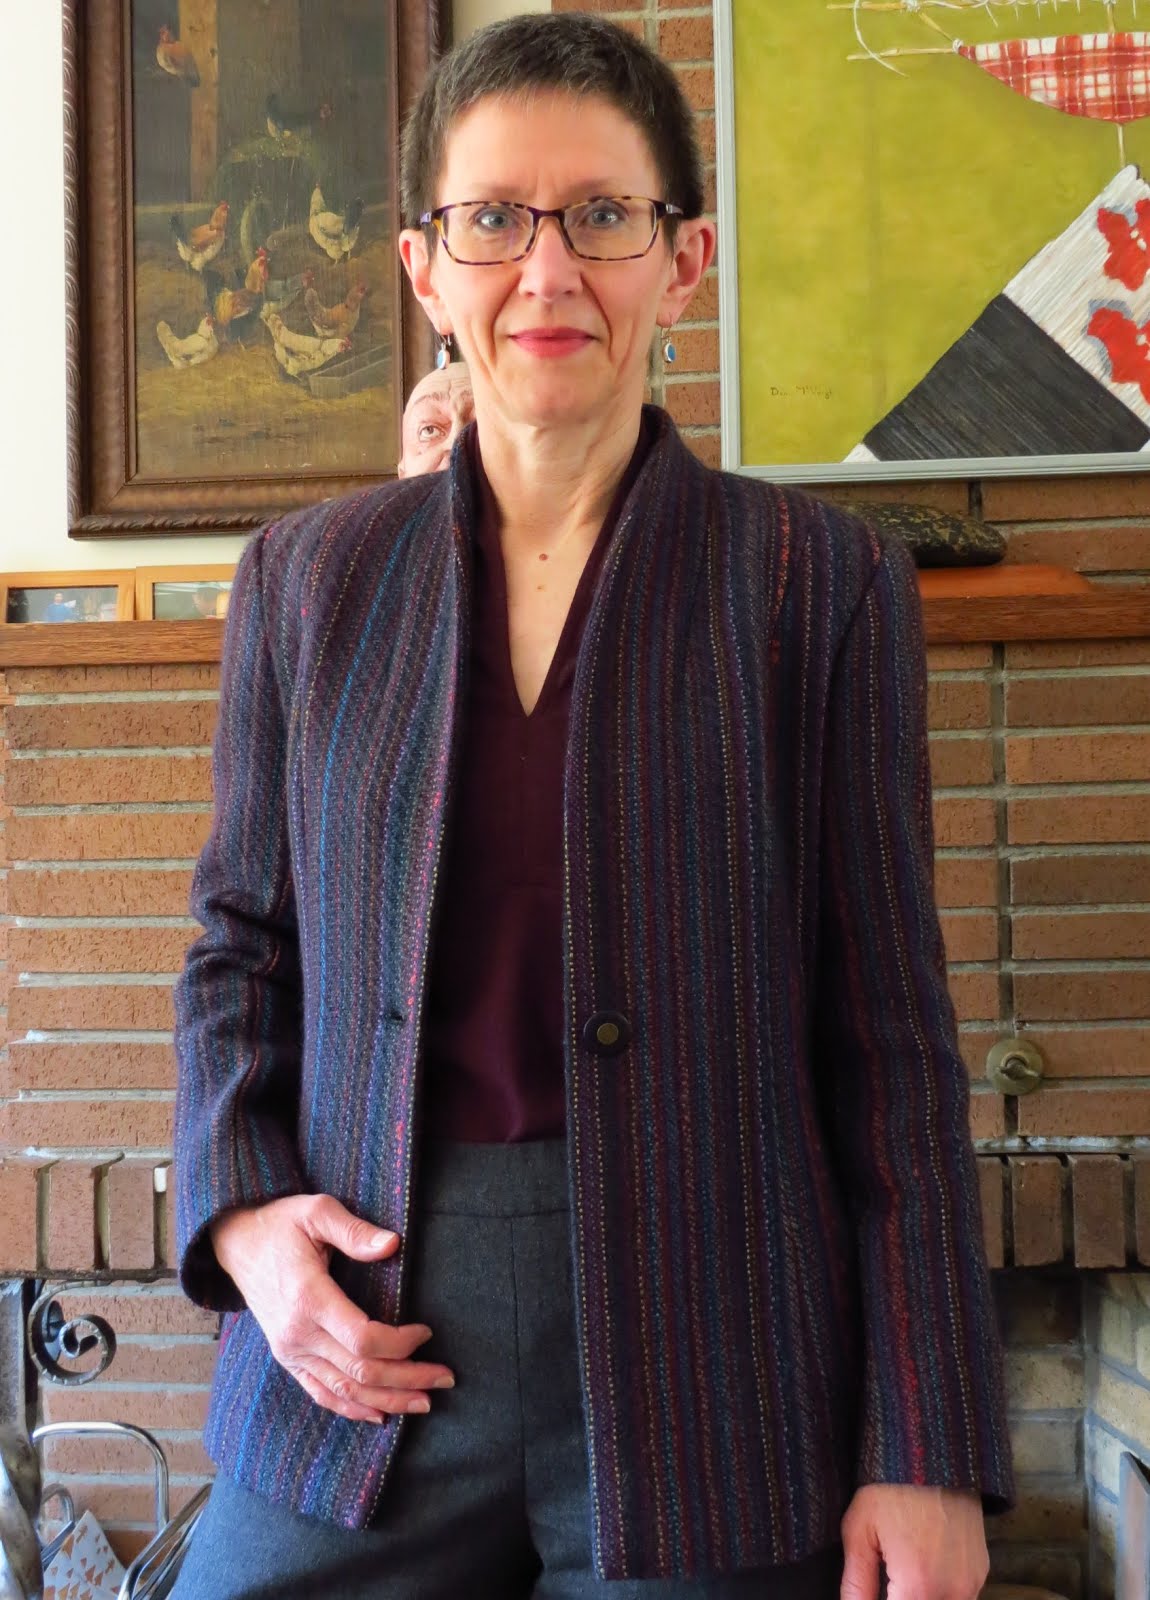
The photo at left is reasonably accurate in depicting the crazy colours in The Sewing Lawyer's recently completed jacket, and she likes all of them!

The jacket doesn't go with everything in my closet, but there are quite a lot of choices.

To the right, here it is with my new grey pants and a teal sweater (which is however hiding from view under the buttoned jacket).


Aubergine top
Or how do you like it with an aubergine wool top (Jalie 2682) and the same pants?


Or we could go with a dress. My new grey one, from BurdaStyle (August, 2012), is a natural.


Grey dress
Or a black dress (BurdaStyle, February, 2012).  I even tried it with a bright turquoise dress (Burda, February 2012).
Turquoise dress
Black dress

I do like what the crazy stripes do in the back.


It occurs to me that there is a hole in my wardrobe that could be plugged with a new pair of dark navy pants. You may not be surprised to learn that there is a pant length of such fabric in The Sewing Lawyer's stash. And something in a nice cherry red... So many possibilities, so little time!

Monday, March 14, 2016

Productivity

Sadly, my annual five week sewcation is over. Happily, it was more productive than ever, resulting in a swimsuit and exercise top, dress pants, a knit dress, two knitted cardigans (one by machine and one mostly hand knit) and the pièce de résistance, my new jacket. It was hardly a sweatshop, however, as I found time to do lots of other fun things too.

I'll post modeled shots of the jacket when I have time at home during daylight hours. But this is it. Vogue 2770, OOP, a Tamotsu designer separates pattern.

Sweet and simple and striped in multi colours. Light and soft and warm.

Making up a pattern that I had already adjusted for fit was a treat.

I kept the construction fairly simple and the jacket has minimal structure.

Fusible underlining; serged SAs
I underlined all body pieces with an extremely light weight fusible interfacing, to give some body to the very soft and loose-woven fabric, but also to minimize its inherent stretchiness (mostly in the length, surprisingly). I underlined the sleeves with silk organza cut on the bias as I wanted to keep them light.

All seam allowances were serged to control the tendency of the fabric to fray.

The sleeve caps were eased with a bias strip of wool which also serves as a light sleeve head. I inserted shoulder pads.

The jacket is fully lined with Bemberg. I went with this weird purply-grey colour.

The buttonhole was made with my vintage Singer buttonholer (perfect every time).

All this goodness, including wool, lining, interfacing, thread and button, came from The Sewing Lawyer's imperceptibly diminishing stash.

I have enough of the fabric left to use it as an accent on another piece (a yoke for a skirt?). Maybe I should check stash for coordinating fabric or leather... Who knows what's in there?

Friday, March 4, 2016

What is the right number of cardigans?

Anyone?

Pretty soon I'm going to run out of storage space. But I may not be able to stop making them.

Wear it open
Wear it closed
This is the one I was planning in my last post. It goes pretty well with my new grey pants.

Machine knitting - it's fast. I started the actual knitting on February 27 and finished the garment today, March 4. It would have been finished even faster but I wet-blocked each piece and it took a while for them to dry.

The cardigan is exactly what I hoped it would be. Long with a cozy collar in this nice springy wool (Briggs & Little Sport).

The ribbing is really nice and springy - it's a kind of 2 x 2 ribbing that can't be done in hand knitting. Basically you fit two purl stitches in the space for one knit stitch on the front bed of a knitting machine, and two knit stitches in the space for one purl stitch on the back bed. There is no slack anywhere in this type of ribbing. I may use it exclusively from now on!


See those added stitches? Maybe not...

I was able to insert ribbing stitches in the middle of the fronts (at the point where the stockinette switches to ribbing) to widen the collar slightly, without changing its outer edge, as you can see in the photo to the left.

Collar seam - inside back neck
The back neck is hand sewn so I could figure out exactly where to seam the ribbing together. One nice thing about machine knitting is that it's super easy to knit a few extra rows more than you will need, and knit the piece off on waste yarn that protects the open stitches while you are blocking and handling the piece, and can be unravelled and tossed away later. Once I had sewn the neck seam to the CB point, I new exactly which rows of the ribbing I had to seam up. I joined them with a chain stitched seam made with a crochet hook through the corresponding stitches. It's less obvious than any other way to join this seam. And with steam, the ribbing pulled back in very nicely despite the seam.

More details can be found on my Ravelry project page.

And for you sewing enthusiasts, never fear. I haven't totally gone to the dark side. I'm going to up the pace of progress on my striped jacket of many colours next.

Tuesday, March 1, 2016

The sewing-knitting lawyer's methodology for converting a hand-knitting pattern for the machine

And of course I also have another knitting project on the go too! Gotta get it all done before I go back to work (in two weeks, sniff).

I am making a shawl collared cardigan. I'd say it's my own design except that is not completely true. I'm way more comfortable starting with an existing base and modifying it than designing a garment from the ground up. In this case, I started with the schematic drawings for a cardigan of about the shape I wanted from a Bergère de France knitting catalogue (Créations 2014/15) that I bought a while back.

Incidentally, these publications are really great value. The current catalogue is 288 pages and contains 144 patterns for garments and accessories for men, women and children, as well as toys, blanket and pillow type projects. Only $12 CAD, which is practically free in $US...

I really like the fact that every pattern has a really clear schematic drawing. I'm working from pattern #887. But I'm completely ignoring the fancy stitch pattern and the sideways-knitted collar piece.


How do I convert this to a machine knitting pattern? I'm sure there are high tech ways to do this but I haven't figured them out yet. (If you have suggestions, please by all means make them in the comments!) Here's my non-digital method.

First, knit a swatch in your chosen yarn. In this case I am using the same yarn (down to the dye lot#) as I used to knit my son's zipper cardigan. So I already knew what stitch size to use on my Passap. If I was starting from scratch with a different yarn I would knit a big swatch of plain stockinette.

Telling me I have 18 stitches in 10cm
Like this one, which is the swatch I used to determine the stitch size for the sleeves of my recently-completed red cardigan. I knit this using my worsted weight yarn on my mid-gauge machine (a Singer LK150). You cast on 50 stitches and knit segments of 40 rows in different stitch sizes. In the middle row, you attach a contrasting yarn tag on the needles that are 16th from the centre, on either side (making 30 stitches really obvious). Separate the sections with a couple of contrasting rows. Then take the knitting off the machine, block it (ideally wash it and let it dry) and then measure using the handy-dandy stitch gauge ruler that is appropriate for your machine. I found a really great explanation of this process on Ravelry if you want to know more about measuring gauge.

My swatch
You should also knit a swatch that includes details like your ribbing. Because I already knew my gauge, that's all I did for this project. I decided on 2x2 industrial ribbing because it's really springy and thick, and it looks identical on both sides.

Once you have decided on the density of fabric you like and you know your gauge of stitches and rows in 10cm, print off some gauge-specific knitting graph paper. Make sure you print it without scaling! I like to use it at half size (so the "10cm" squares are actually 5cm on the page) because this is big enough to see the detail but not so big as to be unwieldy.

Then transfer the schematic to your paper. This is easy if you have an engineer's or architect's scale that is metric. Use the 1:20 edge if you have printed your graph paper at half size. An accurate metric ruler will also work but you'll have to do the mental math to get half scale. If you don't have the right kind of ruler, you'll have to use a calculator to figure out how many stitches or rows are needed for each segment of the schematic and count out the right number of tiny boxes on your graph paper - doable but a bit more painful.

Use a pencil or Frixion pen or some other erasable (very important!) writing implement.

At left is my graphed version of the Bergére de France schematic for the left front. The original information from the schematic are in orange Frixion pen and my changes (extending the front into a shawl collar) and key details are mostly in blue. I've taped two pages together to get the length I needed.

I've written key information on the chart - the dimensions of the finished piece, the ribbing pattern, the number of stitches I need, the row numbers in which changes like increases or decreases are made, precisely how many stitches are increased or decreased, etc.

I've also used the original pattern instructions to plot the shaping at the armhole edge. I could do this because the gauge for the pattern was very close to my actual gauge; if it hadn't been, I would have drawn a curve that looked about right and then charted the specific decreases. On the schematic the edge looks like a smooth curve; on my graph it is a steps and stairs effect; on the finished knitted piece it is again a smooth curve.

Speaking of the finished piece, I have now knitted both fronts (mentally mirror-imaging all the steps as I knit the right front) and I do believe my project is going to work!


Vogue 2770 encore

Way back when I spent a lot of time altering the pattern for the jacket from Vogue 2770 to fit me perfectly. Why waste all that work? I'm making it again.

Out of this unique and irreplaceable fabric.

I got it at the Fabric Flea Market (where else?) in 2009. The vendor told me she had raised the sheep (merino), sheared the wool, spun and dyed it, and then wove it (together with a few novelty yarns) into this luscious and completely irregular stripe.

The fabric is only 98cm wide and the vendor had cut it into skirt lengths of around 1.5m. I bought two, which are enough for the princess seamed jacket.