Sunday, November 28, 2010

The Blue Gardenia

I'm in SUCH good company over at the Blue Gardenia.  Denise is doing a series on sewing spaces.  She has already given us access to the sewing spaces of your favorite bloggers, and today, she's featuring my (rather messy and despite what she says, disorganized) sewing room.  Head on over there to have a peek at the chaos in which The Sewing Lawyer turns out her projects.

For fun, here's another picture:

Saturday, November 20, 2010

A new trick - Spanish snap buttonholes

It's good to stretch your skills by trying something new, right?  The Sewing Lawyer challenged herself by trying the "Spanish snap" buttonhole technique today.  The instructions can be found in Roberta Carr's book Couture:  the art of fine sewing.  Or, read on...

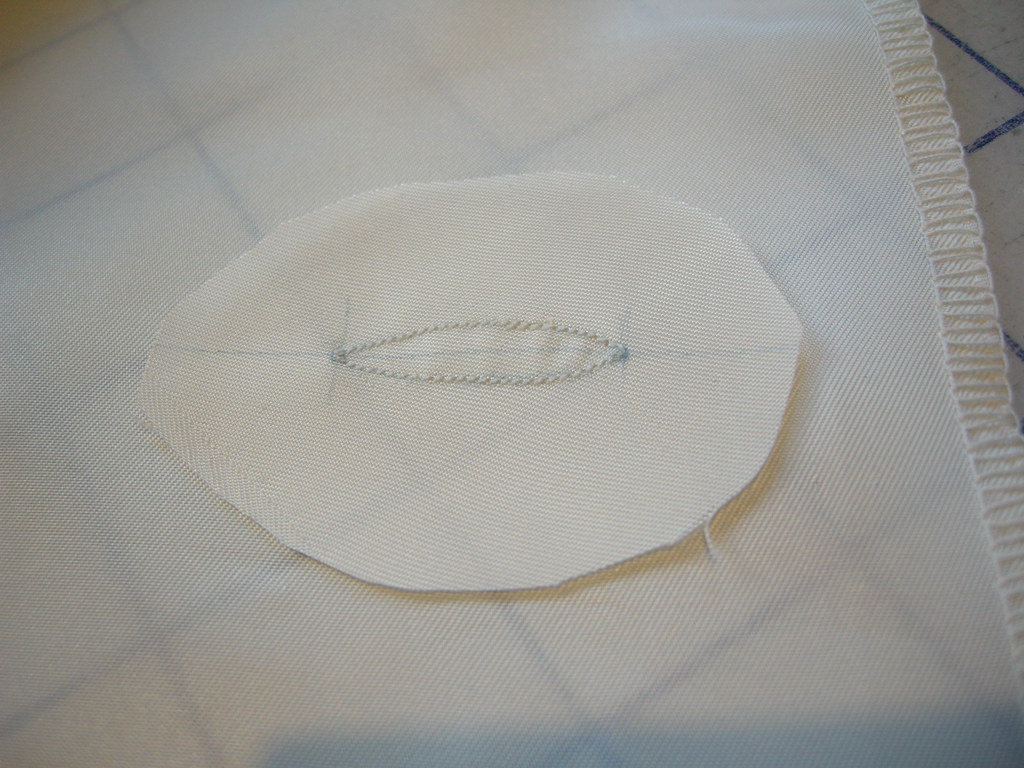
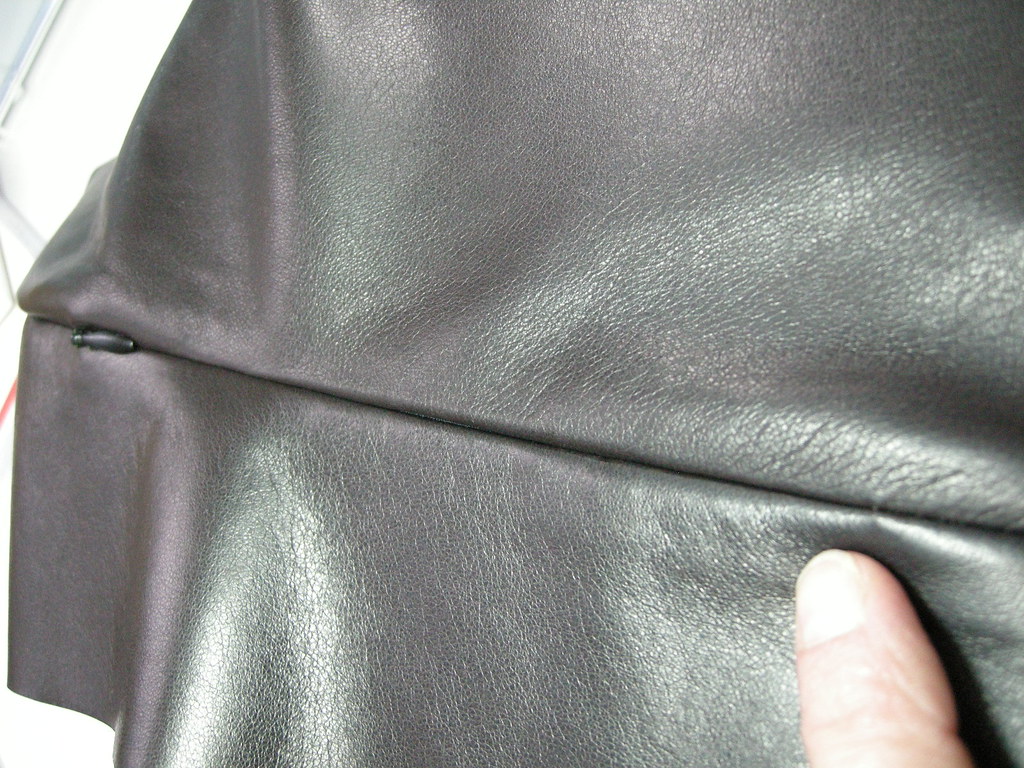
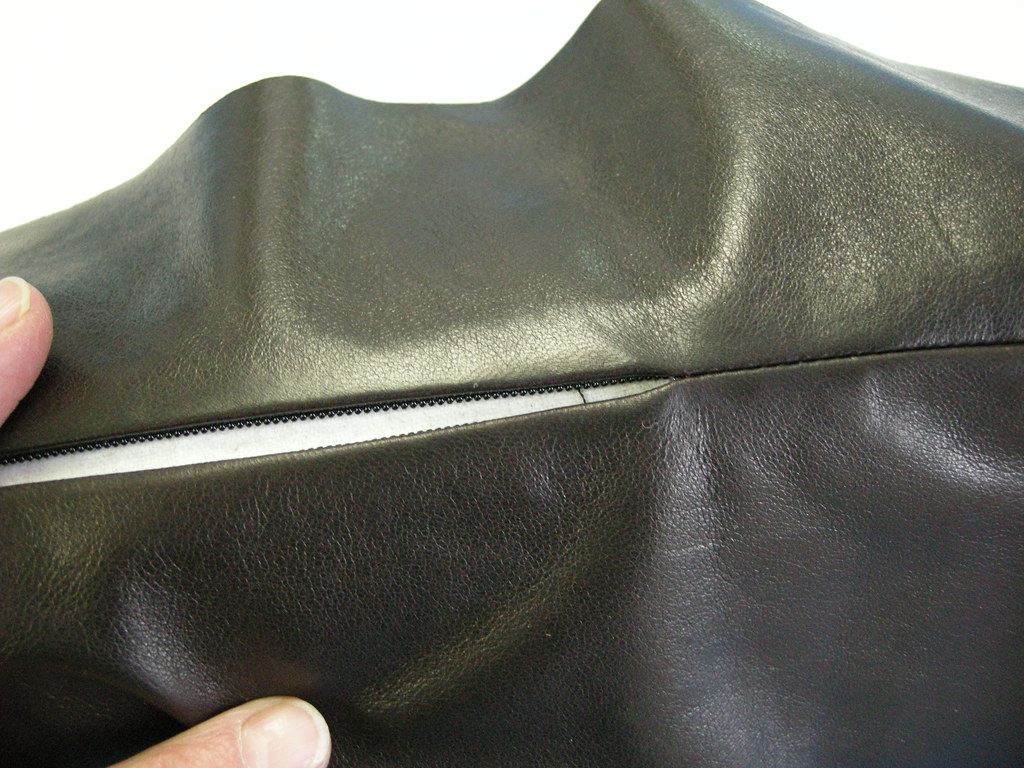
First, here's what a Spanish snap buttonhole looks like (click on the photos for eye-popping close-up detail).


This technique came to mind for the project of re-lining my Auckie Sanft jacket.  One of this jacket's fantastic features is that it's lined to the front edge.  But... that meant that its buttonholes were originally sewn through both the fabulous Linton tweed, and the lining fabric behind it.  Removing the lining meant literally cutting the lining fabric out of the buttonhole stitches.  I needed a way to make buttonholes that would lie behind the original ones and look good from the inside.  The latter requirement meant that sewn buttonholes were instantly rejected.   (Sew buttonholes in one layer of lining fabric?  No thank you!)

Then I remembered reading that Chanel jackets sometimes had bound buttonholes made in the lining to back sewn buttonholes in the outer jacket.  And I dimly remembered the Carr technique.

Ms. Carr wrote:  "Frequently used by the designers, this buttonhole has very thin lips that can hardly be seen.  I like to call them 'invisible' bound buttonholes.  The advantage of a Spanish snap buttonhole is that it can be made very small - as one might use on a silk blouse.  On the other hand, Spanish snap buttonholes are equally effective used on a tweed or nubby fabric with the lips made from wool flannel or worsted."

What's not to like?  Here's how to make them.

First, mark your buttonhole placement on the fashion fabric.  Then cut little patches that are big enough so that ON THE BIAS (this is important!) they are as long as your marked buttonholes, plus about 2.5cm (1") on either end.  Mark the patch (wrong side) with a line that represents the centre line of your buttonhole, and the ends of the buttonhole.  Then draw (lightly) a pointy oval shape (like a flattened football) that is about 6mm (1/4") wide at its widest, centred on the marked line.  Carefully pin your patch to the markings for your buttonholes, right sides together.

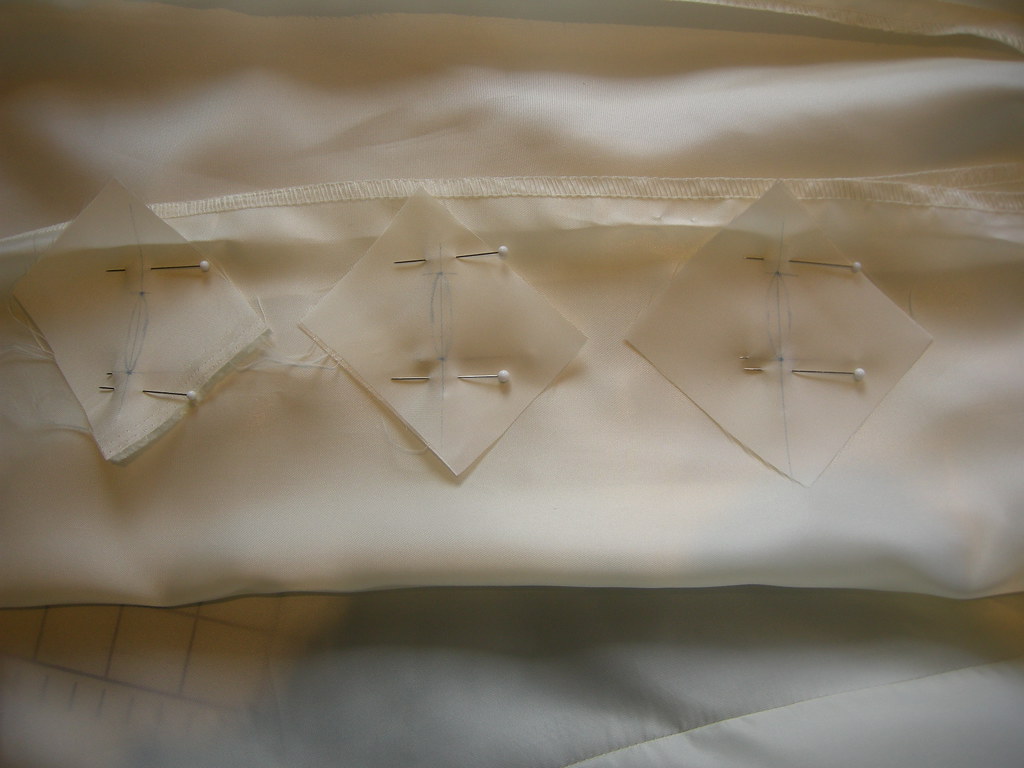
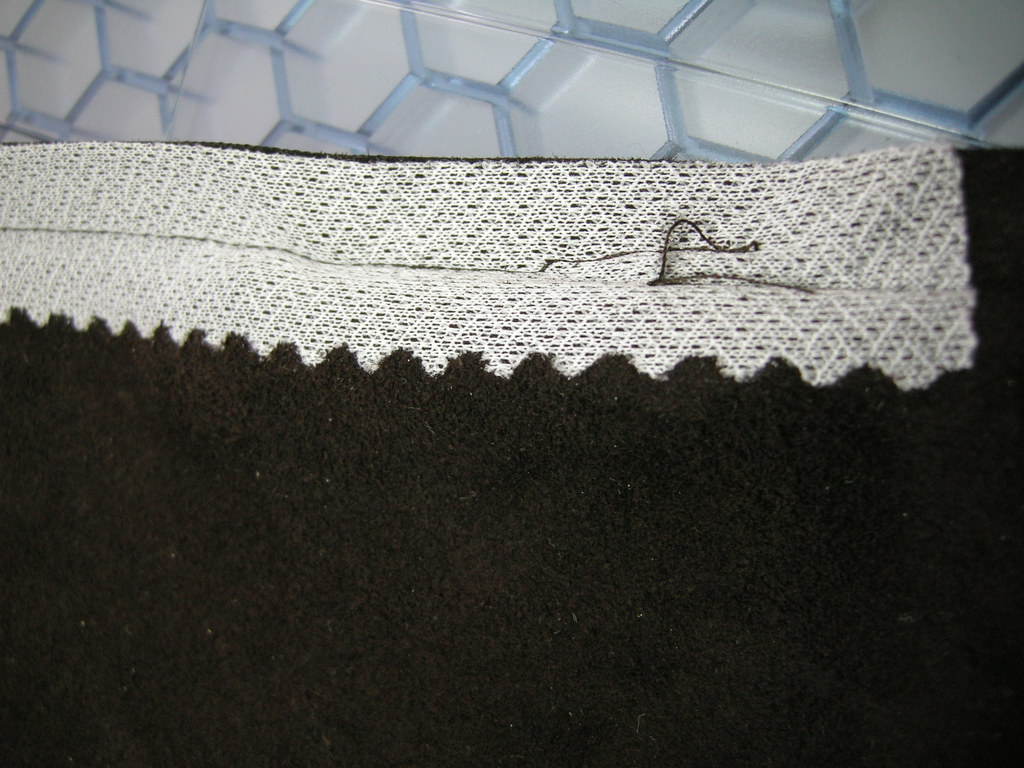
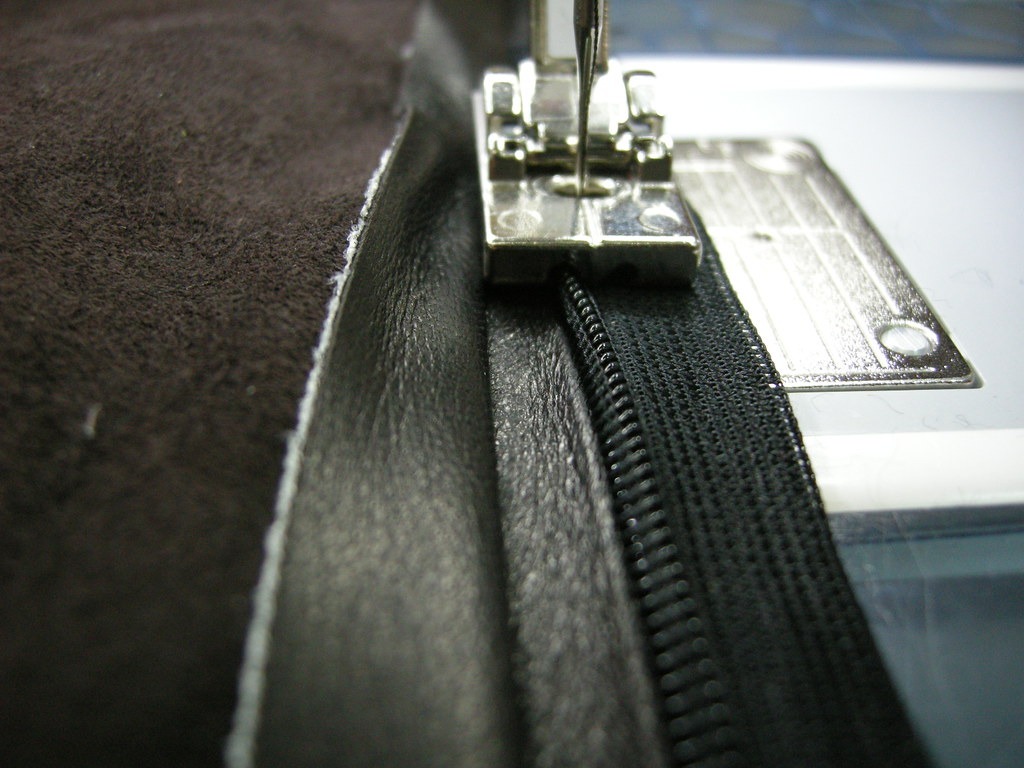
Sew around the marked football, pivoting at the pointy ends, using teeny-tiny stitches (1mm on my machine).  Here's a close up of the stitched patch.  You can see I've trimmed my patch to an oval shape. Ms. Carr suggests starting with this shape but it really doesn't matter. 

Snip carefully along the marked centre line to (but not through) the stitches at the pointy tip.  Then pull your patch through to the wrong side.

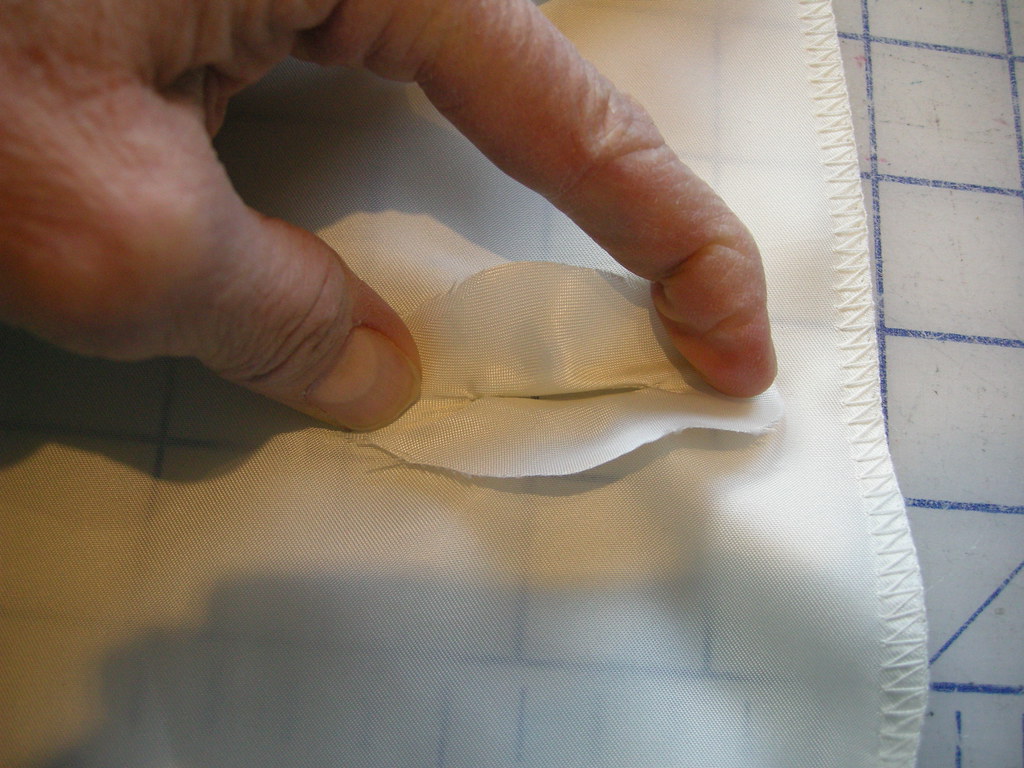
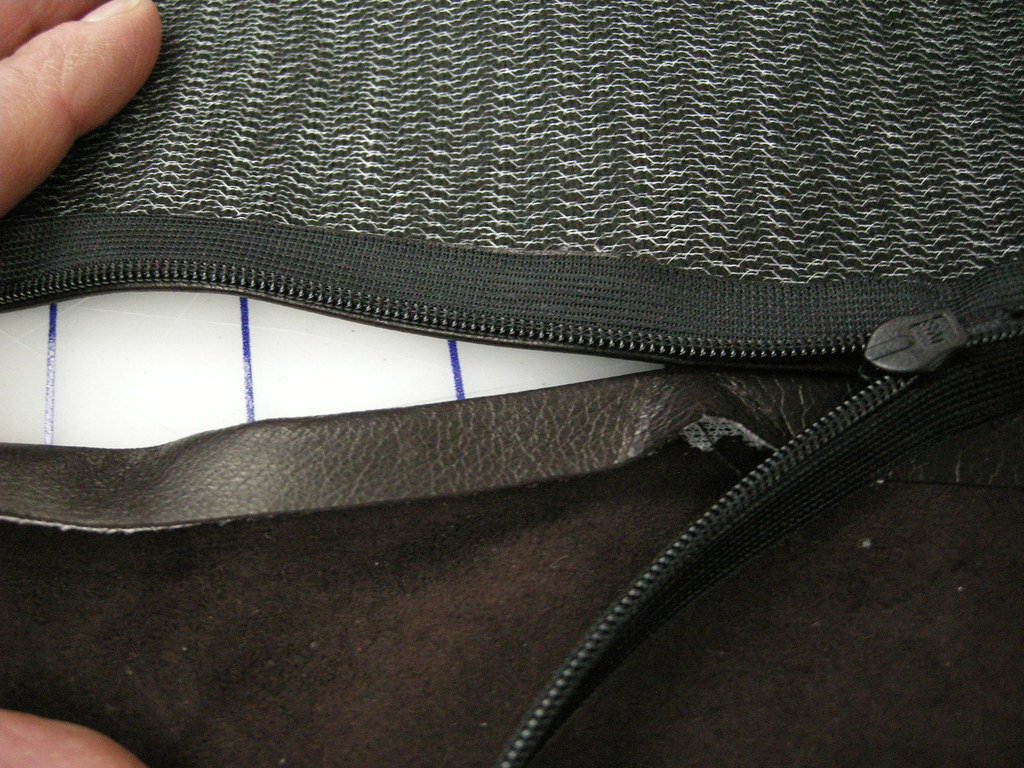
Next comes the magic, ineptly illustrated here because I was holding my camera with one hand.  To quote Ms. Carr:  "Holding each end of the egg shaped patch with the thumb and forefinger, pull in a snapping motion.  One good 'snap' and the bias will wrap around the 1/8" (.3cm) seam allowances and automatically create tiny narrow lips."

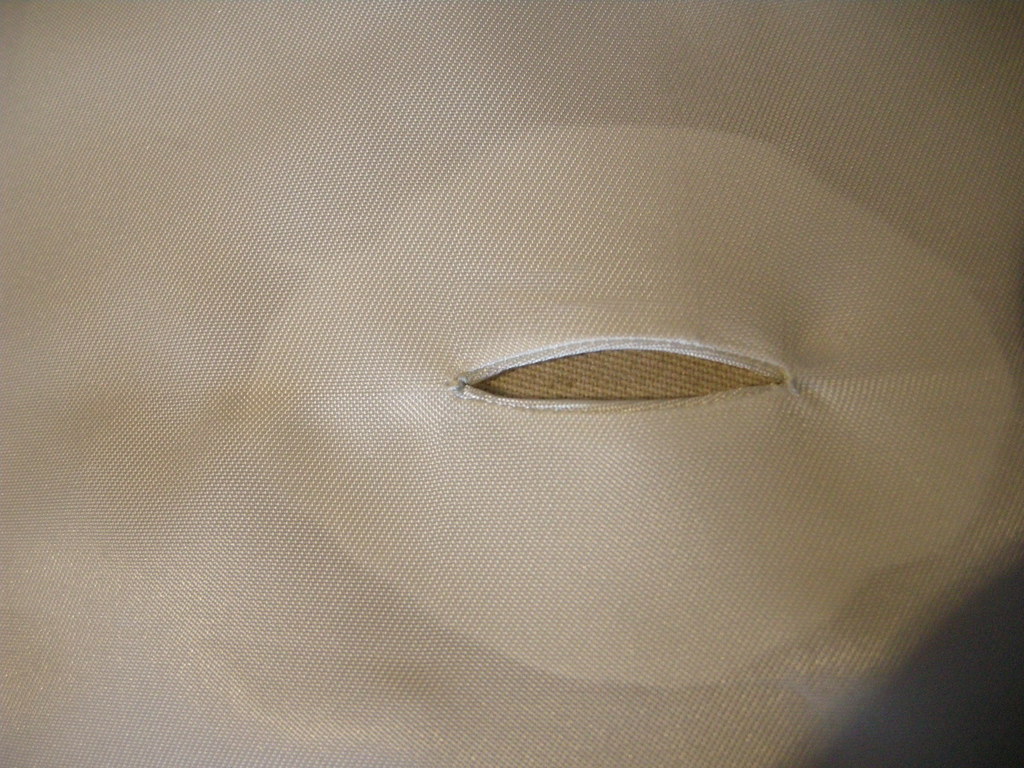
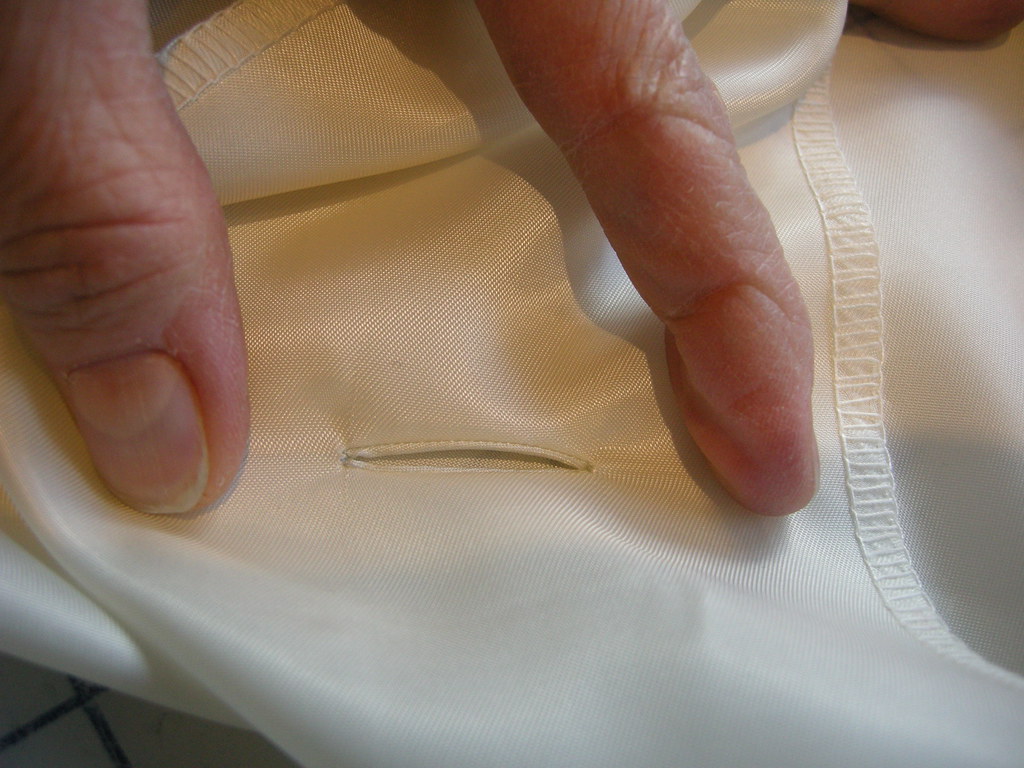
This is the right side, even before pressing!  

Magic, I tell ya!

No additional sewing is required - Ms. Carr says you can use a tiny bit of fusible web at each end to keep the patch in place.  (I will however tack the patches to my jacket to keep the buttonholes in place.)


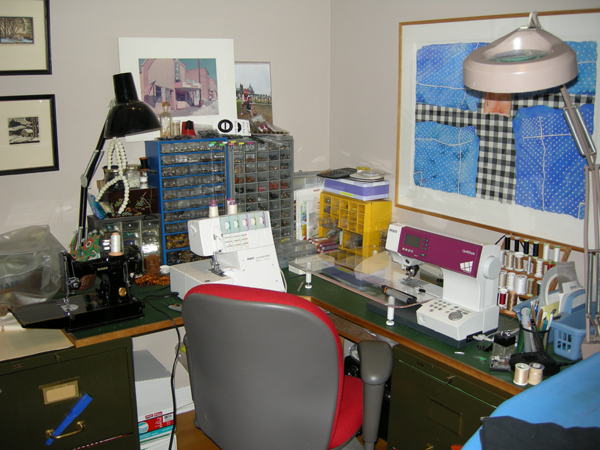
In other news, I had approximately 50 minutes while in Toronto to shop, and I wanted to do two things:  visit 
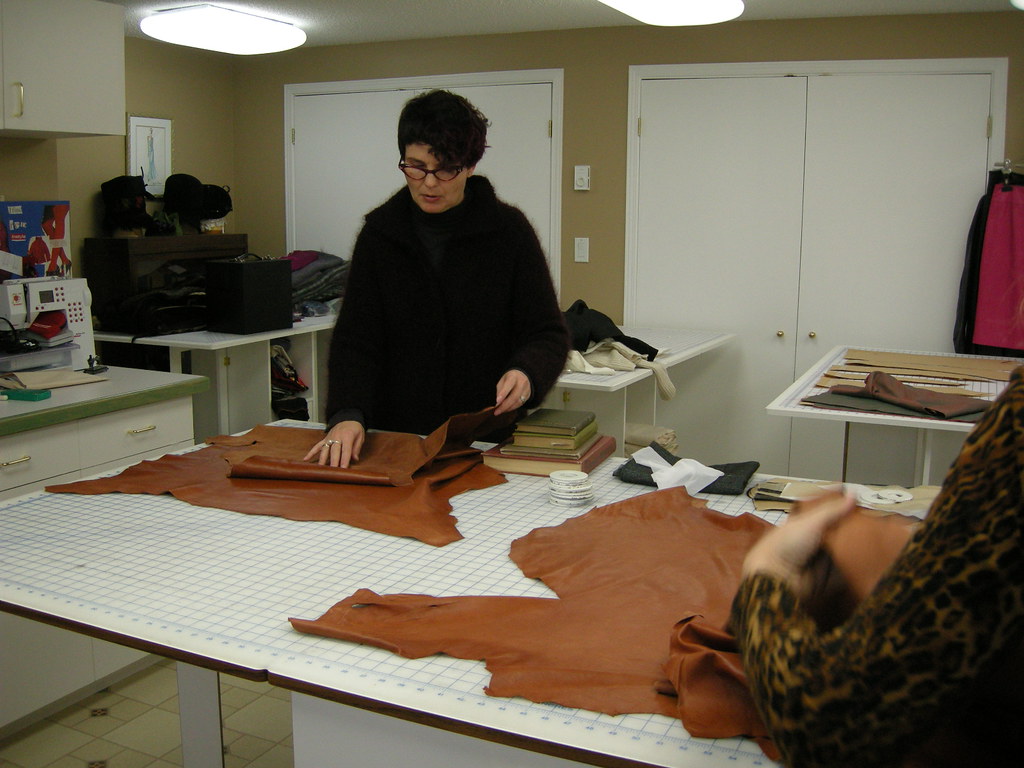
Perfect Leather at 555 King Street West; and look for waterproof (or water-resistant) fabric for the fur coat.  


Guess which one prevailed?  (This photo from Perfect Leather's website.)  All I can say is WOW!  I think you can find any kind of leather; any colour; any finish; any size; any combination.  Needless to say there is a very intoxicating and leathery perfume in the place.  I bought 4 sq.ft. of orange goat leather for a little project...  


Sunday, November 14, 2010

The edges of sewing

By which The Sewing Lawyer means an activity that has something to do with sewing but doesn't involve the actual activity of putting cut pieces of fabric together with thread.  It includes choosing fabric (in a store or from the stash) and patterns, thinking about sewing, reading about sewing, and tracing patterns. More constructively, it may involve shoveling out the sewing room.   This is a (rarely-seen) variation of sewing around the edges because it tends to result in recently-acquired fabric being handled, thought about, and put away, and leads to unfinished projects being unearthed, thought about, and sometimes even advanced (without actual sewing).

Because I feel I have truly started to "sew" until the machine has been turned on and a bobbin wound, I also include cutting out projects in this category, if I'm pretty sure I'm not going to turn the machine on and wind a bobbin imminently after cutting out the last piece.

Right now, I am marking time while waiting for my teflon foot to arrive so I can get back to the leather jacket.  It's going to be a bit of a pain to translate the very precise settings I had been using (on Kathryn Brenne's Bernina) to the very imprecise settings available on the Featherweight, but I am determined.

So in recent days, quite a lot of stuff around the edges of sewing happened here.  This included:

  • taking the lining out of the mink coat pictured in a recent post, reading Kathryn Brenne's article in Vogue Pattern Magazine several times, studying the construction of the coat, identifying Vogue 1083 as the perfect pattern for its transformation, thinking about the kind of fabric that would best complement it, rejecting every piece of fabric in my stash as unsuitable; shopping several websites without success, and trying to figure out if I'll have enough time to seriously look for fabric on my work-related trip to downtown Toronto later this week;
  • making the lining pieces for my leather jacket (after all the adjustments it was easier to make the lining patterns from my altered pieces than to alter the included lining pieces);
  • (finally) finishing the lining pattern for my Auckie Sanft jacket which was enthusiastically disassembled for this very purpose more than a year ago; 
  • cutting Jalie 2795 out of cushy blue-grey Power Stretch; 
  • washing and drying recently-acquired fabric; and
  • putting fabric away (!) which is always a challenge chez The Sewing Lawyer due to an overabundance of fabric and an underabundance of storage locations.  

Today I feel like more, maybe to include tracing Jalie 3024, which I think I'll shorten for now to another top suitable for exercise wear.


Wednesday, November 10, 2010

Invisible zipper pockets - an illustrated guide

One of the features of the Material Things Fearless Jacket is its in-seam zippered pockets.  I figured the pattern is called "fearless" because you'd have to be to sew such a thing and expect it to look any good.  I've put in my share of invisible zips over the years but tend to approach the task with a bit of a quaver in my voice, if you know what I mean.  I learned how to do it back when the world was young and zippers came in packages with instructions.  They said to sew the zipper in first and sew the seam closed afterwards, and you used one of those special blue plastic feet that fit on any kind of sewing machine.  It's hard to manoeuvre your zipper foot close enough to the end of the zipper to make a really neat transition between zipper and seam.  Sometimes you had to fudge a few hand stitches at the seam below the zipper opening.  More often, you had to rip and re-sew.  Neither would be a good idea in leather.

By contrast, Kathryn Brenne's method worked perfectly, the first time (a practice zipper) and the second and third times too (the real thing)!  Here's how:

First, prepare your seam.  Interface the pocket opening if it isn't already.  In my jacket, the centre front panel is fully interfaced but not the side panel.  I cut a strip of fusible and applied it as shown to the left.  Mark the pocket opening.  Then sew the seam above and below it.  Press the seam open, including the seam allowances beside the pocket opening.


It turns out that things go a lot better when you have the right tricks up your sleeve.  The trick, in this case, is Wonder Tape.  Stick this stuff on the zipper tape, both sides, as shown to the right.
Next, peel off the Wonder Tape paper backing on one side.  Position the zipper so the top stop is a little bit above the end of the stitching at the top of the pocket opening (above).  The bottom stop should be a bigger bit below the end of the stitching at the bottom of the opening (right).  Stick the zipper down on the seam allowance so that the coil is just along the pressed-open seam allowance on that side.

Sew that side of the zipper down using your choice of special foot.  At left is the Bernina invisible zipper foot.  The first side is easy, I tell you.  The second is much harder because you have to somehow get the zipper coil in the opposite groove while the first side of the zipper is snugged right up against it.  When I complained about this, Kathryn said "It'll be fine.  That part of the stitching is in the seam allowance and you will never see it."  She said exactly the same thing when I complained that it was hard to sew right to the bottom of the zipper on the second side.
And just look at the mess I made of it!  Oh no!

Once both sides are sewn, you have to fish the zipper pull out of the little well you've sewn it into below the pocket opening so that it's accessible in the pocket opening.


Look!  Kathryn was right!  No sign of the ugly mess behind.


It'll be fine...

Tuesday, November 9, 2010

Leather Workshop - "It'll be fine"

This phrase was oft-repeated during the four days I spent working under Kathryn Brenne's supervision at her fantastic and well-equipped sewing studio in North Bay Ontario last week.  Kathryn has endless patience and seems unfazed by any mistake or imperfection her students turn out (and there were some).  And you know what?  I think she's right - my leather jacket (which I shall finish once my teflon foot arrives from Mr. eBay) will be fine.

I did in the end go with the Material Things Fearless Jacket pattern.  Kathryn mostly approved of the fitting changes I had made but on her recommendation I trimmed up the pieces even more.  The first day of the class was mostly taken up with finalizing the pattern changes, and then making brown paper pattern pieces (doubles so there's a right and a left of everything for single layout on the skins).  I had cut out some of it by the end of that  day.

The second day was occupied with cutting out all the jacket pieces and interfacing, and fusing the interfacing where it needed to be fused.  I had assembled the backs by the end of that day.

On day three I felt brave enough to tackle the invisible zipper pockets and assemble the jacket fronts.  Day four involved sewing the sleeves and setting one of them in, inserting the front separating zipper, and almost completing the facings.

It doesn't seem like I did a lot each day, when I write it out like that, but believe me these were full days of sewing and associated learning (9AM to 5:30PM, with breaks for delicious homemade snacks and lunch).  Of course if I had known what I was doing, I would have been more efficient...

Anyway, here are some photos of the sewing studio.  It's on two levels.

Upstairs are the latest Berninas.  Kathryn invited us to choose any one of them - I tried out the 640.

She also has two steam generator irons and a full kit of tools for every table.


Downstairs are the cutting tables, including one that was big enough for me to lay out five lamb skins at once.  Here, Kathryn is examining another student's skins and talking about leather quality.

Kathryn is extremely generous with her knowledge and brought out numerous things for us to ogle and examine, including the fannnnnntastic sheared mink lined coat which is featured in the latest issue of Vogue Pattern  magazine!

I was so inspired that when I spied an XL sized mink coat in good condition at the Value Village that night, I snapped it up.


That's it for now - stay tuned for pictures of my jacket in progress.