
We (the retreaters) have revealed our finished and mostly-finished cardigans to each other and to Nic Corrigan and are cleared to show them to whomever we please. So here is the cardigan I mostly made while in Yorkshire, but finished here at home. There, I used the assigned machine, which was a Silver Reed punchcard (a Zippy plus, which is older than a SR 360 I think). Here, I used my Brother KH965i.
I chose to place the leaf pattern on the centre fronts and at the lower edge of the side fronts and back. One punch card repeat perfectly aligned with the pocket opening and continues around the back.
I didn't know (or possibly had failed to notice or forgotten) that stranded knitting is always longer than the equivalent number of rows in plain stockinette. I found I had to unravel about 10 rows of my centre fronts and re-cast off by hand to even them up with the side fronts.

We were able to examine and try on some samples at the retreat, and based on my assessment I made some changes so it would fit me better.
There is a V neck at front, which is fully fashioned. As designed, it is quite a bit lower than the front of my cardigan. I knit extra rows to raise it up by about 10cm.
I also decreased the width of the back by approximately 4cm (there is a centre back seam) because my back is narrow.
Finally, I lengthened the back overall and added a back neck drop. This helps the cardigan sit correctly on my shoulders.
I did a couple of things differently in the construction as well.
The samples had seams sewn with wrong sides together. I made mine the conventional way.
The instructions asked for all body pieces to be taken off the machine on waste yarn rather than cast off, and then seamed using a linker. I wanted the stability of a cast off edge at the shoulder and back neck. Also, I was taking the pieces home in my luggage and wanted the stitches to be extra secure. So I cast off around the gate pegs on all but the sleeves. I left the sleeve stitches live but cast off the waste yarn for security.
 I totally recalculated the neck band so that it had a seam at CB rather than (as designed) two seams above the V crossing of the front neck. The structure of the band is many stitches cast on in full needle rib, and then every 2nd stitch transferred on the ribber bed. It looks like 1x1 ribbing on the ribber side, which is the public side once attached, and like FNR on the main bed side. It's OK but not my favourite ever neck band technique. My thought was that it needed to be stretched much more than the pattern indicated - i.e. that the pattern instructions would produce a neck band that is overall too long for the opening. I am glad I shortened it and think I could have been even more aggressive as it is not sitting quite flat at the side neck.
as the pattern instructed. They are just an extra length of knitting within the side fronts (knitted with the few stitches to either side in hold). I made them in the contrasting colour.

I assembled the cardigan mostly on my linker but had to attach the band by hand due to technical issues too tedious to describe.
New features/experiences associated with this project:
- Intensive knitting experience - no time to ruminate, had to make quick decisions, jump in and just knit. That was surprisingly tiring!
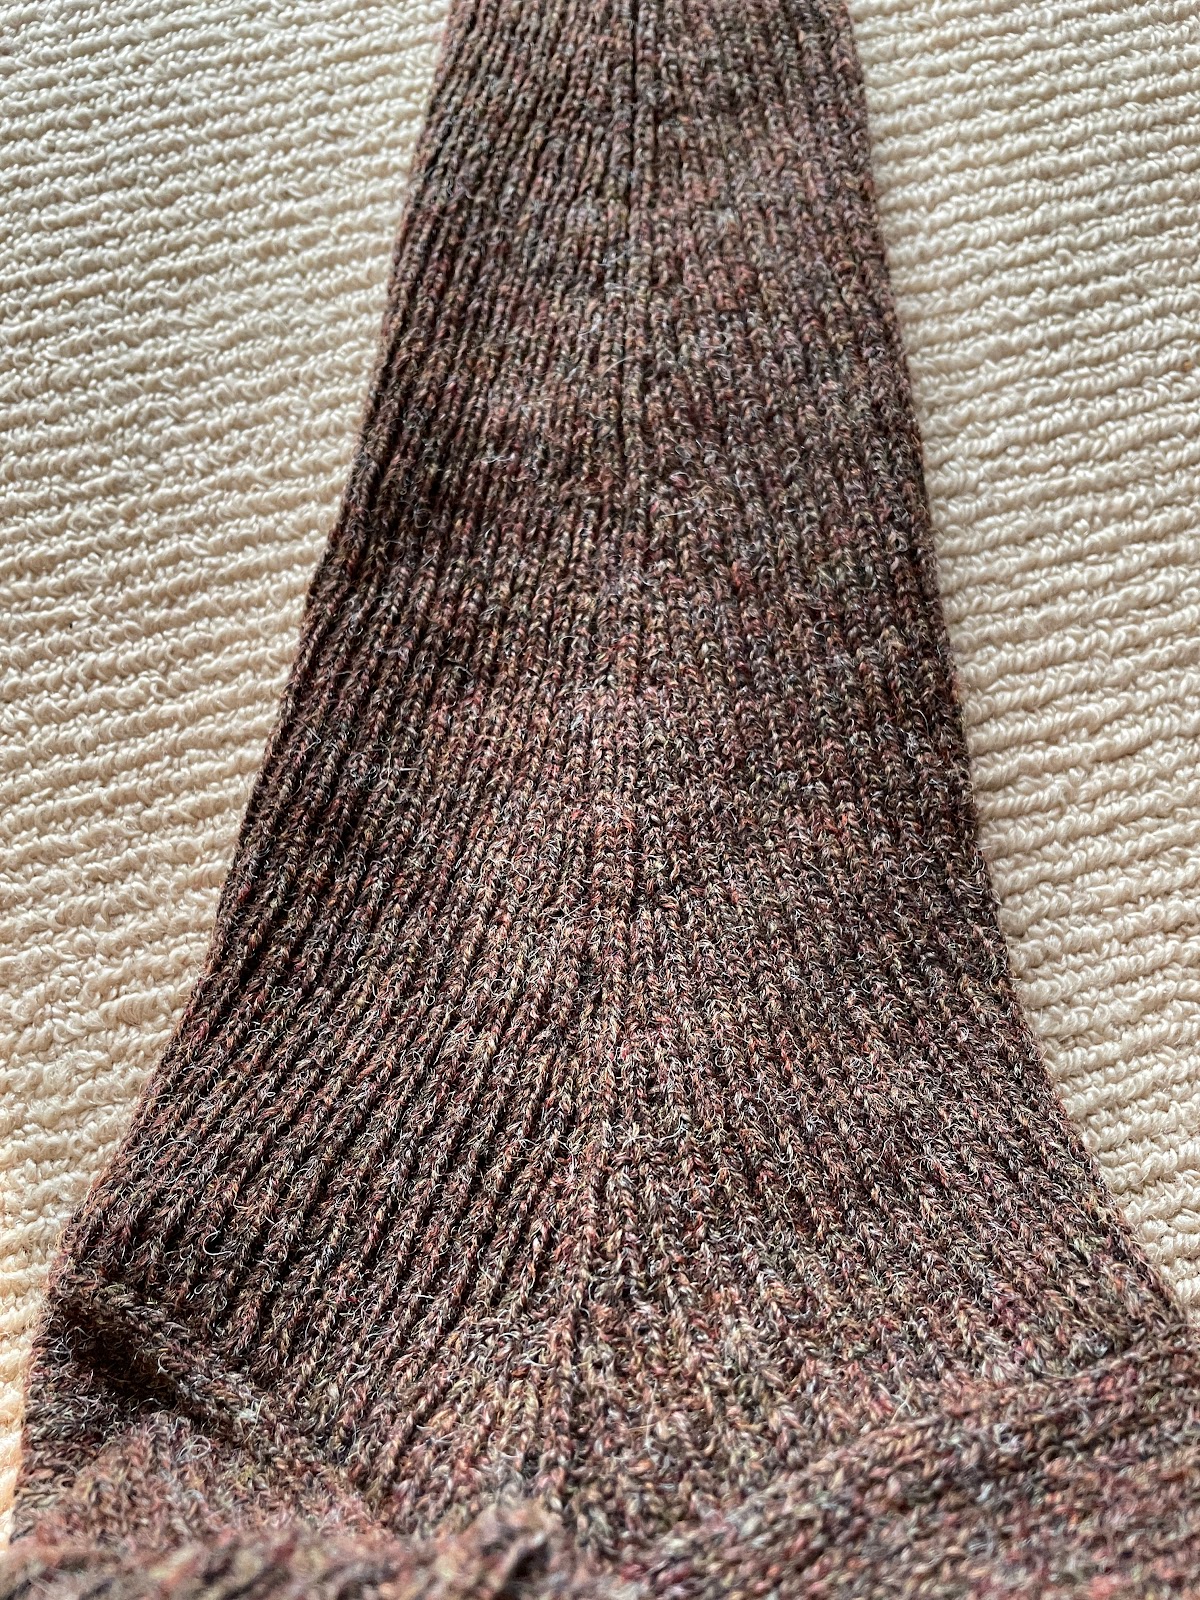
- Properly fully fashioned ribbing (behold at right the underarm seam).
- Put almost the whole thing together using my linker, which hasn't been my favourite piece of kit.
BTW the actual colour of this cardigan is somewhere between how it appears in the inside and outside-in-the-sun photos. The yarn is very heathery. It's Gardiner Yarns SS11 Shetland, 100% wool. I'm not convinced I got all of the spinning oil out of it when I washed it and may attempt to rough it up some more to make it a bit softer.
Once I finished it I realized I didn't have a lot of tops that would look good with this. I'll have to make something!


Wow, what a beautiful sweater! I hand knit but don’t machine knit, so I must say the process sounds daunting, but the finished project is gorgeous!
ReplyDeleteThanks for sharing your experience with this pattern. I was about. To purchase a different one, but your post helped me see what is special about this sweater.
ReplyDelete