
 There's not really much to say about it. The extravagance of the collar is evident in the pattern envelope photo, and it does live up to that. It's a one-piece "shirt-style" collar and I found that with the weight of the rayon jersey, a light and somewhat supple fusible interfacing gave it just the oomph required to stand up, or spread open (as I wish).
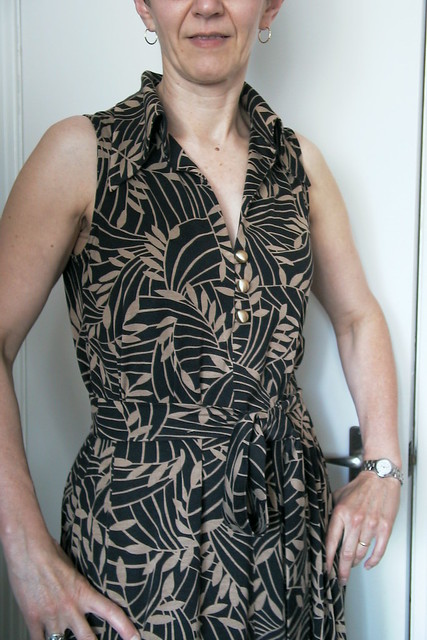
 To the left, the collar is UP.
 To the right, it's more OPEN. Either way, is OK with me.
DvF wanted me to cut facings for the armscye but I ignored her and did the same kind of narrow binding that I did on my little tank-top earlier in the week. The only difference is that I started by sewing the binding strip to the right side of the fabric, so that when it was folded over the seam allowance, it would be on the inside. I really like this technique!
A detail that gets lost in the pattern photo is the 3 buttons with loop closures. These are working buttonholes, but unnecessary since the dress can easily be pulled over my head.
My friend Gail gave me the secret to sewing a narrow filled tube, for just this kind of application. Here is a tutorial.
First, cut a strip (lengthwise grain of the jersey to control stretch) of suitable length. My pattern had a piece for this but just calculate - # of loops required by (length of loop needed plus 2 seam allowances, one at each end of loop).

Fold the strip of fabric lengthwise, RS together, over the yarn.

You are encasing one end of the yarn inside the sewn tube. Be careful not to catch it with your stitching!
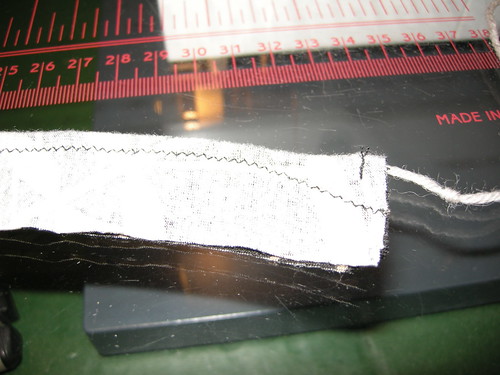
The yarn (to the right in this photo) is at least as long as the fabric strip.
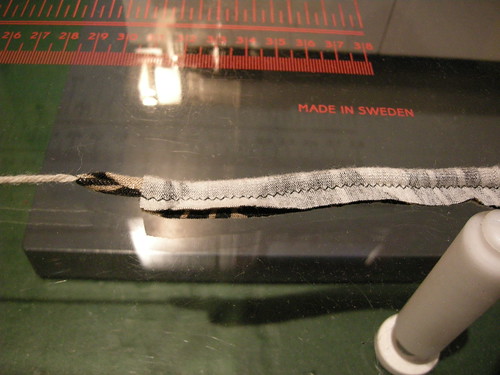
Then trim the strip fairly close to the stitching - I trimmed at about 5mm.


Gail is a good friend. I've been using this technique for years and every time I show it to someone they can't believe how easy it is to do it this way.
ReplyDeleteGreat dress! I love the fabric and the style.
ReplyDeleteAwesome dress and what a great tip on the fabric tube. The Fasturn is not so great on really long tubes.
ReplyDeleteHiya - the dress just looks wonderful on you. Fab colour, cut, pattern and style. Thank you for the tips too.
ReplyDeleteSTUNNING!!!!!
ReplyDeleteFabulous dress and I love the loop tutorial - thanks!
ReplyDeleteThe dress is beautiful! And thanks for the loop tutorial...loops are the bain of my existance so I'm glad to find an easier way to do them!
ReplyDeleteIt looks great - if it's as comfy as it looks, you could practically live in it :-)
ReplyDeleteGreat technique, thanks for sharing! And great dress, it looks like it will be very comfortable.
ReplyDeleteGreat looking dress on you! Love the fabric. Thanks for loop tutorial, most helpful.
ReplyDeleteGreat dress, it looks very nice on you!
ReplyDeleteI really like the fullness of the skirt combined with the more spare bodice. What a great pattern.
ReplyDeleteWonderful dress. That style is timeless. Thank you for the loop tutorial --- I'll have to try the technique soon.
ReplyDeleteYeah! Thanks for that loop tutorial, definitly learnt something new today, and won't be punching holes in my loop any more (by trying to use a knitting needle to turn it)
ReplyDeletePretty spectacular on you. Looks nice and cool for summer too. Good tutorial. I turn tubes in a similar fashion, but I've always just let the sas fill the tube. I've never corded them. I assume that they hold their shape?
ReplyDeleteGreat timeless dress - love the collar and it looks so comfortable for summer!
ReplyDeleteYou look like you're heading to a chic safari! I love it.
ReplyDeleteLove the dress! It looks great on you.
ReplyDeleteThanks for sharing the technique, it is a great way of making these loops.
I'm a big fan of your sewing. Thanks for the tutorial. I can't wait to try it myself.
ReplyDelete:)Deb M.
Neat trick! And a very nice dress.
ReplyDeleteGreat Job! I Love the DVF patterns from the seventies.
ReplyDeleteChristiana
sewamusing.blogspot.com
What a great-looking dress, Kay. You look marvelous (as always) in it.
ReplyDeleteKathryn
DvF lust! The style is perfect for you
ReplyDeleteYou have a wonderful eye for matching fabric to pattern! Looking at your pictures vs. the pattern envelope, that gorgeous fabric really adds something to the pattern style. The result is a beautiful dress that looks great on you! And it's my favorite kind of garment -- one that can be worn alone for work or more casual occasions and with a jacket for more formal events. Also, thank you for the tutorial.
ReplyDelete