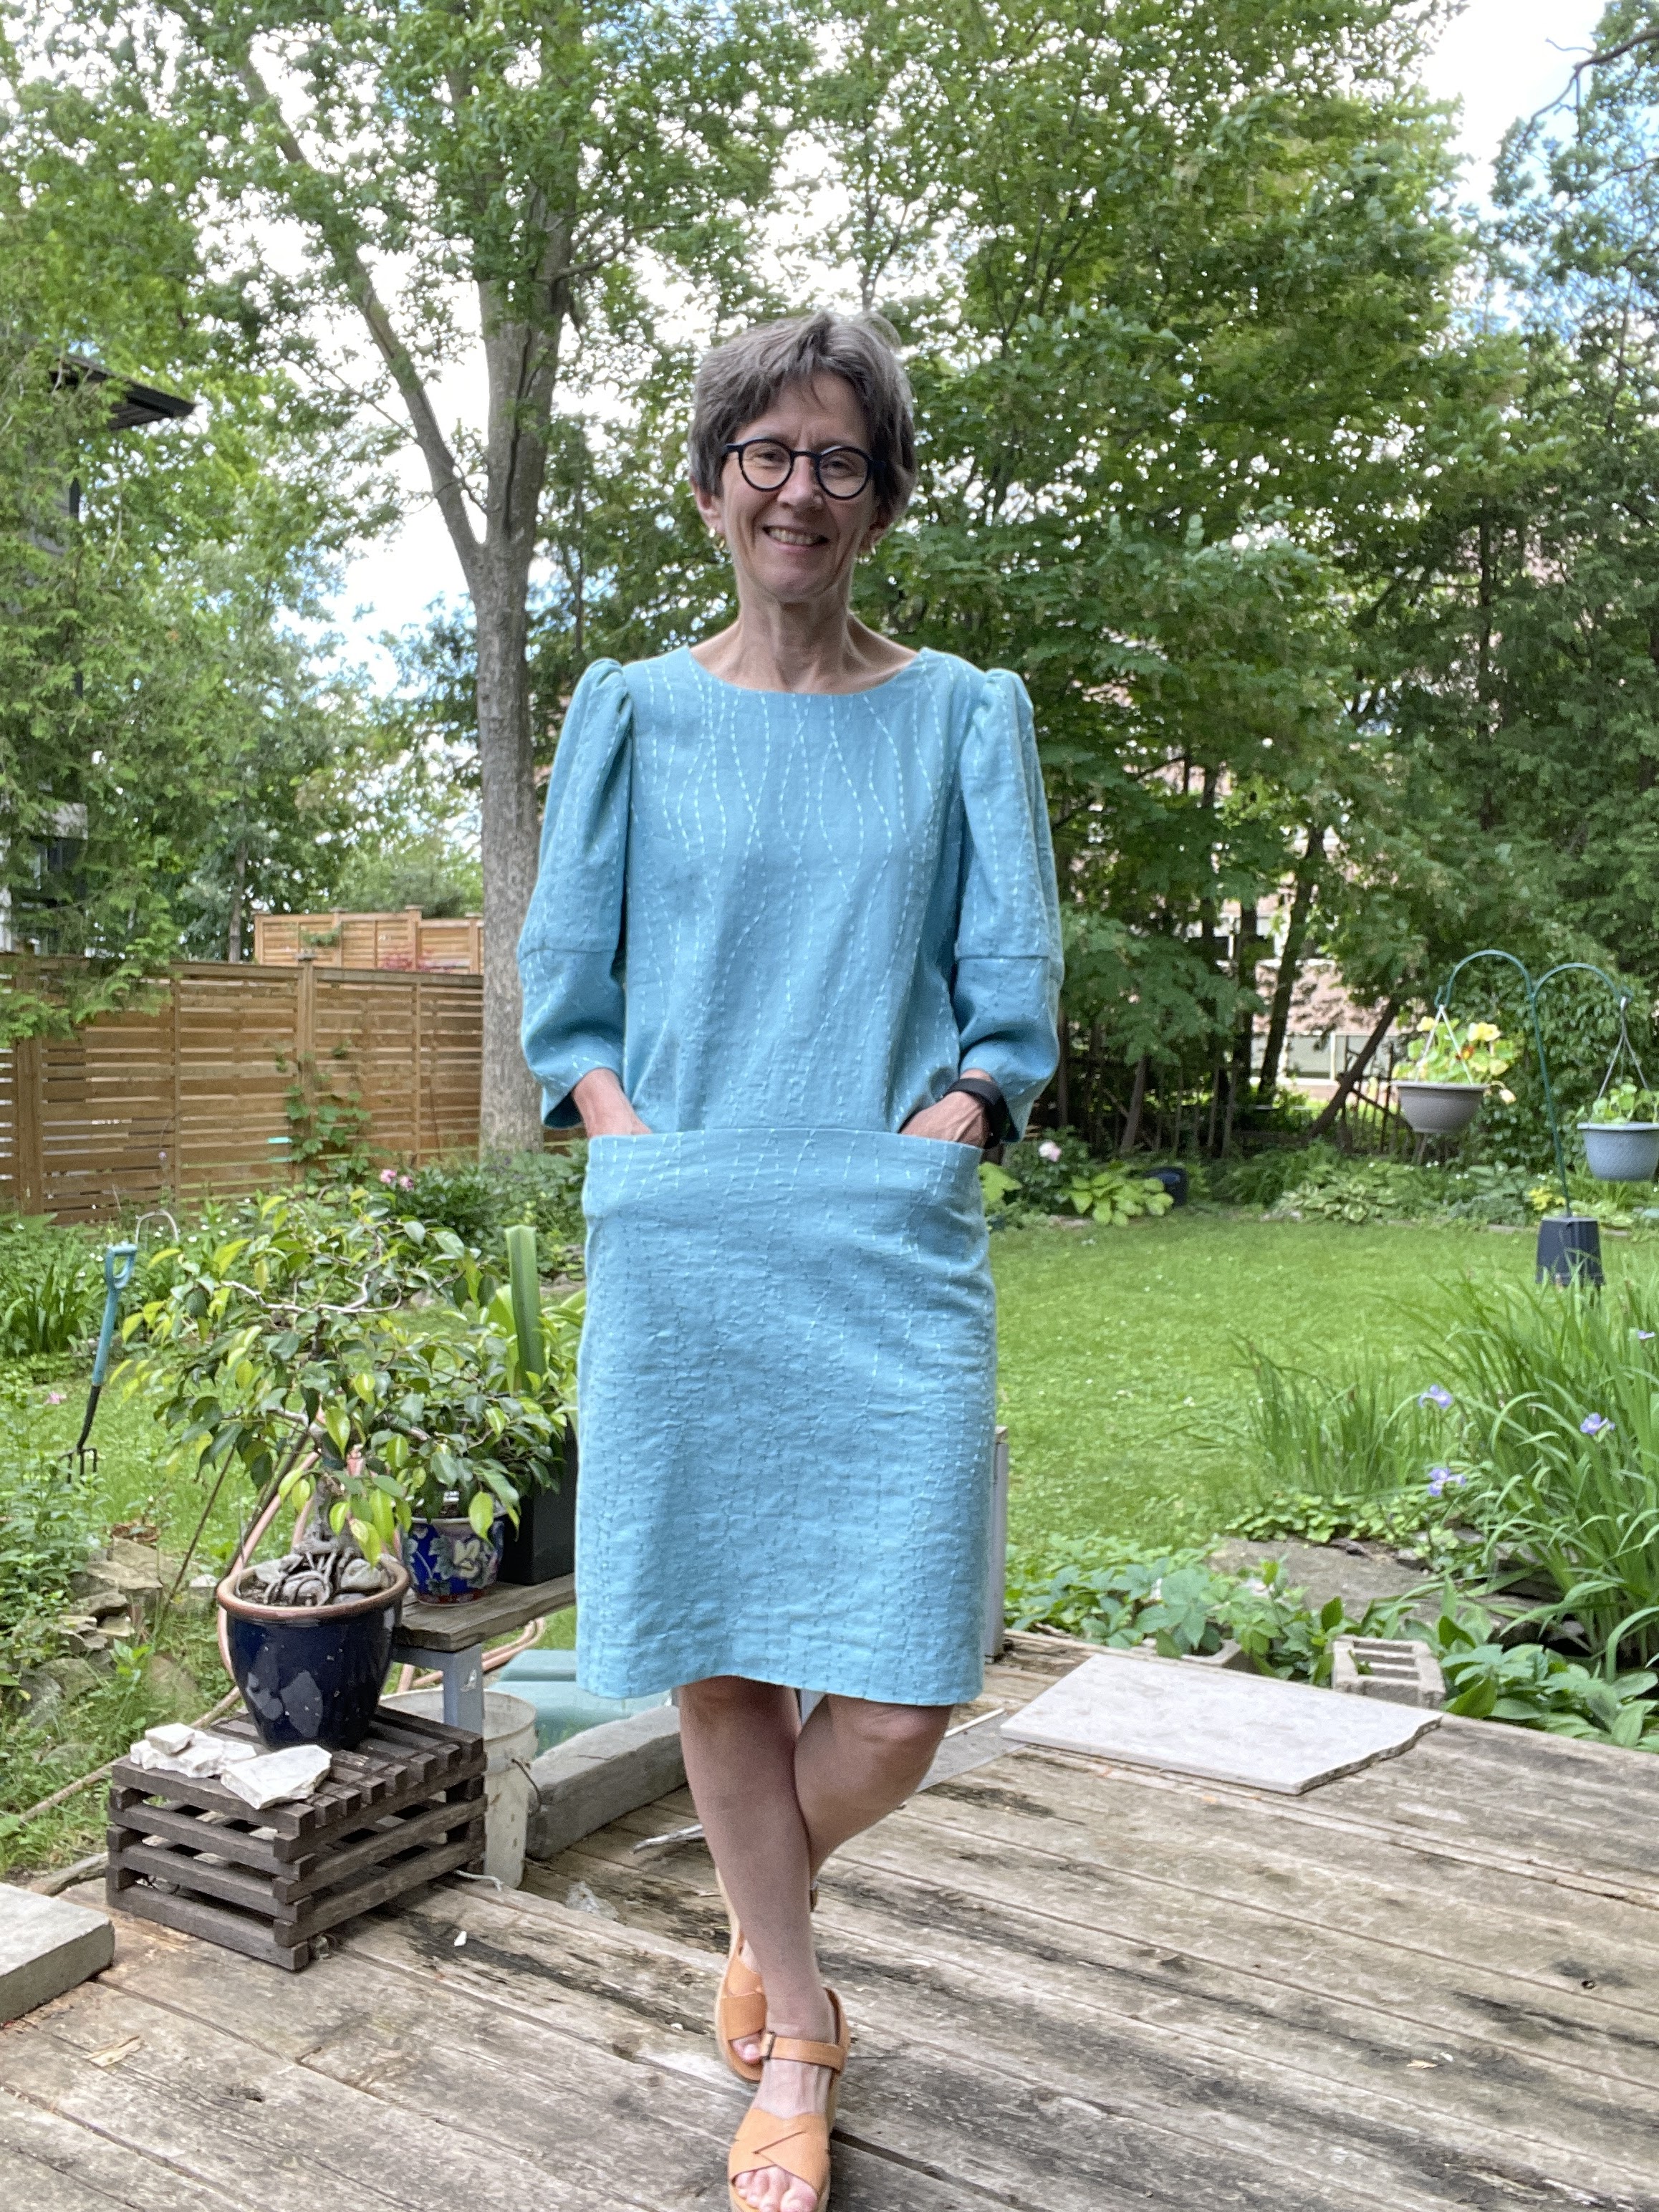
This version is made from a mid-weight woven embroidered blend (maybe viscose and something) from stash. I had more than enough to cut the extravagant sleeves and the pockets.
I predict more.
Not that this pattern is perfect. I had to tweak it to get it to a state I was prepared to live with.
This dress has 2 bust darts but otherwise no shaping at all. The side seams are dead straight - no flare, no curve in at the waist. This makes it challenging for a person whose hips (10) are typically 2 sizes bigger than her bust (6) to pick a size.
I did some flat pattern measuring and decided I should just cut the size indicated for my measurements. 6 for the bodice, grading out to 10 at the hips.
Readers, it hung off me. The finished dress is more like a 6 overall and if doing it again I think I would go for 4 in the bodice and sleeves.
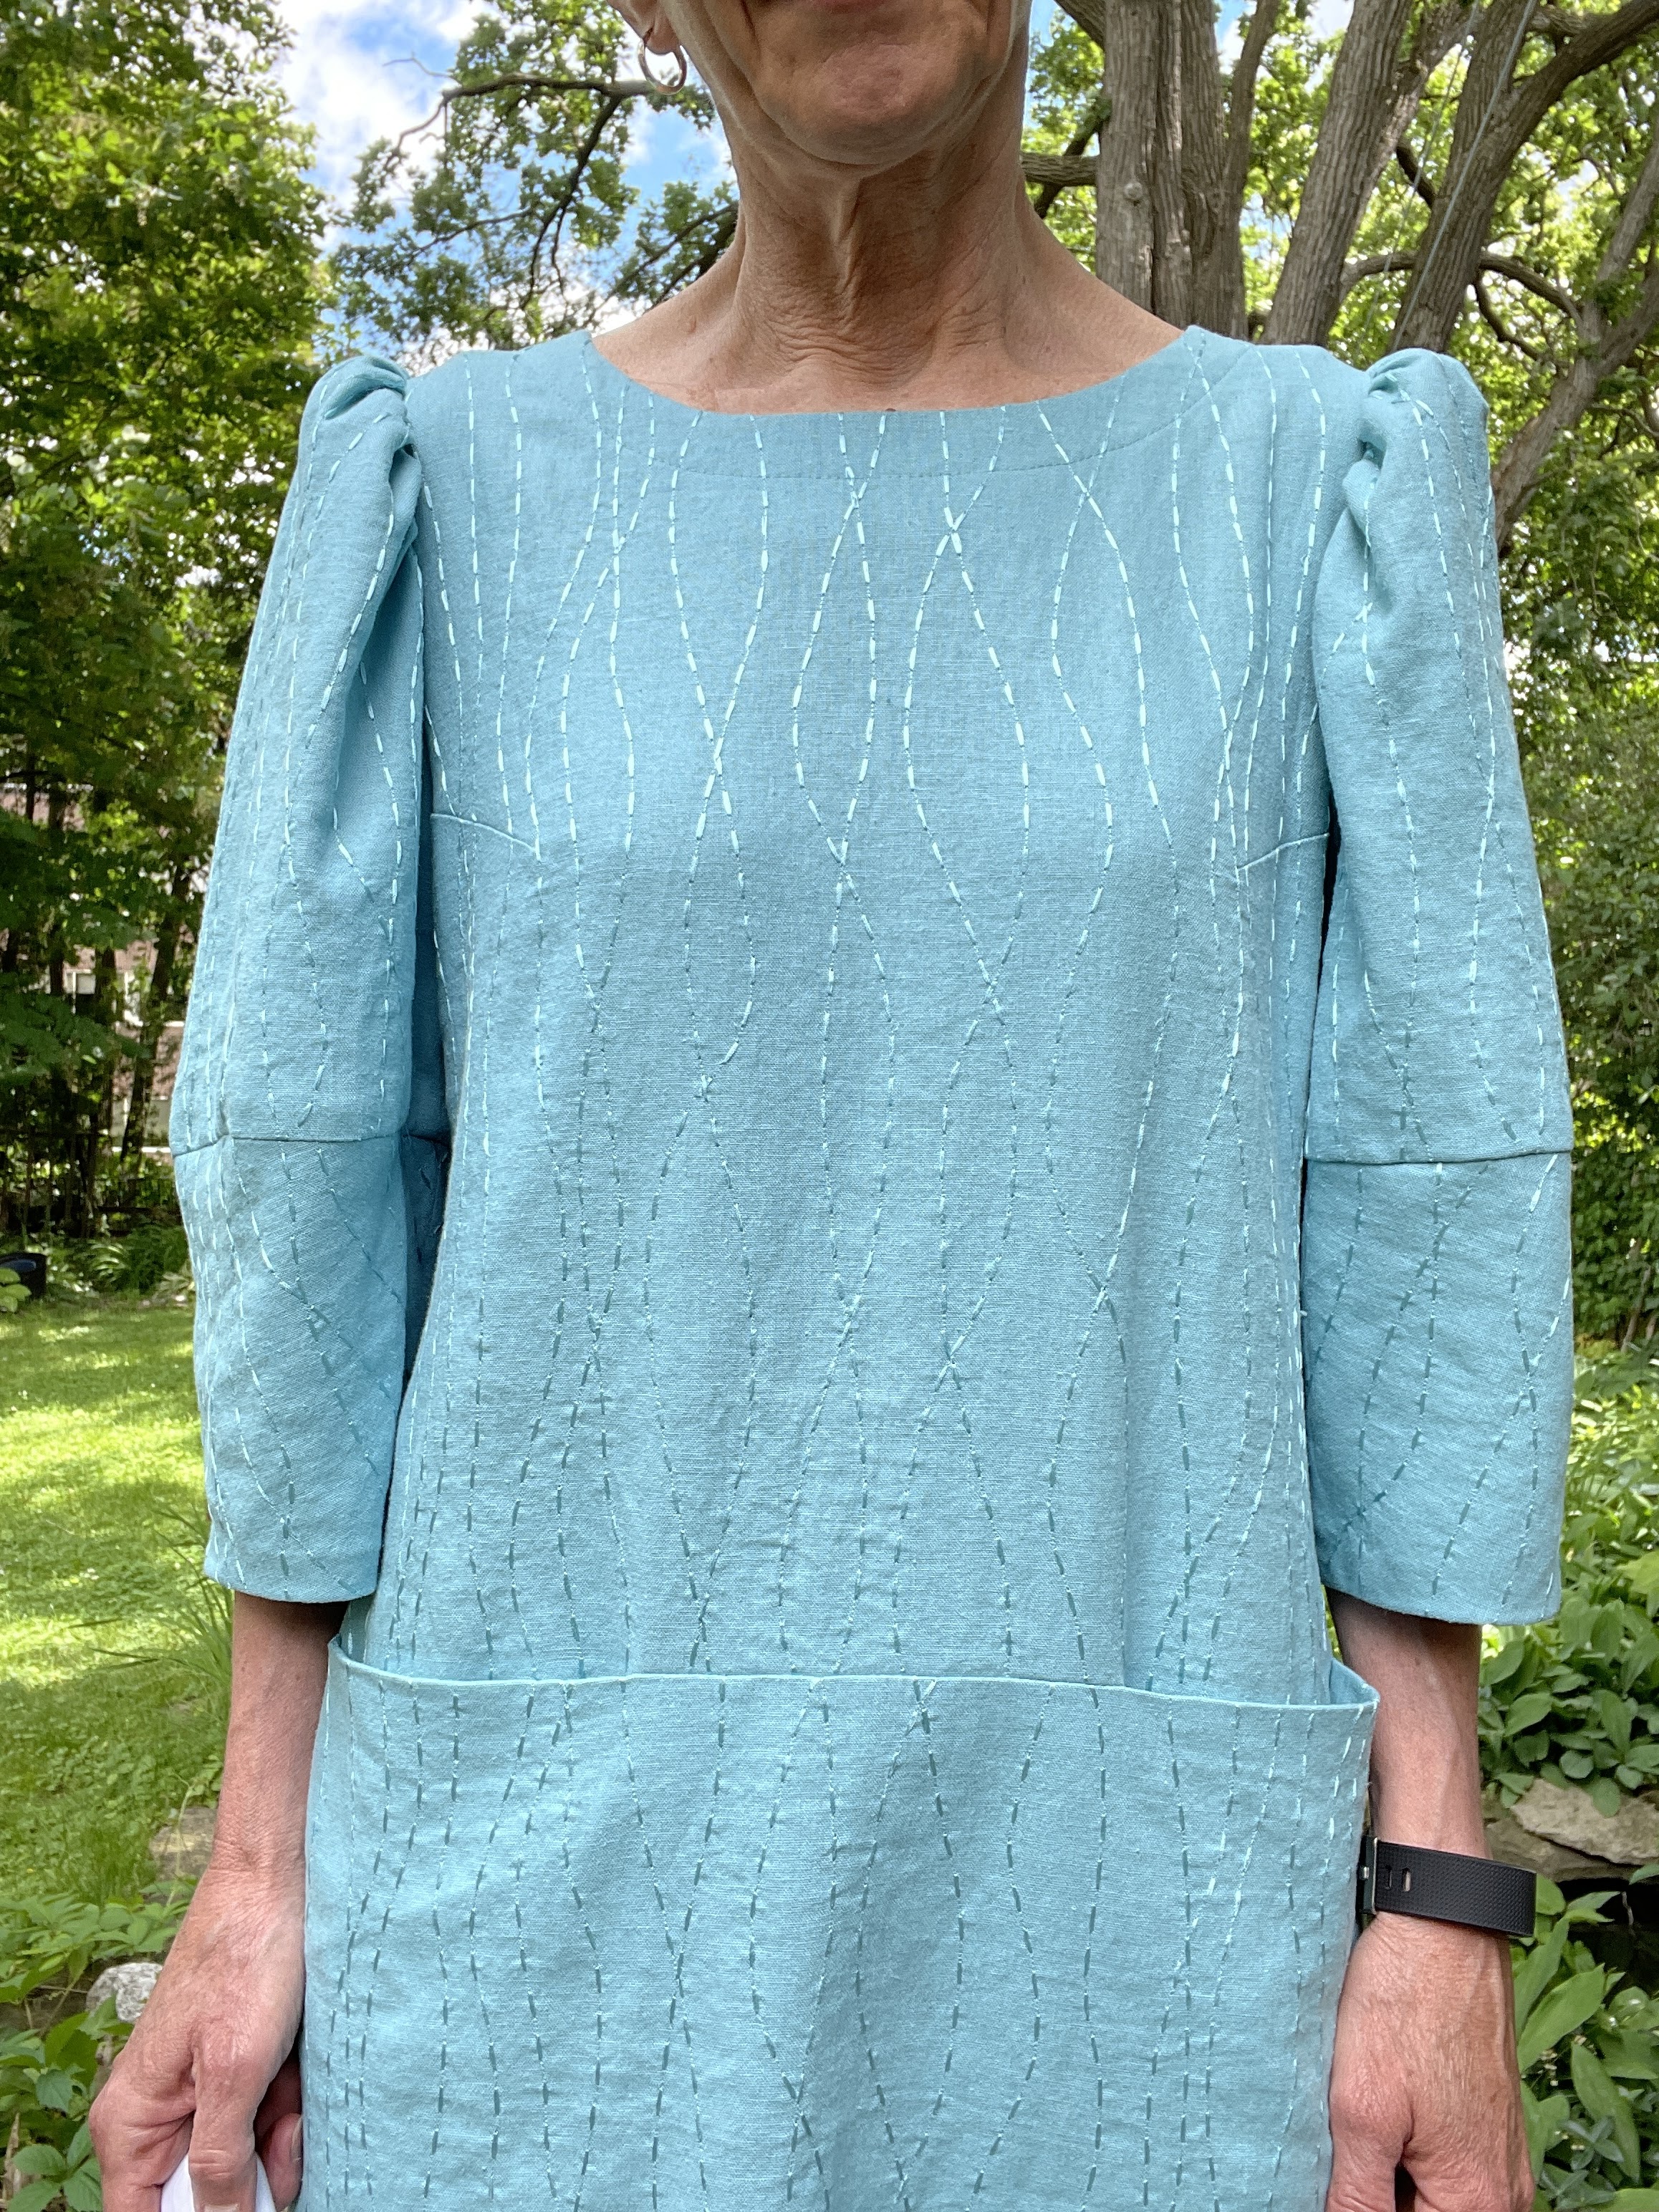
Unlike similar dresses from the 80s and 90s, this pattern doesn't call for shoulder pads to support the sleeves, but they needed support of some kind.
A roll of soft tulle to the rescue. I cut a strip approximately 11cm by 50cm, folded it lengthwise in 3 and gathered it. Then I inserted the gathered strip in the upper sleeve.
My sleeves went from sad to statement in a flash.

Someone asked if I can feel the tulle - I can't. It's soft stuff that I acquired in stash from a wedding dress maker, if memory serves. You never know when things like that will come in handy.
The other thing I changed while sewing this pattern is the order of construction. The instructions say to sew the dress at shoulder seams, finish the neck, then install the upper sleeves. The underarm seam is then sewn in one pass. After that, you add the lower sleeve.
I prefer sewing anything even slightly structured in the round, setting the sleeve into the armscye. Sewing the underarm/side seam in one pass flattens the seam joining the sleeve and body under the arm. Unless you're making a T-shirt, this risks distorting the garment.
(The same goes for the crotch seam in pants. Sew it last if humanly possible.)
I should have ignored the instructions from the start for this reason. I could have checked the fit of the dress before having to deal with the fit of the sleeves. Having attached sleeve 1 to the body before checking fit made it a lot harder to adjust things on the fly.
So it was a bit of a pain but in the end I have a dress that's quite wearable (at least if I don't need a sweater or coat...).


Oh, definitely wearable! Good save!
ReplyDeleteI am so used to reading your reviews of athletic, more casual wear and knitted sweaters that this review was a surprise! Love the fabric! Thanks for the idea of adding the tulle and the addition of a photo. I have missed reading about your creative adventures and am glad to see you back!
ReplyDeleteA weird rtw sewing method for the side seams and sleeve seam construction is to sew shoulder seams (finish neck and closures), attach sleeve in the flat EXCEPT for 1-2 inches either side of the side edges; sew sleeve seams and side seams in one pass; insert the bottom 2-4 inches of the sleeve in the round.
ReplyDeleteI wouldn't do this for any fine garment, but for basic blouses and shift dresses it works a treat. Gives the ease and speed of sewing in the flat, with the better fit at the underarm of setting in the sleeve in the round.