Showing posts with label Material Things; leather jacket. Show all posts

Friday, April 15, 2011

Another sheath dress

The Sewing Lawyer cannot have too many sheath dresses, since she has a pattern that fits.  For years, a simple dress with no waist seam that fit everywhere was an elusive goal, given a hip measurement that is about 2 sizes bigger than the waist or bust.  PatternMaster Boutique to the rescue.

PMB produces a pattern that is a decent but not excellent fit.  It needs tweaking in the pattern editor (CAD) component of the program.  My goal for the program is to produce basic blocks, like this dress and my princess seamed skirt, that I can make over and over as is, or adjust for different styles.

For this sheath, I started with a princess seamed dress.  This is a simple shape that as originally drafted, had both a shoulder princess seam and a second seam that corresponds to the second waist dart in front and back.

To the right are the finished pattern pieces.  One of the standard changes I make is to take a little wedge at the CB waist, since PMB drafts with a dead straight CB seam.  I'm not straight there, are you?  As you can see, I converted the second princess seam back to a fisheye dart in the front.  In the back, it's a long dart that ends in the armscye.  The hem is also slightly pegged so it looks less blocky.

So this is at least the third sheath dress I've made from the pattern.  You last saw it here.


Here are the pictures of my most recent iteration of this dress.  So comfortable!  It has about 2" or so of ease at the hip.  

I think it looks pretty good with my leather jacket.  

I wore this to the Haute Couture Club of Chicago luncheon and fashion show last Sunday.  But I had not correctly anticipated the weather.  It was 85 degrees F (29.5 C)!    

Tuesday, March 22, 2011

Extra! More leather jacket photos

My model washed her hair and consented to try on the jacket with a few existing and possibly coordinating pieces.  She's looking forward to the new pieces promised, however.

This is with the Jalie tie-top in darkest brown and blue tie die print, and a pair of lighter brown wool cuffed trousers (Simplicity 4366, a Threads pattern now out of print).

Kathryn was right, I think, to have me take it in at the shoulders and upper back.  However, the waist area is where I think it's a little over-fitted.  The seams would look smoother if it wasn't quite so nipped in.


I like separating zippers with a pull at each end.  It makes it possible to wear the jacket zipped up and still move around, sit etc. without the jacket riding  up.

I keep my eyes open and buy nice zippers on spec.  I was lucky to have, in stash, a very light weight separating zipper with pulls that are exactly the same as the invisible zippers used at the pockets.


To the left, here it is with Vogue 2683 (one of my TNT patterns).  The colour is a little dull in the picture.  In real life, the fabric is a wonderfully soft heathery mix of grey and rust.  Writing it out, it sounds dreadful.  However it's one of my favorite dresses to wear in the winter (with a jacket, since it's sleeveless).


To the right is a detail I didn't think to photograph before.  The sleeves are split at the cuff so (theoretically) they can be turned back.

Sunday, March 20, 2011

At last

There's a new luscious leather jacket ready to hang in The Sewing Lawyer's closet!  Just in time for crisp spring days and for an early April long weekend in Chicago.  Where no doubt there will be intense scrutiny of the wardrobe, inside and out, since the itinerary includes real time with Liana and Ann among other prestigious and prodigious creators of beautiful sewn things, including the entire membership of the Haute Couture Club of Chicago (or so much of it as attends the annual fashion show and luncheon on April 10.  Phew!  I've got to get back to it!

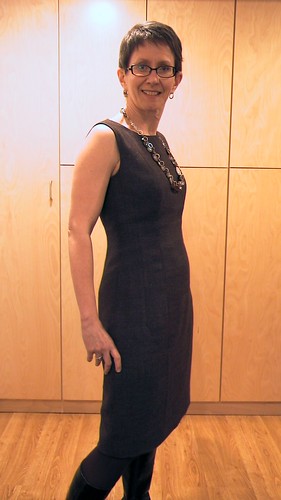
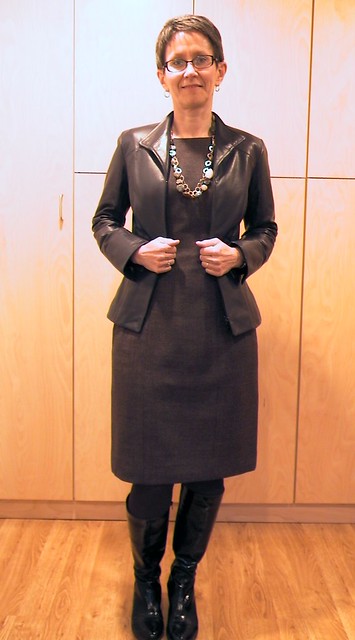
But not before leaving you with some photos.  Sadly (for now) none of them actually include the jacket being worn.  It needs (a) coordinating objects and (b) a model who's having a better hair day.  I promise more later.

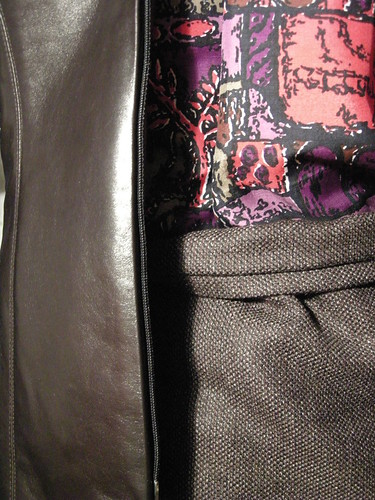
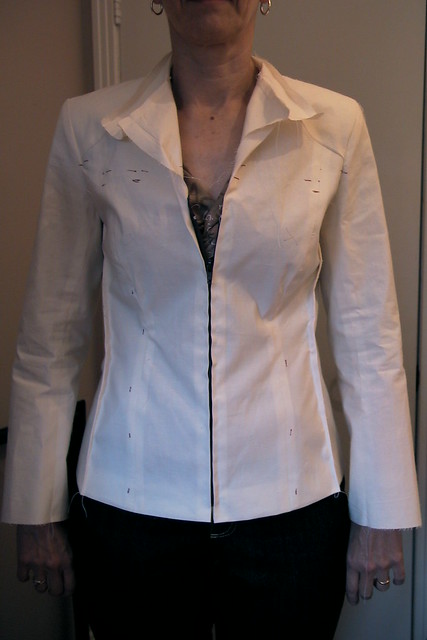
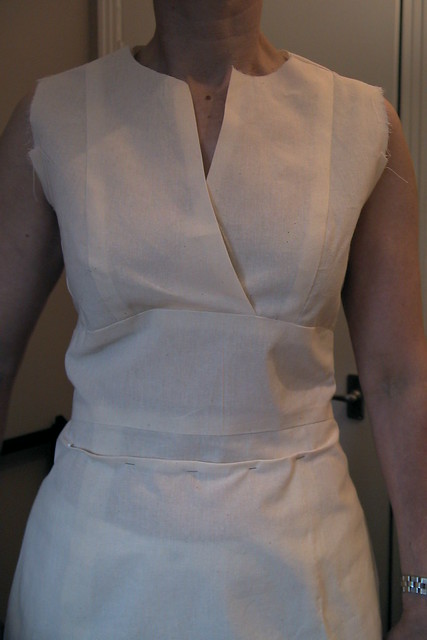
I have no excuse for not having taken a full front photo; except to force you to open my blog again hoping for better pictures.  Oh, and to allow you to admire (
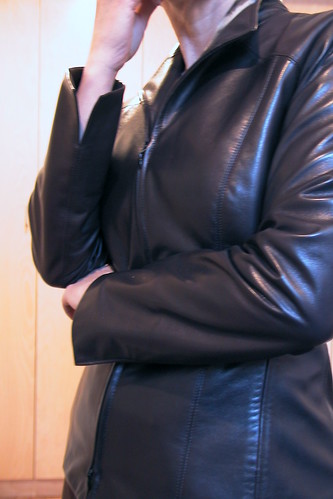
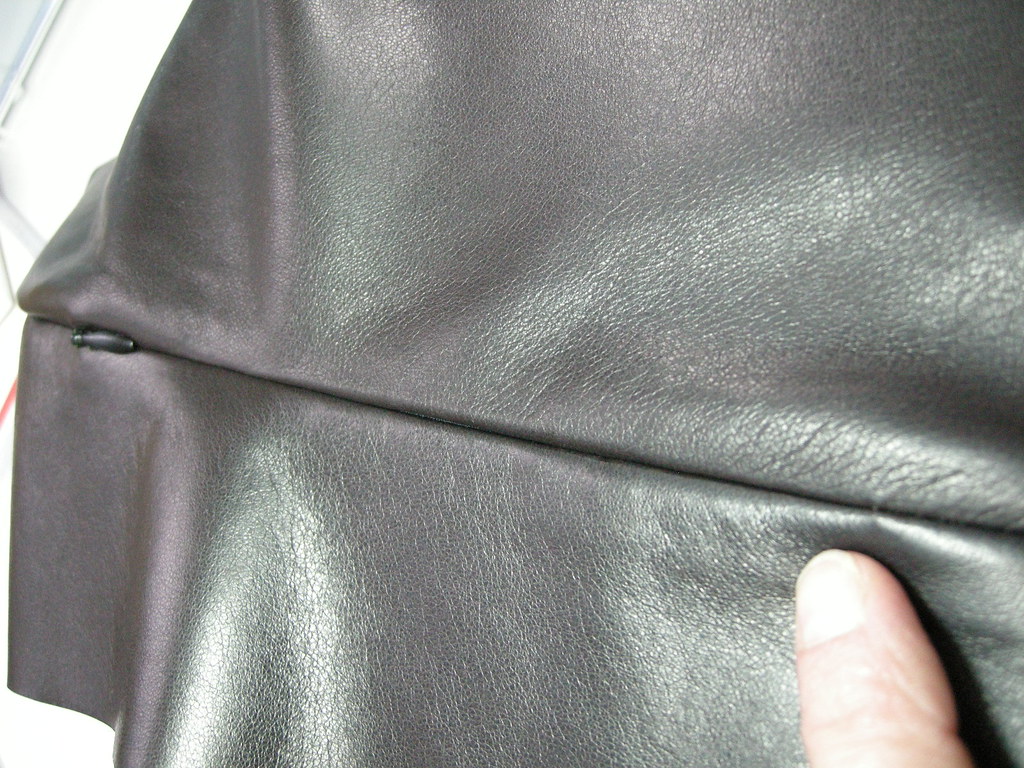
again) the invisible zipper pockets set into the side front seam.  Below right is a close up showing that the lapels are indeed symmetrical and the topstitching worked pretty well.

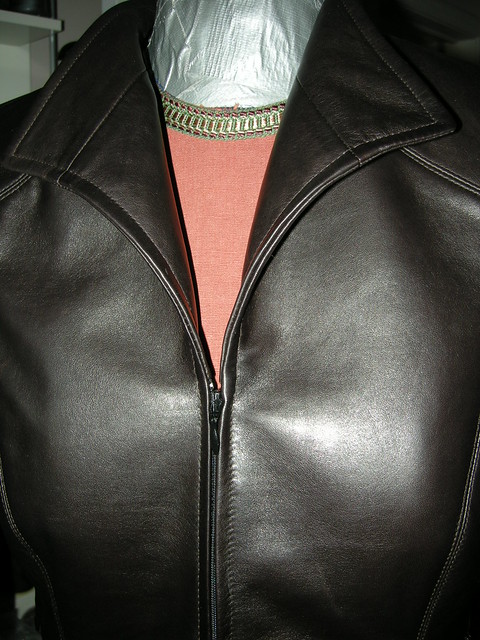
As instructed by Kathryn Brenne, I laboriously paid attention when topstitching to the fact that the upper thread should always be on the public side, and the bobbin thread side is always hidden.  This meant stopping and starting again (by inserting the needle in the hole left by the last stitch before stopping, if you please, and pulling the thread tails to the inside for knotting) at four separate points, since the facing side is outermost for the lapels but inner at the back neck.  I'm pretty pleased that I placed the stopping/starting points quite well, just at the point where the leather is into the curve, so they are not visible.  Because they are not perfect.  (Let's hope that the ladies at the Haute Couture Club of Chicago won't be all over it looking for my boo-boos!)

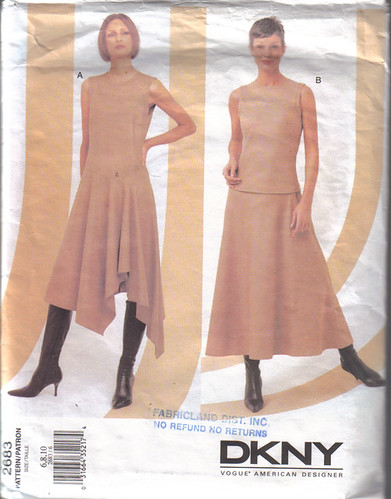
One thing that is really great about this pattern (and let's not forget that there were lots of things that weren't) is the drafting at the collar/lapel.  There is a perfect amount of extra length built into the under collar and front facing so that once you match the edges and sew them together (carefully stretching the other pieces to avoid any puckers) the lapel just does what it's supposed to.  There is no guessing about where the roll should happen because it rolls automatically.

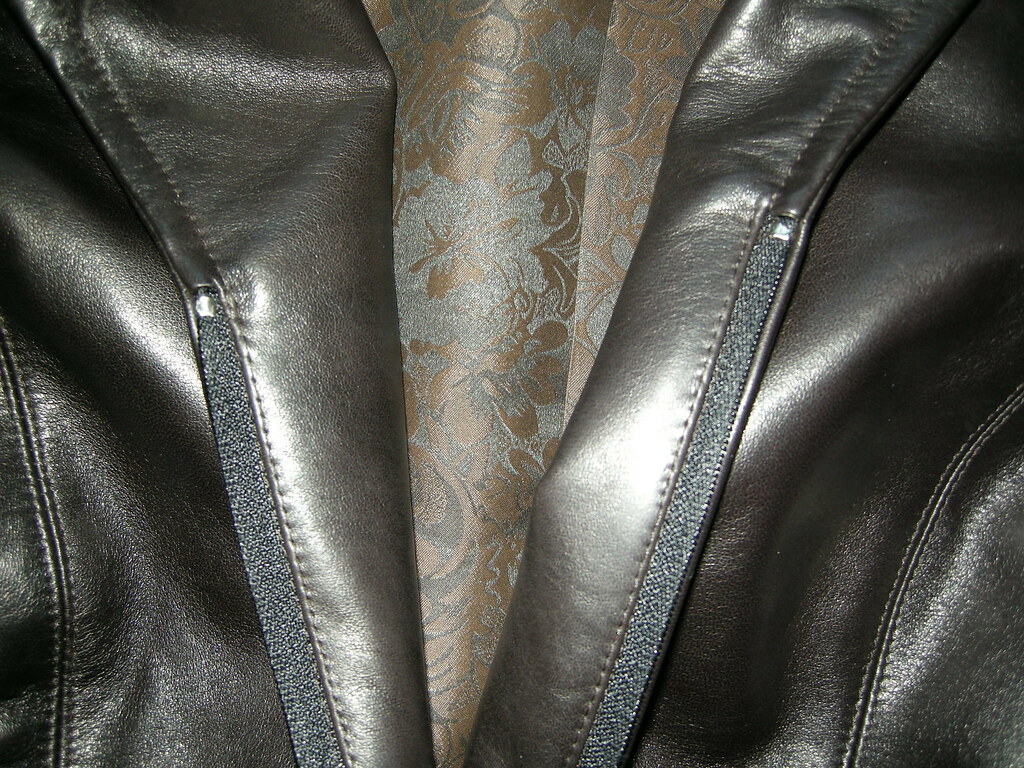
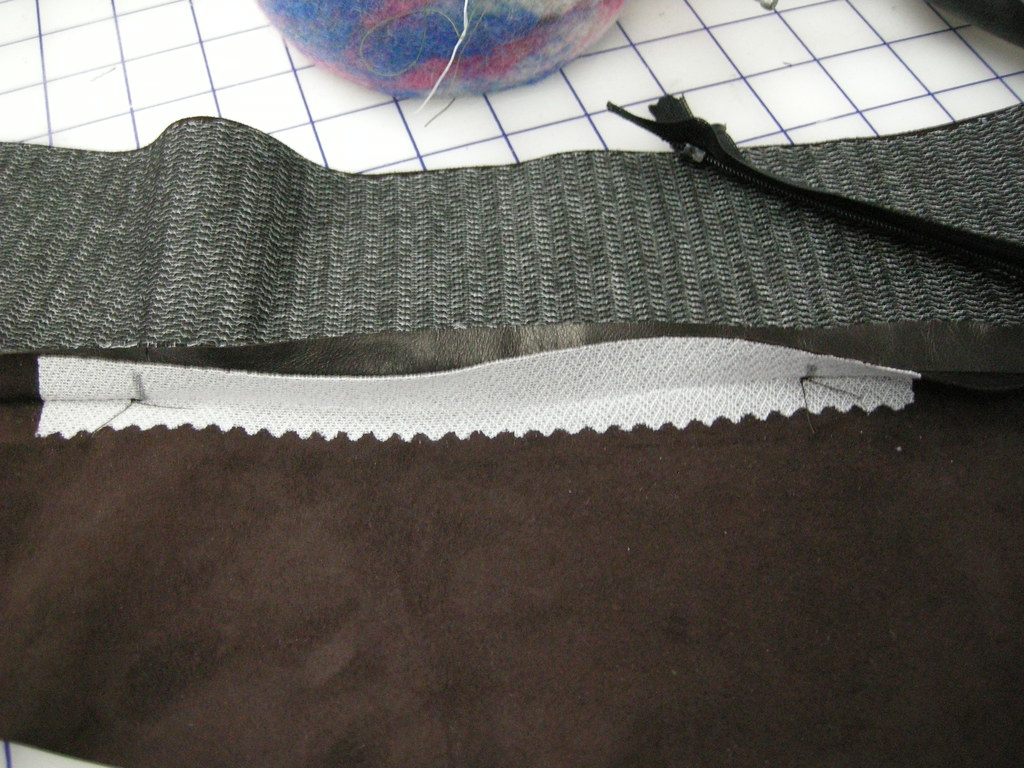
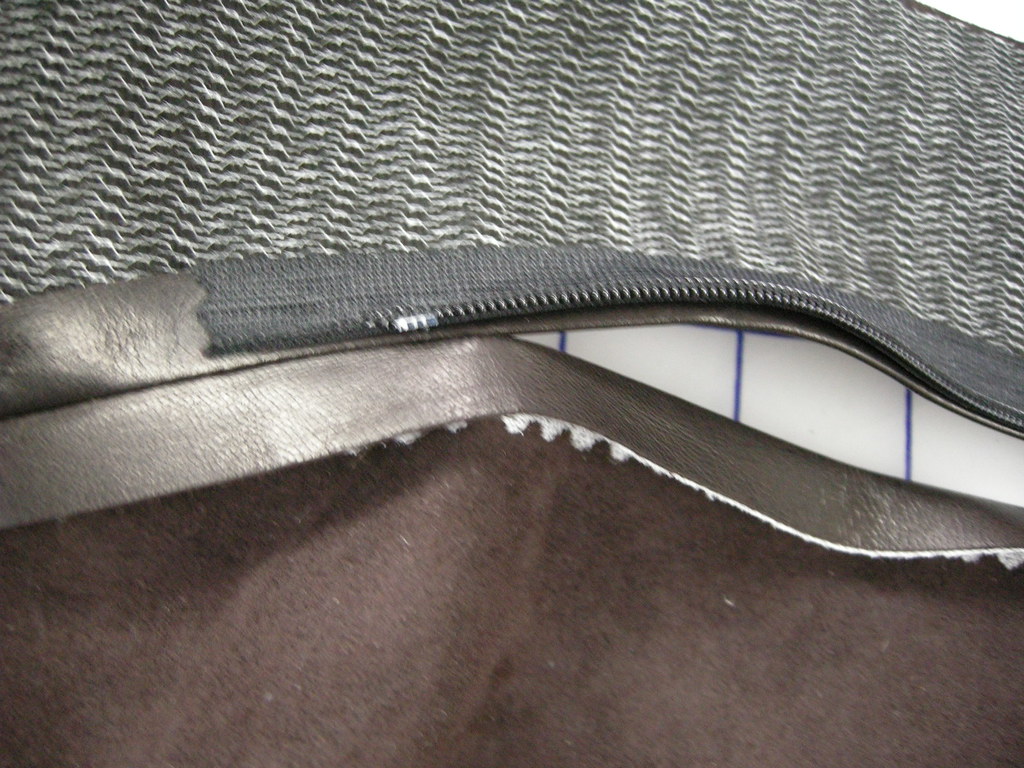
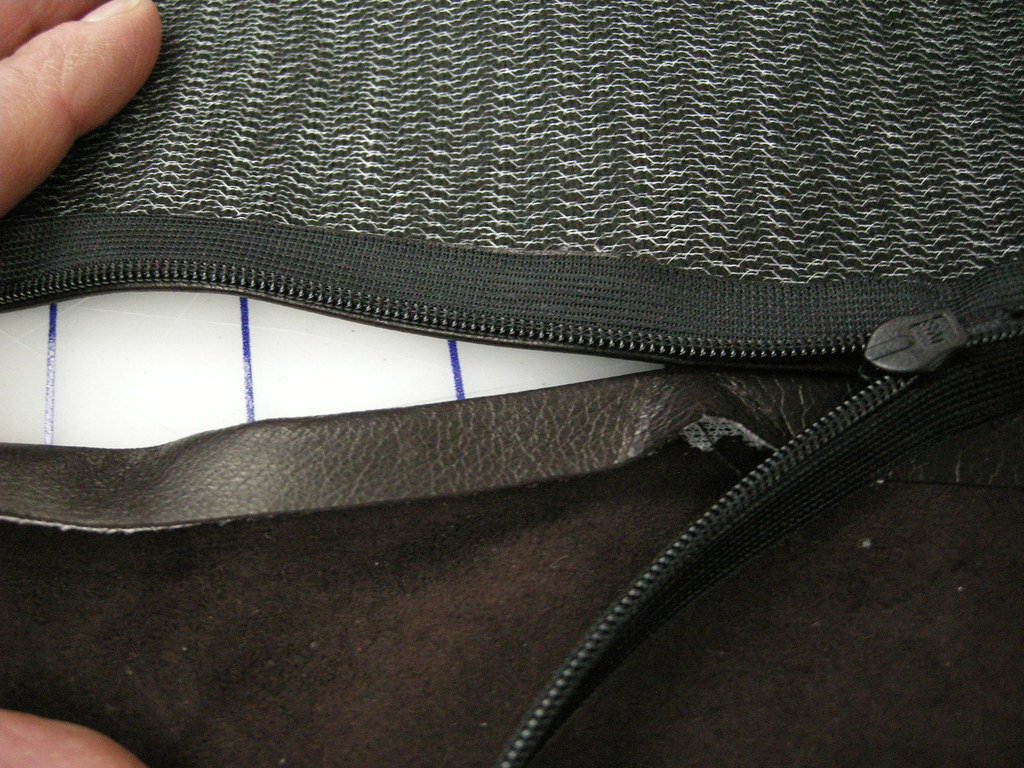
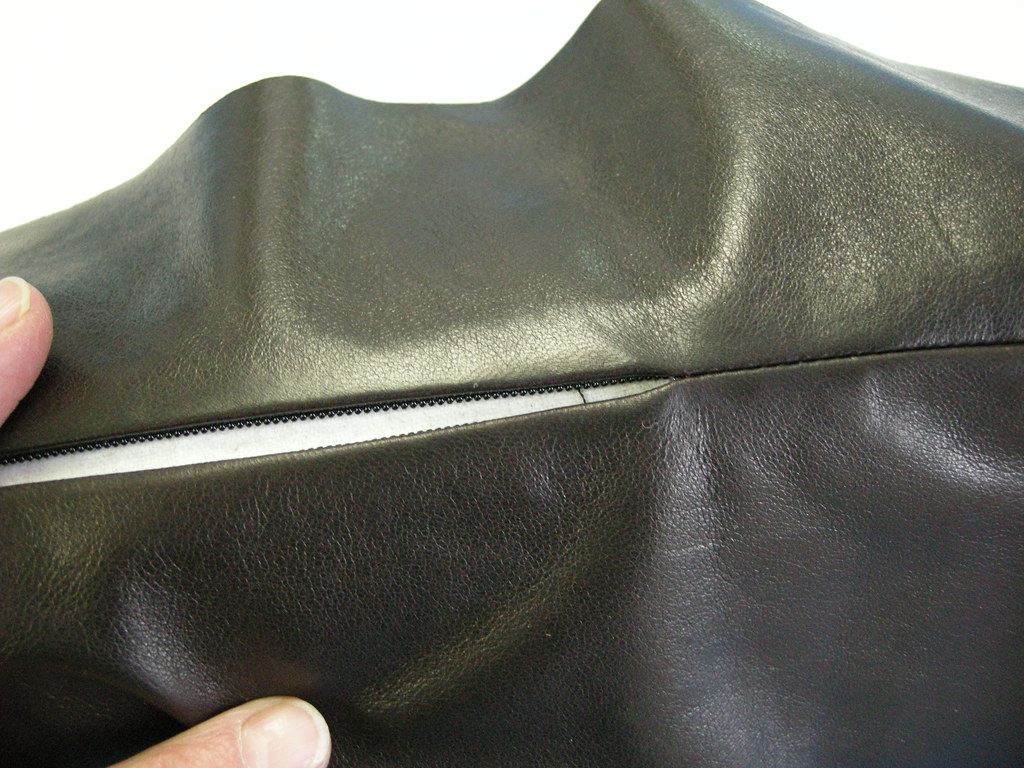
Here's the inside showing how the facings are sewn around the zip (click to biggify the photo to see it better).  On the outside, the leather meets at CF to cover the zipper, but on the inside the facing cuts away above and below the zip.  I thought Kathryn told me that the pattern instructions (which I have ignored in making this) gave directions for how to do this, but they don't, now that I look at them.  Kathryn had worked out an ingenious way to make this inset box in leather after sewing the facings to the jacket above and below the zipper, but I did not take pictures and I think it would be too complicated to describe.  Another way to do it, which would also work in fabric, is to sew the inset box using a thin, flat facing (silk organza is ideal) before attaching the facings.  If anybody is interested, I'd definitely consider doing a photo tutorial on it because it is a super nice way to finish a separating front zipper on a jacket.

Inner construction:

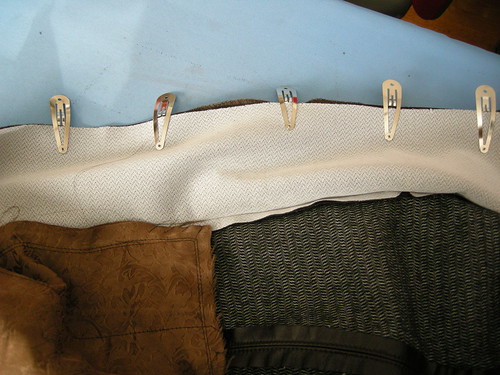
I used these nifty metal clips to hold the leather for sewing, since you can't use pins.  I think they are the same as a sort of hair clip, but I bought them in a fabric store.  To the left, you see the facing clipped to the lining fabric.

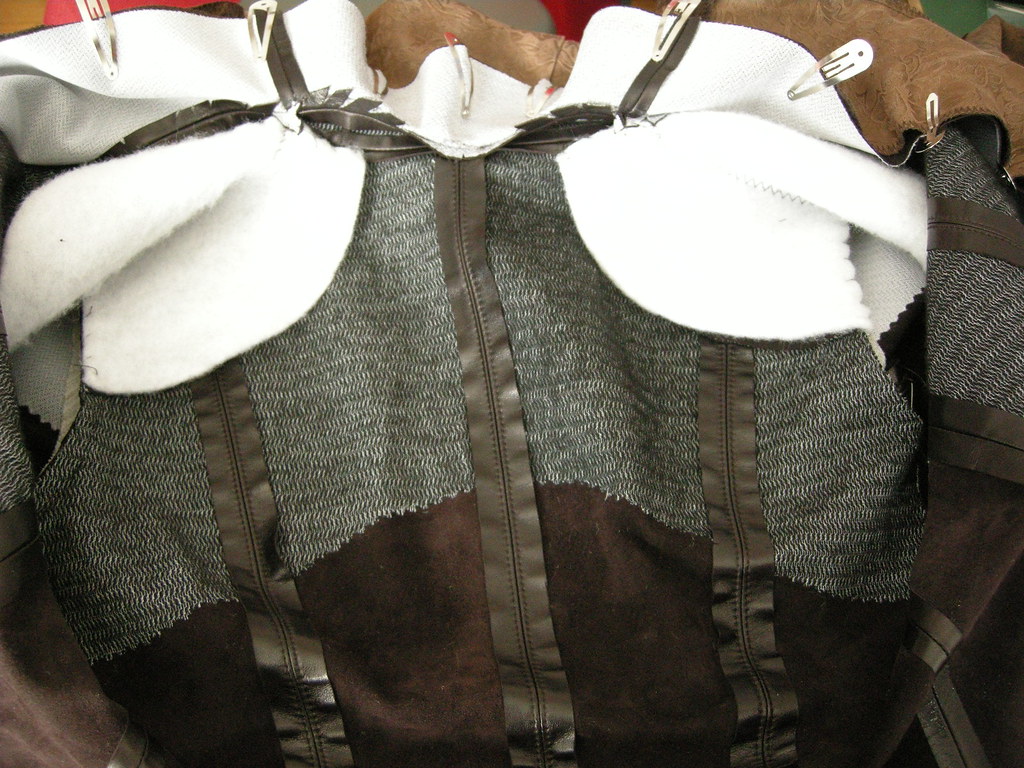
To the right is the inside of the back and shoulder area.  At the top, notice how the curved jacket-collar seam is clipped diagonally.  I normally trim rather than clip, but was following Kathryn's directions.

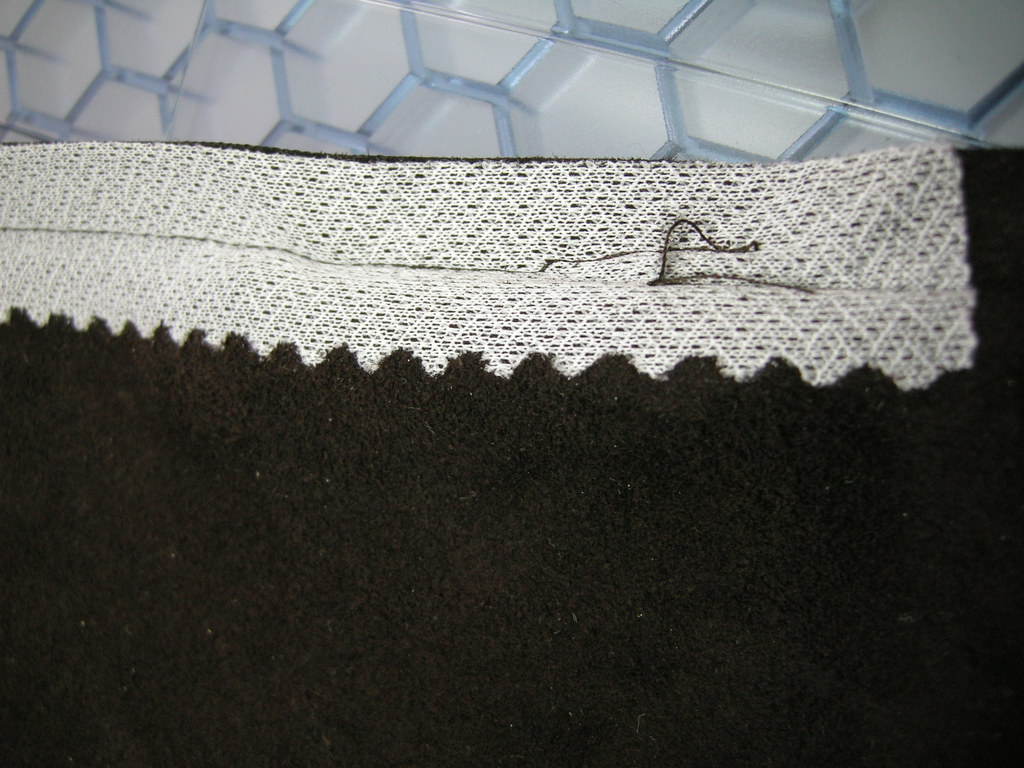
The upper back (and the fronts) are interfaced with a fusible weft insertion interfacing.  The lower edges are pinked to avoid a show-through ridge.  (But if you look hard, you may be able to see a show-through pinked line.  Anyway, I could see it right after fusing. My lamb leather is truly thin, but lusciously soft.)  The collar and facings are interfaced with a lighter but slightly crisper fusible knit.  I did not have room in the jacket for shoulder pads, but inserted a single layer of synthetic batting just to cushion the shoulders and prevent bony shoulder show-through.  I used the shoulder pieces from the jacket, and hand stitched the padding to the armscye and neck seams (using a glover's needle).

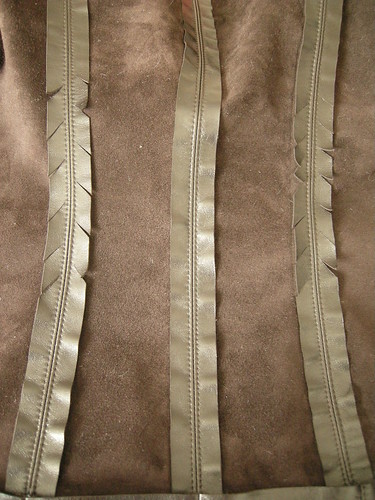
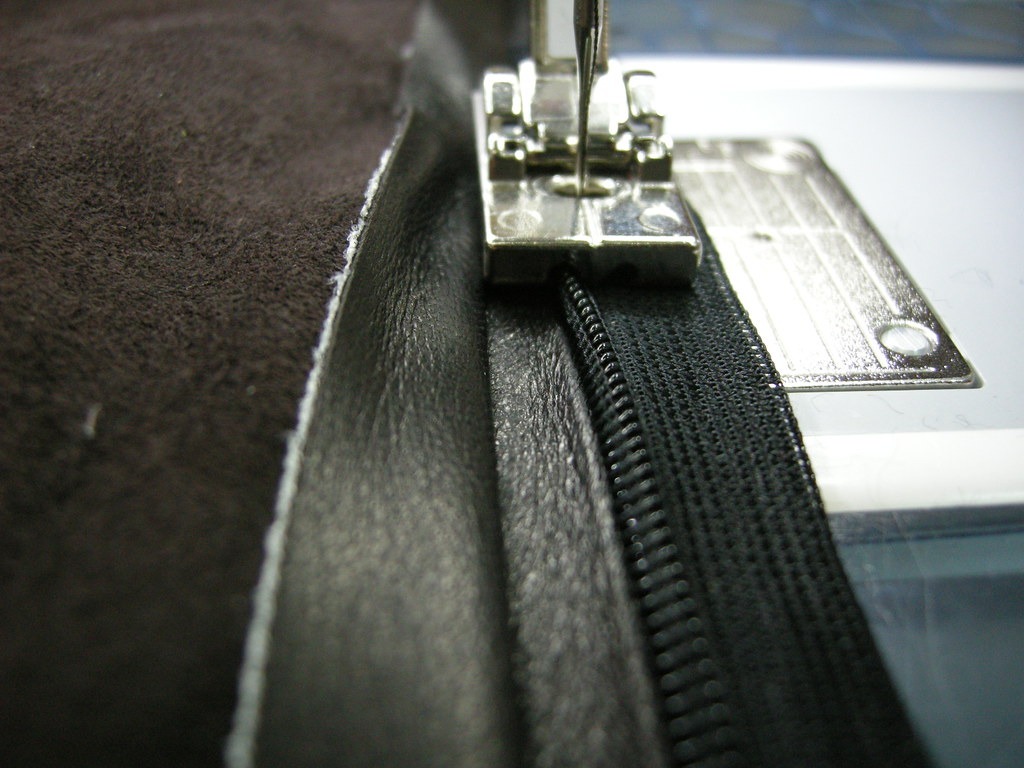
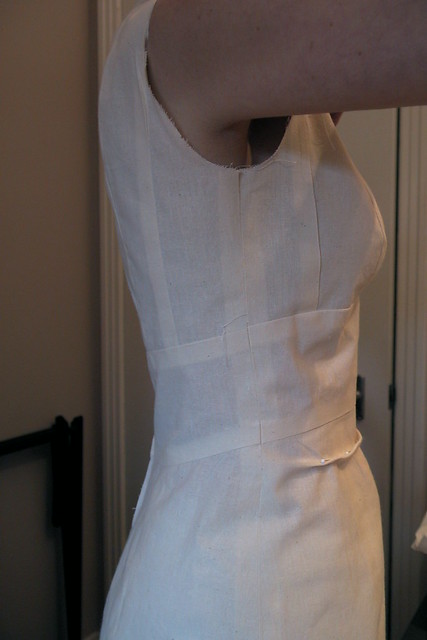
The  back seams are very curved (if I am truthful, they are slightly over fitted).  They are edge stitched to keep them flat (leather seams have to be treated with glue or stitching; pressing doesn't make them lie flat).  I followed Kathryn's instructions to clip diagonally to flatten the seam allowances.  All body seams are sewn at 1.3cm or .5" rather than 1.5cm or 5/8".

Oh - I should have said all body seams except the side seams, which were the last ones sewn and due to edgestitching, zipper pockets or other treatments the only ones still available for adjustment once I had the jacket sufficiently put together so I could try it on.  It would have been slightly skin tight if they had been sewn as designed.  I'm not sure what went wrong.

Let me correct that - a few things happened.

One.  When Kathryn saw my muslin, which I thought was pretty good, she recommended that I reduce shoulder width (by something like .7cm or about 3/16") and take in the back seams even further.  She pinned out the amount, and I faithfully transferred these further reductions to the tissue and then ... cut right into the leather.  (There's something about being the student in a class taught by a trained professional that makes you just trust the said professional when she repeats, reassuringly, "It'll be fine".  If I had been doing this at home I would have done some serious agonized thinking, and maybe sewn another muslin, before tackling the leather.)

Two.  I sewed my muslins on my trusty treadle.  I used a magnetic seam guide which I placed carefully to get exactly 1/2" seams.  At Kathryn's I was using one of her Berninas, which have seam guide lines marked only in metric, I seem to recall.  I sewed the seams using 1.3cm (the conversion on the pattern) which in actual fact is slightly bigger than 0.5"; 0.5118110236", to be exact.  That extra .0118110236" works out to an extra 0.0236" (or so) on each of 7 seams, which isn't a whole lot but...  


Three.  Even the thinnest leather is thicker than muslin, so takes sort of a leisurely U turn (instead of a sharp fold) when you turn it back on itself as you must at each of the 7 seams.  It takes more width, in leather, to do that U turn, than it took in muslin, to do the sharp fold.  


All of which is to say that it's a good thing leather doesn't fray, because the side seams at my hip are seriously tiny.  


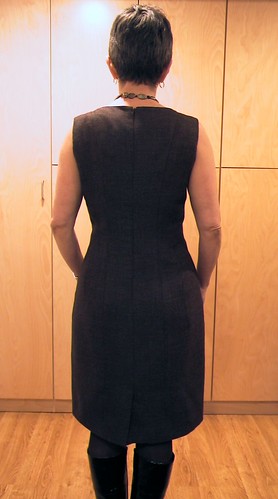
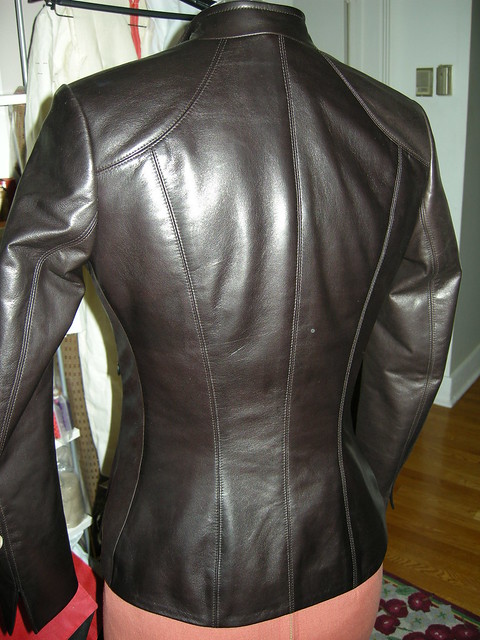
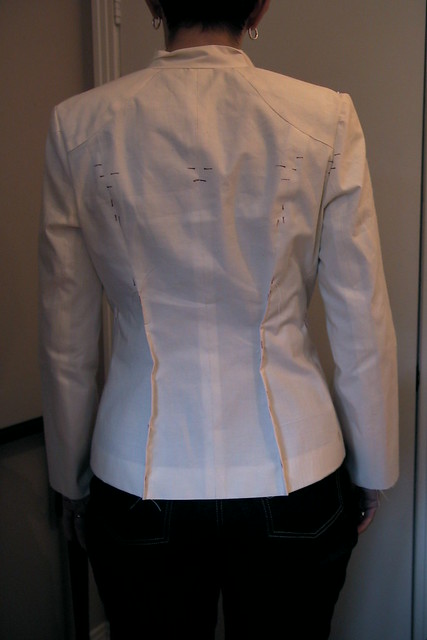
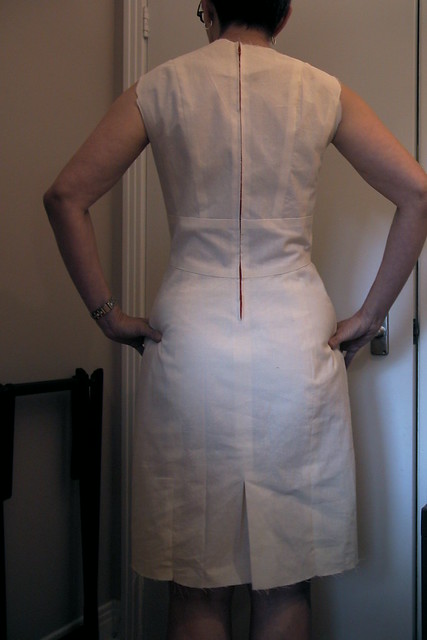
The back.  The sleeve caps are also a nice thing about this pattern.  There is very little ease (easy to sew even in lining fabric and a no-brainer in leather).


It really is very nice with all those curved seams.  But, as I said, maybe a bit on the over-fitted side.  


Leather does stretch, right?


I already wore it out to a birthday party last night (with jeans).  After I take care of my bad hair, I'll post more photos.  I promise.  


Tuesday, March 15, 2011

Coordinating from stash with TNT patterns

So my leather jacket completion project is moving along.  The body of the jacket is finished except for the topstitching which will require a clear mind and a steady hand.  Thus far I haven't felt up to it, so I started on the lining.  I have to say, making the lining is the least fun part of sewing a nice jacket.  But I can see the finish line so am working through my lack of interest.


The lining fabric is a silk and rayon blend from Fabricland which I think they were marketing as "dirty silk".  Here's a close up of the fabric.  You can see it's a floral jacquard weave and the right side is brownish-black, or blackish-brown, in an interesting kind of way.   The lighter side is the wrong side, and it really does look "dirty" - the dye is uneven and smeared as you can see below (the real colour is less yellow than the photo below, and less pink than the photo to the right).
The dark side looks great with my "navy brown" and buttery soft leather.

My thoughts then turned to the inevitable question:  "But what (besides jeans) can I wear this with??"  I went burrowing into my stash, where I found some likely candidates.

My first thought was to identify a suiting weight fabric and I came up with a really soft and drapey, slightly tweedy pure wool that gives just the right overall effect of rich brown but is really a complex mix, in a tiny woven pattern, of at least three different browns - one really dark and cool in tone, the second a rich red-brown, and the third is a mix of beige and dark brown.  I have just under 3 metres.  I'm going to make my PMB sheath dress (again) and a pair of wide-legged pants.  I have had great luck with  Vogue 7881 which I have made three times already.  There should be enough left after cutting these 2 pieces to make my favorite bias shell, from an OOP Vogue, 2683.  Like 7881, this is a real TNT (tried 'n' true) pattern for me since I have made the top at least 4 times (and the skirt at least 3 times).  The dress/top combo is 100% appealing to me, but the dress leaves me completely cold.

But what else to wear with these future elegant and flowy trousers?  In my silk bin, I found many possibilities, but the one that has caught my eye is a refashioning project.  My super-shopper friend found a Thai silk skirt in one of her second-hand haunts which she gave to me while extracting a promise that I actually do something with the fabric.  The skirt is a floor length, front-buttoning dirndl in an interesting print.  The colours are unusual for me since I don't gravitate towards purple, but I like that it's combined with a cool beige, black and a couple of nice pinks and reds.  There is lots to make a little shirt.  I could reuse the front button detail since it has really gorgeous tiny self-fabric loops and covered buttons, but right now I'm leaning towards the top from Simplicity 2938.  I've made this one before too.

To the left is a sneak peek of the jacket together with the two coordinating fabrics I'm planning.  What do you think?

Saturday, March 12, 2011

Oh yeah ...

Oops, when I spoke just now about my next project, I forgot to slot in the Material Things leather jacket.  I think it deserves a little attention.

When next I report, I hope it's off the UFO pile and into the closet.

And now, I'm off to reacquaint myself with its state of unfinishedness.

Sunday, November 14, 2010

The edges of sewing

By which The Sewing Lawyer means an activity that has something to do with sewing but doesn't involve the actual activity of putting cut pieces of fabric together with thread.  It includes choosing fabric (in a store or from the stash) and patterns, thinking about sewing, reading about sewing, and tracing patterns. More constructively, it may involve shoveling out the sewing room.   This is a (rarely-seen) variation of sewing around the edges because it tends to result in recently-acquired fabric being handled, thought about, and put away, and leads to unfinished projects being unearthed, thought about, and sometimes even advanced (without actual sewing).

Because I feel I have truly started to "sew" until the machine has been turned on and a bobbin wound, I also include cutting out projects in this category, if I'm pretty sure I'm not going to turn the machine on and wind a bobbin imminently after cutting out the last piece.

Right now, I am marking time while waiting for my teflon foot to arrive so I can get back to the leather jacket.  It's going to be a bit of a pain to translate the very precise settings I had been using (on Kathryn Brenne's Bernina) to the very imprecise settings available on the Featherweight, but I am determined.

So in recent days, quite a lot of stuff around the edges of sewing happened here.  This included:

  • taking the lining out of the mink coat pictured in a recent post, reading Kathryn Brenne's article in Vogue Pattern Magazine several times, studying the construction of the coat, identifying Vogue 1083 as the perfect pattern for its transformation, thinking about the kind of fabric that would best complement it, rejecting every piece of fabric in my stash as unsuitable; shopping several websites without success, and trying to figure out if I'll have enough time to seriously look for fabric on my work-related trip to downtown Toronto later this week;
  • making the lining pieces for my leather jacket (after all the adjustments it was easier to make the lining patterns from my altered pieces than to alter the included lining pieces);
  • (finally) finishing the lining pattern for my Auckie Sanft jacket which was enthusiastically disassembled for this very purpose more than a year ago; 
  • cutting Jalie 2795 out of cushy blue-grey Power Stretch; 
  • washing and drying recently-acquired fabric; and
  • putting fabric away (!) which is always a challenge chez The Sewing Lawyer due to an overabundance of fabric and an underabundance of storage locations.  

Today I feel like more, maybe to include tracing Jalie 3024, which I think I'll shorten for now to another top suitable for exercise wear.


Wednesday, November 10, 2010

Invisible zipper pockets - an illustrated guide

One of the features of the Material Things Fearless Jacket is its in-seam zippered pockets.  I figured the pattern is called "fearless" because you'd have to be to sew such a thing and expect it to look any good.  I've put in my share of invisible zips over the years but tend to approach the task with a bit of a quaver in my voice, if you know what I mean.  I learned how to do it back when the world was young and zippers came in packages with instructions.  They said to sew the zipper in first and sew the seam closed afterwards, and you used one of those special blue plastic feet that fit on any kind of sewing machine.  It's hard to manoeuvre your zipper foot close enough to the end of the zipper to make a really neat transition between zipper and seam.  Sometimes you had to fudge a few hand stitches at the seam below the zipper opening.  More often, you had to rip and re-sew.  Neither would be a good idea in leather.

By contrast, Kathryn Brenne's method worked perfectly, the first time (a practice zipper) and the second and third times too (the real thing)!  Here's how:

First, prepare your seam.  Interface the pocket opening if it isn't already.  In my jacket, the centre front panel is fully interfaced but not the side panel.  I cut a strip of fusible and applied it as shown to the left.  Mark the pocket opening.  Then sew the seam above and below it.  Press the seam open, including the seam allowances beside the pocket opening.


It turns out that things go a lot better when you have the right tricks up your sleeve.  The trick, in this case, is Wonder Tape.  Stick this stuff on the zipper tape, both sides, as shown to the right.
Next, peel off the Wonder Tape paper backing on one side.  Position the zipper so the top stop is a little bit above the end of the stitching at the top of the pocket opening (above).  The bottom stop should be a bigger bit below the end of the stitching at the bottom of the opening (right).  Stick the zipper down on the seam allowance so that the coil is just along the pressed-open seam allowance on that side.

Sew that side of the zipper down using your choice of special foot.  At left is the Bernina invisible zipper foot.  The first side is easy, I tell you.  The second is much harder because you have to somehow get the zipper coil in the opposite groove while the first side of the zipper is snugged right up against it.  When I complained about this, Kathryn said "It'll be fine.  That part of the stitching is in the seam allowance and you will never see it."  She said exactly the same thing when I complained that it was hard to sew right to the bottom of the zipper on the second side.
And just look at the mess I made of it!  Oh no!

Once both sides are sewn, you have to fish the zipper pull out of the little well you've sewn it into below the pocket opening so that it's accessible in the pocket opening.


Look!  Kathryn was right!  No sign of the ugly mess behind.


It'll be fine...

Tuesday, November 9, 2010

Leather Workshop - "It'll be fine"

This phrase was oft-repeated during the four days I spent working under Kathryn Brenne's supervision at her fantastic and well-equipped sewing studio in North Bay Ontario last week.  Kathryn has endless patience and seems unfazed by any mistake or imperfection her students turn out (and there were some).  And you know what?  I think she's right - my leather jacket (which I shall finish once my teflon foot arrives from Mr. eBay) will be fine.

I did in the end go with the Material Things Fearless Jacket pattern.  Kathryn mostly approved of the fitting changes I had made but on her recommendation I trimmed up the pieces even more.  The first day of the class was mostly taken up with finalizing the pattern changes, and then making brown paper pattern pieces (doubles so there's a right and a left of everything for single layout on the skins).  I had cut out some of it by the end of that  day.

The second day was occupied with cutting out all the jacket pieces and interfacing, and fusing the interfacing where it needed to be fused.  I had assembled the backs by the end of that day.

On day three I felt brave enough to tackle the invisible zipper pockets and assemble the jacket fronts.  Day four involved sewing the sleeves and setting one of them in, inserting the front separating zipper, and almost completing the facings.

It doesn't seem like I did a lot each day, when I write it out like that, but believe me these were full days of sewing and associated learning (9AM to 5:30PM, with breaks for delicious homemade snacks and lunch).  Of course if I had known what I was doing, I would have been more efficient...

Anyway, here are some photos of the sewing studio.  It's on two levels.

Upstairs are the latest Berninas.  Kathryn invited us to choose any one of them - I tried out the 640.

She also has two steam generator irons and a full kit of tools for every table.


Downstairs are the cutting tables, including one that was big enough for me to lay out five lamb skins at once.  Here, Kathryn is examining another student's skins and talking about leather quality.

Kathryn is extremely generous with her knowledge and brought out numerous things for us to ogle and examine, including the fannnnnntastic sheared mink lined coat which is featured in the latest issue of Vogue Pattern  magazine!

I was so inspired that when I spied an XL sized mink coat in good condition at the Value Village that night, I snapped it up.


That's it for now - stay tuned for pictures of my jacket in progress.

Sunday, September 12, 2010

Sewing without a plan ... and 3 ghostly garments

The Sewing Lawyer has always been mightily impressed by the entrants to the various "SWAP" contests.  That anyone completes these grueling marathons is a wonder, especially if their marriages or significant relationships remain intact.  What is this thing - a sewing "plan" anyway?  How could anyone actually settle ahead of time on pattern and fabric combos to make 11 (or whatever other double-digit number the SWAPpers aim to make) garments that would work together as a complete wardrobe?  How do they keep motivated, or even interested?  How can they stand the deadlines?

It's beyond the Sewing Lawyer.  She has occasionally read the rules and has always immediately dismissed the idea of participating.  She prefers to (mentally) endlessly reformulate a stream of projects which may or may not employ fabric, patterns and other bits from her stash, thumb aimlessly through her stack of Burda magazines and bulging pattern files, examine each and every bolt in the local fabric store to see what's new and what's deeply discounted, while waiting for inspiration to strike.  There is rarely any kind of deadline other than hoping vaguely to be able to make something-or-other before the season (or fashion) for it has completely passed.  The only advantage to be gained from not seizing the day and putting scissors to cloth is that the potential sewing disaster or fashion faux-pas is avoided, or at least put off for another day.

In the meantime, the Sewing Lawyer bumbles along making things that strike her fancy from time to time, and (mostly) turning out garments she's prepared to wear out in public, which sometimes even coordinate.

Ya, I'm exaggerating but right now it sure does feel this disorganized!  Since the last post, I've got three ghostly garments which have been slapped together to test patterns and fit to show you.  It is probably not a great idea to have this many ideas on the actual go.  One of the patterns has even been translated (well, cut out) into actual fabric!  But more on that later.

First up, I've improved the Material Things "Fearless Jacket" muslin immensely and I'm warming to the idea of actually using it to make out of my luscious lamb leather.  I took the muslin completely apart, adjusted the tissue in the places I had already identified, and recut the pieces.  I was at about size 0 (if there had been such a thing) on the MT tissue.  After sewing it together again I realized that it was still too big!  If I was at 0 before, I guess this is size -2.  In the Big 4, I would usually choose a 10 as my base size.  The new tucks are out of the side front and centre/side back seams.  The other change that needs to be made is to raise the armscye to improve mobility - the muslin looks ok while I have my arms at my side but when I raise them it's not a good look.


My second muslin is supremely uninteresting, but it's the one that's getting made first.  This is from a 1990s Burda envelope pattern which I have made before and wore to death.  I still really love the picture on the envelope.

I made a muslin only to check how much too low these armscyes are - I'm raising them by 2.5cm (1") so the answer is - a lot!


My final ghostly garment is a muslin of Vogue 1183, the second Kay Unger dress released this summer.  I could tell from the measurements printed on the pattern that this dress was going to be a snugger fit than V1182, my cocktail dress.  Before cutting out the muslin, I separated the skirt front into two so there will be princess seams instead of darts.  The back already has a corresponding seam and the bodice is princess-seamed all over the place, so this change seems natural and adds more opportunities to adjust fit.  For the muslin I cut a size 10 in the bodice and midriff, transitioning to a 12+ at the hips.

It is too snug.

Besides that, there is something strange happening at the join between the bodice and midriff at the front.  It almost feels like I need an FBA (!).  I notice that several reviewers of this dress on PR had a problem with the overlap gaping - they did need an FBA.  Mine isn't gaping so much as the leading edges of the front are pulling up on the midriff piece.

Here's another picture (in which the left neck edge is not folded under).   I'm going to mull this over some more but if you have a suggestion for how to fix this, please put it in the comments!

But the strangest thing is that the skirt front is too long on me just below the midriff, around the level of my actual waist. I've pinned out a wedge/tuck that is about 2cm deep at CF and tapers to nothing at the side seams.  You can see it better in the side view to the right.

I really like the way the midriff piece curves downward in the back.

The back fits pretty well except for the too-tightness of it.

It's also too short for my taste.  The muslin hits about 1cm above where I'd like the finished edge to land, and it includes the hem allowances!

Wednesday, September 8, 2010

Idea overload

I'm in major future-potential-project muslin mode so I have nothing to show.

First, I'm trying to fix my Material Things jacket muslin.  I took it apart and trimmed the pattern an obscene amount before putting it back together, but it is still too big!  I figure I'll be down to a size 0 in the MT size chart before long, which is just ridiculous.  I am going to make a muslin of the Burda leather jacket too, as I'm still not sure if the MT pattern is what I want to make.

I muslined another jacket, an unlined sort-of-safari jacket Burda envelope pattern from the 1990s.  I made this pattern way back when but no longer have the garment, and I wanted to check the armscyes (yes, they were too low on the body for my current taste in fit).  I've got some crepey woven wool earmarked for it, and lining to do Hong Kong finished seams.

I want to make a dress to wear with the jacket. I was going to reprise a sheath dress made from a much-tweaked Pattern Master Boutique pattern but then got the bright idea to try the other Kay Unger dress (Vogue 1183) instead.  It's a real fabric miser and I have only 1.2 metres of the softest, finest Zegna wool...

Oh yeah, I also had to go back to work.  Less time for sewing.  Phooey.

Sunday, September 5, 2010

Swearing off Material Things patterns now ...

Just remind me if I seem to be falling off this particular wagon.  I don't like the way they, or at least the two I own, (don't) fit me.  


Earlier this year, I tried out the "Fearless T Shirt" pattern.  Yuck.  


I spent much of yesterday trying to kill two birds with one stone - namely actually sewing on my new machine (which turns out to be an interesting back-to-basics learning experience) and making a muslin of the "Fearless Jacket & Vest" pattern.  I'm planning to make a leather jacket.  


Now there are only 3 reviews of this pattern on PR.  Two give it a glowing "love it" type thumbs up while the third does mention that it was too big so she had to give the vest she made away.  Well, my experience is more like that reviewer's.  Ms. Podolak might say that it's my fault for not reading ALL of the information on the back of the pattern envelope, which does include the finished garment measurements (OK you can now all mock the the Sewing Lawyer for not reading the fine print).  It turns out full disclosure is made of the fact that size 6 (my bust size) has 12 cm of ease at the bust (that's a whopping 4.75"!!) and size 8 (my hip size) has 15 cm of ease at the hip (holy cow; 6").   


But the "fashion drawing" on the envelope is so very misleading.  If that drawn jacket showed 15cm of ease it would have been standing visibly away from the skinny hips of that "model", as indeed my too-real muslin is doing on me.  


If this were a waiver clause in a contract, I'd say the ease measurements should have been in RED and large bold type; perhaps saying something like:


WARNING!
IF YOU CHOOSE YOUR SIZE BY YOUR ACTUAL BODY MEASUREMENTS, THE RESULTING JACKET WILL NOT RESEMBLE THE PICTURE ON THE ENVELOPE.  READ THE "FINISHED MEASUREMENTS" CHART ON THE ENVELOPE CAREFULLY BEFORE PROCEEDING.  


GRRR.  


All of that said, I like the lines of this jacket, and to its credit it does have a ton of seams to take in.  I experimentally pinned out (a lot) of extra fabric last night and will work with it a bit longer before starting a muslin of the pattern shown in leather in September's issue of Burda Magazine, which is really pretty!  It's shown on a real human being ... and it's Burda whose sizing is quite predictable (but I think I'd move the sleeve zips to the back seam).


Oh yeah, the armscye on the fearless "fitted" jacket is too deep on me as well, and it was drafted for Ms. Gorilla Arms.  I'll be taking about 2.5cm (1") of length out through the upper chest and sleeve cap and at least the same out of the length of the sleeve.