Tuesday, August 31, 2010

New (to me) sewing stuff

The Sewing Lawyer had a sudden, severe, sewing-related mania (clearly, it is contagious) this week which resulted in a drive to a not-too-distant town to purchase a rather large thing (luckily not for a gigantic sum); which hopefully will be more than another piece of furniture.  Without further ado, here it is.  Can you guess what's inside?


If you guessed a working treadle sewing machine, you are correct.  The contents, please.

Well, it's a Singer 127 (or 128; not sure, the manual - original - is for both).  She's in lovely condition - purchased in 1935, probably in Timmins, Ontario, by Émerilda, the grandmother of the seller.  The manual is in French which was Émerilda's mother tongue (though it's clear from the notes and clippings found in the drawers that she was fluently bilingual).

It seems from the drawer contents that Émerilda was still using this machine in the early 1970s, which is kind of remarkable given that my grandmother, who may have been Émerilda's contemporary, had an electric Singer (a Featherweight) much earlier than that.  I wonder if Émerilda got a new machine in the 1970s, or if  she used this one all of her sewing life?

 At left is the beautiful scroll-work and at right, the shuttle - all clean; no rust.  The leather belt is in place and she really goes!  So quiet!

On to the ephemera and tools that were stuffed into the drawers.  Alongside the usual suspects (bags of old metal zippers, spare buttons in pill bottles and bits of trim) were some intriguing items.

Don't you love these promotional rulers?  The lower one is a campaign item from a 1971 mayoral race in Timmins.  What a thoughtful guy to supply sewing notions as give-aways!


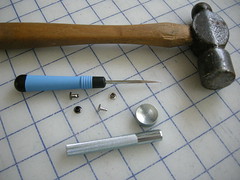
The next (left) is a mystery.  The round part is an expanding metal bracelet-like thing.  It stretches to fit over my wrist, but mine are on the small end of wrists so I'm not certain it's meant to be worn in this way.  Attached to it is this odd device (right).  The end piece is a very thin bit of metal which rotates (with some help).  The inscription is PAT 405/14 which tells me nothing in particular.  Does anyone reading have any idea what this is?
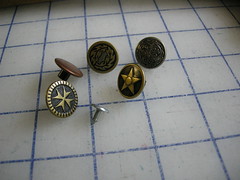
Perhaps the strangest item was this souvenir sewing kit (left) which proudly proclaims "Temagami, Canada".  (Temagami is a northern Ontario cottage/summer camp paradise.)  The clown's hat is a (plastic) thimble and thread is concealed inside his head.  Weird!  OTOH I wish we still lived in an era of sewing-related tourist drek.

To the right is a very handy hosiery mending kit.  Another promotional item.

The needle book at top is almost complete and very pristine.  The other side sports a photo of 4 biplanes flying over a very busy harbour.

The mending tape may be nothing to write home about but I like that it's in the original packaging.

The little taped booklet at the bottom of this photo is clearly Singer propaganda aimed at the younger set.  Inside it warbles "Let Us Send You a Singer Machine For Free Trial!" - beware of those dealers who sell (horrors) second-hand!  Inside the rear cover is a picture of a machine "For the Little Girl"; a Singer 20 (chain stitch machine) which "is at once a fascinating amusement and a means for instruction in an essential household art".


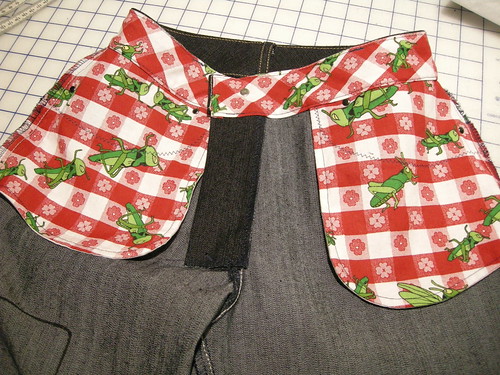
Last but not least is this intriguing clipping (click to enlarge to readable size).  It looks like a free-motion quilting item, but specially designed for making buttonholes.  "Twice as neat results in half the time, too!"  For "only" $1.00 or three for $2.50.  But wait a minute - maybe it was an expensive item after all.  Based on some other newspaper items bundled into the drawers, 89¢ would have purchased "strongly-made Blue Red-back Denim overalls" sized to fit children from 8-16 years from Simpson's, one of Canada's original department store chains.

I'm delighted with my purchase; the seller was happy it was going to a sewing home.

Saturday, August 28, 2010

A combination of favorite things

There is a lot to be said for re-using a pattern that's (a) simple and (b) classic.  Even more so if it's a type of garment you like to wear.  As the Sewing Lawyer has arrived at a certain age, she has come to appreciate sleeveless shirts and tops.  Even in the depths of winter, when the freezing winds howl around, she has found that a lined wool top is quite comfy to wear and permits climate control when paired with a long-sleeved jacket.  For summer, bien sûr,  the benefits are truly obvious, especially when it's a crisp cotton shirt.

The Sewing Lawyer is also a sucker for a really nice batik print - especially one that's an overall repeating block print in indigo and white.  Recently while in Saskatoon, there was a flying visit to the lonely downtown fabric store, Unique Textiles Studio (on 1st Ave.).  Like so many others, this store specializes in quilting cottons of a good quality, all neatly displayed in colour-coded or print themes.  Snagged!  Some  indigo and white block-printed floral batik came home to the Nation's Capital, earmarked for a sleeveless shirt from a previously-tested vintage Simplicity pattern.

Speaking of the Nation's Capital, I came across this quaint YouTube video about my home city originally filmed in the late 1940s - though it's older than my vintage pattern, the scenes of the Parliamentary precinct and Rideau Canal, the War Memorial (seen from the roof of the Chateau Laurier) and the buildings opposite, are unchanged to a surprising extent.  Except, NB, we pronounce the canal's name REE-do, not ri-DOH; you don't see red-coated Mounties hanging about in random fashion; the rowers in the Ottawa River will surely be in modern racing hulls; and that interesting diving (?) platform is no more.  It's a great place to live.


But I digress.  Of course, the OOP Simplicity pattern was approximately 3,000km away from the place in which a decision had to be made about how much to buy.  It turns out the pattern calls for 1 3/8 yards (1.25M).  Oops.  After pre-shrinking in the washer and dryer, there was exactly 101 cm of this crisply-wonderful fabric which gave rise to a few anxious moments but in the end, only necessitated a VERY efficient layout and piecing of the under collar.  There was enough (in the lower left corner) to cut bias strips to face the arm openings instead of the facings that Simplicity wanted.  And the CB could be placed on a  natural break in the printed pattern (you can see that the selvedges are slightly offset; that's why).


If you click on this photo to enlarge it, you can see why the print was so enticing.

So here's the finished shirt (worn with Jalie jeans #1).

It made up super fast (or would have if The Sewing Lawyer's day job hadn't interfered) and has that lovely crisp quality that makes for such a great summer garment.  It's getting hot again this week, so it will have some more outings before the leaves start falling, to be sure.

Friday, August 20, 2010

Light relief ... again

 Jeans are hard.  Not only was the fitting a challenge, as you know, but the actual sewing is physically demanding.  Denim is thick and tough to sew; there's lots of practical details like belt loops and topstitching, to be sewn through multiple layers, and there are metal zippers and metal rivets, and buttons that need to be hammered in place.  Assembling the main pieces of the jeans is relatively quick; finishing them off takes three times as long.

When the Sewing Lawyer has had it with a tough project it may be time for some knit tops.  Jalie always  seems ready to come to the rescue.

By lucky coincidence there were two dark brown-based knit fabrics in stash begging to be made up, and so another iteration of Jalie 2805 and Jalie 2921 (the scarf-collar top) came quickly into being.

Here's the latest version of 2908. The most interesting thing about this shirt is the print - the fabric is a fine rib-knit cotton/lycra printed with a VERY large and colourful swirly paisley motif (this was a Fabricland offering from earlier this summer).  The motif is larger than the front or back pattern pieces as you can see here (the fabric is lying on my cutting table; those are 1" squares).  I had two complete motifs plus parts - which became the sleeves.

I cut out the back with the print in this orientation (orange swirls at the shoulder) as you can see in the next picture, but the front in the opposite direction after a moment of angst about whether the print had a noticeable direction.
What do you think?  Not obvious?  Phew!


The scarf-collar top is, as any of you who have tried it will know, quite magical.  The instructions for the ingenious construction of the collar/tie are well illustrated in the pattern, but I was also lucky enough to see Jeanne Binet demonstrate how to make this top at PR Weekend Montreal.  I'm sure it works best with a thin knit; luckily that's what was on hand in the stash (a crepey polyester knit acquired at Couture Elle in Montreal, a few years back).  This is another big-scale print, but although one needed to be alert to avoid the dreaded big "bull's eye" on the upper front, cutting it out involved less angst.

I'm wearing the top with a vintage plastic buckle in this picture.  It also looks good threaded through the little hole in the CF (another genius trick in this pattern) or simply tied in a bow.

Saturday, August 14, 2010

New computer; new jeans

The Sewing Lawyer spent much of the past week, after mostly recovering from a nasty summer cold and jet lag (bad combination) sewing the Jalie jeans pattern.  Or rather, sewing it twice.   Why, you might wonder?  It comes down to fabric choice.  The Sewing Lawyer owns quite a lot of fabric, including what remains, after 2 previous pairs of jeans, of some very nice stretch denim purchased years ago from Wazoodle, which was claimed to be genuine Levis denim, 1% stretch.  Too nice to try on a new pattern, must save ...  THAT affliction accounts for much of our stashes, no?

Off to Fabricland, where the "denim ends" table yielded up a serviceable denim of approximately the same stretchiness.  When sewn up into the Jalie jeans pattern, the resulting pair of jeans appeared to be i-m-p-o-s-s-i-b-l-y tight.  As you already know, The Sewing Lawyer got a little discouraged and thought; well, maybe Fabricland's ends table could turn up another piece of denim that could be turned into an actually-wearable pair of jeans.  There was none of the same stretch, but for $8 a beefy and stretchier dark denim was available.  The second pair of jeans was cut and sewn to the same point.

The Sewing Lawyer hates sewing failures.  So returned to the first pair, and realized that by using ALL of the seam allowance insurance adding an extra 6cm (yes you heard that right) of width through the hips and most of the thigh, the first pair of jeans would actually be wearable.

So two pairs of jeans were sewed simultaneously.

Sometime before the cutting and sewing of the 2nd pair, The Sewing Lawyer got smart and altered the back piece to add more (let's call it) sitting room by slashing the back and adding a 2.5cm (1") wedge at the CB.  She also got confused, and thought she understood where the seam lines should always be on these Jalie jeans, but then almost instantly forgot this understanding, and sewed the 2nd pair with 2.5cm side seams.  Maybe the cold was still operating to fuzzify the Sewing Lawyer's brain.

In the end there were 2 pairs of jeans which fit remarkably similarly except the second stretchier pair is tighter through the knees, as a result of the cold-induced confusion.  It's a good thing they're stretchy!

All the pictures are on Flickr - here are the highlights.

The back - This happens to be the first pair; the second (despite the extra 2.5cm of length) looks really identical.  There are only 5 belt loops with one at CB - that extra one Jalie wants you to sew on looks weird, IMHO.

The front (this also happens to be the first pair).


And the side (for a change, this is the second pair - told you they looked identical).  Of course you will note the absence of "bootcut" flare.  The leg was redrawn to be completely straight below the knee.

Of possibly more interest is the fact that rivets were actually used, for the very first time.  And, on the 2nd pair, interesting pocketing was used, and the pocket seams were enclosed so no raw or serged edges are visible.  Behold:


This post concludes with a view of essential jeans-sewing tools and hardware.  The blue-handled and very pointy awl pokes the holes needed for the jeans buttons (to left) and the rivets (right).  Of course, to sew through denim, you also need a good jeans needle and for topstitching, heavy thread plus a topstitching needle.  Without 3 machines going to make these - my regular Pfaff threaded with dark blue thread; my Featherweight which is the topstitching and buttonhold station, and my serger, I might have gone mad.

This post was created on my new (Windows 7) computer - could you tell?

Thursday, August 5, 2010

Jeans & fit

Just about everyone (all 67 of them) who has reviewed Jalie 2908 for women's stretch jeans on PatternReview has loved it.  Me ... well, let's just say I'm working on it.  However, I fear I'm not really the target audience.  I do not want very tight jeans, like enough room to sit down without the waistband pulling down at CB, and really don't care for either a low rise or a boot cut.  Holy cow!  I should have just bought their version of Mom Jeans (#968) and be done with it!

I traced according to my hip (size U) and waist (size S) measurements.  When I compared the pattern to my current jeans pattern, a Burda WOF pattern from 2004 (reviewed most recently here), I decided I needed insurance and added 1.5cm extra on the side and inseams.  The pattern includes 1cm so that gave me 2.5cm or 1" to play with.

I cut out of an inexpensive denim with the required amount of lycra/stretch.  The assembly of the fronts and backs went swimmingly.  The rest, not so much.  All came to a grinding halt when I tried them on after basting at the original seam line.  Talk about skin tight!  Since then I have let out both the side seams (better) and the inseam (not a help).  I have read and re-read Kathleen Fasanella on why jeans fit lousy these days.  These jeans definitely give the mono-butt effect, which I'm not all that enamoured of.  There will be no pictures, by the way!

My current theory is that I need more length and width through the back.  I am off to purchase more inexpensive denim of similar quality.  Wish me luck.

Tuesday, August 3, 2010

Style - knowing one's own (but barging ahead anyway)

Thanks for sympathizing, and offering constructive comments - so many suggested I delete the belt.  So obvious, why didn't I think of that?  It is better, although still not my favorite garment.

This experience does cause me to stop and think - and wonder why I didn't trust my instincts?  While I liked the look of the jacket on the envelope, I'm not that model!  I probably wouldn't have bought it for myself if I had tried it on in a store.  I'm not a frilly-frou-frou person, but this pattern has some of that (albeit with collar and lapels).  I don't care for raw-edge embellishment; this jacket had tons of it.  I am usually cautious around things that tie in the middle.  I threw caution to the winds.

I should have read the PR review of the jacket, which would have warned me it was too-long and kind of bathrobey.  I should have made a muslin; I would have learned lots from it.

I should have made a cleaner style - more like a blazer.  

I should have trusted my instincts.

In the Jalie jeans department, I'm not quite throwing caution to the winds.  I traced the size per my hip measurement, and after comparing the result to a tried & true jeans pattern I've made many times, I'm adding 1.5cm insurance to the side seams and inseams.  My fabric is stretchy, but I don't want the jeans to be skin tight!


Monday, August 2, 2010

The sweatshirt version ... meh

How do we choose our projects?  As previously explained, I had this teal ponte de roma knit and had thought to make a simple, unlined jacket.  Something I could throw on when the AC was too frigid, or to dash across the street to get a coffee.  It would look good with some dresses in my closet, and (of utmost importance) it would be easy to wear.  I was leaning towards making Simplicity 3631 when suddenly, and without warning, Vogue 2942 leapt out at me.  I had to make it.  I'm not sure why.

Well, it's done.  Meh.  As you can see at right - Exhibit A - my version (MV).  Below - Exhibit B - is the Vogue version (VV).

I do believe Vogue has engaged in a little pattern manipulation to ensure that MV does not bear enough similarity to VV to be cute and perky instead of .... bathrobe-ish.

The VV is visually square and blocky - looks fresh.  The MV not so much.  It is rectangular and droopy.

Both jackets are cut in the middle by the tie belt, but the MV tie is lower on the body.  The pocket flaps are higher on the VV.  The tie belt is shorter on the VV.

Partly this is explained by fabric choice - the VV is evidently made of a crisp silk whereas I chose a drapey knit.  But I think the proportions are off.

The VV is a veritable sampler of weird sewing/finishing techniques, some of which I chose to ignore.  Thinking about trying to describe them all makes me tired.  So here are some details of MV:

Pocket flap - This is a single layer of fabric with an applied facing edge, into which the trim is inserted.  The edge of the edge is raw, the trim has raw edges (VV had bias-silk Gazar; I used a thin jersey knit).

The underarm gusset and side panel.  The latter has wide 1" (2.5cm) seam allowances which are topstitched (I used a triple-stitch about 4.5mm long).  You leave two openings in this seam - the upper for the belt and the lower for the pocket (the flap is decorative).


I had to tack the belt to the back of the side seam opening to keep it from rolling down to the bottom of the opening, making the jacket look even more bathrobe-ish.


A covered snap at CF.


I'm moving on.  Time to tackle the Jalie jeans pattern, and I need a nice pair of shorts.

Sunday, July 25, 2010

What to do with a border print

I was ironing a favorite summer shirt and skirt today when this blog topic popped into my head.

There are so many lovely border prints out there; and seemingly so few patterns that suit them.  Conventional wisdom says you need straight lines which would seem to eliminate many interesting designs such as flared skirts and shaped blouses.  Wrong!!  Here are two projects to illustrate.

First, my laundry for today.  Some years back, I used a cotton print with 2 different borders to make a shapely 8-gored flared skirt and matching shirt with front and back yokes and princess seaming.

The print featured quirky vines through the middle of the fabric, and a border at each selvedge with stylized figures and narrower design bands at the top and bottom of the figures.  I cut my 8 gores using the full band at the bottom, and it so happened that I could use one of the narrow bands at the top of the skirt pieces.  Obviously this meant I had to cut the pieces "sideways" on the cross grain.  If I recall, the border was the same at both sides, so I could place the triangular pattern pieces very economically using both edges.

Here's a close up of the hem.  You can see one seam in about the middle of the picture - I tried as much as possible to cut so that the figures would not be chopped up by the seams.  While each pattern piece has a slight curve at the hem and the border is (more or less) straight, the overall effect is a printed border that tracks the curving hem line perfectly.

What about the shirt?  I used a Burda magazine pattern from the late 1990s (I think).  It features a front and back yoke (front is slightly angled down from the armscye to CF), princess seams, and a collar with lapel.

As you can see, I cut the yoke pieces so that the border tracks the yoke edge.  This meant I had to ignore the grain line on the pattern pieces.  It is possible to do this without causing the world to come to an end!  I did the same in the back, but could respect the straight grain for the back yoke, which is horizontal.


Here's another project using a border print in an interesting way.  I was lucky enough to have a silk sari which had two different border prints - a wide one at one selvedge (meant to be the hem) and a narrow one at the other.  I used a Vogue pattern (8193, now OOP) which features large puffed sleeves and a triangular shawl collar.

I used the wide border for the sleeves and the narrow border at the CF and collar edges, and for the sleeve cuffs.  Again, this meant I had to selectively ignore the grain lines on the pattern pieces (especially for the upper collar - I also had to create a CB seam).

The sleeves involved a little trick - the lower edge of the pattern piece is not perfectly straight but the selvedge is.  I started by laying the piece on the fabric (cross-grain) so that the bottom of the curve included the entire border.  I then cut the piece except at the lower edge where I wanted to preserve the border and selvedge.  To create approximately the right curve, I took a long, narrow dart parallel to the selvedge, between the lower edge of the border and the leafy design as you can see in the next (sideways) picture... or can you?

The only hint is that the lower edge of the leafy design is being swallowed up a little bit by the red border, near the under-arm seams.  Once I had sewn and gathered the sleeves, this was completely invisible.  On the other hand, if I had cut the curved lower edge, the drooping border might have been visibly distracting.

These fudging, fast-and-loose techniques might not work for all border prints or all fabrics.  Darting the blouse sleeve worked very well with my thin silk fabric - as you can see, the dart pressed perfectly flat (although a slight shaping would have been unnoticeable).  Also, both my prints were quite "freehand" - the lack of precise geometrics in both prints meant that the slightly approximate matching and shaping wasn't fighting with the aesthetic of the print.

Here's hoping this may inspire you to think outside the box with those border prints that you love but can't figure out how to use...

Planning for fall

It's still July but I'm thinking about wool - specifically, a scrumptious piece of feather-light wool/cashmere blend of which I have just enough for a sheath dress, and a coordinating, amazing, hard but light and airy pure wool for a jacket (I probably have enough to eke out a skirt as well).

The colour is blue - a greyish but still blue blue.  I purchased the cashmere blend in Toronto at the Wool House on Queen Street West (highly recommended, if you're in Toronto) and the coordinating fabric in Montreal at PR Weekend at Couture Elle (highly recommended, if you're in Montreal).  I gave my little swatch of the Toronto wool to the guy in Montreal and asked him to recommend a coordinating fabric (finding coordinating jacket fabric for 2 dress lengths was another of my shopping goals for the weekend).  He strode decisively to a high stack of bolts, pulled one out, placed the swatch on top and ... TA DA!  Perfect, first time.  This guy is amazing.


Is it true that real blazers are in style for fall?  I'm not very good at sussing out trends, but what I want to make is a traditional, single-breasted, long and lean jacket with tailored shoulders, and a slightly peaked lapel.  I found this in the new Burda envelope patterns.  What do you think?  It's #7421.  (Sorry for the fact that this is not an English page.  Thankfully, Burda's unbelievably inept decision to migrate ALL of its English content to the inane "Burdastyle" page, from which it is impossible to find any of the actual corporate content - i.e. its magazine and envelope patterns - has not yet affected its French site).  

But no - the dress and boots would not be part of my wardrobe plan, though they are utterly cute on this 20-something model.  You'll just have to imagine the jacket on top of something more sleek and age-appropriate.  

Much like this, in fact.  (It's a PatternMaster Boutique pattern reviewed here.)   Shorter??  

In the meantime, I'm finishing up another pair of bike shorts today, and really ought to finish the knit jacket so I can wear it ...

Wednesday, July 21, 2010

More stretchiness


OK, I’m clearly running out of catchy names for this spate of exercise-related sewing I’m doing recently.  Here’s evidence of two more jacket-and-iron-avoidance projects.  I have finished my Champion technical T-shirt knockoff and made a pair of snazzy new bikeshorts. 

There’s not much to say about the bike shorts.  I used an ancient (ca 1989) Stretch & Sew pattern  which, by some miracle, is still on their website here.  This is the 3rd pair I’ve made.  If (as I do) you choose not to make the contrast side stripe, you can construct them from a whopping 2 pattern pieces.  Not front and back, but front/back (no side seams if you so choose) and a crotch gusset, which runs from left shorts hem to right shorts hem.   

I add another piece – a casing for the waistband elastic.  S&S says just to fold the top edge over too-thin elastic.  I’m either very long through the crotch as compared with S&S’s ideal figure (which is possible) or these bike shorts are meant to be a lot lower-slung than I prefer.  This is also possible, though doubtful, given the date on this athletic wear classic.  

One of my few fabric-purchasing goals for PR Weekend Montreal, since I knew we’d be visiting the favourite stretch-fabric buying haunts of Jeanne Binet (Jalie), was to buy a good beefy black something-or-other with lycra for new bike shorts.  My other pairs are very old and tired.  I found this absolutely fantastic bottom-weight which I think is RPL.  It’s very firm in its negative ease – easily the most comfy girdle-like garment I’ve ever worn!

The S&S pattern also has pieces to make your very own “seat padding” which I have done in the past.  However for this pair I installed a commercial pad (all curvy in 2 directions, laminated foamy stuff etc.).  I swear my bike goes faster when I’m wearing these shorts, so mission accomplished.  I’m going to make another pair while I am in the mood and will have to make the padding myself, so stay tuned for a post on that.

The shirt is one of 2 I’ve completed (a third is cut out) which combines a very stretchy mesh for the dark grey side panels and under sleeve, with a polyester athletic knit purchased some time ago from Wazoodle.  

To the right is the completed PMB pattern which turned out just as I wanted.  That is, it fits exactly like the original plain T-shirt before I started slicing and dicing it, and its style lines are more or less mimicking the commercial shirt I was trying to clone.  For once I got smart and drafted .65cm (1/4") seam allowances like Jalie does - this uses less fabric and I can sew with my serger by letting the blades just skim the cut edges.  The tiny seam allowances make it easy to sew the curved edges without puckering.  

I used the Jalie neckline technique  and it works marvellously even with the rather non-stretchy poly knit.  The stretchy panels stretch when I’m hunched over on my bike, so that the whole shirt doesn’t ride up.  To jazz it up and get rid of the puckering at the seams, I used a quasi-utility quasi-decorative stitch on my sewing machine.