Showing posts with label Burda 2010-04-105. Show all posts

Saturday, September 10, 2016

End of summer project

With the shortening days my thoughts turn naturally to layers and wool and knitting and the need to make something to keep myself warm. So I'm putting away all the cotton pieces that I didn't get to this summer. They will have another chance next year.

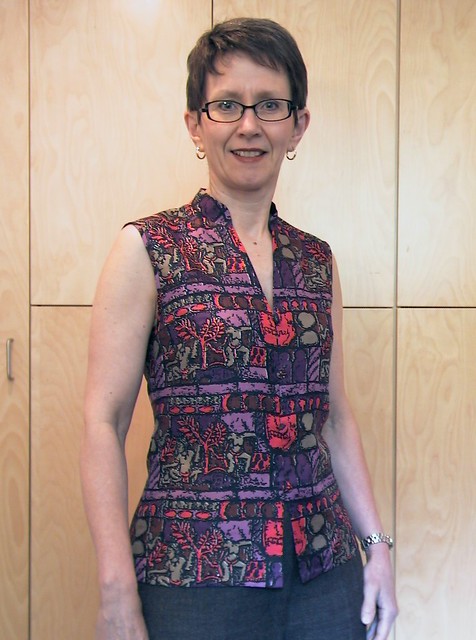
But this weekend is still warm and I am happy that I finished another sleeveless top.

This project started life as a huge man's housecoat. Yes, I am serious! I only wish I had taken a photo but I didn't think of it until it was too late. Thrifted, it was only purchased because it was made of an extremely high quality 100% cotton sateen. The original label is Holt Renfrew. Someone paid a nice amount for that robe. But it wasn't me.

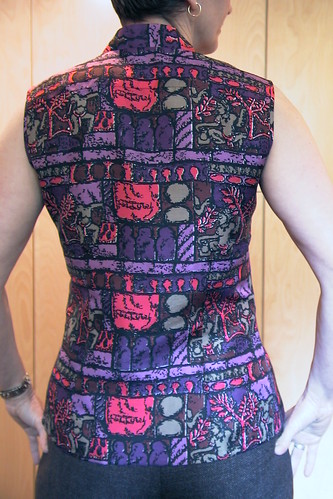
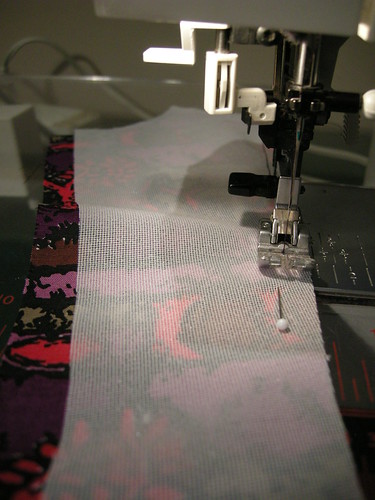
You would think I would have enough to make a garment at least as big. But that isn't how it works. Once I picked off the 4 pockets (all double topstitched with tiny stitches) and realized that it had two-piece sleeves I had enough to comfortably make this sleeveless shirt, including the cut-on front facings, a double yoke in back and bias strips to finish the arm openings.
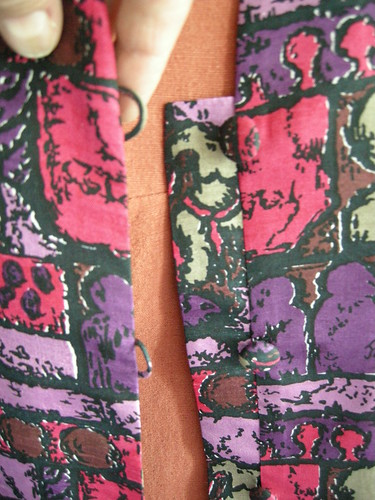
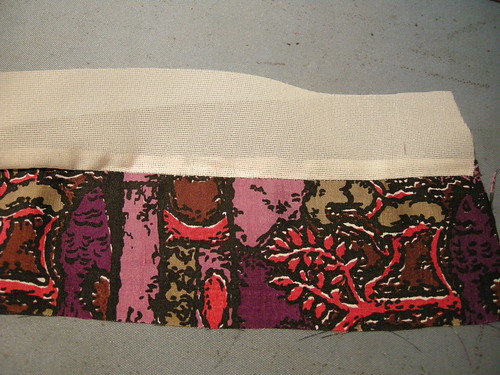
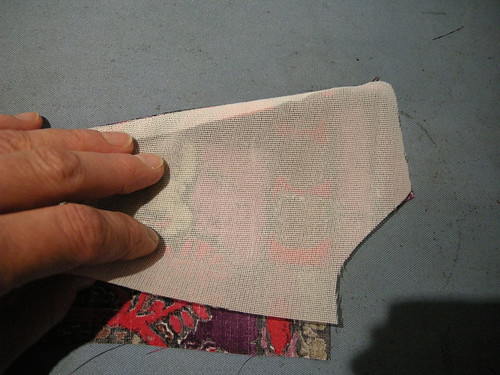
Look Ma! No raw edges!

At right is a photo of the inside, which I am rather proud of. I even remembered to sew the fusible interfacing to the front facing at the outside edge before fusing. Such a nice finish!

My pattern choice is quirky.

I have a vintage pattern for a sleeveless shirt with a convertible collar, which I rejected. I've made it twice (second effort blogged here). I rejected it because I wanted a slightly less blousey and more modern fit. Specifically, it had too much fabric in the upper chest and shoulder area and was too nipped in at the waist.
Burda Magazine 2010-04-105

I had a blouse with just the fit I wanted in my closet, but the original pattern (line drawing at left) was totally wrong in all the details. It had a stand collar, ruffled front and no front opening for starters. And I wasn't sure how the yoke would work with a convertible collar style.

I had gotten rid of some of those details the first time I made it. (Strangely, that too was a refashioning project.)

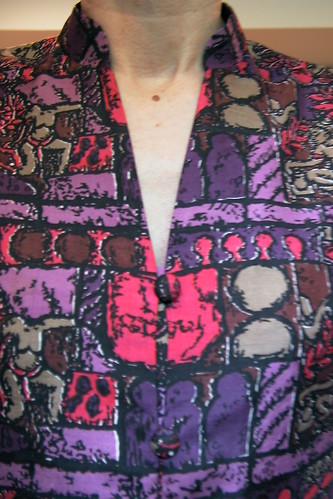
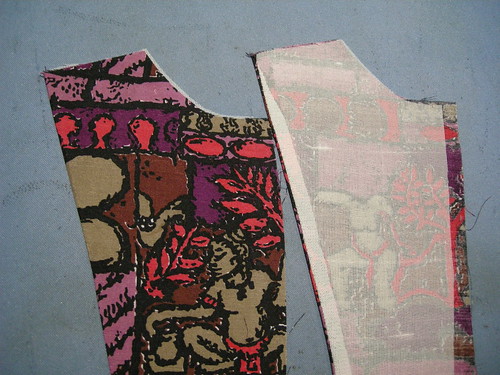
This time I also added an overlap and cut-on front facing for a front button closure, extended the front to the top of the shoulder, reduced the back yoke accordingly, and added a convertible collar. I did not completely eliminate the back yoke (even though its existence made for a bit of a sewing puzzle moment when trying to clean finish the inside neckline) because it builds in some very nice back shaping.

The new collar was a bit of a leap in the dark that had me comparing the shoulder and neck shapes of my vintage Simplicity pattern with the modified Burda one (they were amazingly and completely different and my seeming inability to understand how that can be is a little bit terrifying) and puzzling over my pattern drafting books. I decided to just give up and wing it, cut a mock up out of scrap fabric and pinned it in, finding that it was exactly right. I guess I shouldn't overthink these things.

I really like the resulting shirt, which fits just the way I wanted. I wonder how I'll change the pattern the next time I want a sleeveless shirt...


Sunday, June 5, 2011

Unruffled

The Sewing Lawyer is not really sure what drew her to the ruffled blouse in the April 2010 edition of Burda Magazine in the first place.  Probably it was not the ruffles.  Nor could it possibly be the side zipper opening, or the deeply plunging front neck.  All of these features  have been eliminated or significantly altered in the Sewing Lawyer's version.  She did give the ruffle a try, despite knowing that it would not be satisfactory.  Forty or so years of sewing experience does sometimes enable one to predict when some feature of a garment will be completely wrong. Too bad they don't always allow one to avoid going ahead regardless. The Sewing Lawyer fatalistically reacquainted herself with her trusty seam ripper.

First, she tried cutting the ruffles down, dramatically.  Remember the attack of the ruffles, take 1?  Well, take 2, while marginally better, was not enough of an improvement.  Off they came ... again.

In the end, the Sewing Lawyer's version of the (formerly) ruffled blouse is both less and more.  It's ruffle-less, zipper-less, and less plunging.  It's more buttoned up, more in keeping with the usual style around here, and will be worn more too.  It's all good!


Here's a view of the back.

I'm happy with the print matching.  There is a yoke seam at the upper back...

I'm also happy with the fact I was able to re-use the exquisite button loops and self-covered buttons from the plug-ugly skirt that this top was refashioned from.  (I don't think I gave details earlier.  This project started life as a thrifted floor-length skirt made from Thai silk.  A button-up dirndl, floor length, is not a great thing.  However, a dirndl will yield quite a lot of usable yardage, it had these beautiful tiny loops and self-covered buttons, the silk has a great hand, and I loved the quirky print and the colours.  Finding that the skirt was slightly musty, after taking it apart I threw the pieces into the washing machine.  It came out perfectly.)


I turned the original cut-on-the-fold front into a button-up by virtue of adding a seam allowance at CF instead.  Instead of an overlapping front, I added a little shield to sit behind the loops.  It is barely visible, as you can see to the right, which means it was necessary.

Some additional details.  First, the armhole edges are finished with a very narrow self-fabric bias strip.  I didn't initially read the magazine instructions (as usual) and thought the strip would make a little facing.  When I went to apply it I realized it was too narrow. Then I read the instructions which, as usual, are slightly incomprehensible.  If I correctly understand them, Burda wanted me to trim off the seam allowances at the armscye and encase them in a double-folded strip which I would be sewing in one pass.  Yeah right.  Instead, I cut off the seam allowances, and sewed the unfolded bias strip the desired distance from the raw edge, right sides together.  I then folded that over and, on the wrong side, pressed the raw edge up into the fold.  Finally, I stitched in the ditch from the right side, catching the wider folded edge underneath.  You can see both inside and outside in the picture to the left.

Second, like several other bloggers of late, I clean-finished the facings using fusible interfacing.  I do not know who to credit with this technique.  It's fantastic - both easy and producing an obviously superior result.  There is a tutorial over at Sigrid's site (from Lori V's blog, Girls in the Garden) but, thinking a few more details would help, I took some pictures while this was in progress.

First, cut your fusible as usual using the facing pattern piece.  Lay the unfused interfacing on the facing, right sides together (that means with the glue side NOT against your fashion fabric).  Sew the 2 together along the edge(s) of the facing which will not be sewn to the garment edge.

I think my seam was about .25" which ended up being about right, because this made the fusing a little bit easier than it might have been, I think.

So here is the beginning of the fusing process, in which I use the seam allowance to help me open the seam completely and cleanly.

I started the fusing by opening the seamed unit, and fusing in the seam allowance only while gently holding the fusible interfacing taut and away from the facing.  In the photo to the right, the seam allowance is fused to the right, unfused at the left side.  Obviously you have to do this carefully and just with the tip of the iron, to avoid sticking your interfacing to the ironing board cover.

Then carefully fold the interfacing over so the seam is barely on the fused side and the interfacing won't show from the right side.  Fuse, starting from the seamed edge.

This fusing technique is trickier than the usual where you can take care of any misplacements by trimming away the fusible edges.  But it's worth it.  You end up with a perfectly finished edge.


My next project?  I'm planning to take Vogue 8718 out of its envelop and contemplate its mysteries.