Sunday, October 20, 2013

It's official - The Sewing Lawyer has hit SABLE


Intellectually, I knew it, but yesterday proved that I have internalized the truth.  I have more than enough fabric in my personal stash to last me the rest of my time here.

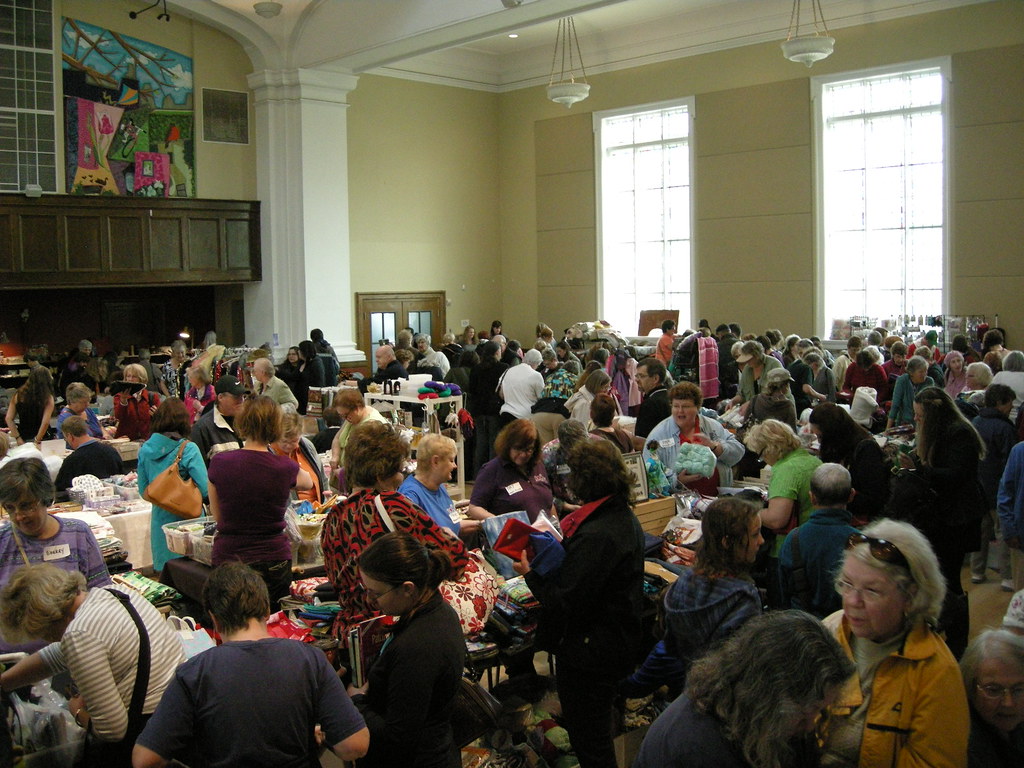
What caused this revelation?  The annual Fabric Flea Market.  For past devotees of this blog, you've read about this fabriganza before, in 2010 and 2011.  My camera didn't come along with me yesterday, but the above scene from last year is an accurate rendition, believe me.  Hundreds of happy shoppers, the buzz of conversation, punctuated by squeals of delight and laughter as new finds and old friends are located.

Much of The Sewing Lawyer's extensive stash, including fabric, notions, patterns and miscellaneous tools, was found at this annual event (yesterday was the 19th).  Every year, I spend the Friday before sorting through donations (this is a fundraiser event), which leads to the perk of being in the right place at the right time to scoop those delicious things that, if only I had known it, I had been looking for all those years.

It was different this year.  Not only have my friend G and I graciously and apparently successfully eased out of the role of being "The Organizers", we both left the venue early with (in my case anyway) very little in the way of stash acquisition, and pocketbook mostly intact.  And not exhausted, another very good thing!

The stash remains ample.  I did have to go to a real store to buy some more thread, but NO MORE FABRIC!


Monday, October 14, 2013

Meh - a knitting project

Back in late July I mentioned I was swatching for another knitting project, the Vitamin D cardigan.  This is a hugely successful pattern if the  numbers on Ravelry are to be believed.  Then, there were just over 2,300 projects; now another 175 have joined the throng.

 "Look Ma, short rows!"
Including mine.

I'm hoping this grows on me.  I like the drapiness of it (a ColourMart linen and silk blend of unknown proportions) and hope the neutrality of its colour makes it a useful addition to my wardrobe.

Its fibre, shape and style probably make it more a spring to summer garment than a fall to winter one but I'm wearing it now on this sunny and somewhat unseasonably warm October day, but predict it will soon be packed away to be a surprise sometime around next April.

More details on Ravelry.

By the way, that red knitted top featured in my late July post stretched a great deal after I washed it.  It is at least 4" longer than it was in my July photos, and looser widthwise too.  The neckline became impossibly open.  I have prevented it from being completely unwearable by putting a line of crocheted chain stitch behind the neck ribbing to pull it in, which has the effect of supporting the weight of the whole top and keeping it from sagging too terribly.  I may later have to do something similar to keep the armscye from stretching out any more.  This is the last time I will ever knit with rayon yarn!  It's just too heavy for its own good.

I have also, you may be glad to know, been making progress on my latest sewing project.  I'm loving the topstitching!

I'm not following Vogue's instructions, which want you to complete the bodice, the midriff band, and the skirt in the round before sewing them all together (fully lined), with the last step being ... putting in an invisible zipper at CB.  I'd rather sew in the zipper flat, thanks very much.  That means I have assembled the back (a view of one side to the left) and will sew side seams last.

All well and good, but the overlap at CF bodice requires one to have the inner bodice finished (including at least part of the lining) before attaching it to the front midriff band.  I'm currently working on the topology of how to accomplish this.  In my mind I think I can make it work.

Saturday, October 5, 2013

One project finished, another one started


I put on a vaguely matching hat and took a lot of very bad pictures of myself wearing my new cape.  For some reason my camera had a terrible time focusing on it.

Cooler weather is just around the corner.  Even though this is just one layer of wool with one layer of Bemberg lining, it's warm.

I feel bad for not having many wonderful pictures of this subtle garment to show you. Here's one more that wasn't too bad.

In other news, today I cut out a dress!  It's Vogue 1183, a pattern I purchased and muslined three whole years ago (click to see my muslin and read about the first round of pattern adjustments).

Originally, I wasn't satisfied with the fit, and that's why I set it aside.  It was too tight, too short, and (even though I'm hardly busty) the bodice didn't seem big enough.  Plus there was some strange pulling where the bodice front pieces overlap and attach to the midriff piece, and the front skirt was too long and pooched out.  Checking the reviews for this dress on PatternReview, I notice that almost everyone had bodice issues, and many chose to sew through all layers at the bodice overlap to prevent it from gaping open.

Trying on the ancient muslin again today (after losing a few inches in the hips) it fits a lot better and I felt it was time to tackle the structural problems.

I made some more changes to the pattern today, including lengthening the front bodice pieces slightly, taking in the princess seams at the bust, just above the midriff, and narrowing the midriff to match.  I also took some length out of the skirt front below the midriff piece.  And I added 4 cm at the hem because the unhemmed length seemed about where I would want the finished skirt to land.

I'm using some gorgeous light suiting purchased many years ago on a flying trip to The Wool House in Toronto.  If I remember correctly, it's wool and cashmere, and it's light as a feather.  Because I want a bit more weight to this dress without stiffening it even slightly, I'm going to underline the wool with a soft cotton shirting, and I will line the dress with Bemberg.  All from stash.  I even had the right thread colour in my extensive collection.  Stay tuned.

Sunday, September 29, 2013

Tweed


Paco's cape - not mine!
Waaaay back when, I reported the purchase of some patterns from Paco Peralta.  It is embarrassing that the patterns have been waiting so long for me to make something.  Better late than never - feeling the need of an easy to wear outer garment I could put on in between season weather, I made the short version of the "poncho cape".

It's pretty simple to construct - two main pieces, two collar pieces and the back facing.  The pattern is nicely drafted, however.  There is turn of the cloth built into the bias under collar, something I always appreciate.  No lining pieces were supplied, but it was very easy to create my own.  Seriously, the hardest part of this was the hemming, a task that seemed to go on forever.

You'll have to wait a bit to see me model this, as it's dark and the beauty of this fabric is subtle.  It was found by my husband, pro thrift-shopper that he is, a few years ago.  I think it's Donegal tweed.  It's certainly hairy enough!  At first I thought it was pretty dull, but it has delightful flecks of colour, when you get close enough to see them.  I have enough left to make a skirt.

For now, here's a view of the collar.


Thursday, September 12, 2013

Progress

My last post that was actually about sewing involved the architecture of a bra.  Thank you to those who commented and provided food for thought.

I overthought the whole bridge thing and tried making it even wider.  Wrong!

I did some internet research, and read into the details of Beverley Johnson's book.  I also borrowed the Lee Ann Burgess book Making Beautiful Bras.  (Horrid picture on the cover.)

Recall that my problem was that after I widened the base of the bridge, I had a flat area inside the wire at the CF and lower edge of the cups.  The first comment was to the effect that because the widened bridge had the effect of rotating the cups down and towards the outside of my body, I might need to remove fabric from the cups.  The flattening could be a symptom of too much fabric.

Similarly, Johnson wrote that "too much depth in the bra cup will manifest itself as a flattened area of fabric right above the middle of the bottom of the cup".

Promisingly, the Burgess book had a section on "An Underwire that sits Down on the Front of the Chest". Her diagnosis?  "This annoying problem can be caused by a number of factors: either the wires are too deep a U shape, ... and/or the cup volume may be insufficient, and/or the cup shape may be too shallow and/or the breast may be drooping within the cup due to a very loose, slack lower cup."  Oh boy, even the experts may not know where to start!

Long story short, I pinched out fabric inside the wire to make the lower cup smaller, and I think it worked. I'm wearing the second and most modified bra now, and it's pretty comfortable, and it is not slipping downward in front.

The most you are going to get are these crappy pictures on my DTD.  Please believe that both bras fit my flesh and blood much better.

First bra, in white.  The ruffly trim was leftover from a BraMakers' Supply kit.  For straps, I used a strip of extremely firm power net covered with the fashion fabric.  They are kind of thick, but they work. I did not bother with rings and sliders (I'm making it the right length, right?).  This bra has some depth taken out of the cup next to the bridge but the lower curve of the cup is still a bit too deep.  However, it's not bad.
 Second bra, in nude (the next pic shows the colour better).  This is a lightweight type of power net with random satiny spots.  I used fold over elastic to finish off the upper edge of the cups and wide strap elastic for straps (again left off rings/sliders).  The band is slightly snugger and the straps slightly shorter than bra #1 and I like that snugness.

The pattern for this bra is close to being just right.
Inner construction.  The cups are lined with a very lightweight flesh-tone mesh.  The bridge is stabilized with firm fusible attached to a lining.

All materials for these were in my (ahem) extensive stash.  However I am now out of wire casing.

This weekend I'm headed to Kitchener Ontario to visit my cousin and his knitter wife.  On Saturday, she and I are going to the Knitters' Fair, reportedly the largest event of its kind in Canada, with "35,000 square feet dedicated to the craft of knitting, offering an incredible display of a diverse variety of yarns in an explosion of colour, knitting books, patterns and accessories." 

I'm expecting it to be a lot of fun!


Saturday, August 31, 2013

The great sewing room makeover - phase II

In my first post on this subject, I promised I'd document the makeover of the annexed room once it was done.  Today the Murphy bed was delivered.  And I installed the new halogen light fixture (wow, that is bright!).  So it's sufficiently done to show you.

Behold:

The two Expedit units I put together a few weeks ago are shown here.  It didn't take very long before they were both pretty full.  I rolled my knit stash into two cubes of the shorter unit.  Previously, this part of my stash was in under-bed storage and so practically inaccessible.  Reacquainting myself with it was a good thing - I've already used part of one piece!

On the opposite wall is the pièce de résistance - the newly-installed Murphy bed.  It looks like a nice big closet, but folds down to be a full-sized bed!  It's very easy to operate - special hardware ensures it is practically effortless to raise and lower.

It even has a built-in reading light!

I love the fact that this bed means the room is completely dual-purpose.  It's a very comfortable bedroom, but it leaves tons of space for my cutting table, when the bed is folded up!  Finally!  I can walk all the way around my cutting table.

Bliss.


Friday, August 30, 2013

Building bridges

Bra bridges, that is.  Both Beverley Johnson and Norma Loehr recommend starting with the bridge.

So of course I followed their instructions, sort of.  In fact I did dutifully make the cardboard bridge they both talk about, but then I kind of did my own thing with my fitting bra which involved starting with the bridge pattern from my pink bra that doesn't really fit properly (top), narrowing it at the top for better fit and lengthening it (I forget why - middle), and finally accepting reality and also widening the base of the bridge substantially for better fit (bottom).

Guess what?  The last bridge is extremely close to my cardboard version.

Since swapping out these bridges involves unpicking the channel for the wires and the stitching that attaches the bridge to the cups, and taking out the line of stitches above the channeling at the CF that prevents the wires from poking out in the wrong place, and reinserting the wires, making the new bridge, sewing it in, re-sewing the channels, and trying the whole thing on again (times three), it would have been quite a bit faster to just follow the learned authors' instructions.

So here is my fitting bra.  It's single layer, made out of some lycra fabric I have a lot of, and basted together in pretty rudimentary fashion.

It fits me a lot better than my DTD, but this is all I'm willing to show the world.

In the next picture, I've highlighted some of the haute couture construction information, but also the problems that also appear when I put this beauty on. I've not highlighted the problems, such as the rippling cup seam, that disappear when it's me wearing it.

Questions for you experienced bra makers (or others with opinions):

  • Should I be worried about the fact that there is a flattish area of the lower cup near the bridge, below the pink dotted lines?  It is less pronounced on me than on the DTD, which is why I'm even asking this question instead of being sure that the answer is to change something to fix this.  My logic for doing nothing is that angling the lower bridge so it is even wider will just push the wires up into my under arm area.  Further, the bra looks good and on a try on it feels pretty comfortable.  The wires are sitting nicely where they are supposed to. 
  • If I was going to fix this, what should I do?  It occurs to me that maybe the wires I have are too long and/or too small, and the cup is too deep?  But I'd also have to make the bridge wider at the base, right?  The bra might look pretty wonky if I did that...
  • Should I be worried about the vertical wrinkles below where the strap attaches?  There is no elastic at the arm edge of the cup, and my thinking is that if that was stabilized and snugged in somewhat, these wrinkles may go away.  
  • If I was going to fix this, what should I do?  


I am already very grateful for the advice in the comments on my last post!  I have taken Liana's advice and for now I'm working on a mashup of my pink bra (which was already a mashup of an ancient Burda WOF (as it then was) swimsuit pattern and a PinUp Girls bra pattern...).  So weigh in and give me your best ideas and advice!


Monday, August 26, 2013

This may take a while

I have Beverley Johnson's Bra Makers Manual. I have this pattern from Merckwaerdigh.  I have Demystifying Bra Fitting and Construction by Norma Loehr (of Orange Lingerie) on my iPad.  I have some mixed experience at making things that look like bras. There is this one which, truth be told, is too big and has wires that dig in at CF. And this pink one, which is tantalizingly close if only I pin 2cm out of the length of the upper cup.  I have lots of lycra fabric and elastic.  I think one of my New Years resolutions was to make a proper bra that actually fits.  I am ready to go.

What do you mean, it's almost September?  It's still 2013.

My first outing, the so-called "sports bra" from the Merckwaerdigh pattern, was a bust (pun intended).  A bust nothing like mine.  As you can see.

 I kind of like the back, but this is really the wrong size (and shape) for me.

This one will not ever be finished.

By the way, bra pieces are very easy to sew together wrong.  Ask me how I know :-)

For my next effort, I have pinned out 2cm approximately from the upper cup of the pattern I used for my pink effort.  At the same time, I've traced a smaller size from the Merckwaerdigh pattern.  This scattergun approach may come to grief.  Time will tell.

Neither of these is getting lining or elastic edging.  I wasted some good FOE on that Merckwaerdigh bra.  I'm making fitting muslins per the Orange book.

Wish me luck...


Sunday, August 18, 2013

Take 2

I hope the title for my last post wasn't too critical.  I really do like the Pavlova top.  Here's the proof.  I made it again.  However, first I fixed the couple of things that bugged me about the pattern.

First the sleeve.  I made it an inch longer.  

This is simple.  Slice through the sleeve, parallel to the hem edge. Add the desired length by sliding the cut-off part out evenly. Add tissue.  

Done.  

More complex was the fix for the too-long upper edge of the wrap front and tie.  

First I tried on my earlier version, and pinned out what seemed right.  I measured this.  Five inches along the top edge.  That seemed like a lot, but it also seemed about right.  

Here is how I took that length out of the pattern piece.  In the photo at left, you can see the tie end.  The angled line to the right is the seam line where it attaches to the front.  The dark green lines are seamlines and the orange lines mark a wedge which measures five inches along the top edge.  I folded out the wedge by aligning the orange lines.  

I left the original length of the seam which will attach to the top.  

Five inches looked like a terrible awful lot to fold out. So I chickened out and backed it off by a bit more than one inch, as you can see at right.  Then I added some tissue to create a curve from the original end of the piece.  

Then I threw caution to the wind and cut out my second version of this top.  

I used another gigantic rayon/lycra print.  Here's a view of it, with my feet for scale.  I had little choice how to cut it out.  I have one big green area on my back and none on the front.  It's disappointingly uniform looking.  Using these massive prints effectively is an art.  An art which The Sewing Lawyer may or may not have mastered.  

The ties on this version are longer than on my other version.  When I shortened up the top edge, I got nervous (unnecessarily) that somehow the ties would be too short to wrap around and connect.  Silly!  They would have been the same length.  However, I went up to the next size, and these are just fine too.  

What about the wedge alteration?  Well, it is not something I notice when I put the top on. But that's a good thing.  I definitely noticed the too long top edge, that I had to fiddle with.  This is much better.  And I could have taken out the full five inches without any problem whatsoever.   

One more thing:  the instructions for sewing the collar are a bit weird.  They produce an OK result.  But the diagrams are somehow off.  Here's how I put this version together.

Here is the inside of the front showing the markings (and where I have used a light fusible to stabilize the darts and corner).

And here are the pieces from the right side.  The collar is the rectangle at top.  Your goal is to sew it into the opening below, with the lower corners where the seam allowances on the collar piece cross attaching exactly at the point into which you have clipped (as marked on the pattern).

 I sewed the ends first, just to that pesky inner corner point.  I pressed the seams open.
 Then I sewed the seam at the base of the collar. Because I interfaced the collar piece (with a slightly stretchy knit fusible this time) the body shoulder seam easily stretched longer than the collar piece. Do not be fooled.  they are the same length.  If necessary (i.e. if you get little puckers in the body) unpick and re-do.  I had to do this twice to get rid of little pleats/tucks.

The pattern instructs you to fold the lower edge and edge-stitch it to the body neck seam from the outside.  I did this the first time but think the result is cleaner and less bulky this way.  And it's easier to maintain a smooth line on the body if you are sewing a regular seam.  IMHO.

Here's the completed corner from the outside.  Nice, huh?  The top half of the collar is actually the collar facing.  After it was folded down I stitched the two layers together by stitching in the ditch from corner to corner.

I may take a break from this pattern now but I will definitely be making a red wool jersey version.  For that fabric, I will add some width as well as length to the sleeves.


Thursday, August 15, 2013

I like this top ... in theory

The Sewing Lawyer hasn't purchased many patterns from the new* independent pattern companies that have flourished on the internet in the past few years.  There are several reasons for this.  One is that there are So. Many. Patterns. already in her collection, waiting to be made.  Another is cost (a minor quibble).  The third and most significant reason is doubt - that the patterns are good quality, reliable, and will produce the stylish outcome promised by the blogs and websites.

This doubt was fuelled by an unfortunate experience with one of the first of these independent pattern producers.  The Sewing Lawyer forked out $20(US) per pattern for two designs that looked so great, so wearable, so fashion-forward (dreaded phrase), so "just like RTW".

And then found an (obvious) printing error on the pattern tissue, and spent far too many hours sewing a muslin that could not be made to look anything like the so-called technical drawings on the pattern envelope and fit badly, to boot, before spending far too many additional hours cloning the look of these drawings through much laborious work.  (If you want to read more and you are a paid-up member of Pattern Review, you can do so here.)  This experience led to a decision not to throw any more time away on the second expensive pattern (also satisfactorily cloned - read about it here).  It also led The Sewing Lawyer to be convinced that when an individual woman designs patterns for mass distribution, she could be mentally designing for herself (her body type and size), and grading more-or-less successfully for people who are not her body type and size, and that if one is not like her, one should perhaps beware.

Now, Stephanie the Consulting Dressmaker who started Cake Patterns ("sewable, wearable basics for busy women - always with pockets!") is a designer whose body type and size are not like mine, but a variety of sewers had made her first dress pattern and everyone seemed to love it.  Some of them were shaped like me, so I bought the pattern.  (I have yet to tackle making it, but promise to do so ... sometime.)  The pattern that really got me interested, however, was her second offering, #0169, aka "Pavlova".  It's a pattern for a wrap top and skirt, and it was the wrap top that captivated me.

I liked the uncomplicated shape, the high and reportedly 100% secure wrap neck, and the intriguing idea of a waist-length front with a longer back that you could tuck in to avoid gaposis.

The skirt, meh.  It's a full circle, and therefore a fabric hog.  Too much for The Sewing Lawyer (as previously reported).

To make a long story short, I cut the top out of some (cheap and cheerful) rayon/lycra print jersey that was rediscovered in the recent excavation of the sewing room.    With my white linen skirt, it looks frighteningly like the pattern envelope, don't you think?

So ... how does this pattern stack up?

First the good.  The pattern produces a garment that looks just like the pattern illustration.  It is very comfortable and as promised, the front wrap is very secure, and the back "tail" stayed tucked in.  I love the way it fits over my shoulders.  The top has cut-on sleeves, but it fits neatly under the arm - no sloppiness there.  I will make this again (I have some red wool jersey in mind).

But, it's not totally perfect.  On the technical side, there are a couple of glitches on the pattern tissue.  When I looked at the skirt pattern, I realized after flat pattern measuring that the waist would be far too loose; you'd have to gather it into the waistband to get the intended fit at your natural waist.  It is acknowledged somewhere on the Cake website that extra seam allowances were added to the pieces (4 seams x 1/2" = 2" too big).


Re the top, I found it odd that the darts (at shoulder) were marked only with dots (see photo at left, I pencilled in the dart).

Then there are those numbers in blue circles, the significance of which is not obvious.  One of four of the instruction pages seems to correspond as it has a large diagram labelled with these same circled numbers, but it's not explained in words anywhere (that I could find) what this is actually for.  I ignored it.  I'd prefer more conventional markings on the tissue and fewer unconventional ones.

The size I used (30 for full bust measurement of 30-34" or 76-86cm) is printed separately on the pattern tissue and for some reason (that I think is a mistake) the lengthen/shorten line on the front piece is not in the same place or (more importantly) at the same angle as the same line on the other sizes (35, 40 and 45) which are nested together.

The separate tie piece is printed in many more sizes than the body piece.  The numbers correspond to the waist sizes (11 of them, starting at 25" and going up to 50") but there is no explanation of the use of the waist measurement in choosing a size for the top anywhere I could find on the pattern itself or in the instructions.  I cut size 30 which is bigger than my waist, and the ties are a good length.  I think they would have been too short if I had paid any attention to the other numbers.

The main pattern piece (the front, back and sleeves are a single piece) and construction of this top are sufficiently off-beat that I paid particular attention to the rest of the instructions, and the top came together without incident.  I even bought and used Steam-A-Seam (lite) tape, which made cover-stitching the very long edges of the ties and back hem a snap. Stephanie sings the praises of this product on her website, and recommends the use of "fusible webbing" right in the pattern instructions.

Things I did that were not instructed were to interface the shoulder dart area, the collar piece, and the facing/front wrap edge with a very light fusible.  I did this to stabilize the lightweight and very stretch fabric I used.  I won't need to do this when I make the top from a more stable knit, but I'm glad I did for this version.

Side seam gap?
The side front seam is designed to be a lot shorter than the side back seam, which extends to the tuck-in tail.  The front and back part company well above the level of the natural waist, as you can see at right.  This is intentional.  It allows the left front/tie to sneak out from underneath and wrap around the back (most wrap and tie tops rely on an opening in the right side seam but this one doesn't need that).  I was worried that this configuration could lead to exposed skin, but it doesn't.  I'm glad I didn't try to lengthen the front piece.

Putting the top on is a little tricky.  In the main this is because of the angle of the ties.

As you can see, they are a continuation of the front and point distinctly downward.  However, to wear this top the ties have to be wrapped horizontally around the body.  When their orientation is changed, suddenly the upper edge is too long and one has to be careful to prevent that edge from flopping over.  At right you can see what I mean.  This might not happen on someone with a bigger bust than me, since the upper edge of the tie would have to travel further to get over the bust.

I am going to try to fix this by taking a wedge off the tie extension at the seam where it attaches to the front. The seam is visible in the above photo - it's a vertical line where the stripe pattern is disrupted. I like the top enough that I may make another wearable muslin to test my theory before cutting into the wool jersey.  I'll report my findings here when I do that.

The only other thing to change is that the sleeves are a slightly awkward length - they hit *right* at my elbow - and they are a little too snug which will be a problem in a less stretchy knit.

To wrap up (get it?) this already long post, here are some more pictures.  The stripe directions are pretty amusing, I think!


* The Sewing Lawyer adores Jalie patterns, which are independently created by a Quebec company.  Jalie isn't new.  It has been around for decades and its patterns are thoroughly reliable.