Showing posts with label teal jakku. Show all posts

Saturday, January 14, 2012

More about the Teal Triangle

In a comment, okie2thfairy asked if I could show in more detail what I was talking about when I mentioned "improving" the pattern for my Teal Jakku with triangle insets at the shoulder.

To remind you, here is the completed front shoulder.

Below is a picture of the pieces, before assembly, that were made according to the pattern.

The textured piece is knitted as a long curving rectangle (made with short rows so that the outer edge is longer than the inner edge).  After the piece is seamed, it forms a donut-shaped piece.  The short edge is then sewn to the lower edge of the upper back piece (so it forms the lower back), to the armscye of the sleeves, and then up towards the back neck edge where it forms the collar.

The back - I'm hoping that the slight ripples
relax when the sweater is washed...
The pattern, as written, instructed you to attach the piece along the front edge of the sleeve cap to the shoulder point, and then along the entire top edge of the upper back piece, which is a straight line that runs from shoulder point to shoulder point.

marked up with Skitch
a great free app for iPad
If  I had followed those instructions, the collar piece would have had to detour into a corner which would pull it out of shape.  In the picture to the right I show the corner and the direction in which the edge of the collar piece would have to be forced to fit.


In this photo of the front of this jacket on the Finnish pattern site, you can (I think) see the distorting effect on the upper front and collar.  The shawl collar is forced open sideways and the fronts have a harder time meeting in the centre.  I suspect that the jacket would be less comfortable to wear as that piece would be fighting to return to its knitted-in shape.

So I made two little triangular pieces to fill in the shoulder corner, and avoid distorting the collar.  The result is that the collar hugs my neck, is very cozy, and the whole sweater feels wonderfully comfortable.

Tuesday, January 10, 2012

Two FKOs*

*Finished Knitted Object  (What did you think I meant?)

While the Teal Jakku pieces were blocking I seem to have knit a hat out of my leftover wool.  Please excuse my slightly stunned expression.  I think it's caused by the unexpectedly speedy pace of my production.

This is the Tundra Toque, designed by Carolyn Doe (available on Ravelry).  I love the asymmetrical shape.  I'm not completely fond of inside-out stockinette stitch, and the fact that you can see the increases and decreases between the lacy cables on the brim.  And I think the crown of the hat is too pointy.  (I am trying to block it out.)

Here's another shot that shows the shape of the brim better.  There are 5 cables that join in the centre of the crown.  It goes pretty well with the resurrected Burda 7731 coat.


The other piece, of course, is the Teal Jakku.  It took about 3 days for the pieces to dry, and another 3 to sew the thing together and weave in all the ends.  (Am I supposed to sew it together and then block, or block before sewing? Experienced knitters, please advise.)

It has no closure.  I've got this big silver pin that seems OK with it.

Thanks to the clearly explained knitting videos on KnittingHelp.com (also available as a $5 app for iPad - excellent value), the assembly of this project involved my first ever attempt at the Kitchener stitch, which is supposed to be completely invisible but in this case is merely not glaringly obvious.  It was moderately difficult because I was seaming the deeply textured lower edge/collar, so there is a bit of disruption in the pattern.  If you must know, it's mostly located under my left arm, but because of the angle of the pattern it isn't completely hidden by my arm.  This location was suggested on Ravelry but in retrospect, I think the seam would have been less jarring if I'd placed it at the CB.

KnittingHelp also supplied a great explanation of the mattress stitch which I used to sew all the other pieces together pretty much invisibly.

For those of you who think I've gone over to the dark side and are wondering when The Sewing Lawyer is going to resume producing more interesting projects, here are a few sewing-related thoughts on knitting design and construction.

According to some things I've read on the internet, some knitters will go to great lengths to avoid having to actually sew their knitted garments together.  They'll knit a piece entirely in the round from the bottom up or the top down, splitting off at the shoulders to form separate in-the-round tubes for the sleeves, including increases and decreases to build in shaping (where you'd sew darts), and cleverly finding ways to include hems, pockets, buttonholes, collars and all manner of details which are joined by picking up stitches and knitting new details directly onto a completed piece.  For example, the cloche hat brim is seamed at its narrowest point, but the crown is then knitted round and round, decreasing from 100 stitches picked up from one edge of the assembled brim.  It's a new world.

Sewing a knitted thing together with the same wool it's made from, and carefully picking up a row or stitch at a time at each edge of a seam means that even if the thing isn't knitted together, it looks like it was.  The perfectionist in me really likes this fact.

As Sherry pointed out in a comment to my last post, the fact that knitted pieces stretch means they can be forced to go together, but this isn't necessarily a good thing.  Understanding how flat shapes best fit the 3 dimensional human body without distortion (i.e. how sewing patterns work) seems immensely useful to me in knitting.  My decision that I should insert a little triangle at the front shoulder area, instead of forcing a smoothly curved piece to fill in a right angle corner was definitely the right one.  

I have a pair of badly needed black pants cut out; they'll look smashing with the jakku.

Wednesday, January 4, 2012

Almost done

As mentioned in my last post, my sewing has been overtaken by knitting, which definitely is slower to show results.  However, my teal Neulottu naisen jakku is almost finished only one month after I started it! (The name sounds exotic and unique, but only means "women's knitted jacket" in Finnish, so maybe most knitted jackety items for Finnish ladies have the same name.)


Here's a sneak peek.  I've just pinned the pieces together.  


Teal jakku - almost done!
You can immediately spot the problem.  The donut-shaped piece which forms the lower back and wraps and curves around to the front to become a luscious shawl collar doesn't fill in the upper front shoulder area. According to the pattern, it is supposed to be sewn under the arm, along the front edge of the sleeve cap to the shoulder point, where it must make a right angle turn and then flow along the dead straight upper edge of the knitted back.  


Sure.  My sewing experience suggests to me that even though it is probable that the gently curved edge of this piece can be made to stretch to fill in this corner, it won't sit there nicely and I'd be tugging at it constantly and wondering why the jacket doesn't feel right.  This piece wants to flow up at an angle from the under arm area, angling towards the neck.  As shown to the right.  


Which leaves a little triangular opening, as you can see to the left.  

I am going to knit a little piece to fill it in.  Then I'm going to block the pieces and sew them together.  And then, I'm going to make a dress and a pair of black pants that will go with this lovely sweater jacket.  


Saturday, December 10, 2011

Uh oh - too many projects

And it's not because The Sewing Lawyer's sewing room has been transformed into Santa's workshop this year.  Oh no.  Last year I was busy as the proverbial bee, secretly refashioning all those bits into fun presents for the entire family.  This year, I've got too many ideas on the go, and sorry, they're all for me.  I'm trying to convince myself that doing a bit at a time on them is an overall advance, but it may be well into 2012 before any of these see the light of day.

Project No. 1 - future leather jacket

You've already seen prototype no. 1 for this - my quilted curling jacket.   They say that a "wearable muslin" should be made up in fabric similar in hand and weight to your intended "good" version.  Well, on that theory, this jacket was a big fail as a muslin.  The knitted version is stretchy and puffy while the intended "fabric" - luscious lamb leather - is sleek and firm.  Apart from the too-low armscyes, I couldn't tell if the pattern would turn out well in leather.  And I wasn't certain if the armscyes would really be too low, if made in a fabric that wasn't prone to stretching in the length.

But the curling jacket did pass the "I think I like the style well enough" test.  So I made a real muslin out of some hideous green woven stuff I found a bolt of at a thrift store.

I'm still liking it.  And it turns out that raising the armscyes by about 2cm was a good call.  But this muslin shows the things that still need adjusting.

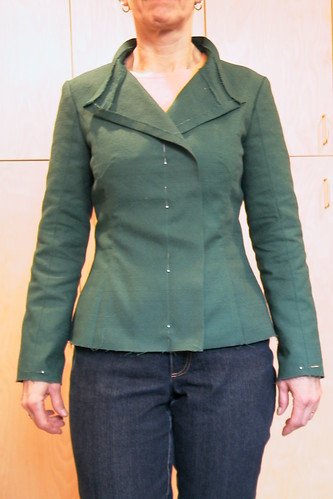
I over-adjusted at the hip when I graded out to a size 40.  I'm going to remove the extra width at least at the side seams.

The neck seam is about 1cm too high.  I have a forward neck.  This won't matter a bit when the jacket is open, as I'd probably wear it about 98% of the time.  But I'm going to lower the neck, and lengthen the collar accordingly.

The bust darts are too long.  This could be a marking/sewing error.  I'll sew them shorter in my good version.

The sleeves are a tiny bit too short, though I already took out my customary 2.5cm.

As you can see better in this view of the back, the shoulders are a tiny bit too wide.  I am going to think about whether to adjust the pattern, or (easier) fix this with some shoulder structure in the jacket, with minimal padding.

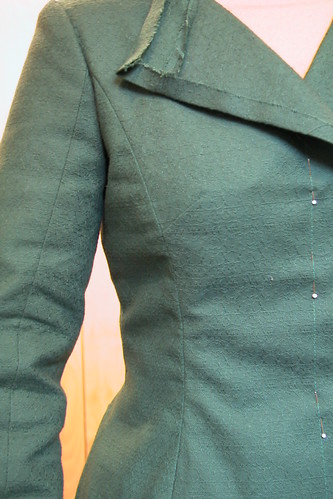
I really like how the seam on the front of the sleeve lines up with the princess seam.

I'm going to plan the zipper placement properly and put a seam in the right side facing and the left jacket front, rather than apply the zipper on top of these pieces.  I have deluxe Riri zippers for this jacket, and even though the front one will be partly hidden, the shorter ones in the front sleeve seams will be on full display.

I am going to retrace this with my adjustments, and 1cm seam allowances.  I will make a pattern piece for every single piece, i.e. one for each of the left and right sides, as taught by Kathryn Brenne.

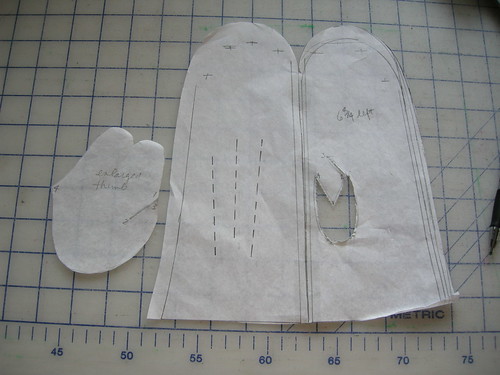
Project No. 2 - Leather mittens

I've made leather mittens before.  But the ones I've got planned will up the ante, in terms of the complexity of the pattern.  

I recommend Make your own gloves by Gwen Emlyn-Jones
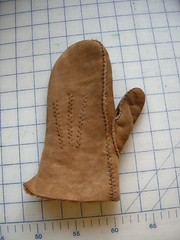
. I've had a copy for years but confess to not really having examined it before being challenged to replicate these worn-out mittens.   There are patterns in the back, in several sizes.

I mocked up a pattern, which I enlarged since my material is a little thick.  I then made a muslin out of fleece scraps.  Frankly I had my doubts about the thumb, which looked so much bigger than the hole it was to go into.  But it was absolutely the perfect size, and the muslin turned out pretty well, as you can see here.  

These are sewn together by hand - a simple running stitch - but they go together surprisingly quickly.  I have some quality time with a glover's needle ahead of me.


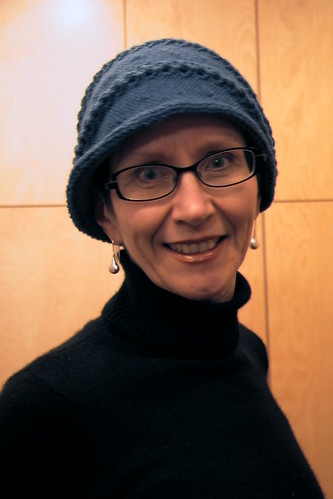
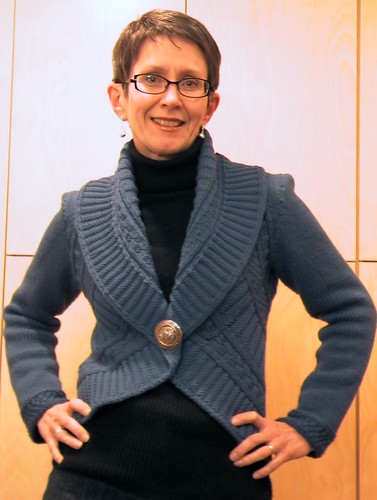
Project No. 3 - Knitting

I'm well into my version of this great sweater/jacket.  The pattern is available free here (in English) and here (in original Finnish).

I'm making it in a gorgeous teal colour.

Pictures to come.  Or check out my progress on Ravelry.
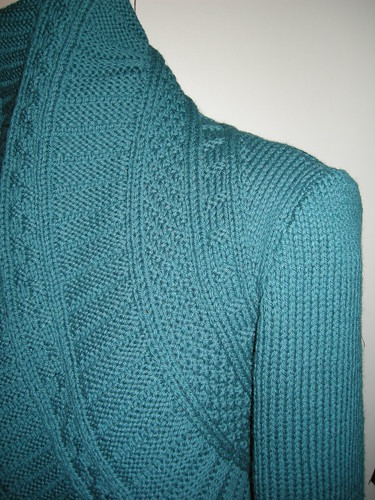