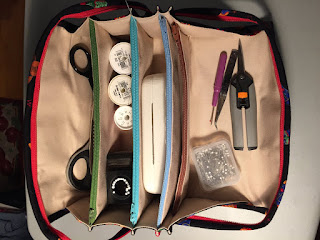
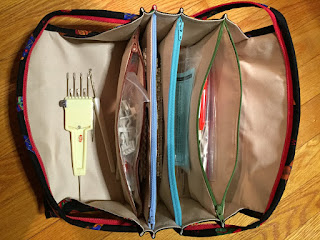
 Update: That Bionic Gear Bag. I made another one. I modified it so all the pockets are the same size and the same height. This simplified things, and thankfully I did not have to consult the pattern at all.
My original bag works for all my hand knitting supplies that formerly lived in a motley collection of plastic zip lock bags. My second one is dandy for my machine knitting tools. I hope never to have to make another, but won't rule it out. They are super useful.

Update: Speaking of machine knitting, I got a bulky (9mm) gauge machine with a ribber and now I am pretty sure I do not need any more knitting machines. This of course does not stop me from compulsively watching the local on-line ads, since that is where almost all of my machines came from after all.
Acquisition of this machine, a Singer 151, sent me diving into my stash in search of suitable yarn. Never mind that it is the beginning of warmer weather (we can hope) and thick, woolly sweaters are not necessarily seasonally appropriate. I rediscovered some mohair yarn and made myself a cardigan. It was fun! It involved hand manipulating stitches on the ribber and main beds to make the lattice stitch pattern.
The design is sort of my own. I actually bought a pattern (Ravelry download) but ended up mostly abandoning it because (a) my gauge was slightly different, (b) I needed to knit separate pieces with seams and (c) it had no helpful schematics so I couldn't easily figure out the shaping for the raglan seams. It worked. If I do this often enough, I'll learn to trust myself and stop spending $$ on patterns that don't help much, right?
Update: Sewing. I am doing some. I got a new sewing machine. It's a Pfaff quilt expression 4.0, the first generation of the gigantic Pfaffs from (I think) 2008. This machine has a 10" harp, lots of light, a 9mm stitch width and 222 built in stitches including 11 different buttonhole styles.
 I thought it would take me a long time to get used to the fact that the foot pedal lowers the presser foot (it has a knee lever to lift it up) and that I wouldn't like the auto tie-off feature. However I have adapted really well to these modern features and am really enjoying sewing on this big beast.
Its first project was Bionic Gear Bag the second and I think it made the construction easier because I could use both hands to position the project.
 Currently, I'm working on a dress. It's a pattern I purchased back in the days when I was a mad keen watcher of current patterns and had ready access to all the brands. The pattern is Simplicity 2927, a Project Runway dress/tunic pattern.
I think this looks like a nice and easy dress to wear for summer and I sure hope it fits. I threw caution to the winds and cut it right out of a length of navy blue cotton/linen blend from stash. I am going to make a cardigan jacket to go with it out of an interesting sweater knit I picked up in Montreal last year.
 One of the dress variations has piping at the edges of the round yoke, the keyhole and princess seams. A friend of mine whose stash is even bigger than mine offered me the perfect trim - it's a narrow pre-made and fusible bias trim intended for quilting, and it's some kind of metallic gold fabric. Time will tell if I need to tack down the edges. I have some invisible thread and can use one of the 222 stitches on my new machine to just catch the edges, but I'm reluctant to interfere with the perfection of the apparently liquid gold trim if I don't absolutely have to.
At left is a peek of the dress in progress. I decided against trimming the princess seams. Less is more, dontcha know.


